
Sometimes a conversion really resonates with people. A few years ago I converted a Deredeo to look taller and sleeker. Since then I’ve been getting a steady trickle of requests about how I went about it. Well, here it is- a detailed tutorial on how to totally convert your Deredeo, including a number of more advanced modeling techniques that I used along the way. I hope this is useful to folks looking to build their own ‘mad cat’ deredeos and to any aspiring conversion fiends looking to learn more techniques.
The Concept
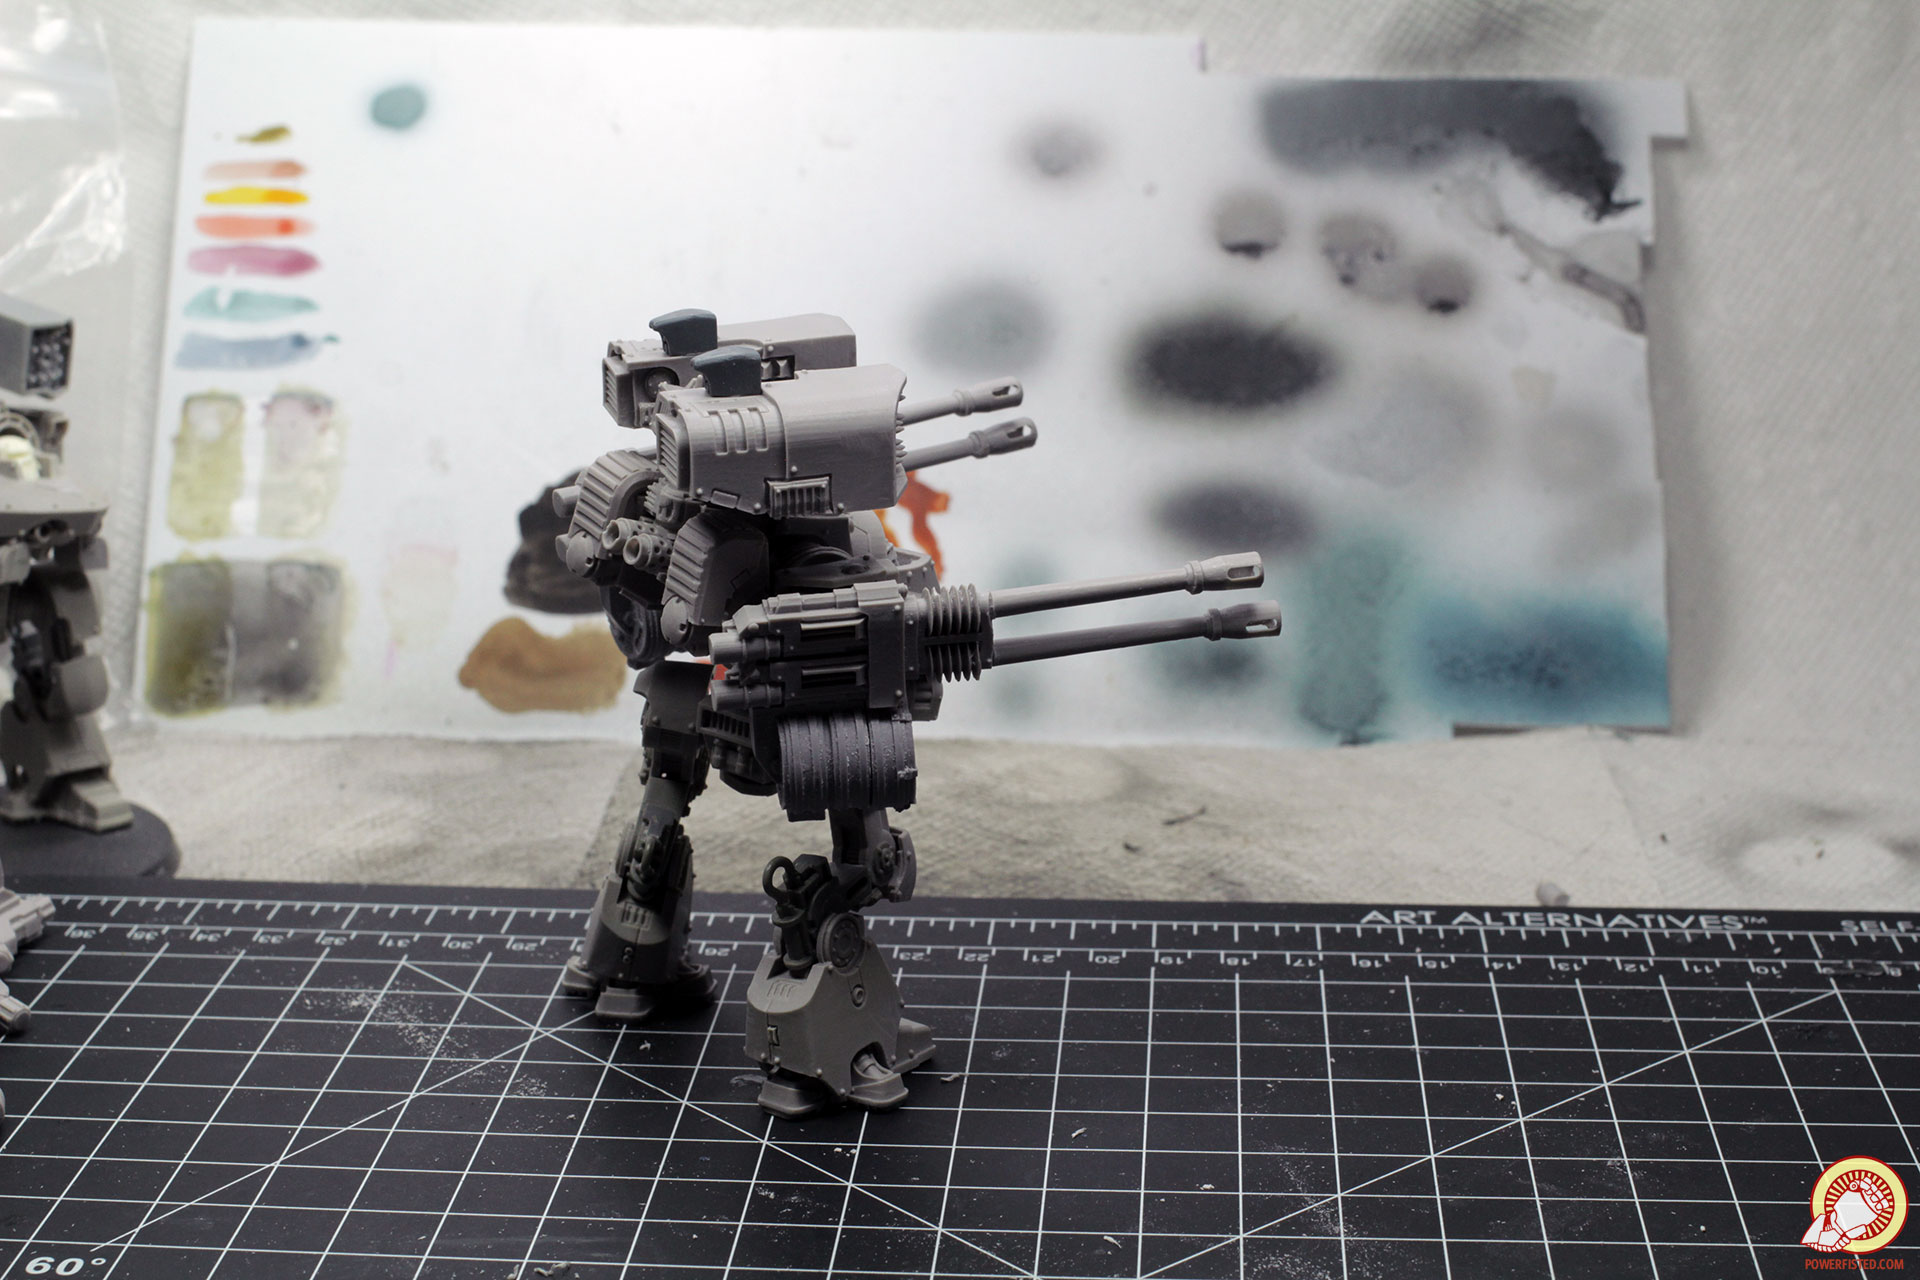
All good conversions start with an idea. For me the original Deredeo didn’t look quite right. The proportions made it feel stout and clumsy when I imagined a dreadnaught that was nimble enough to get into a firing position and fast enough to withdraw without getting into melee. While I never set out to make a Mad Cat mk Deredeo, I gotta say the end result does have a bit of a timber wolf vibe.
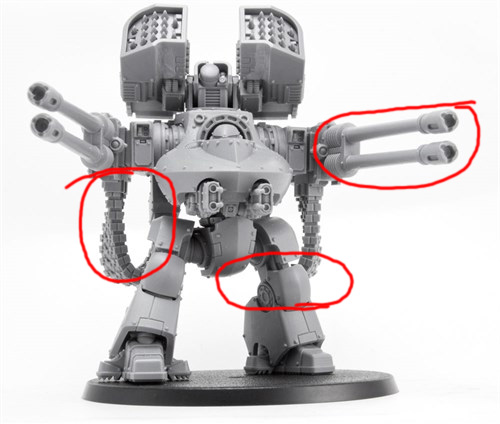
I started by identifying the features of a Deredeo that, in my mind, contributed to the negative proportions. After looking at reference photos, I felt the short legs, long barrels, and huge ammo belts were the culprits. These kept the stock Deredeo from feeling more agile and made dynamic poses more difficult. Behind those features was a sleek dreadnaught. It just skipped leg day and focused on its arms for way too long while at Forgeworld.
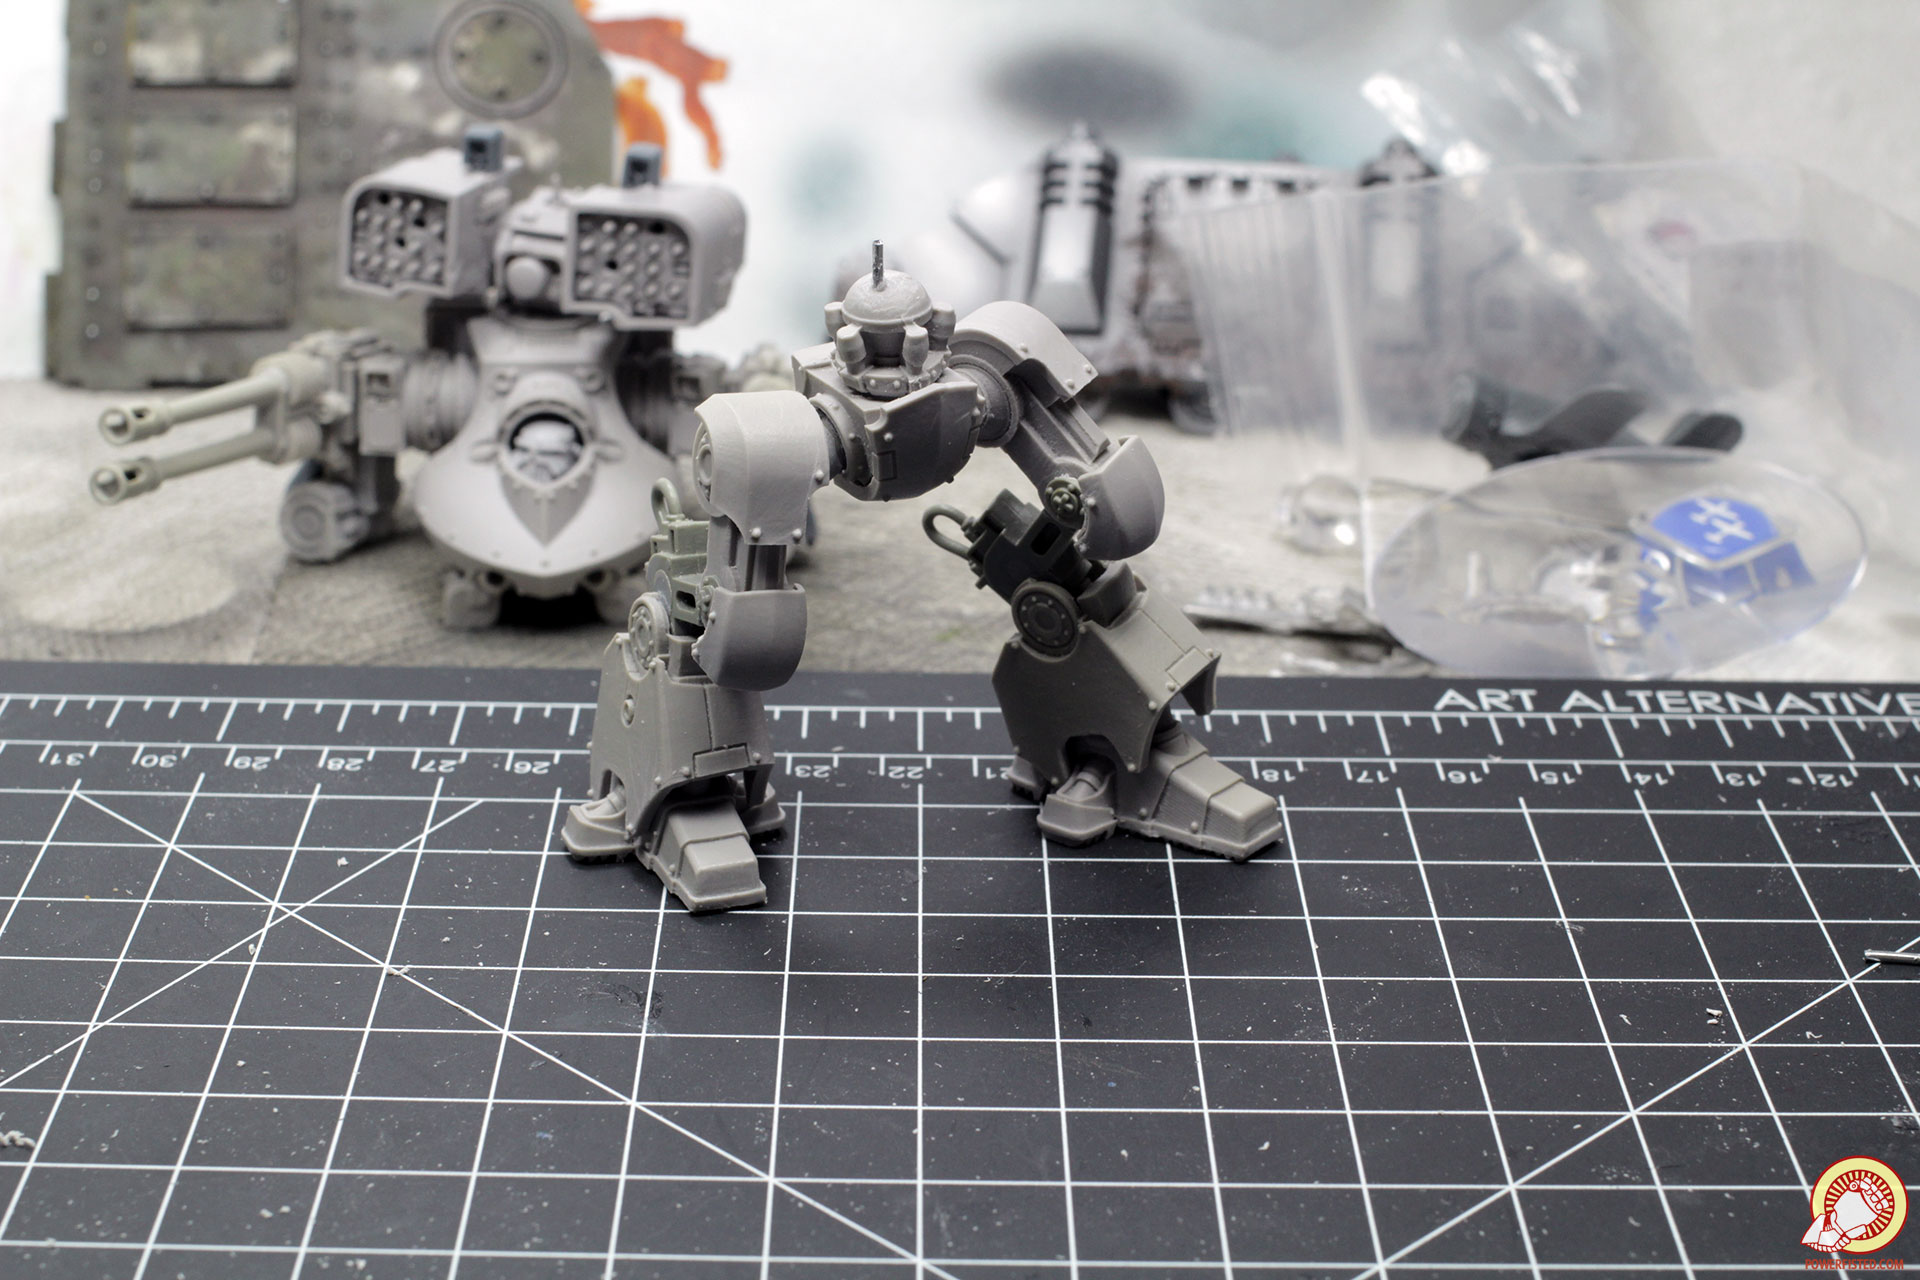
Before committing to the project, I made a quick proof of concept using blu-tack to hold my deredeo models into place. By experimenting with a few alternative leg configurations I realized the conversion had potential, but required a complete rebuild of the legs.
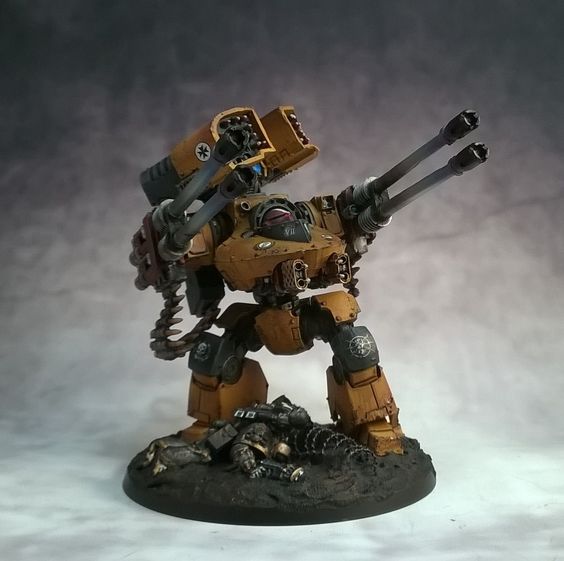
To get inspired I looked at what other 30k dudes had come up with. This particular conversion really stood out- the pose is very dynamic and evokes a strong story through the head and arms. I used this as my reference for creating my own dynamic pose.
Tools and Bits

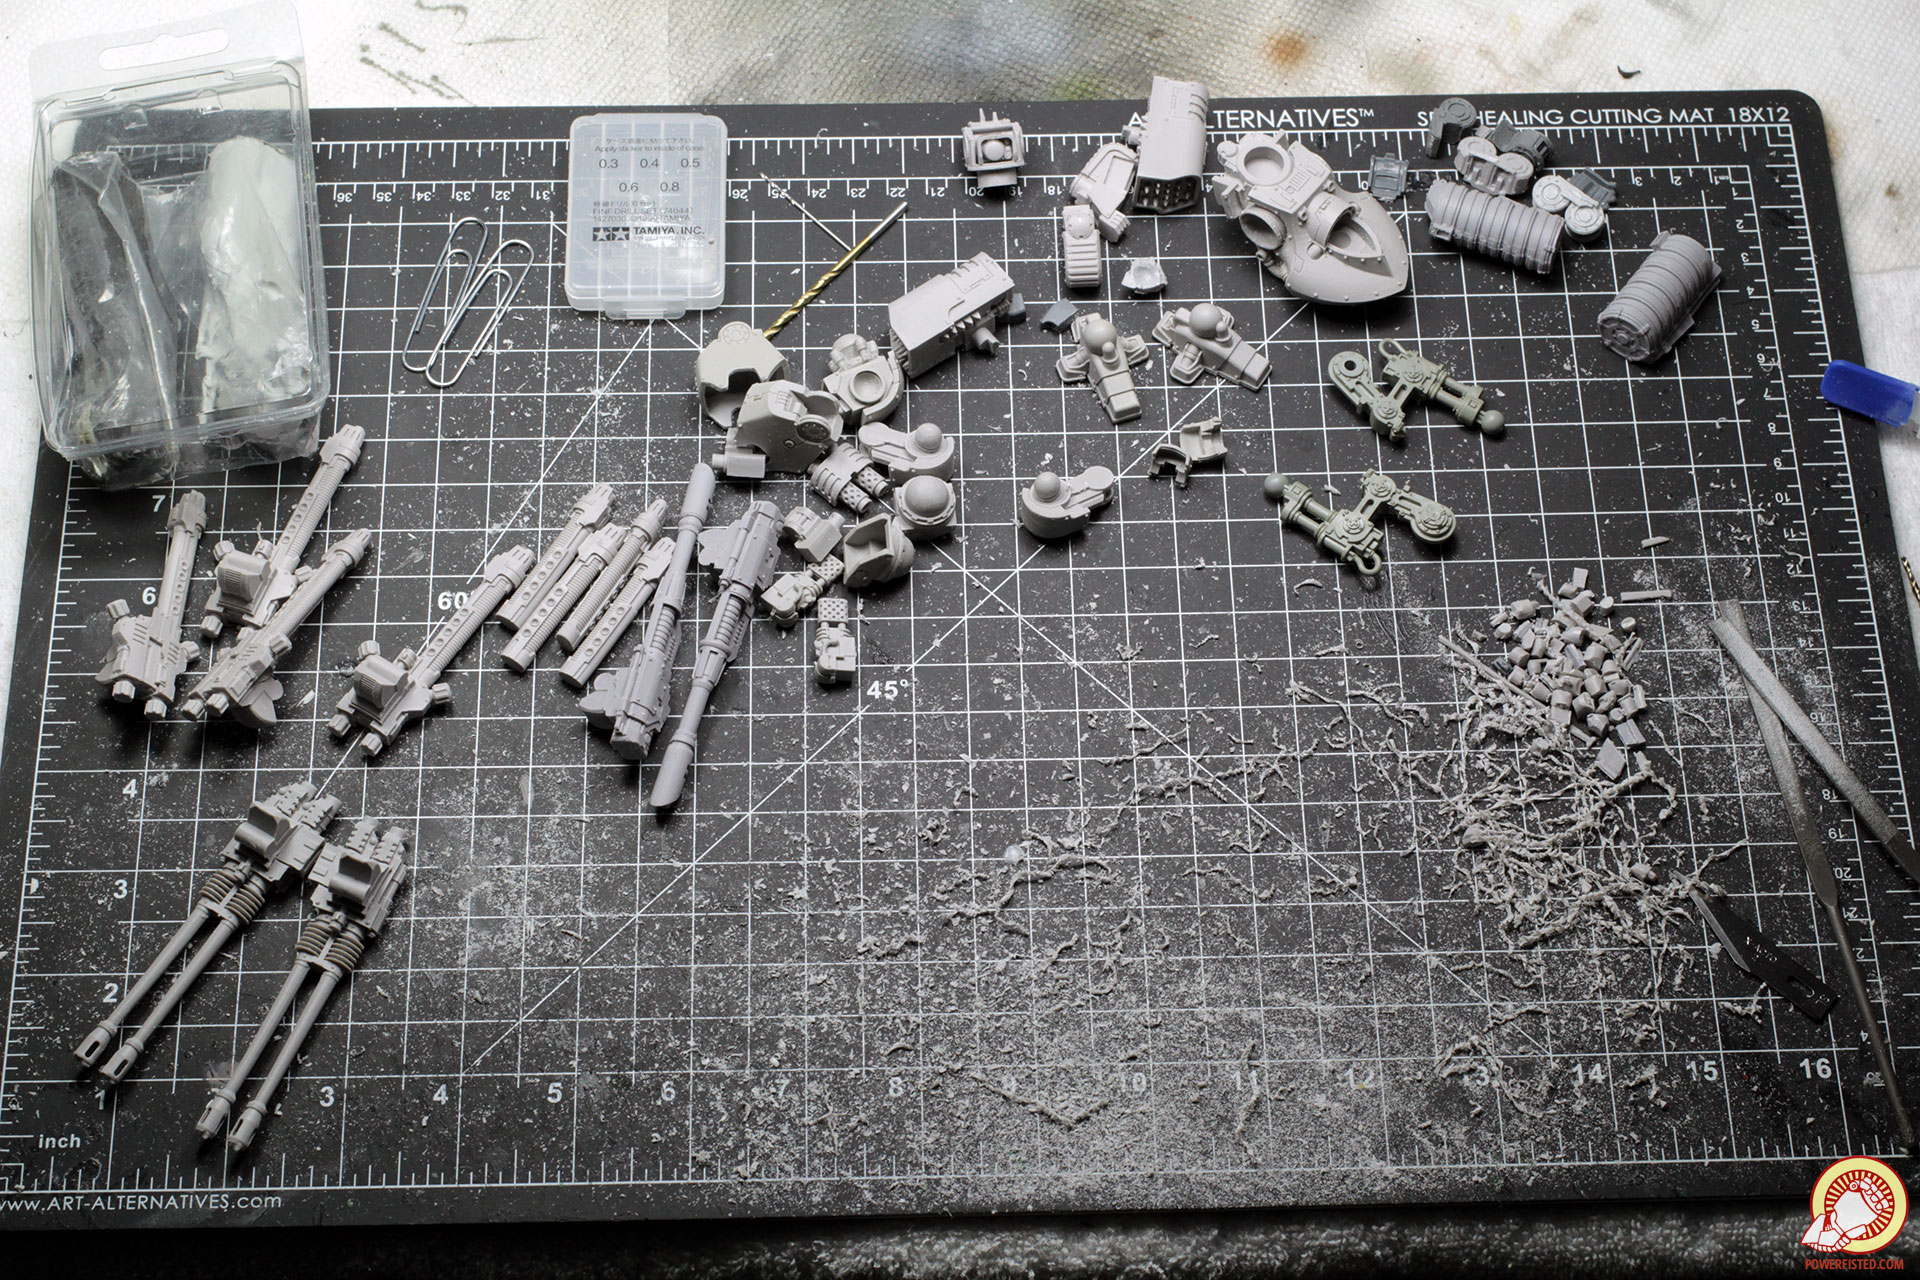
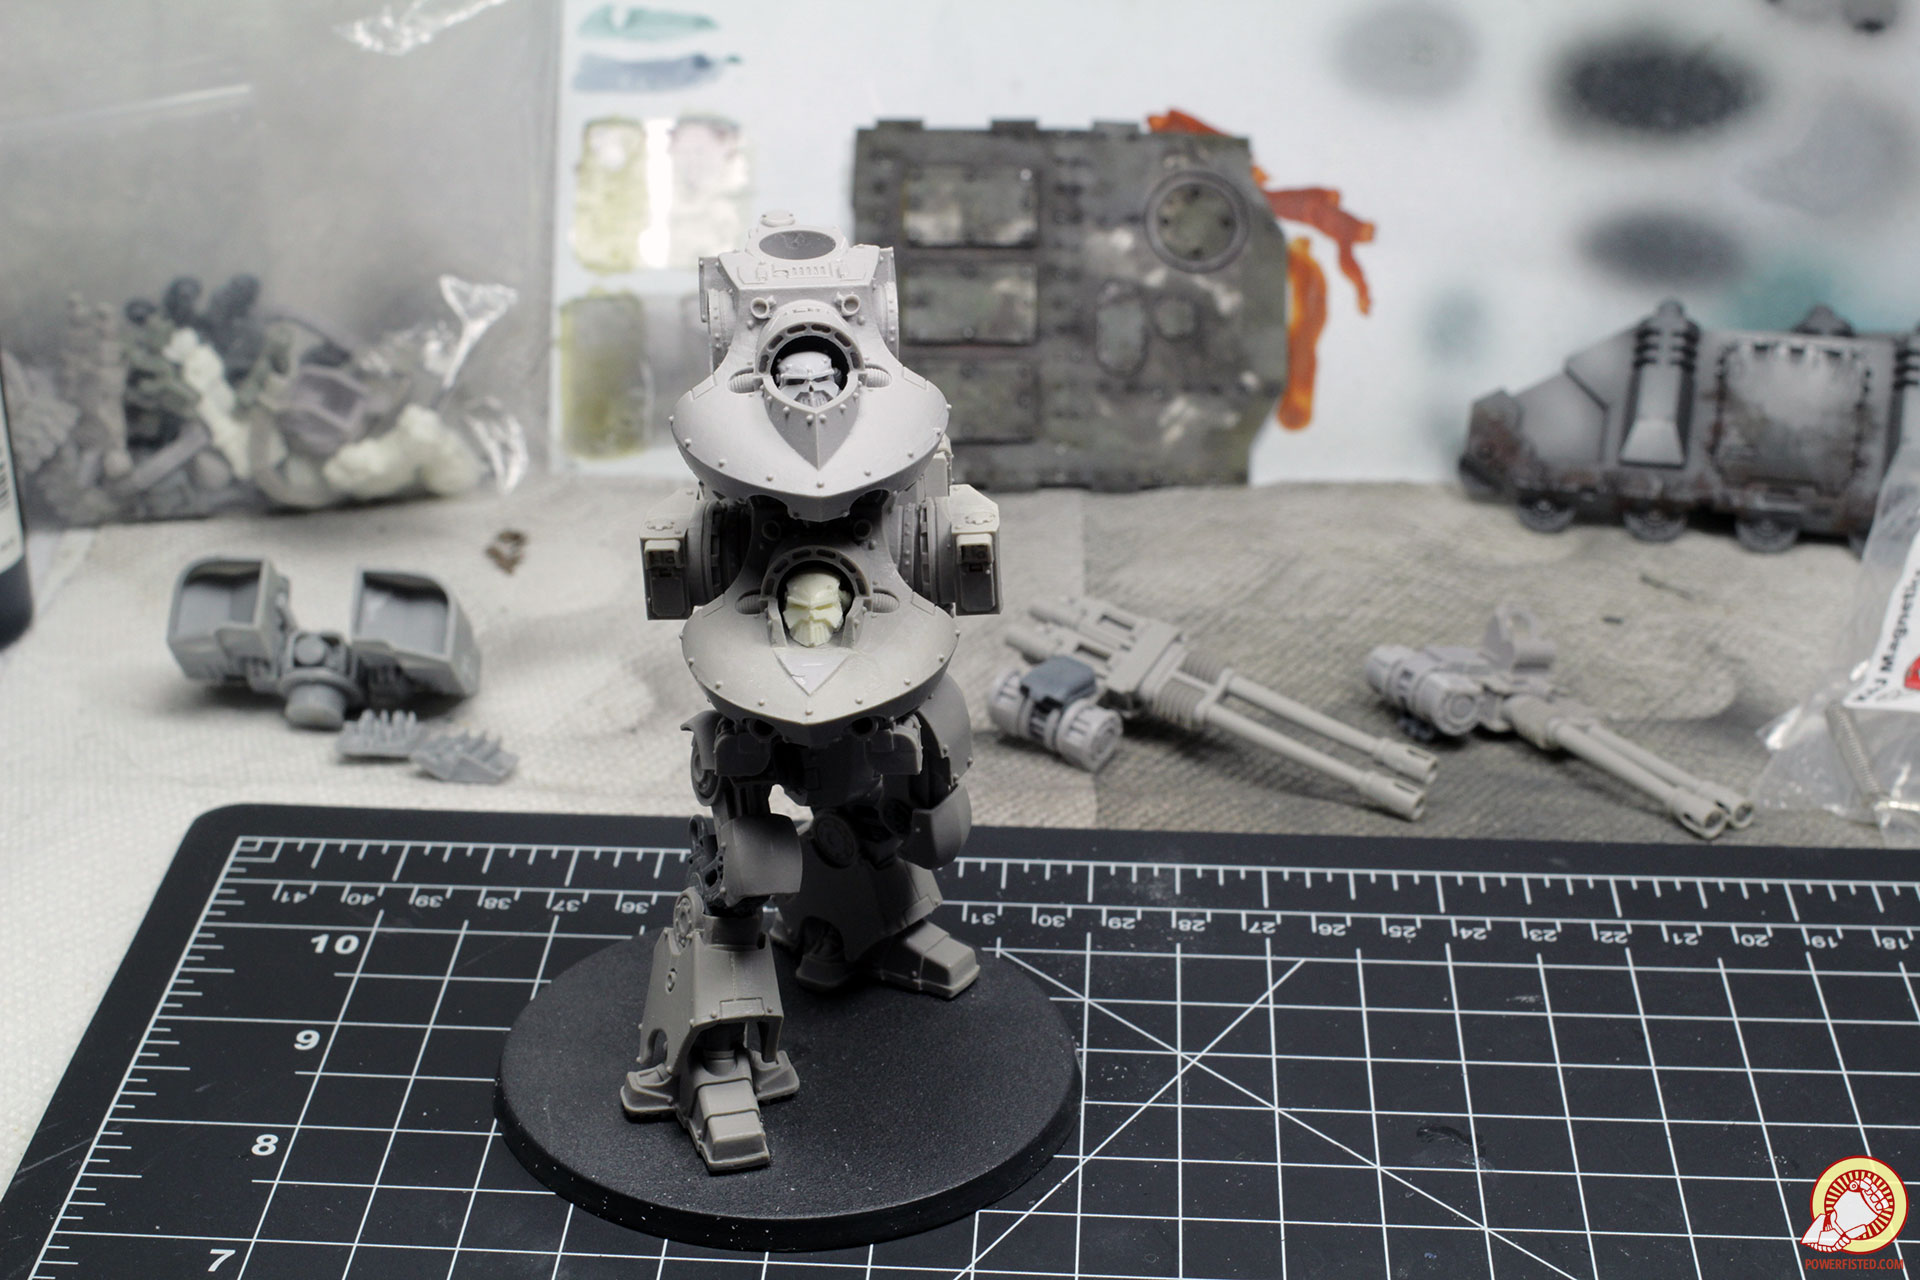
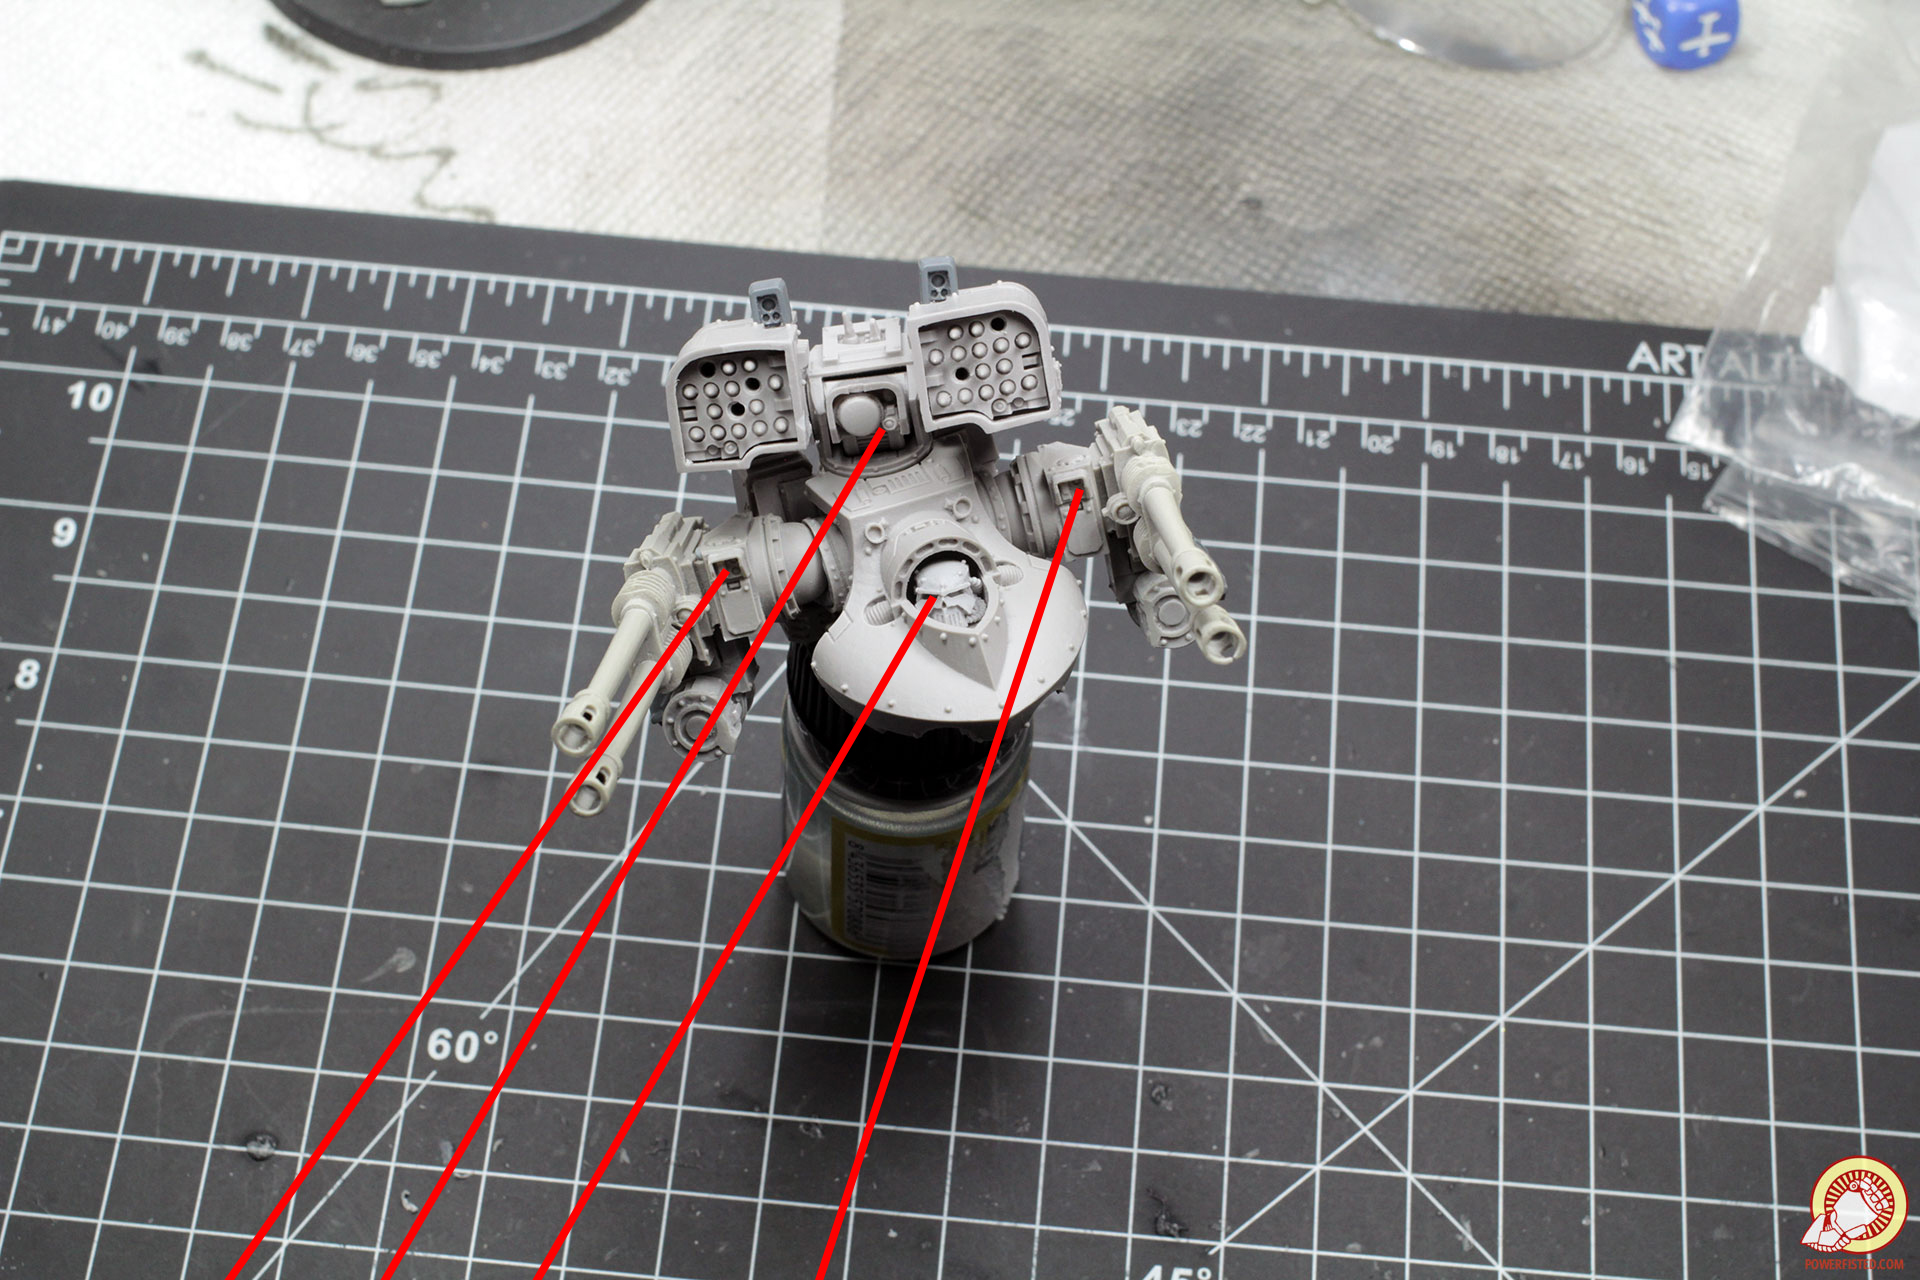
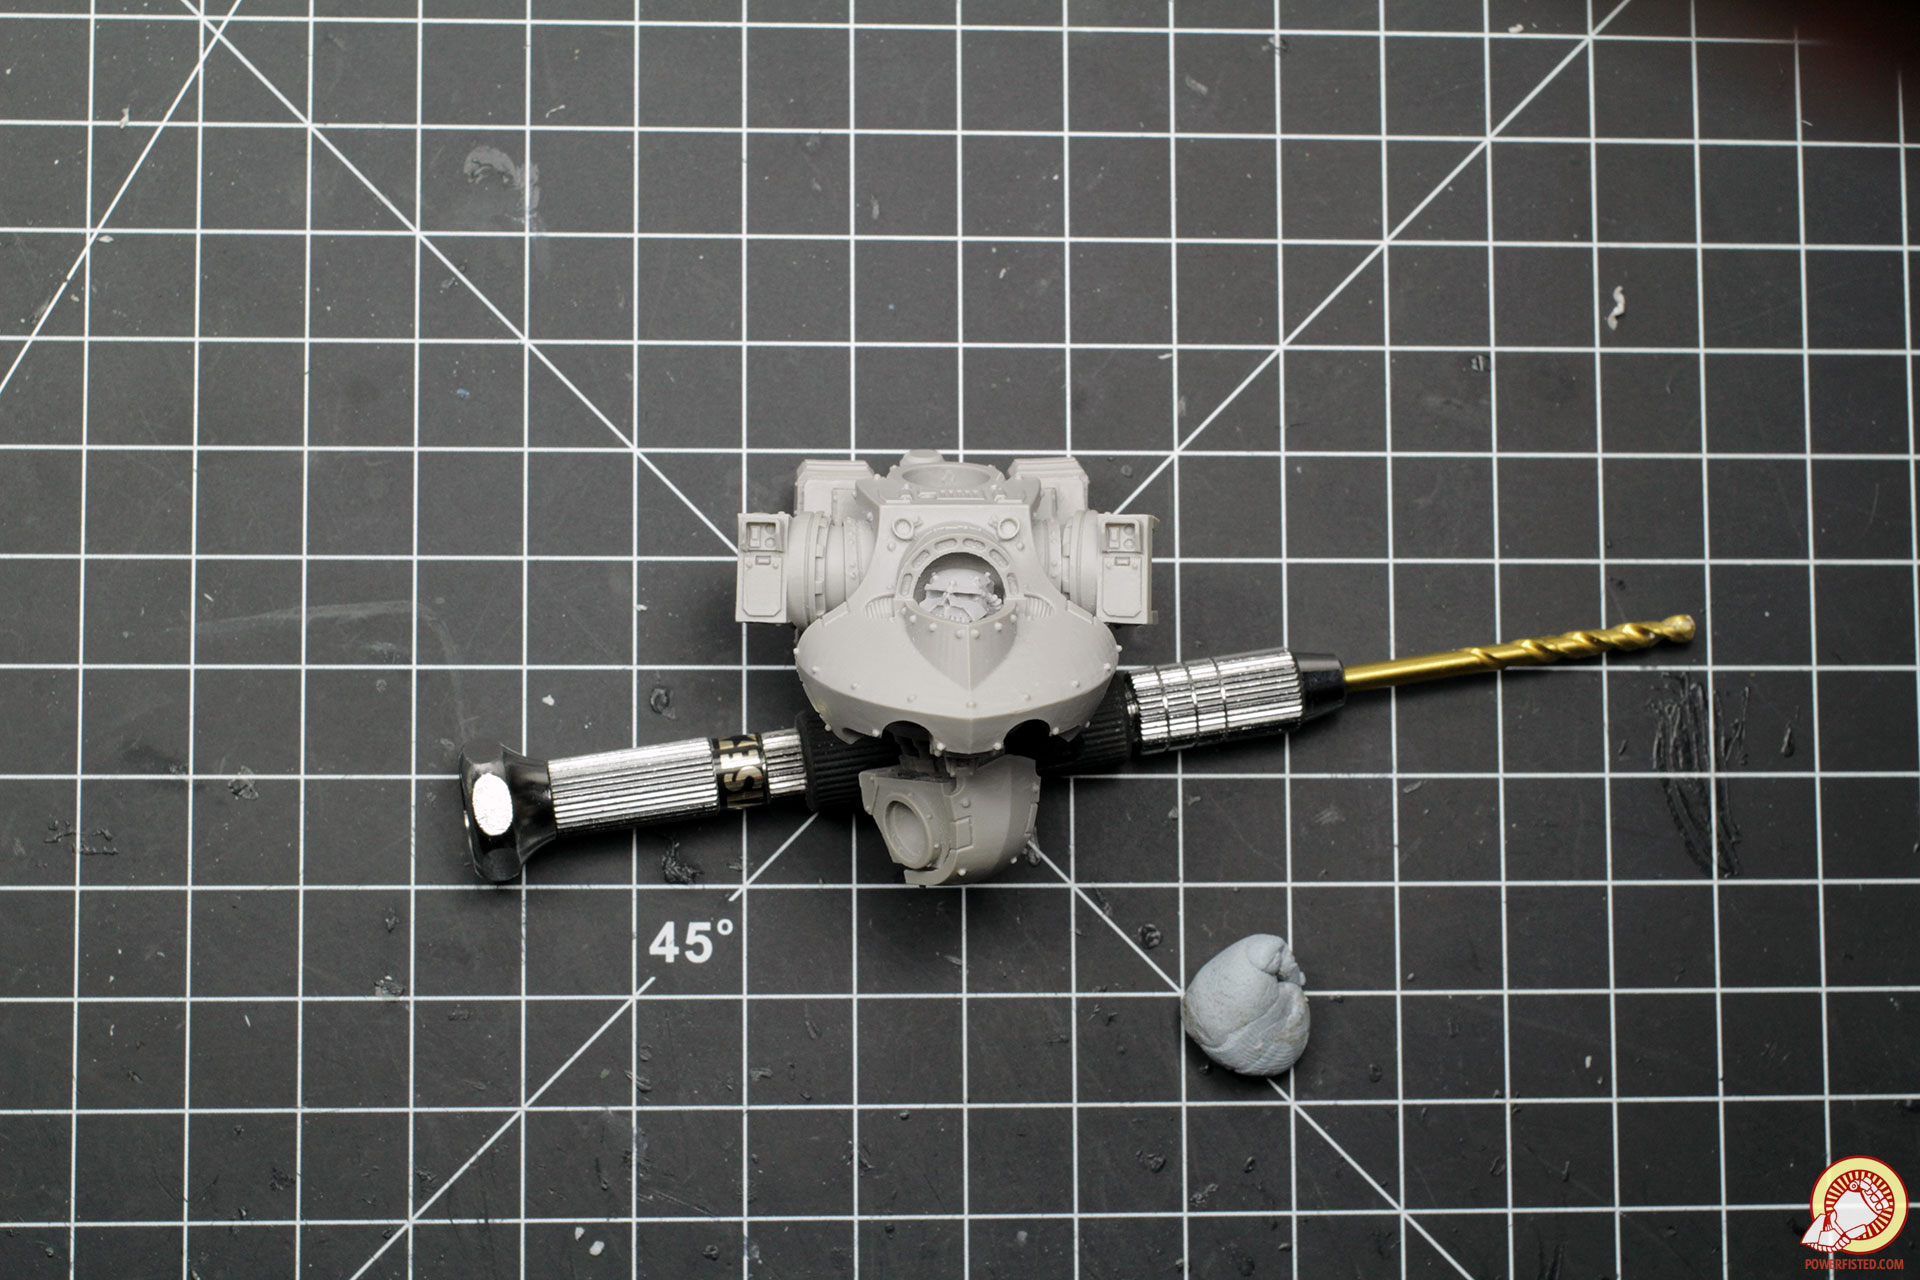
Before starting, I always take inventory of my parts. Here’s everything laid out. The extra arms will get magnets so I can swap load outs as I please.
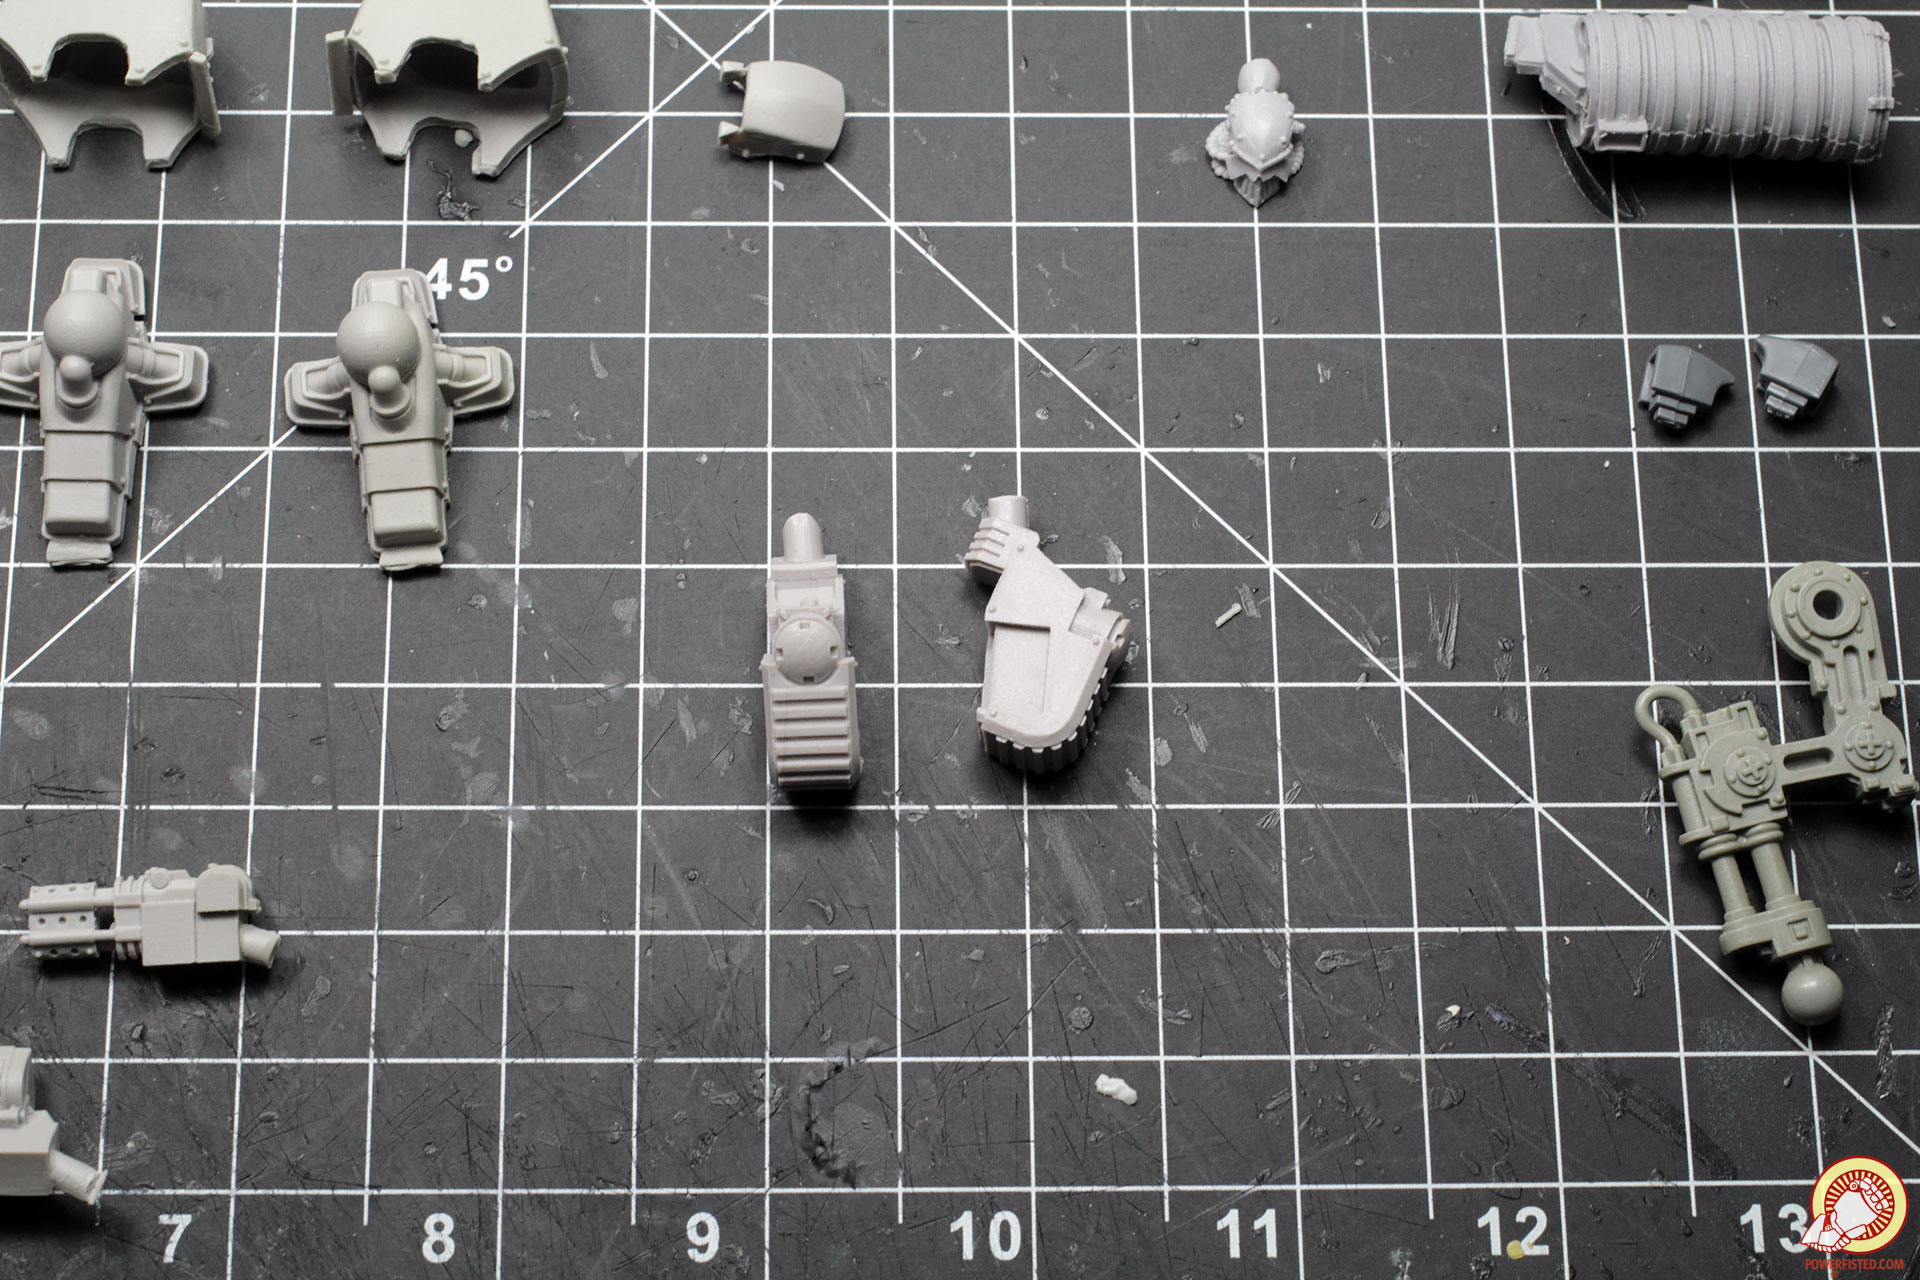
Deredeo’s come with different ammo packs with each set of arms. Because I’m going ‘wireless’ and using drums, I’ve decided to use the packs from the plasma weapons as they look the most generic. You can magnetize these or swap them out for the others depending on your taste.
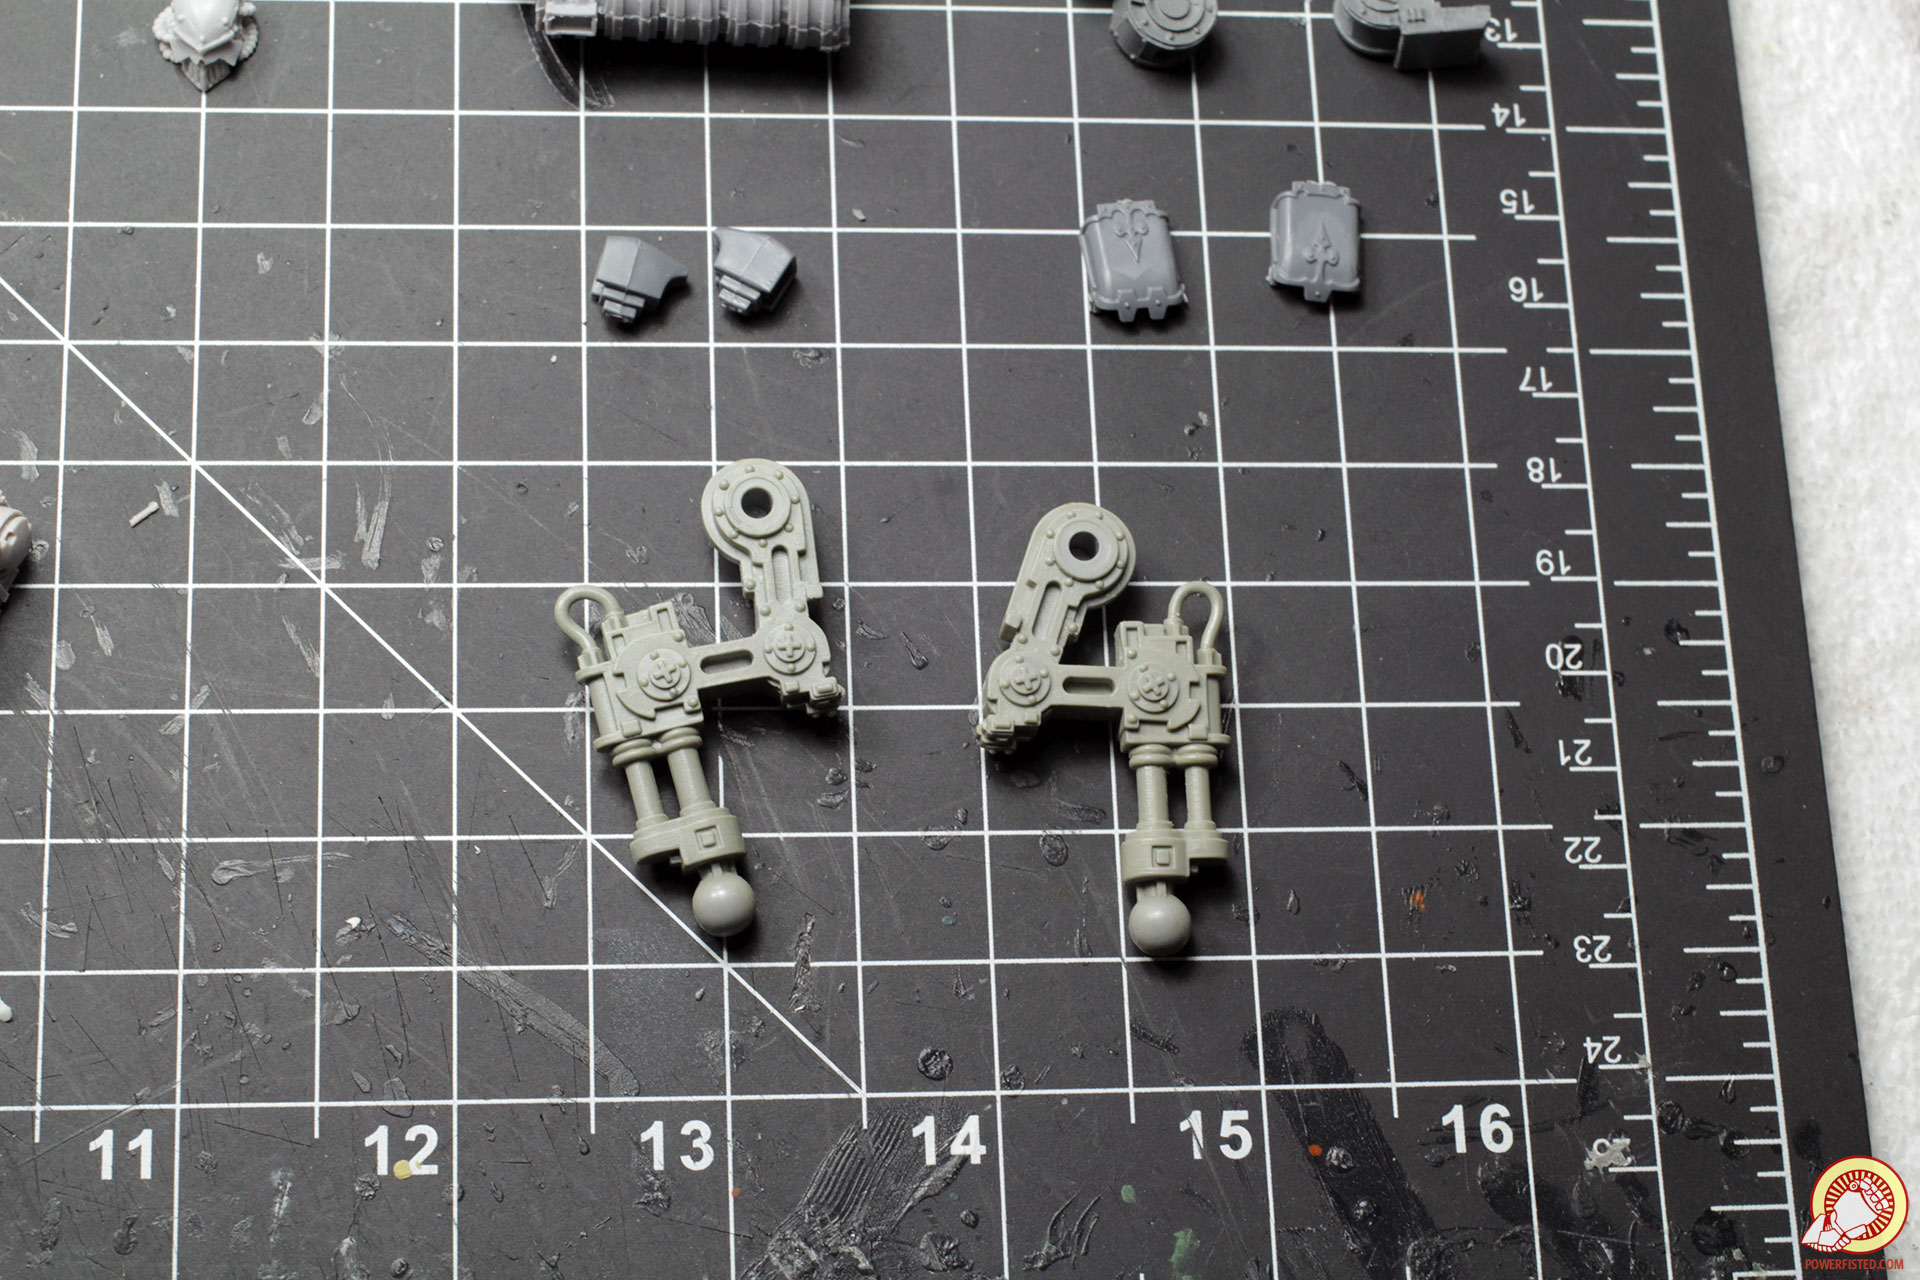
Sentinel legs are critical for this conversion and you’ll need a set. The ones I have here are a single piece and long OOP. Today’s sentinel legs come in two parts, so if you score some from bits sellers you’ll need to glue them together first. The legs from a Sydonian Dragoon might also work in a pinch.
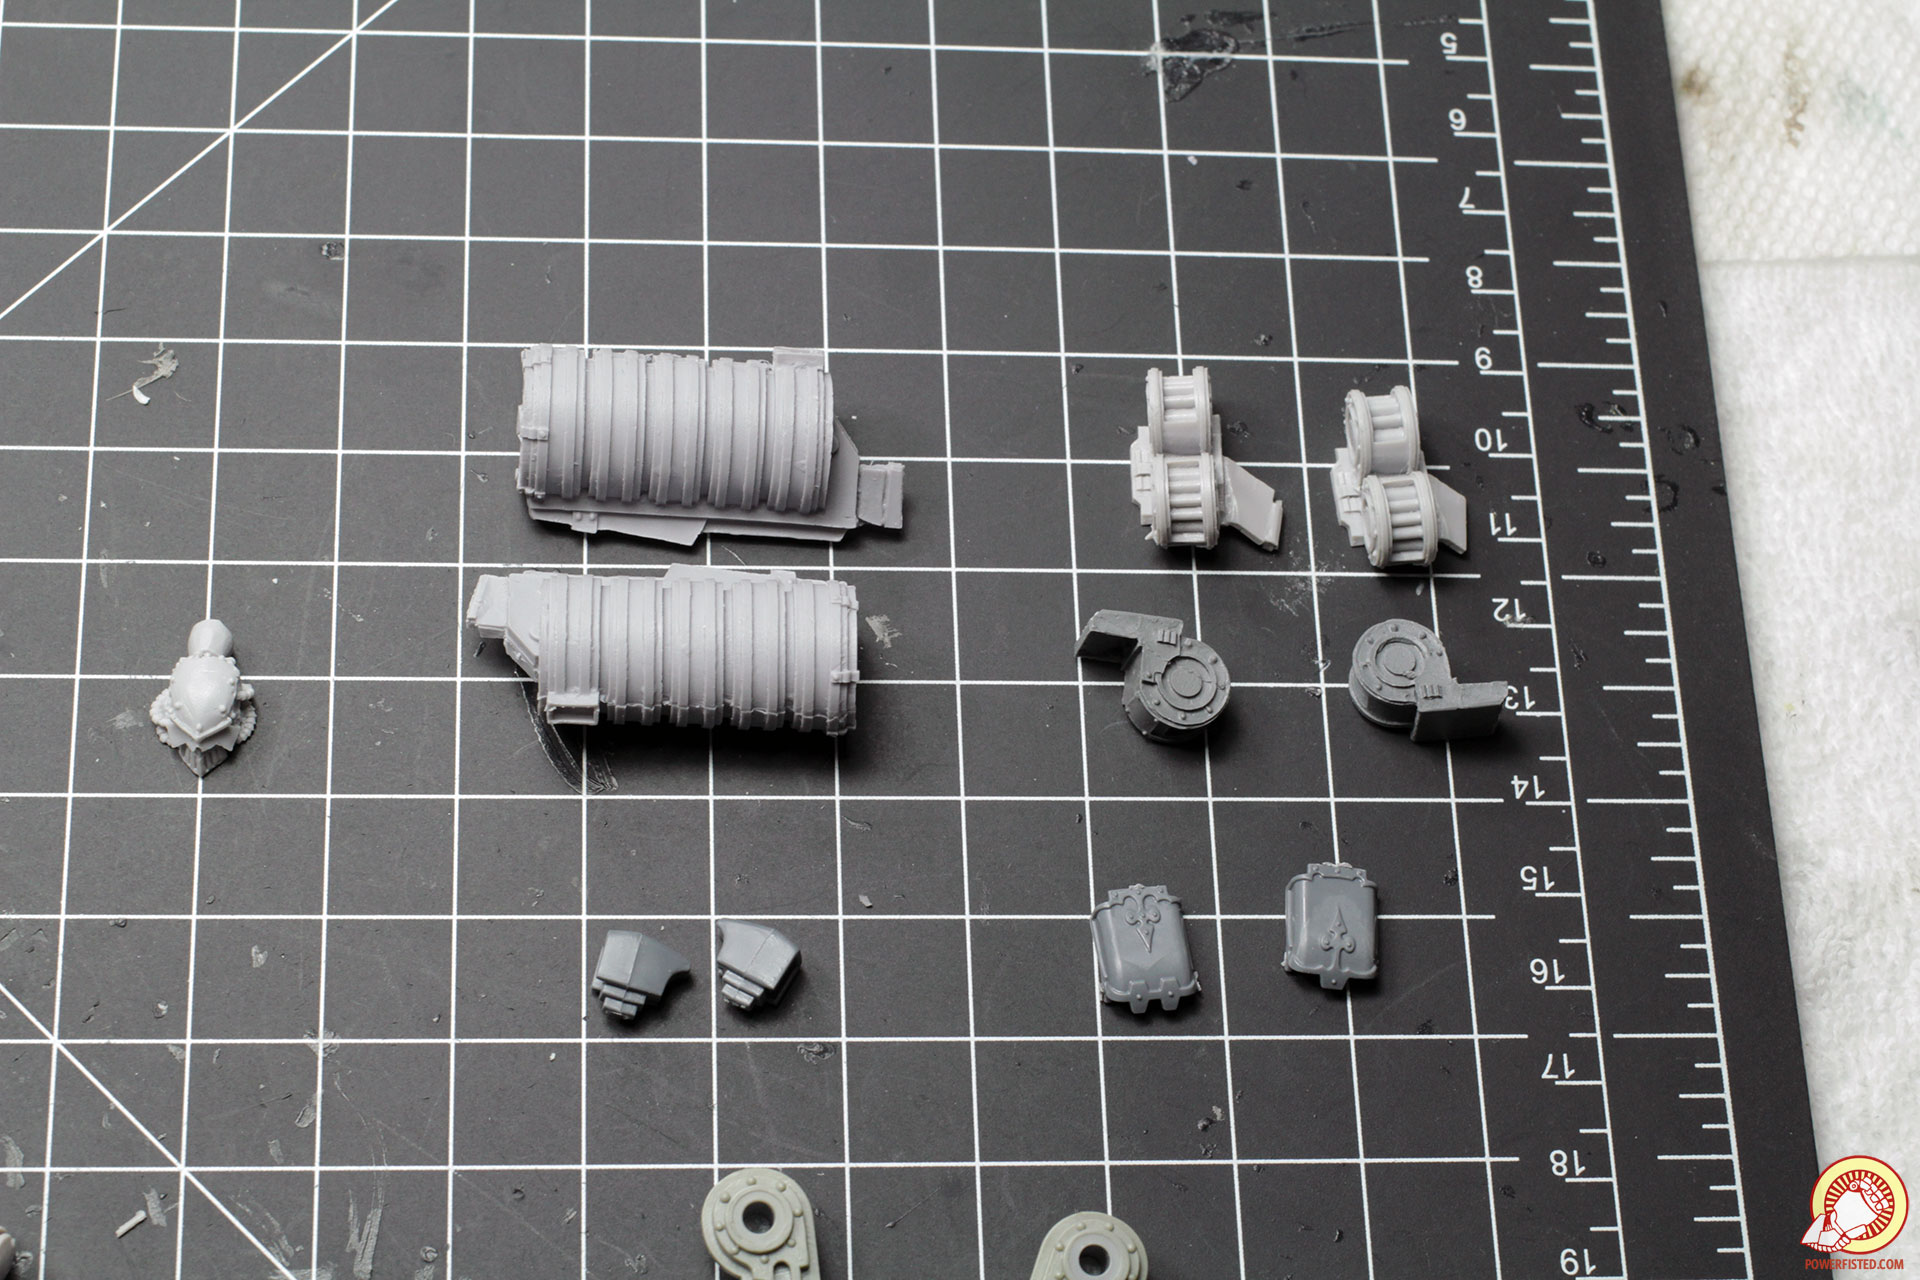
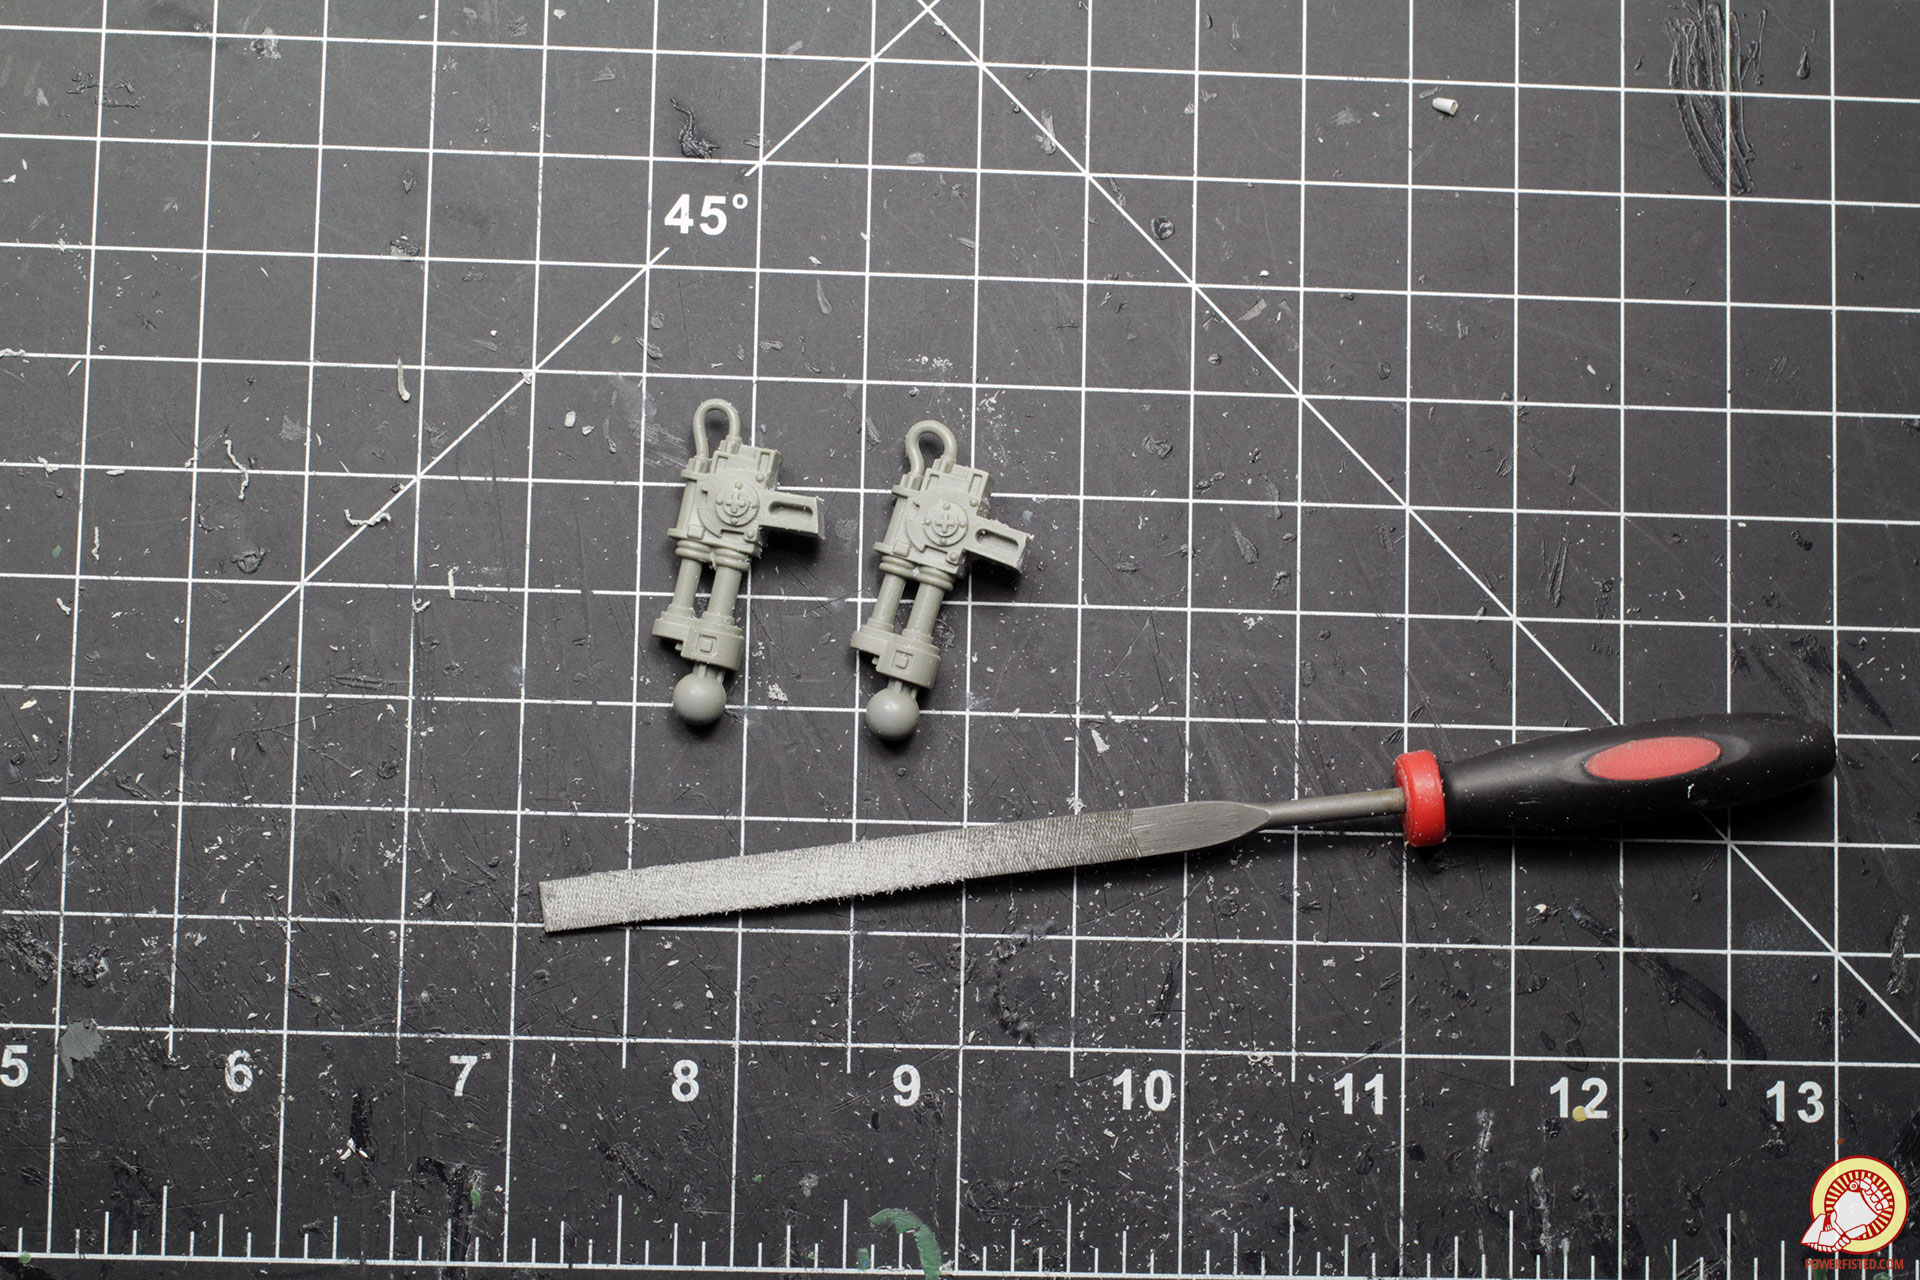
Besides the sentinel legs, I also used a head from an Iron Warrior contemptor dreadnaught and two target locks from a Tau battlesuit. If you replace the ammo belts with drums you have two options- using the drums that come with the FW aircraft punisher cannon kit or heavy bolter drums from contemptors/predators. I initially used heavy bolter drums and a track cover from a kataphron destroyer, but I switched to punisher cannon drums as they were better proportioned.
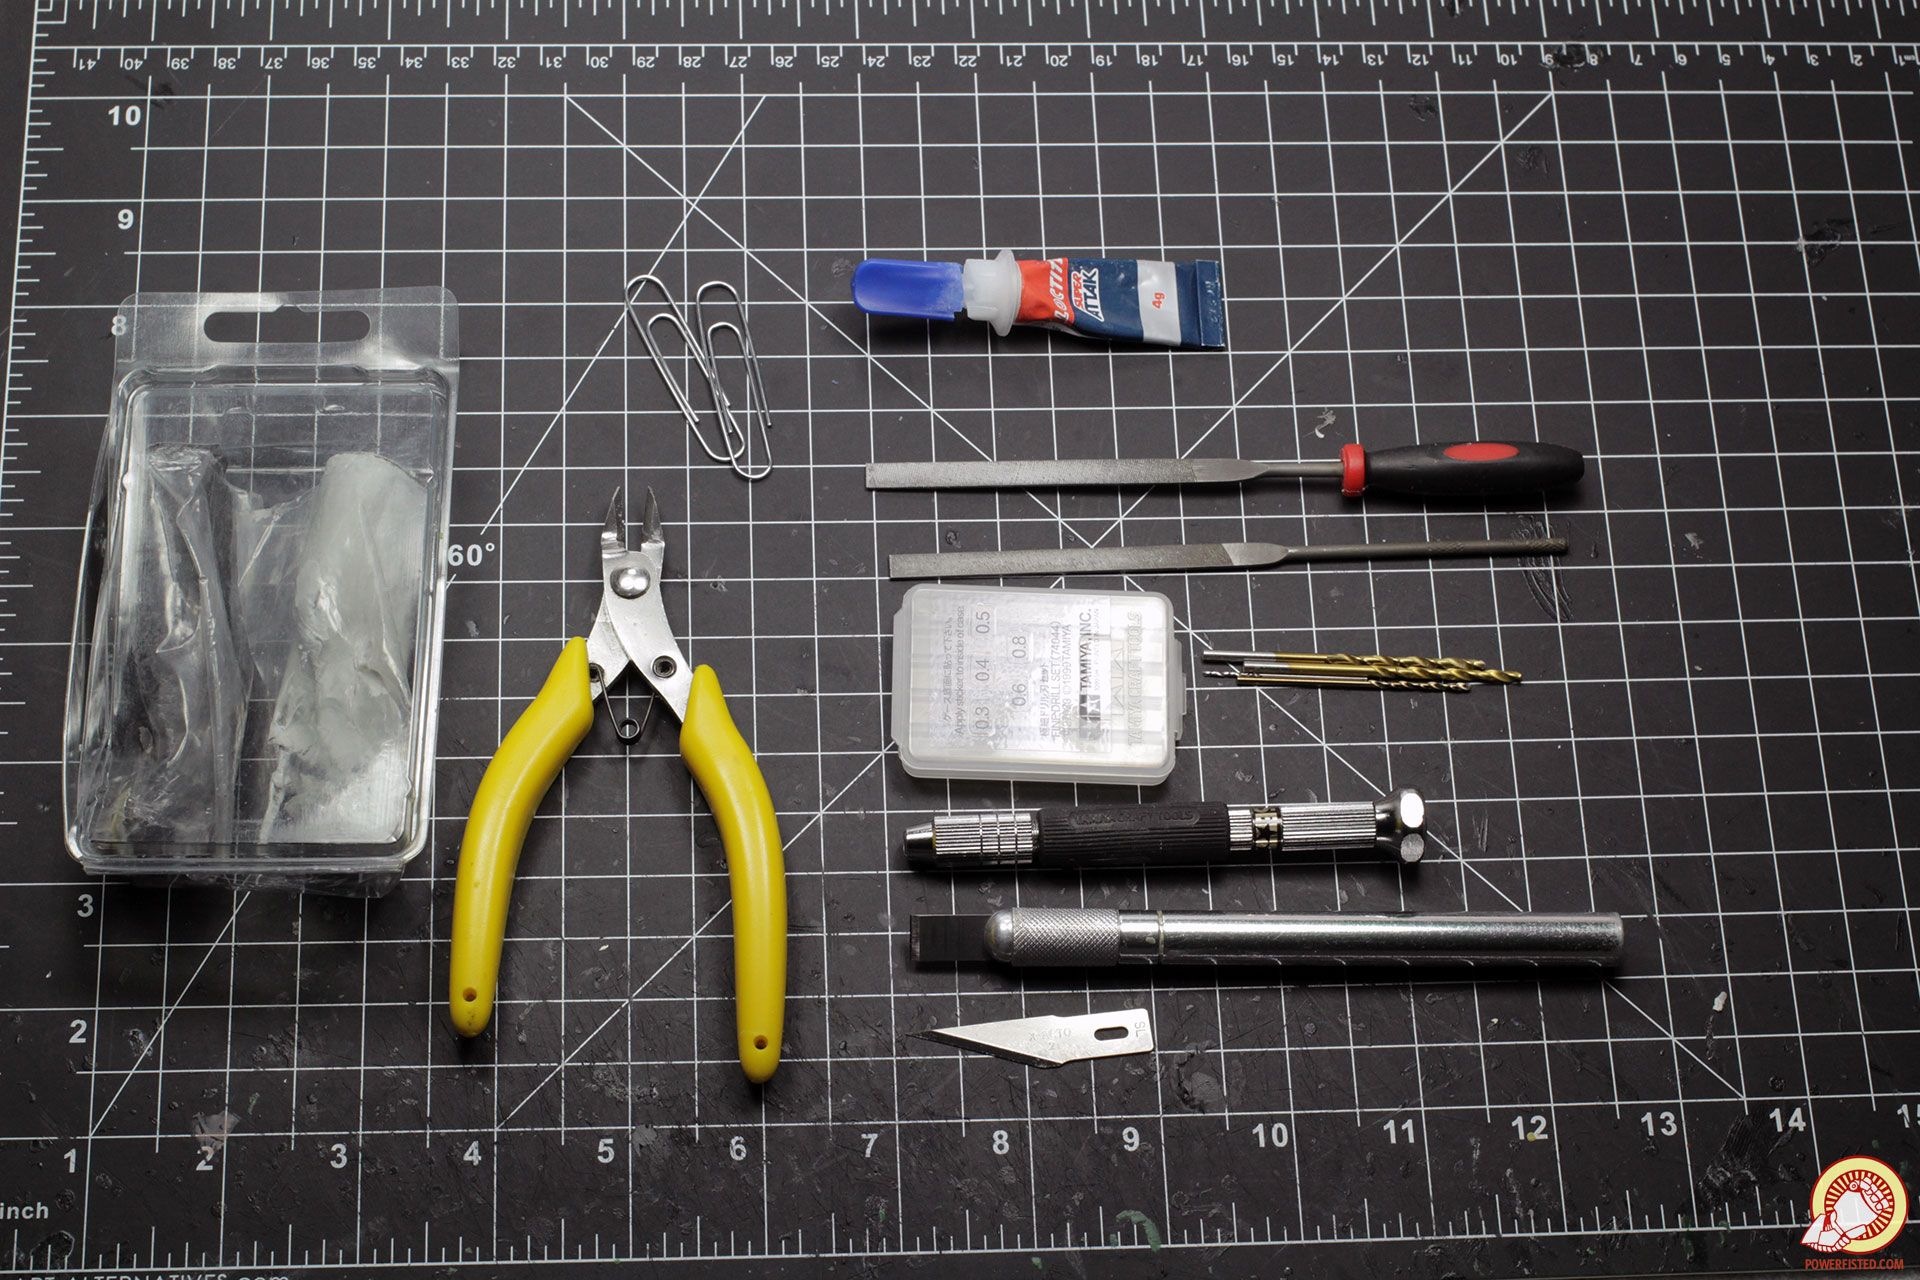
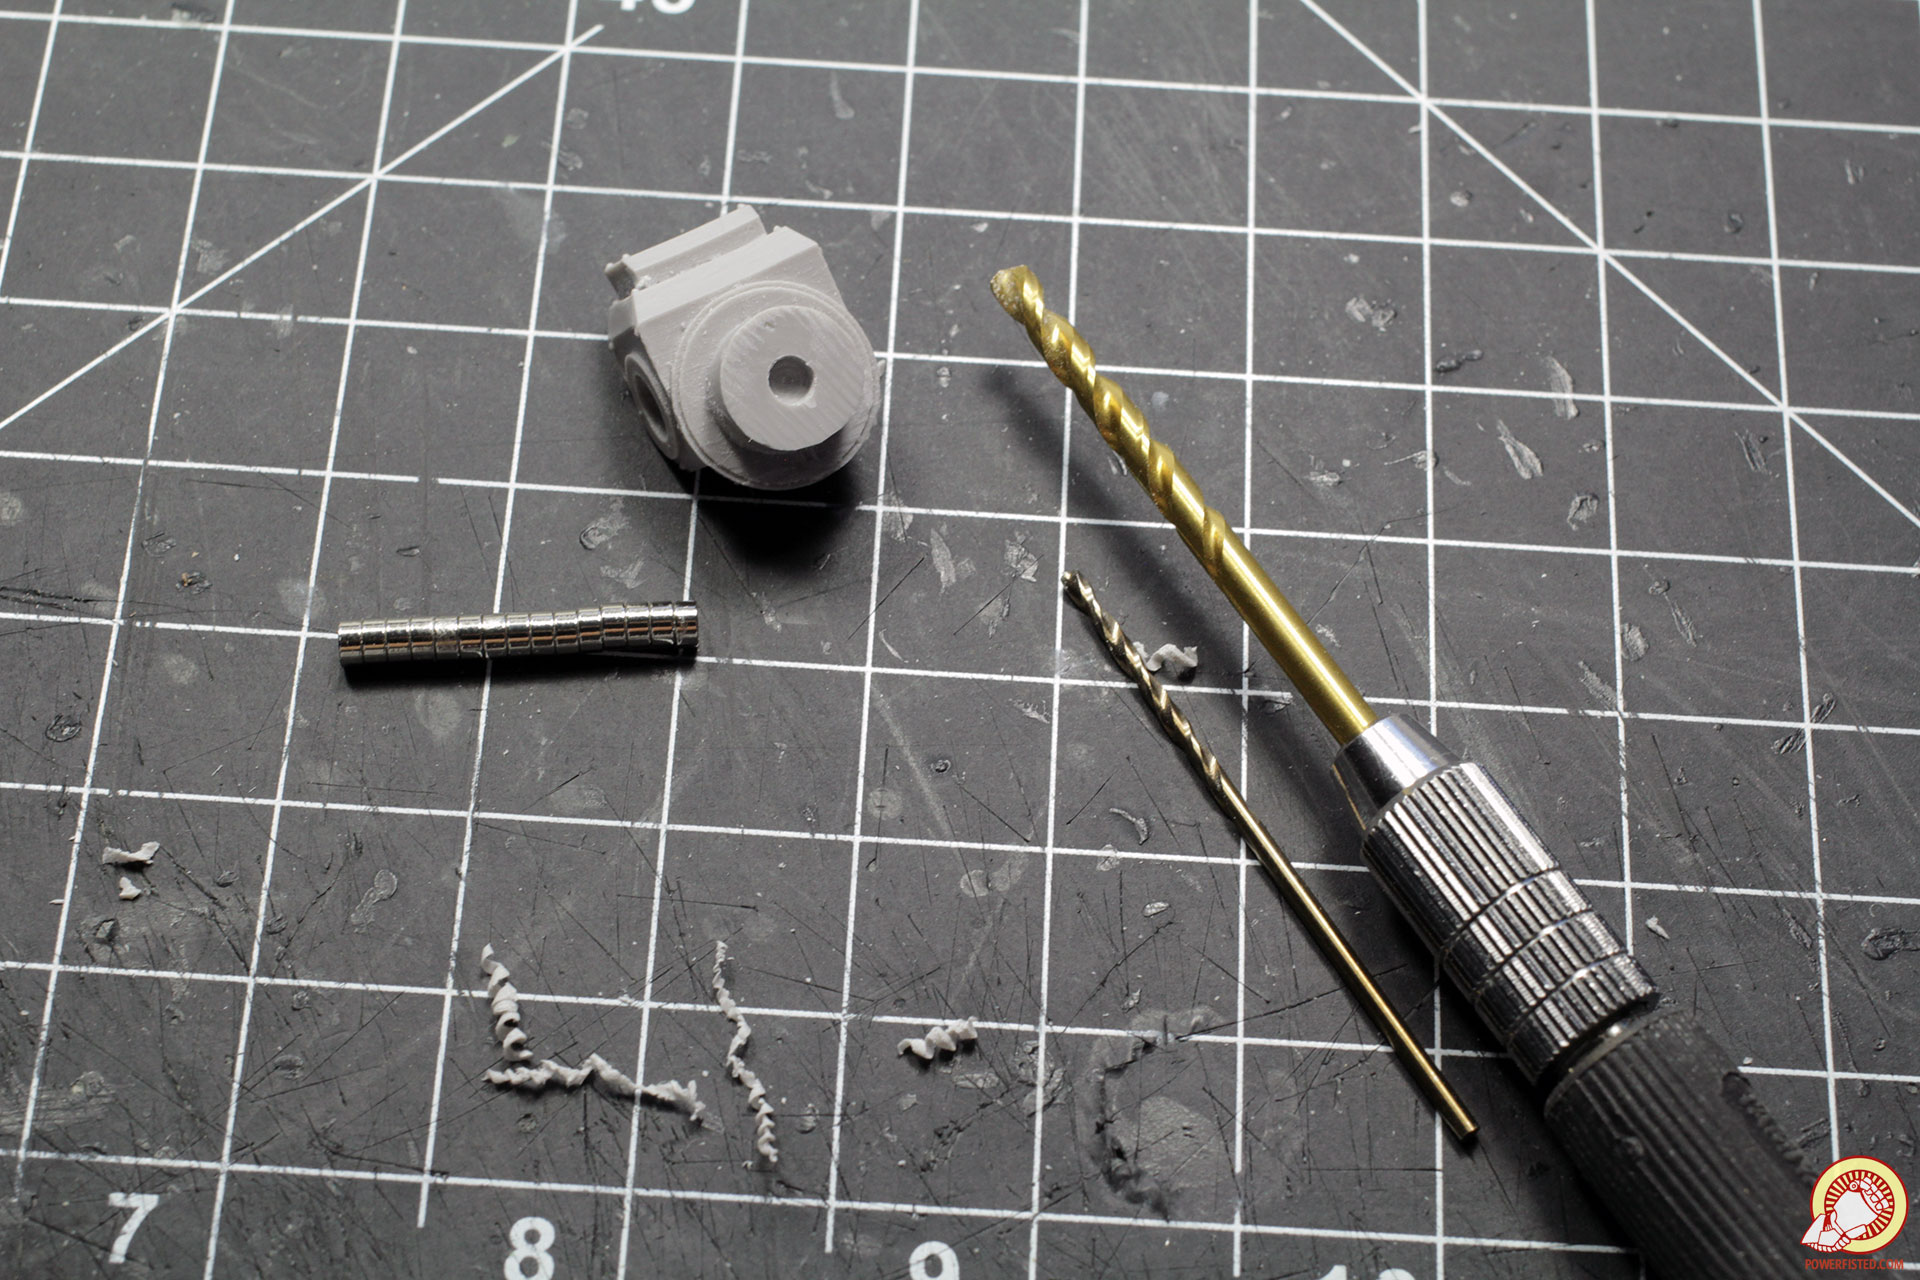
In terms of tools, these are my workhorses: grey stuff (green stuff is fine too), sprue clippers, thicc paper clips, a course micro file, a fine micro file, a pin vice, drill bits that match my thicc paper clips, drill bits that match my magnets, a heavyweight xacto blade, and a heavyweight xacto chisel. Use what you’re comfortable with, but know that good tools do make this hobby easier.
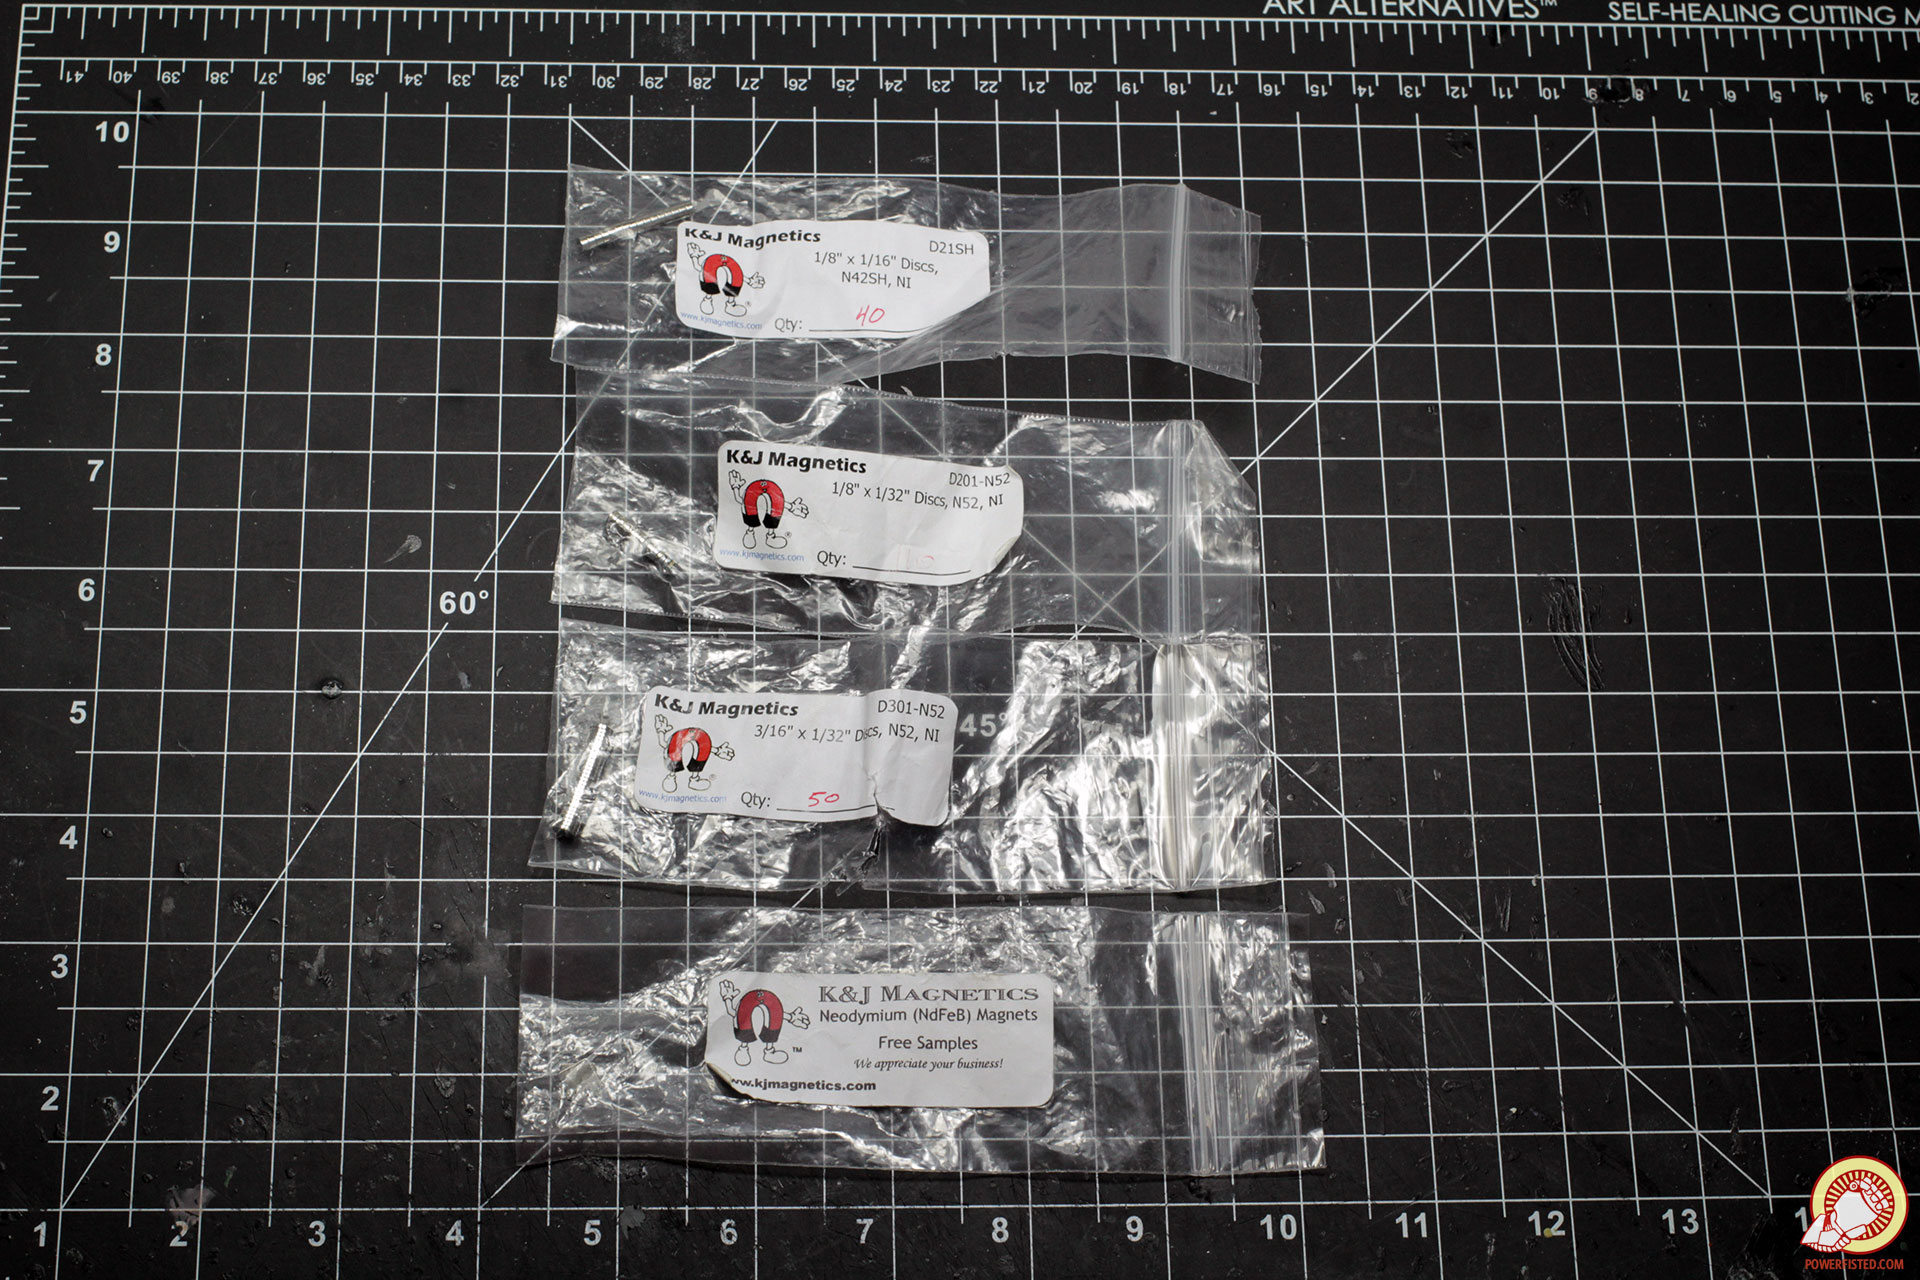
I used four different magnet types for this project sourced from K&J Magnetics. You’ll want to make sure your drills match the sizes you use.
Prep
The most time intensive stage for all projects is the prep work. It’s dull and probably my least favorite part of the hobby, but you gotta bite the bullet. To start any project, I first clip every part from it’s sprue, remove any gates, clean all visible mold lines, and file away any other imperfections.
All this prep work takes hours and results in a spectacular mess, so make sure to wear a respirator. Once all the filing and cutting is done, vacuum up the dust and give your resin parts a bath in some warm soapy water.
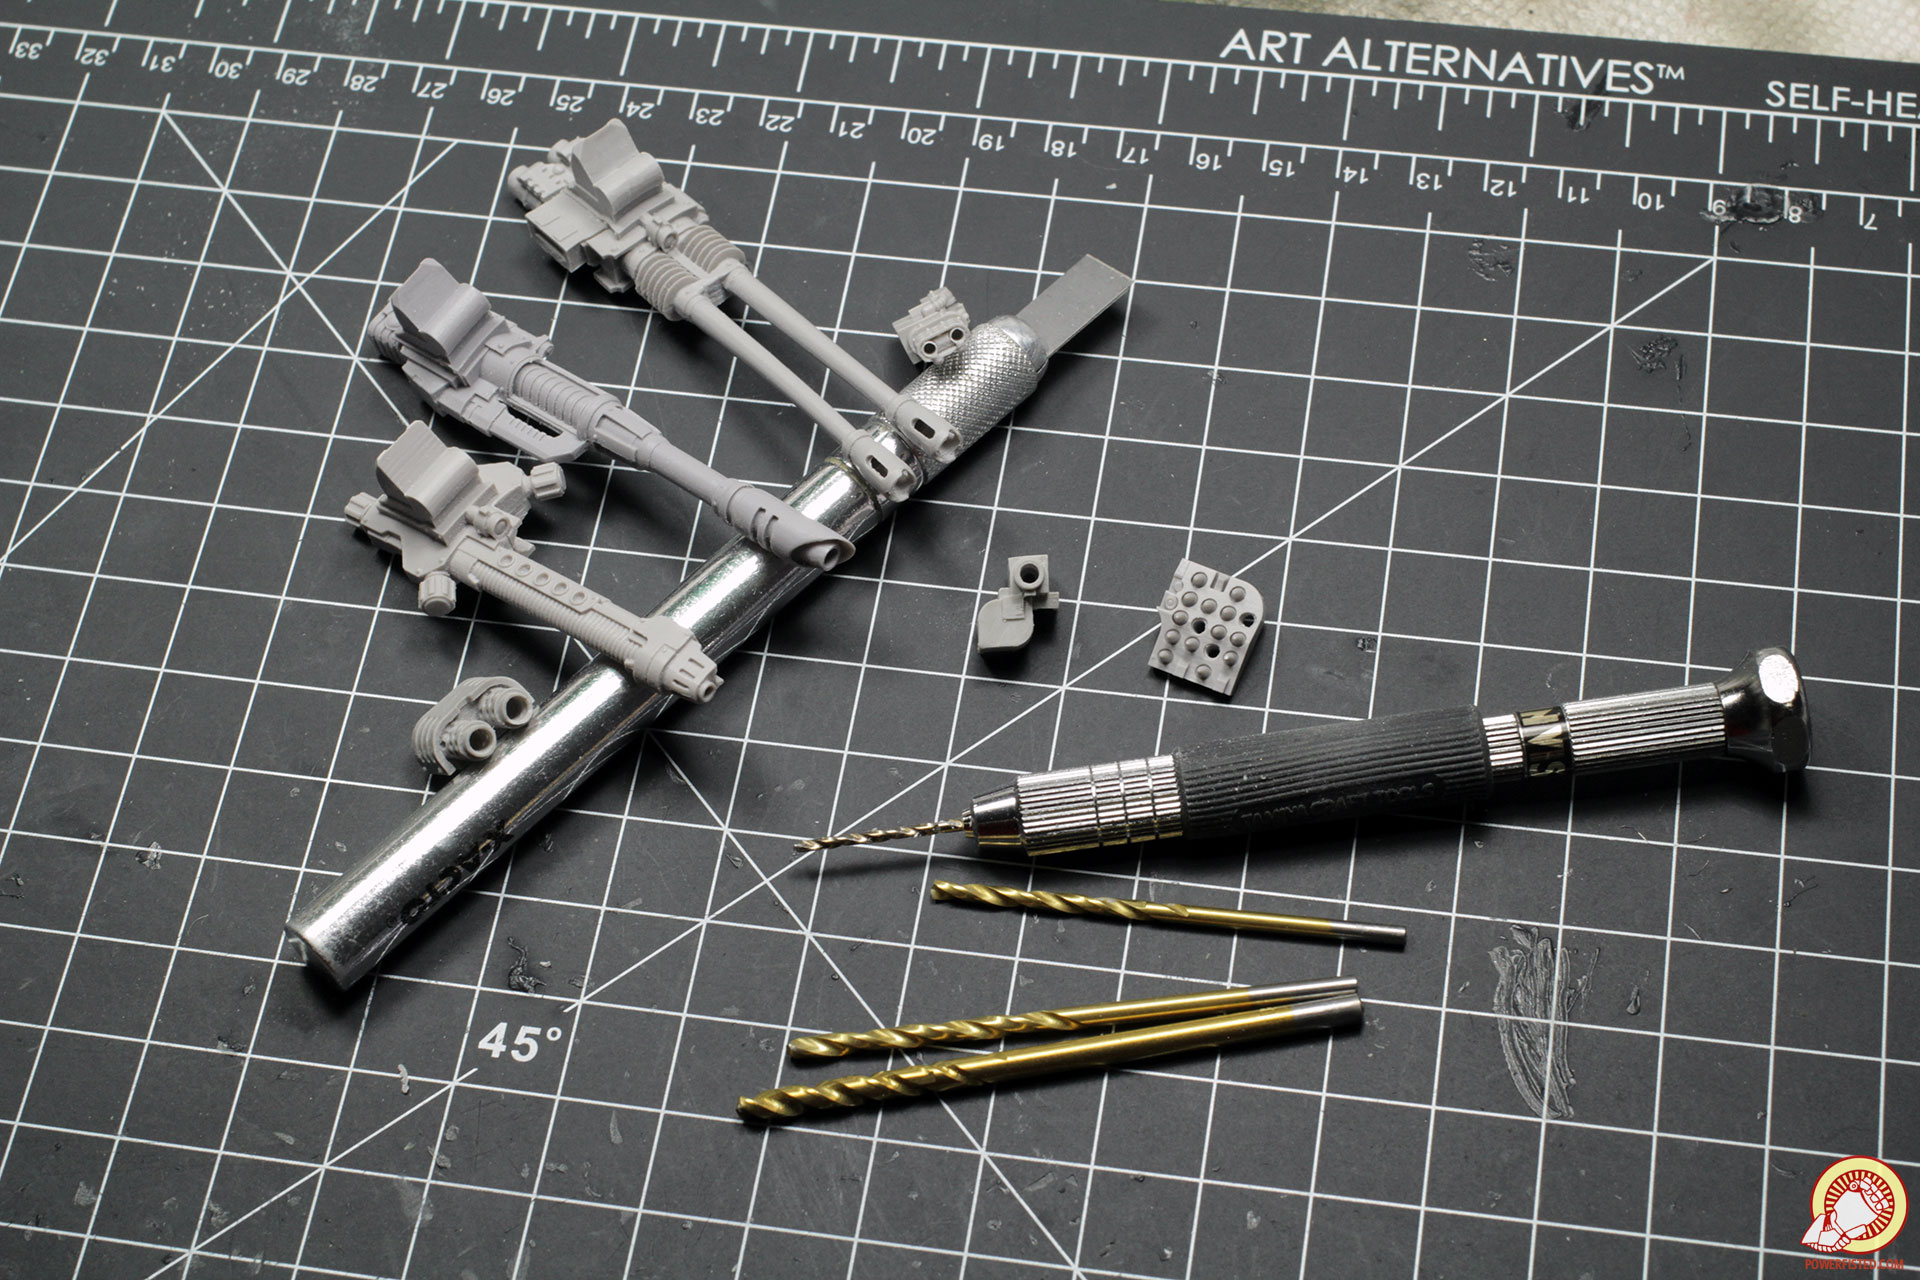
As part of this step I also drilled out my barrels, engine stacks, and some missiles from the missile launcher. Use whatever drill bits match the different sized holes best.
If you plan to remove the armored gorget you’ll want to do it before you do anything else. I used a chisel and file to achieve this, but decided to keep the gorget on my second Deredeo to create some variation.
Assembly
With the prep work done, you’re now ready to start putting this sucker together. Posing a model dynamically really goes a long way to selling a conversion. Because of this, I always start my humanoid conversions from the top and work my way down. This way I can focus on making the head and arms tell a consistent story from the very start. As the rest of the body comes together, I make sure they support the head and arms of the model.
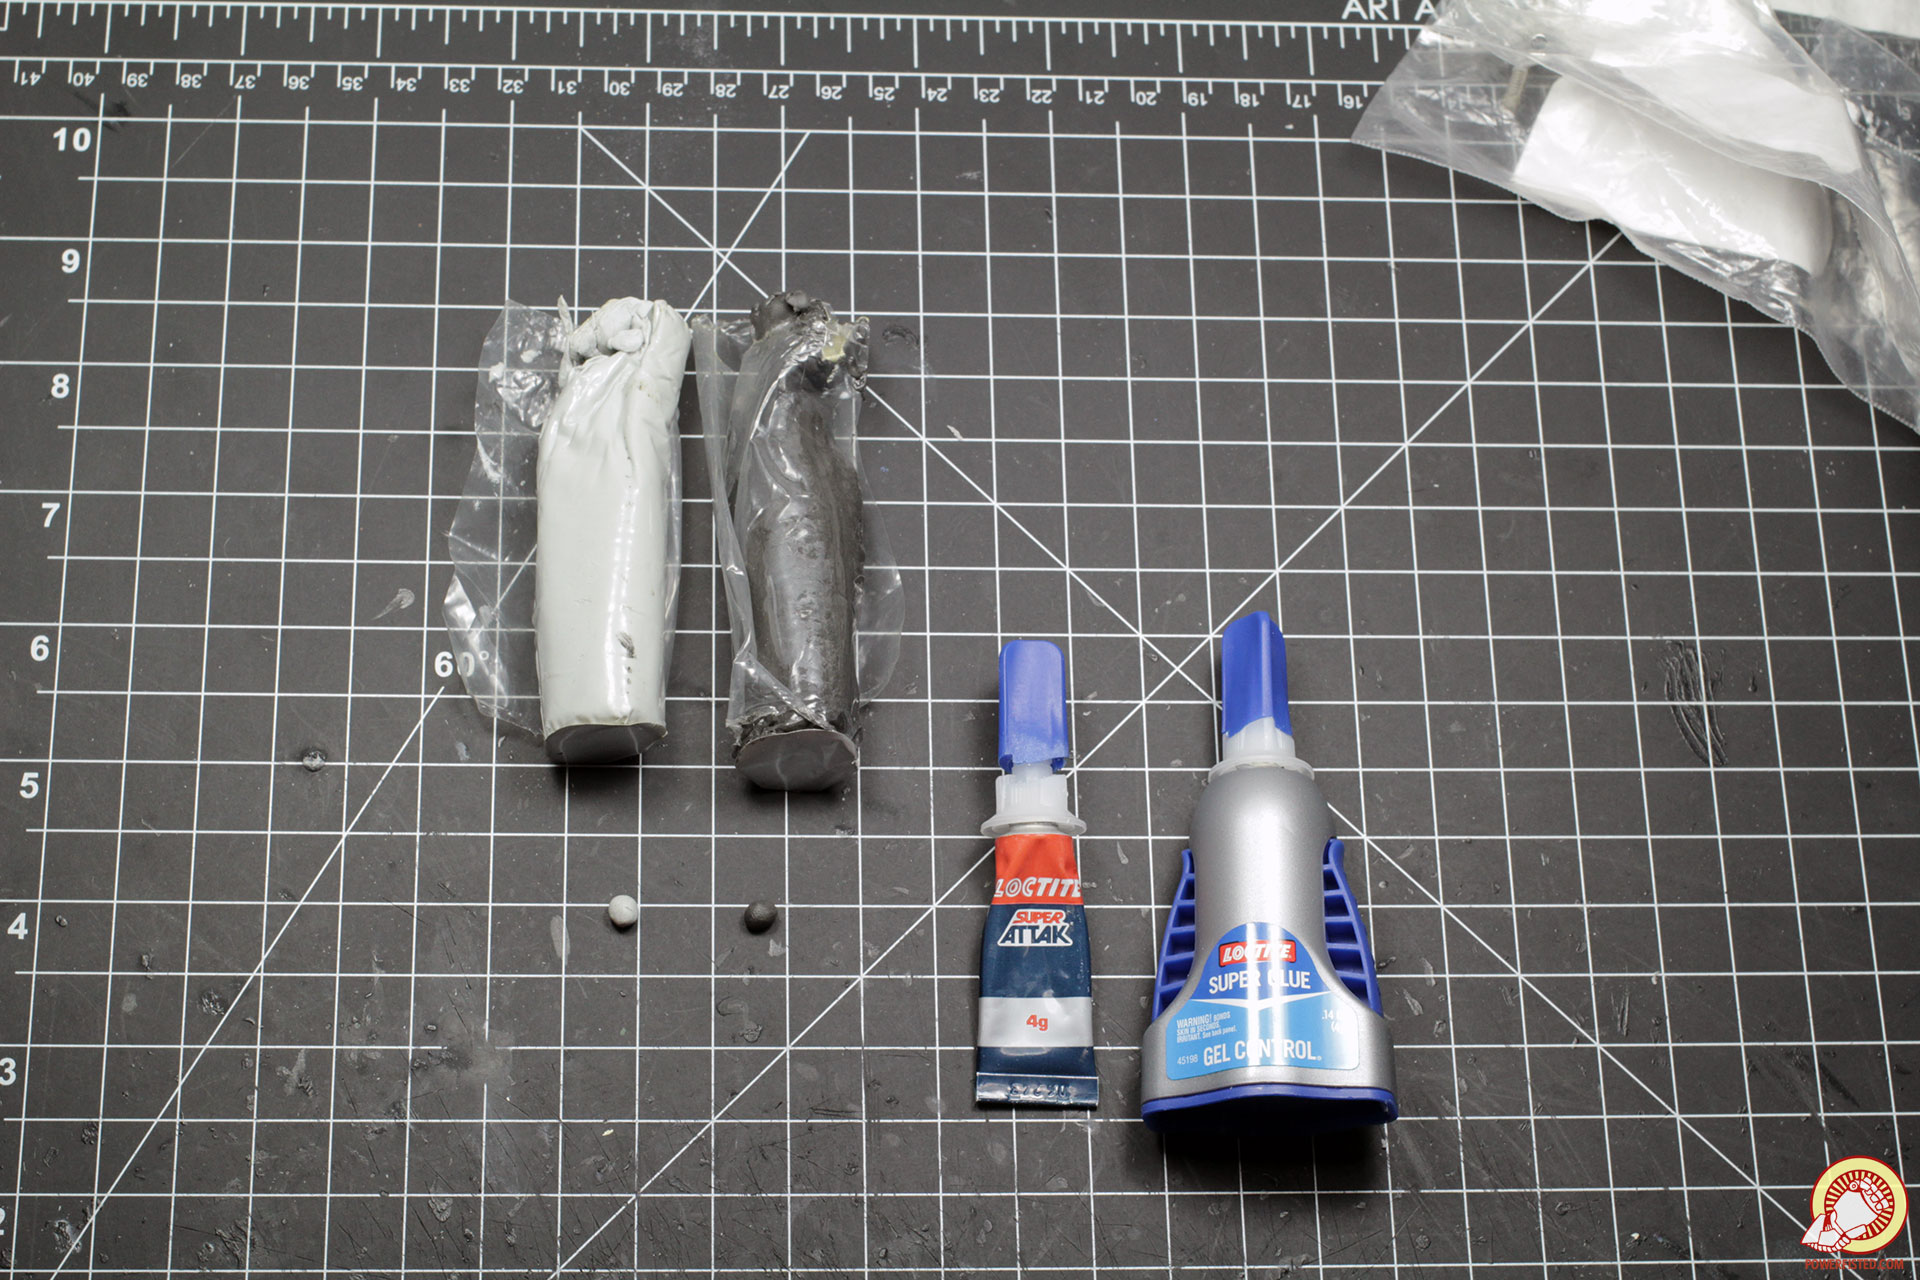
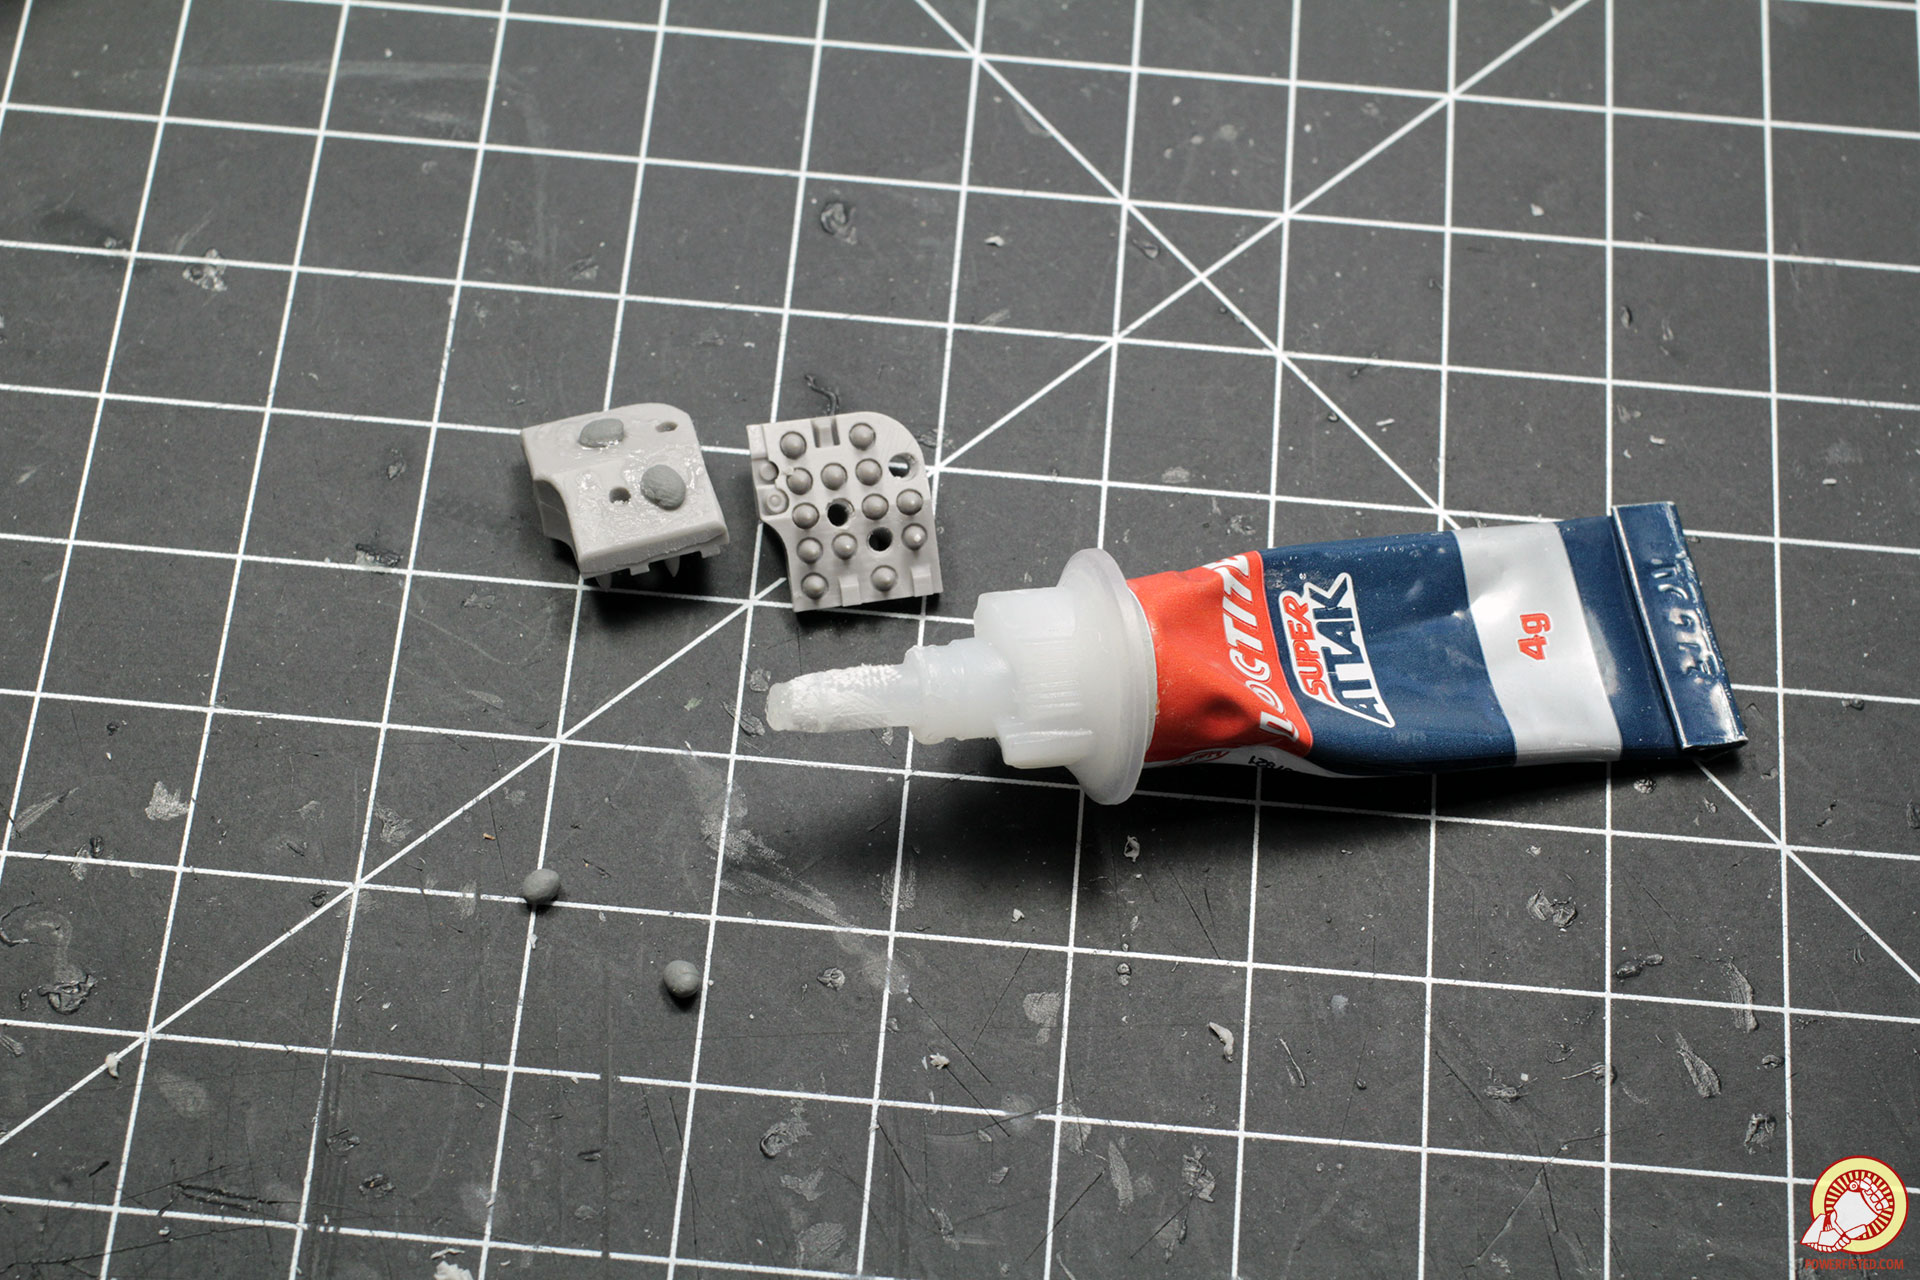
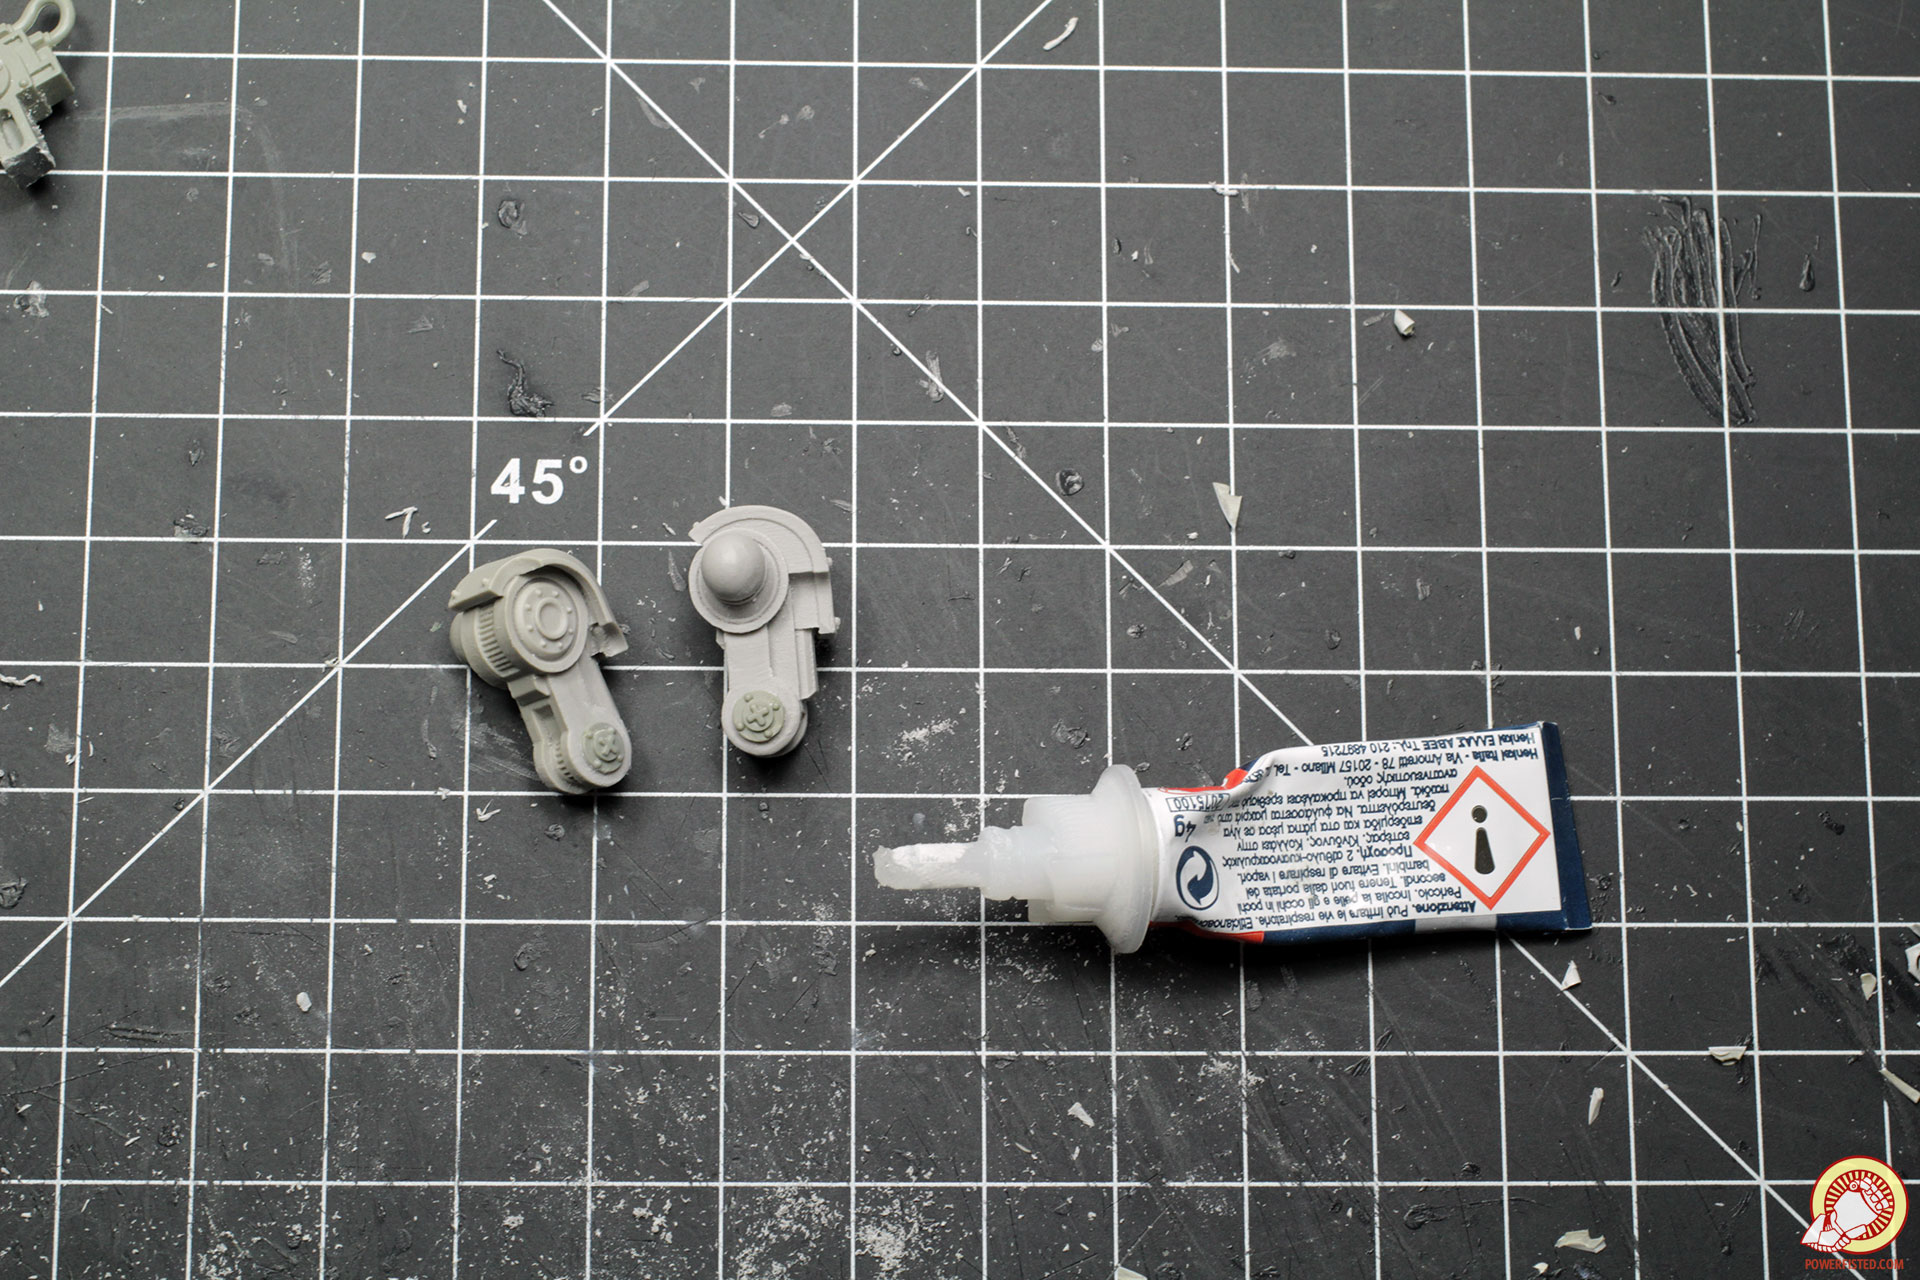
For assembly I use loctite super glue and little balls of grey stuff. The putty is important for posing- gluing both ends of a joint with a small ball of putty between allows you to pose the joint while the putty sets. This technique gives you about an hour to adjust the model like a doll to find the ‘right spot’ for complex poses. You can handle the model as it dries, but be careful not to shift any pieces that are still drying. Once dry it becomes a very solid bond.
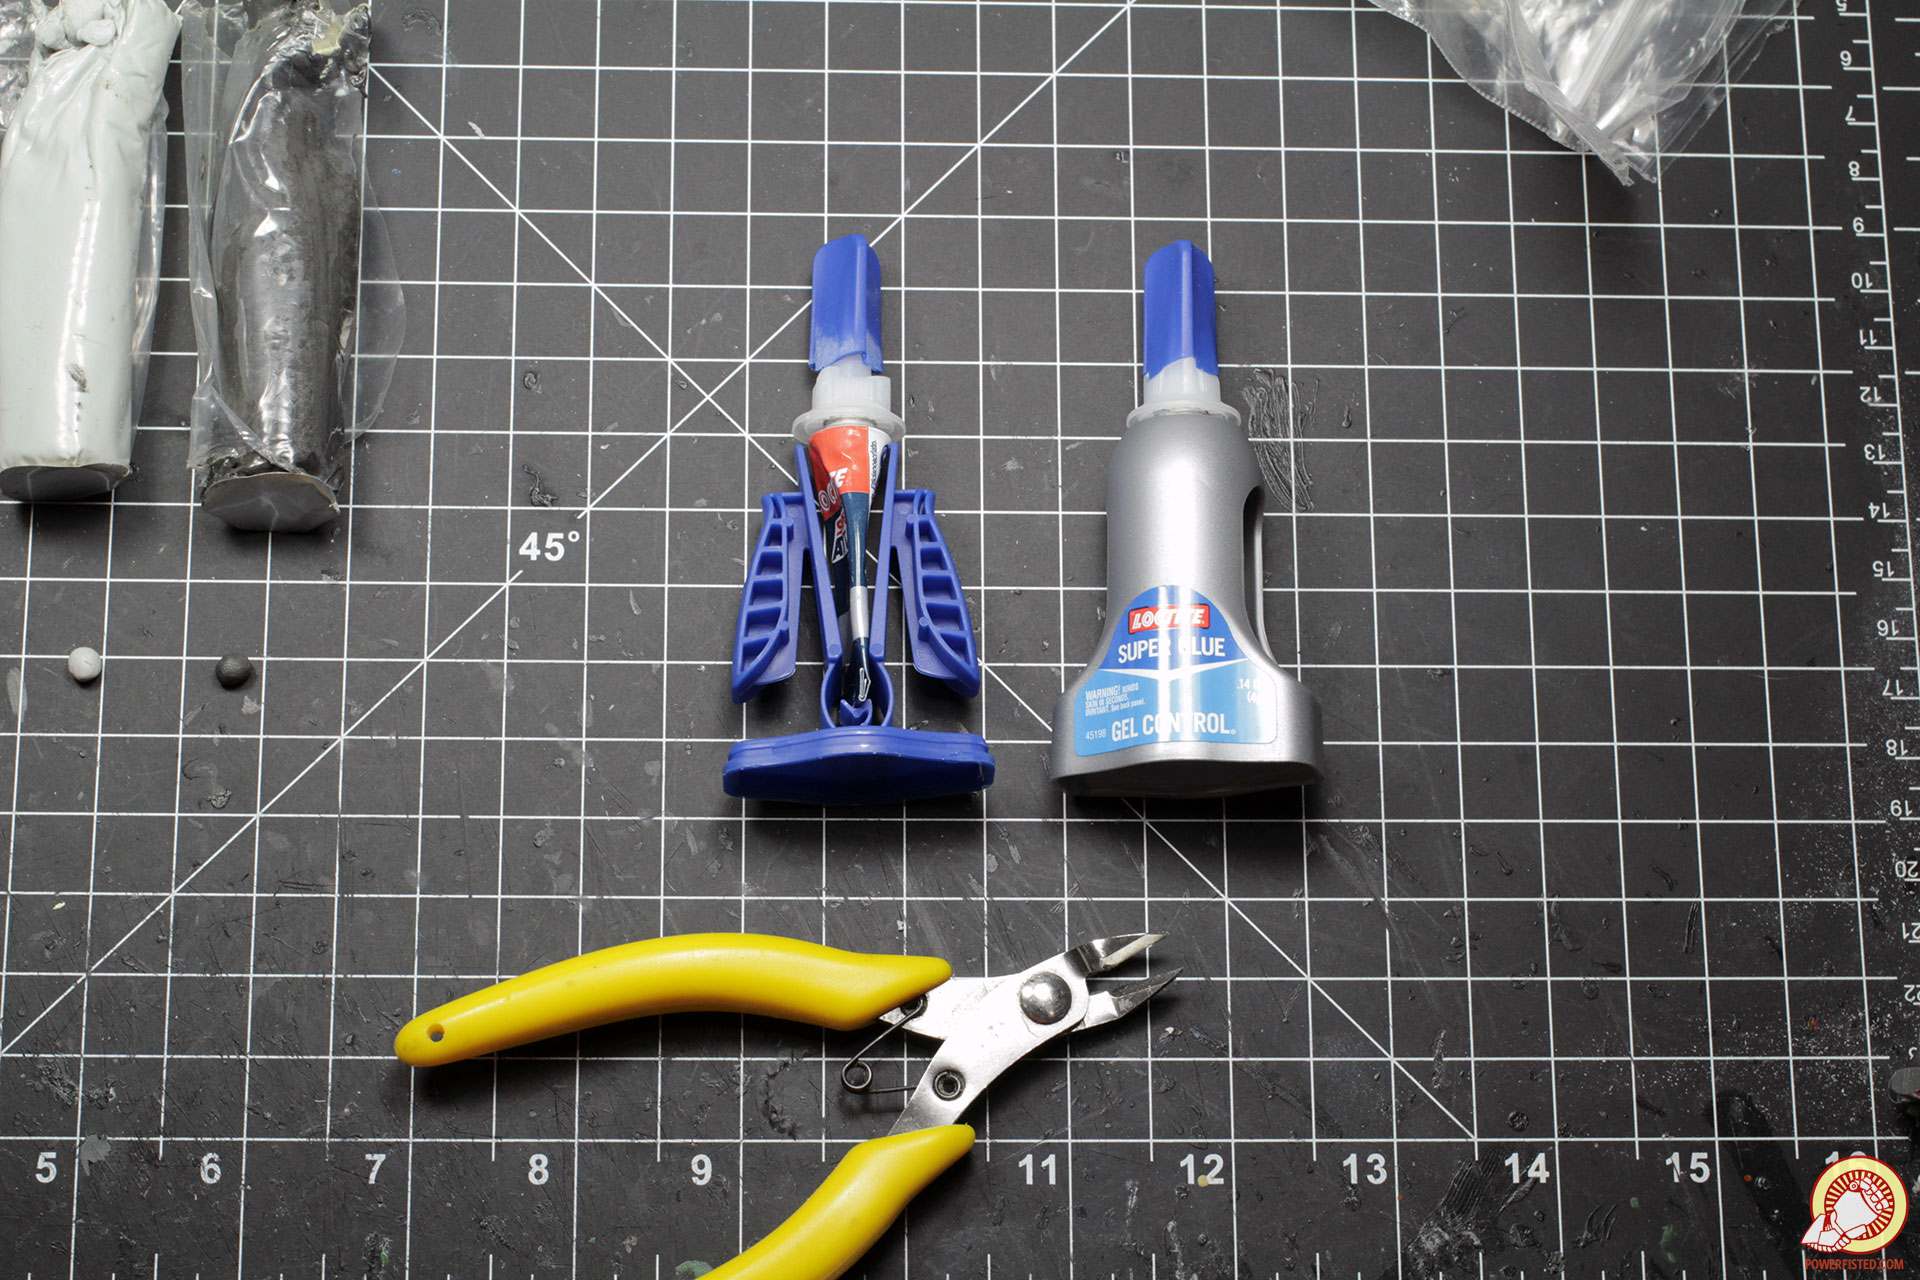
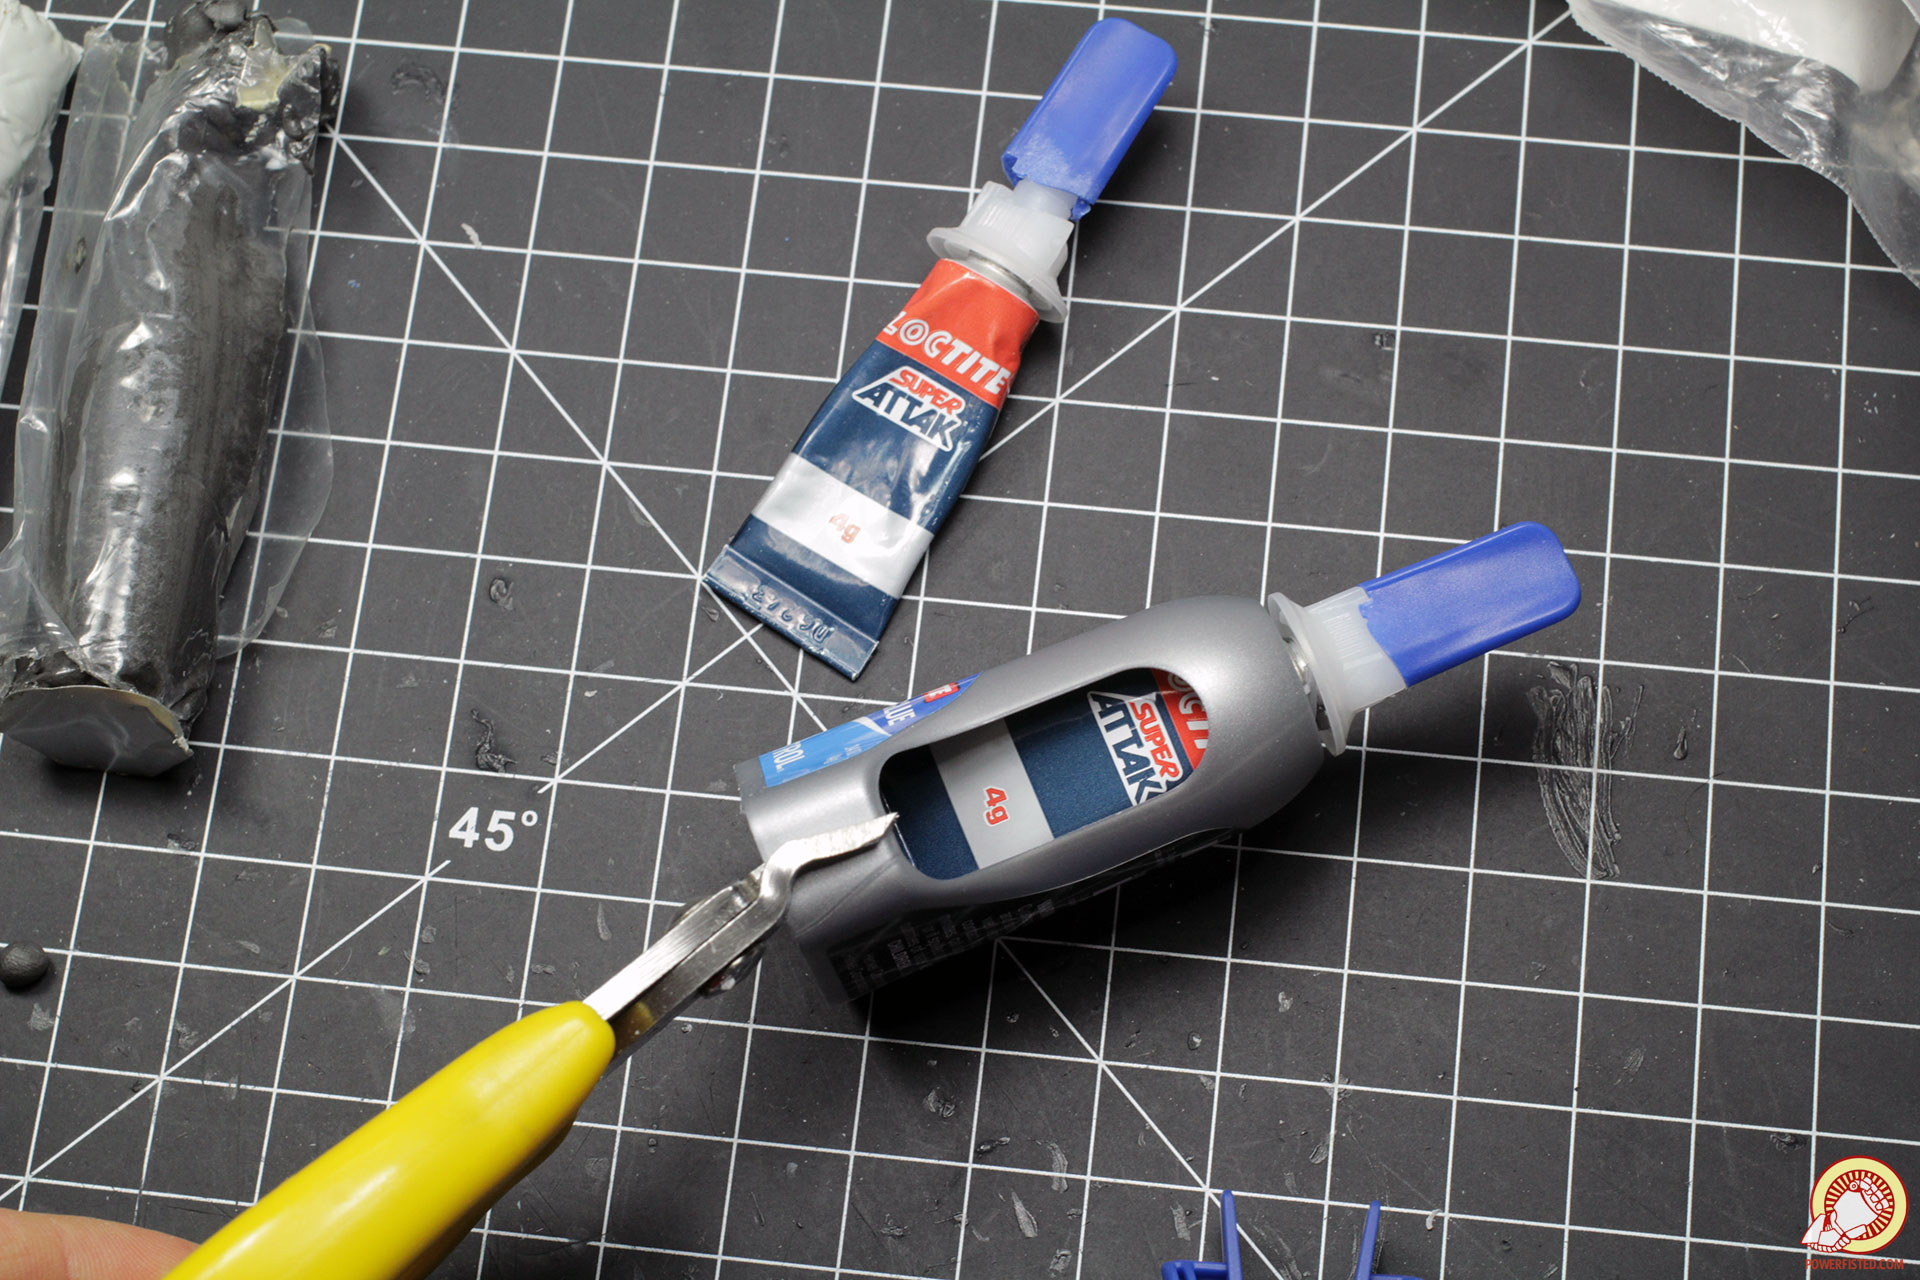

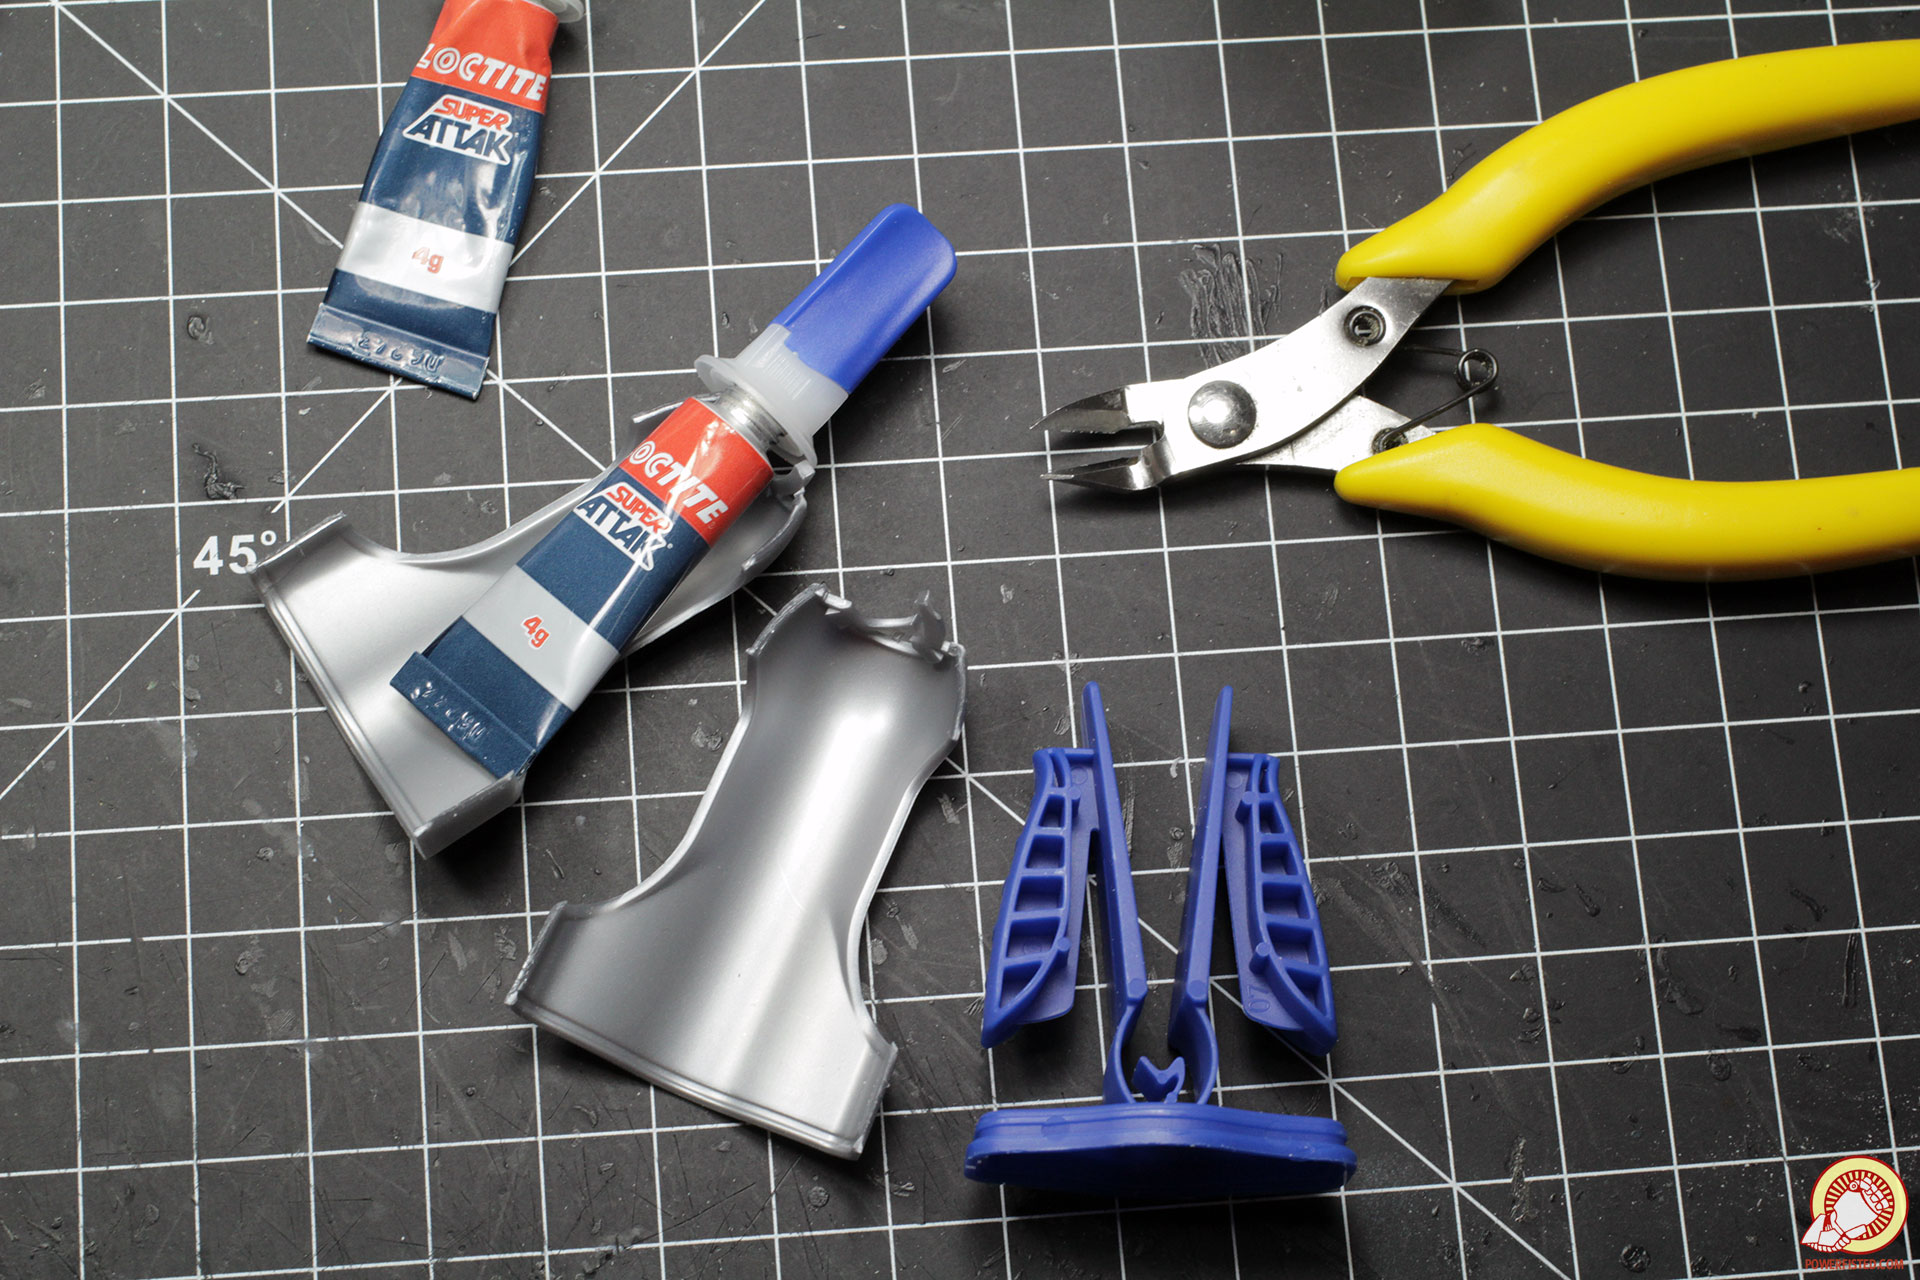
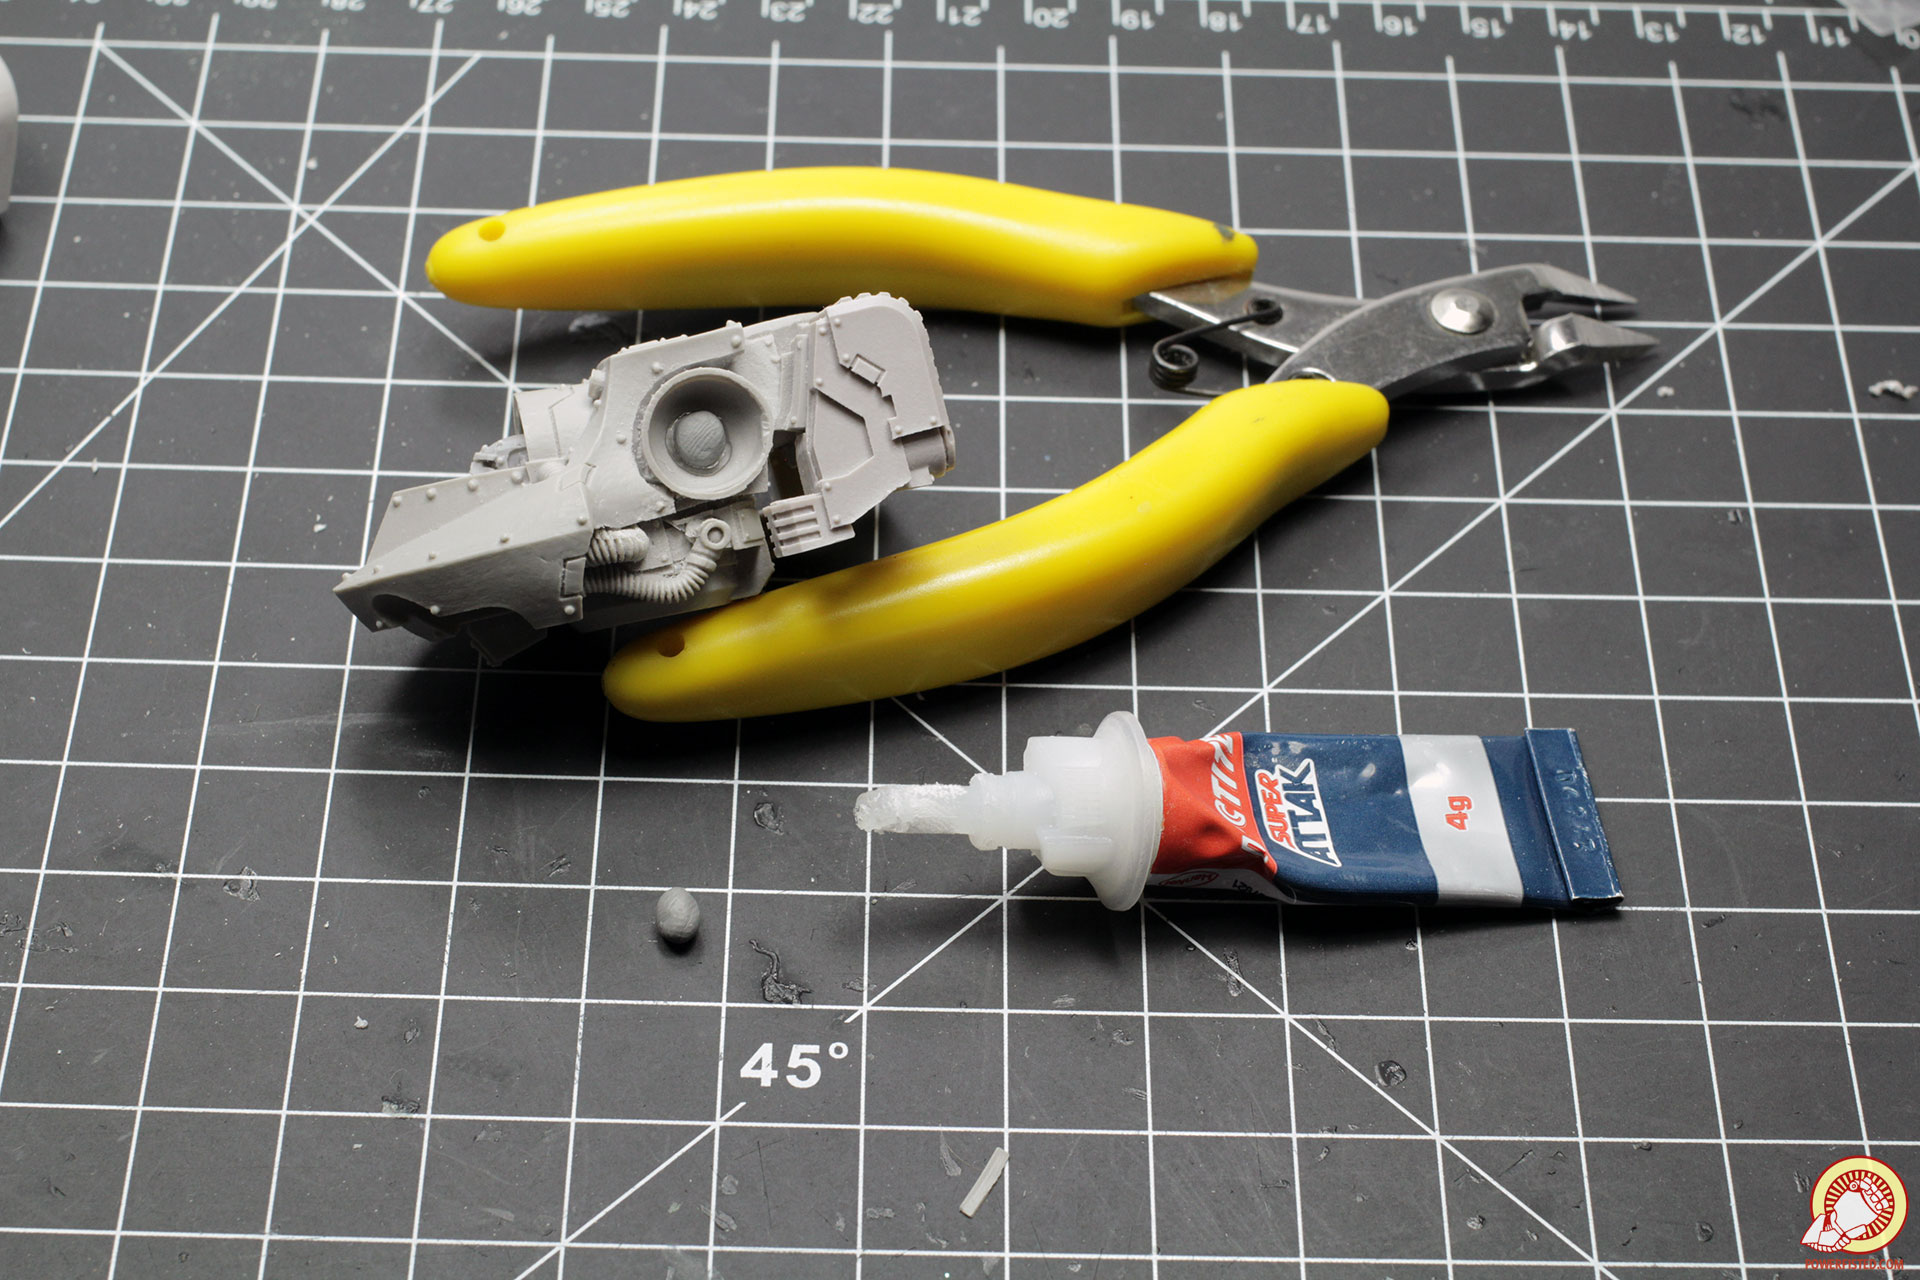
As a tip, if you use loctite glue, do yourself a favor and remove the tube from its container. It’s nearly impossible to get out all the glue due to the design. Using a pair of sprue clippers you can remove the shell and use up every drop.
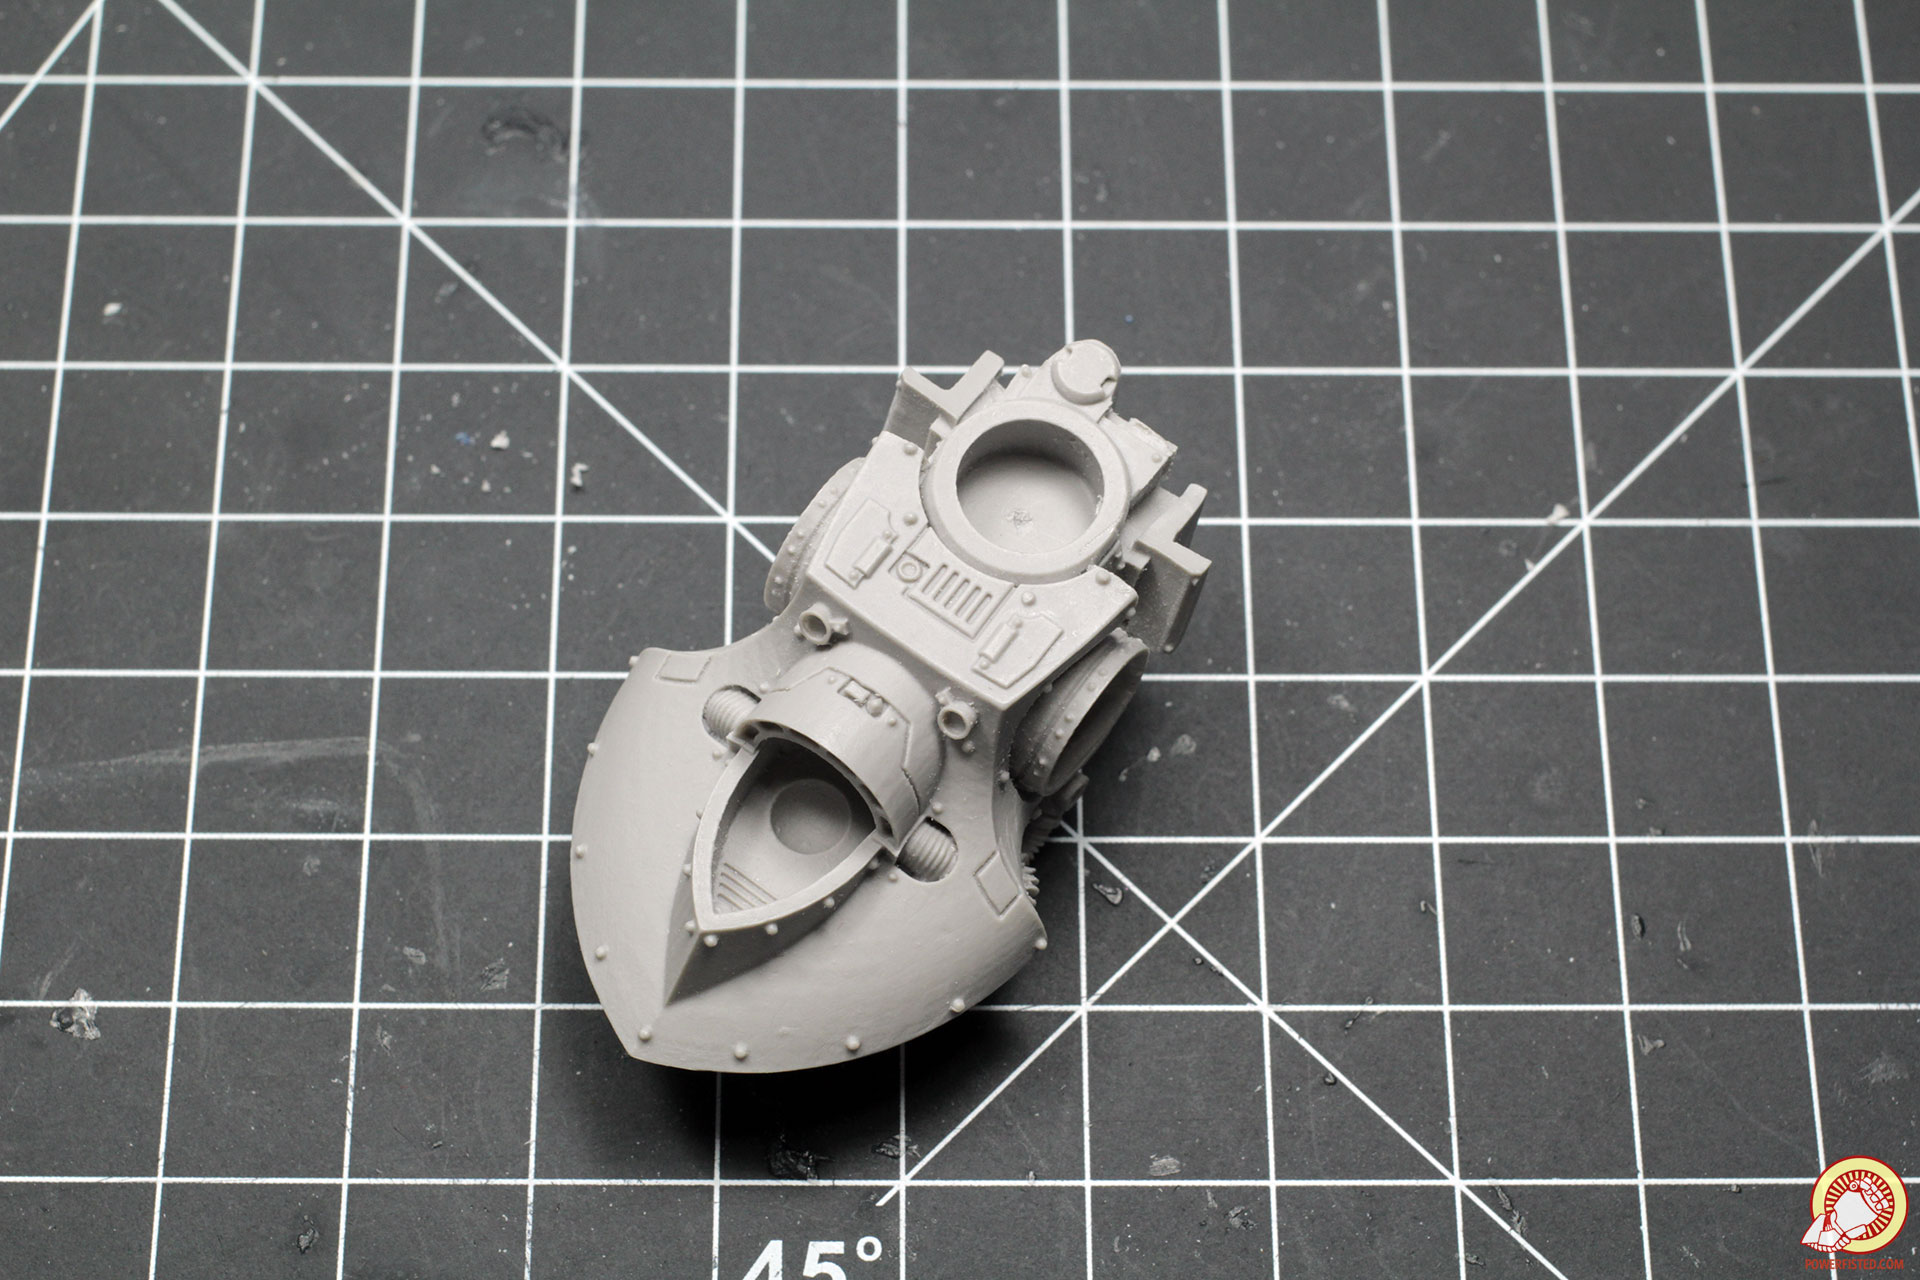
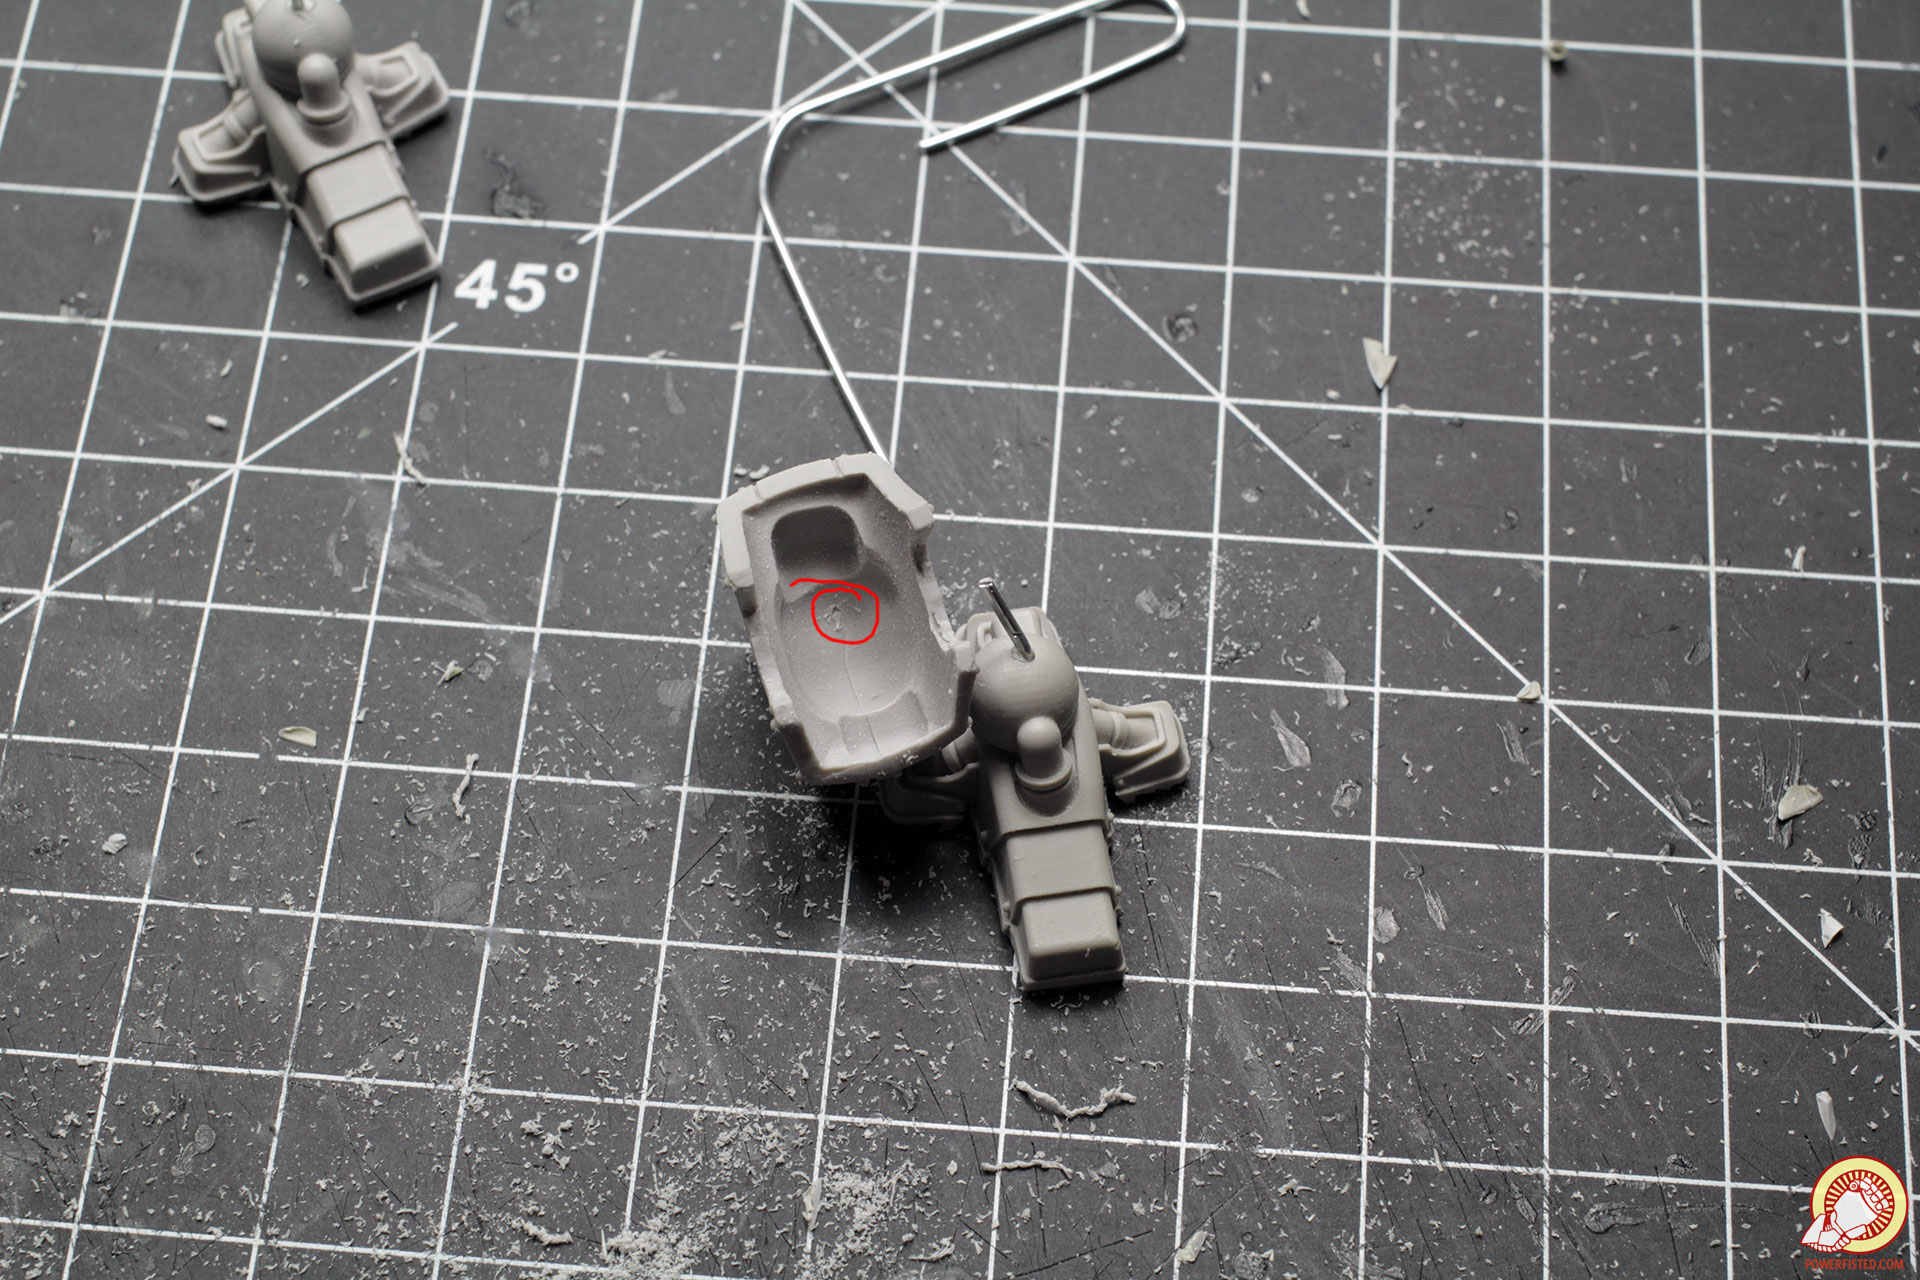
The very first thing I do is mark the spot for my first magnet hole in the Deredeo’s torso. It’s a good habit to scour the centres of any hole you plan to drill as it is more accurate than simply eyeballing and going full ham with the drill. I use the tip of an xacto blade for this.
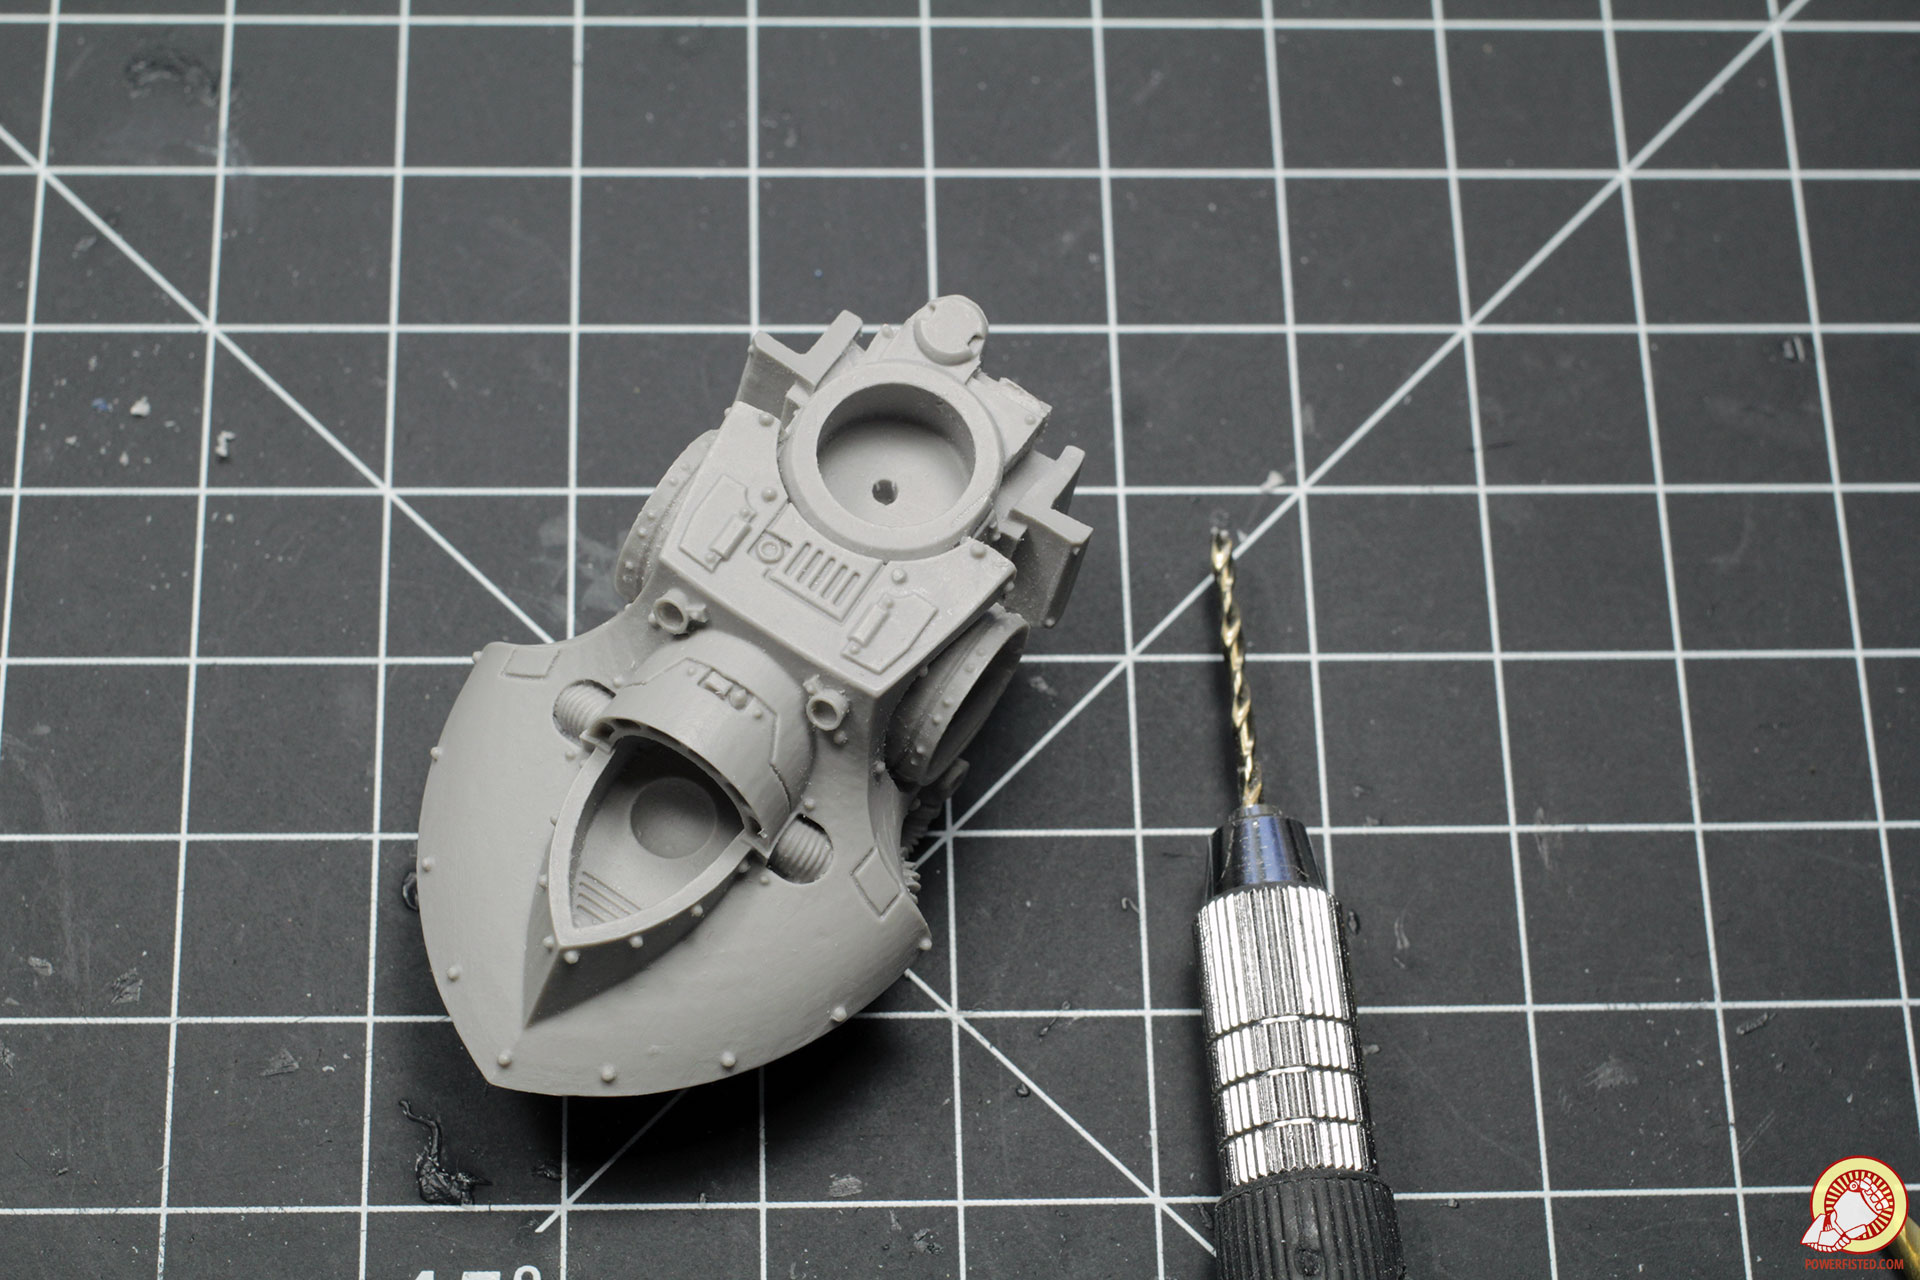
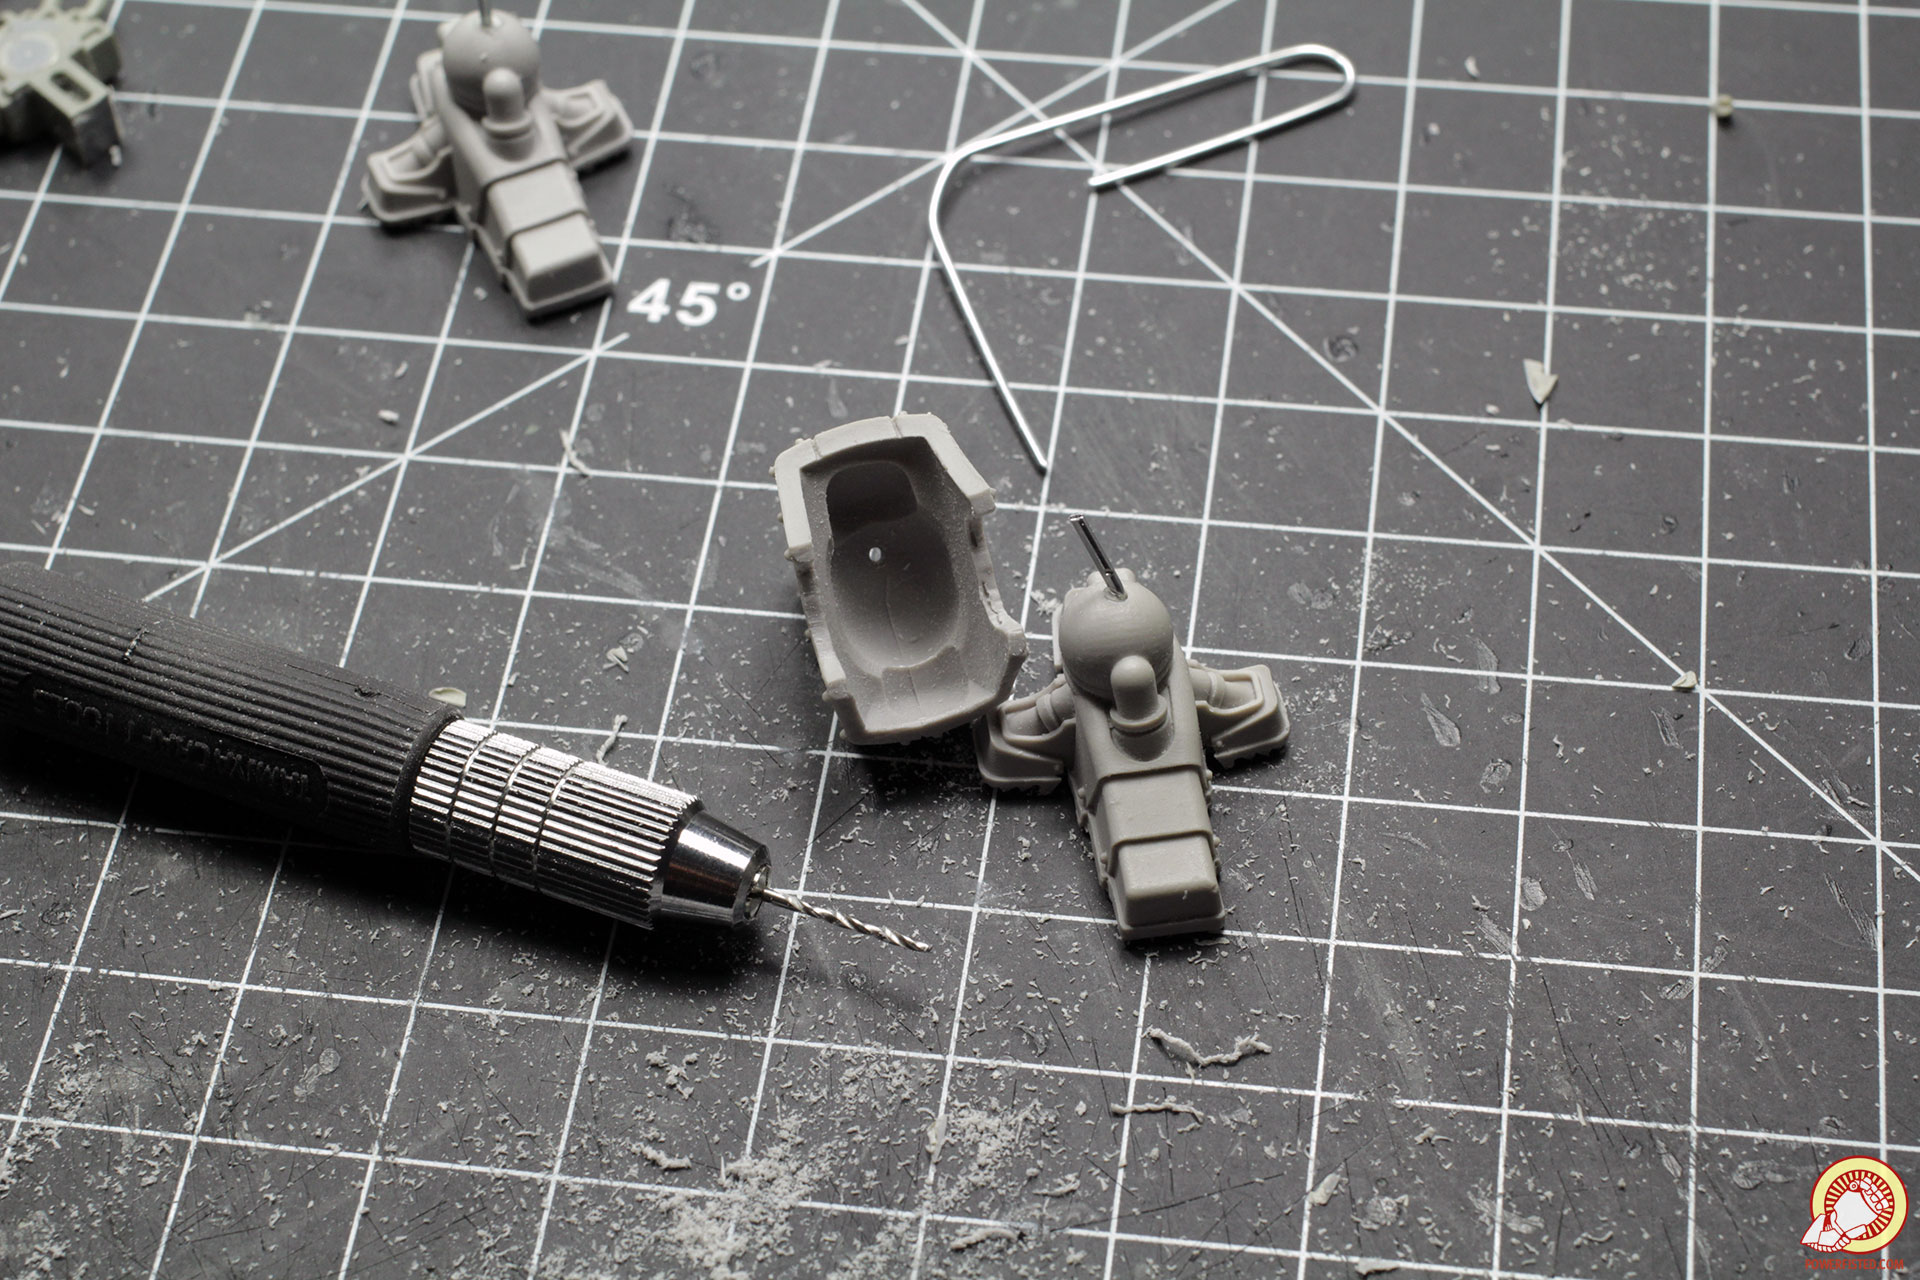
I drill a small pilot hole into the scoured dent, then follow up with a larger bit. This allows me to correct the hole if I didn’t get it centered the first time.
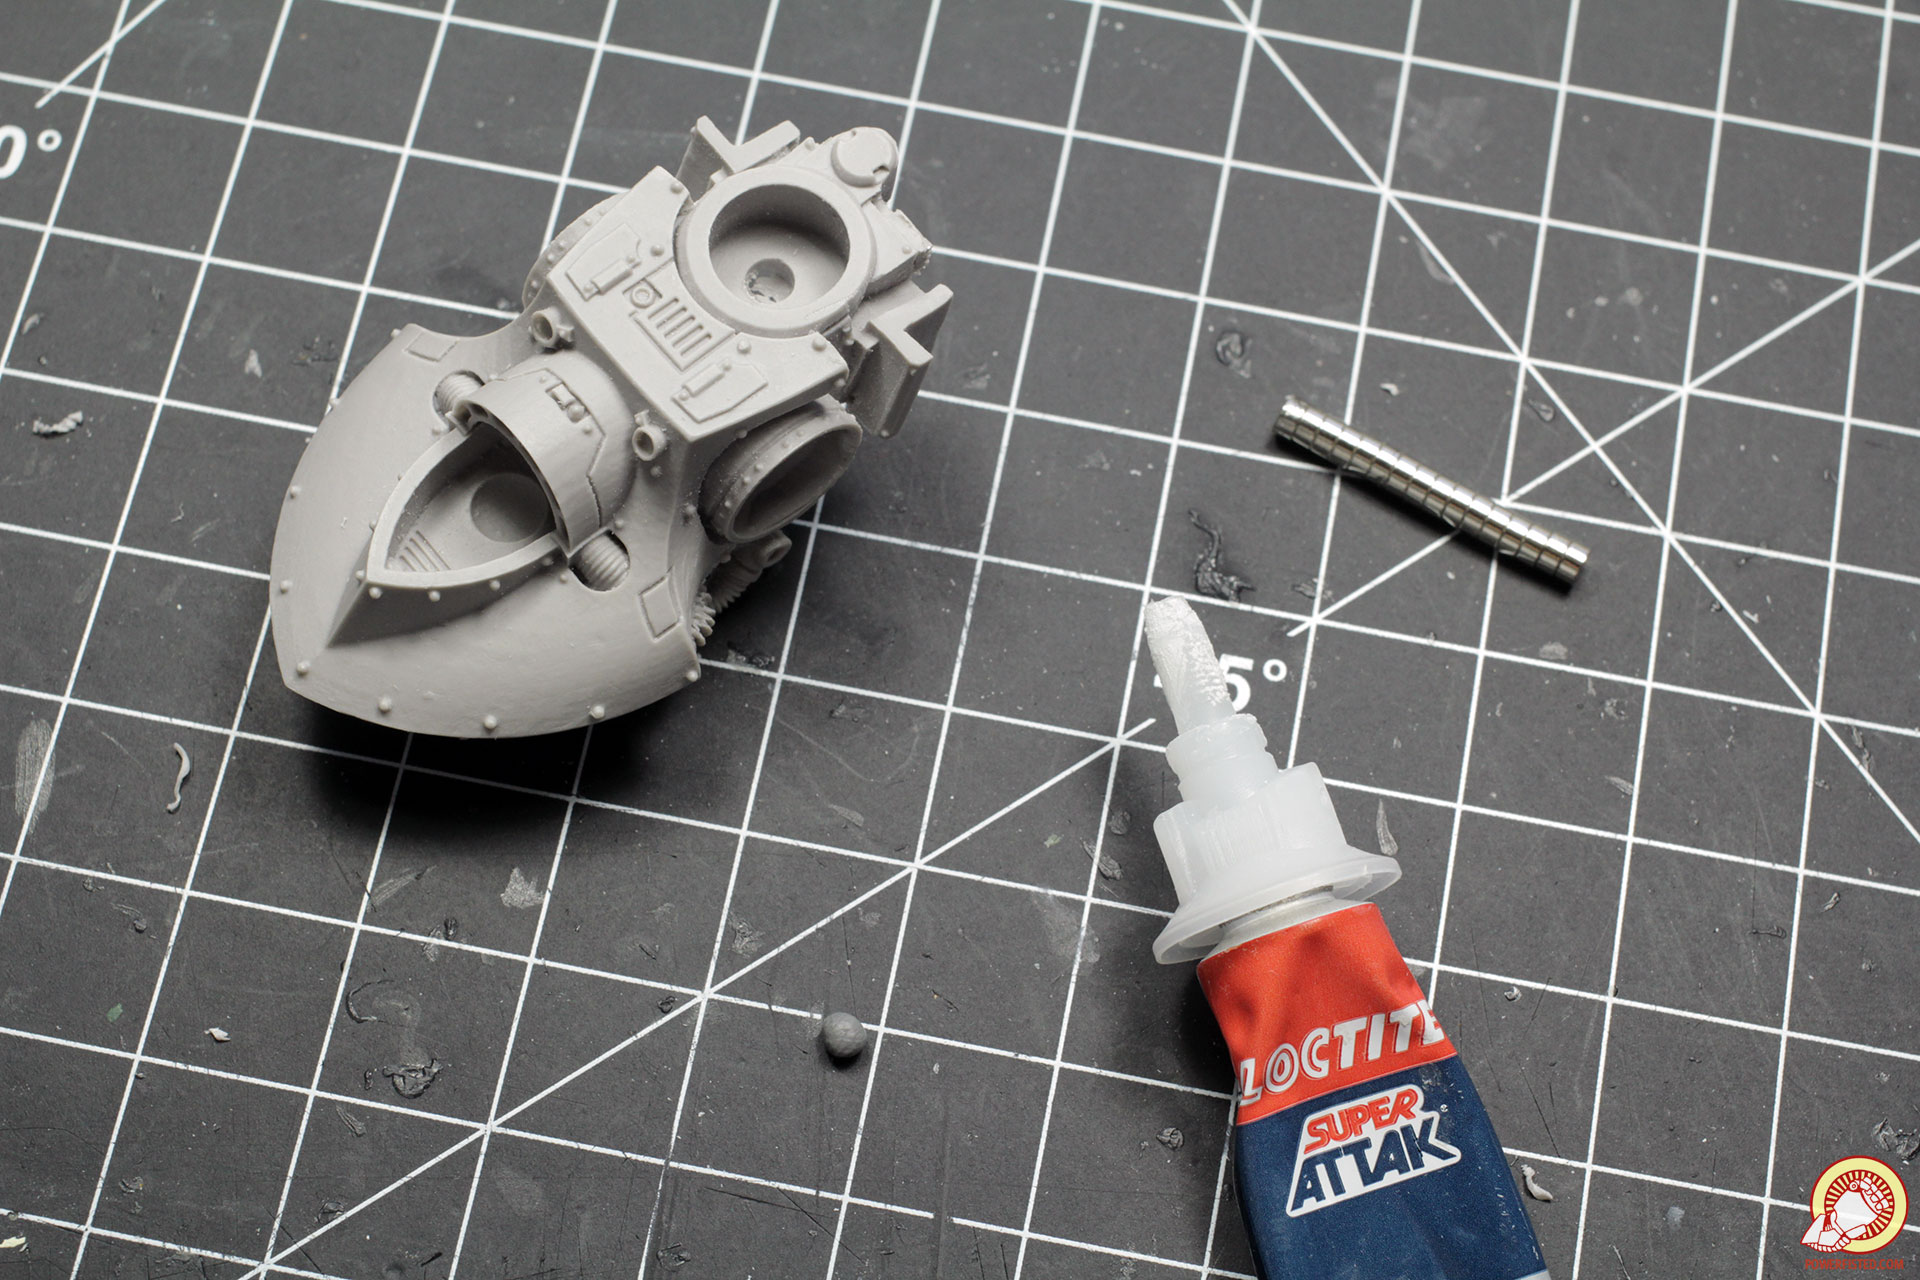
Depth is important. If you drill too much, you’re left with a recessed magnet. If you drill too little you’ll have a magnet that pops out of the hole and messes up the joint. Always dry fit. If you do drill too much… no sweat! Just put a small bit of grey stuff onto the hole before you shove the magnet into the gap.
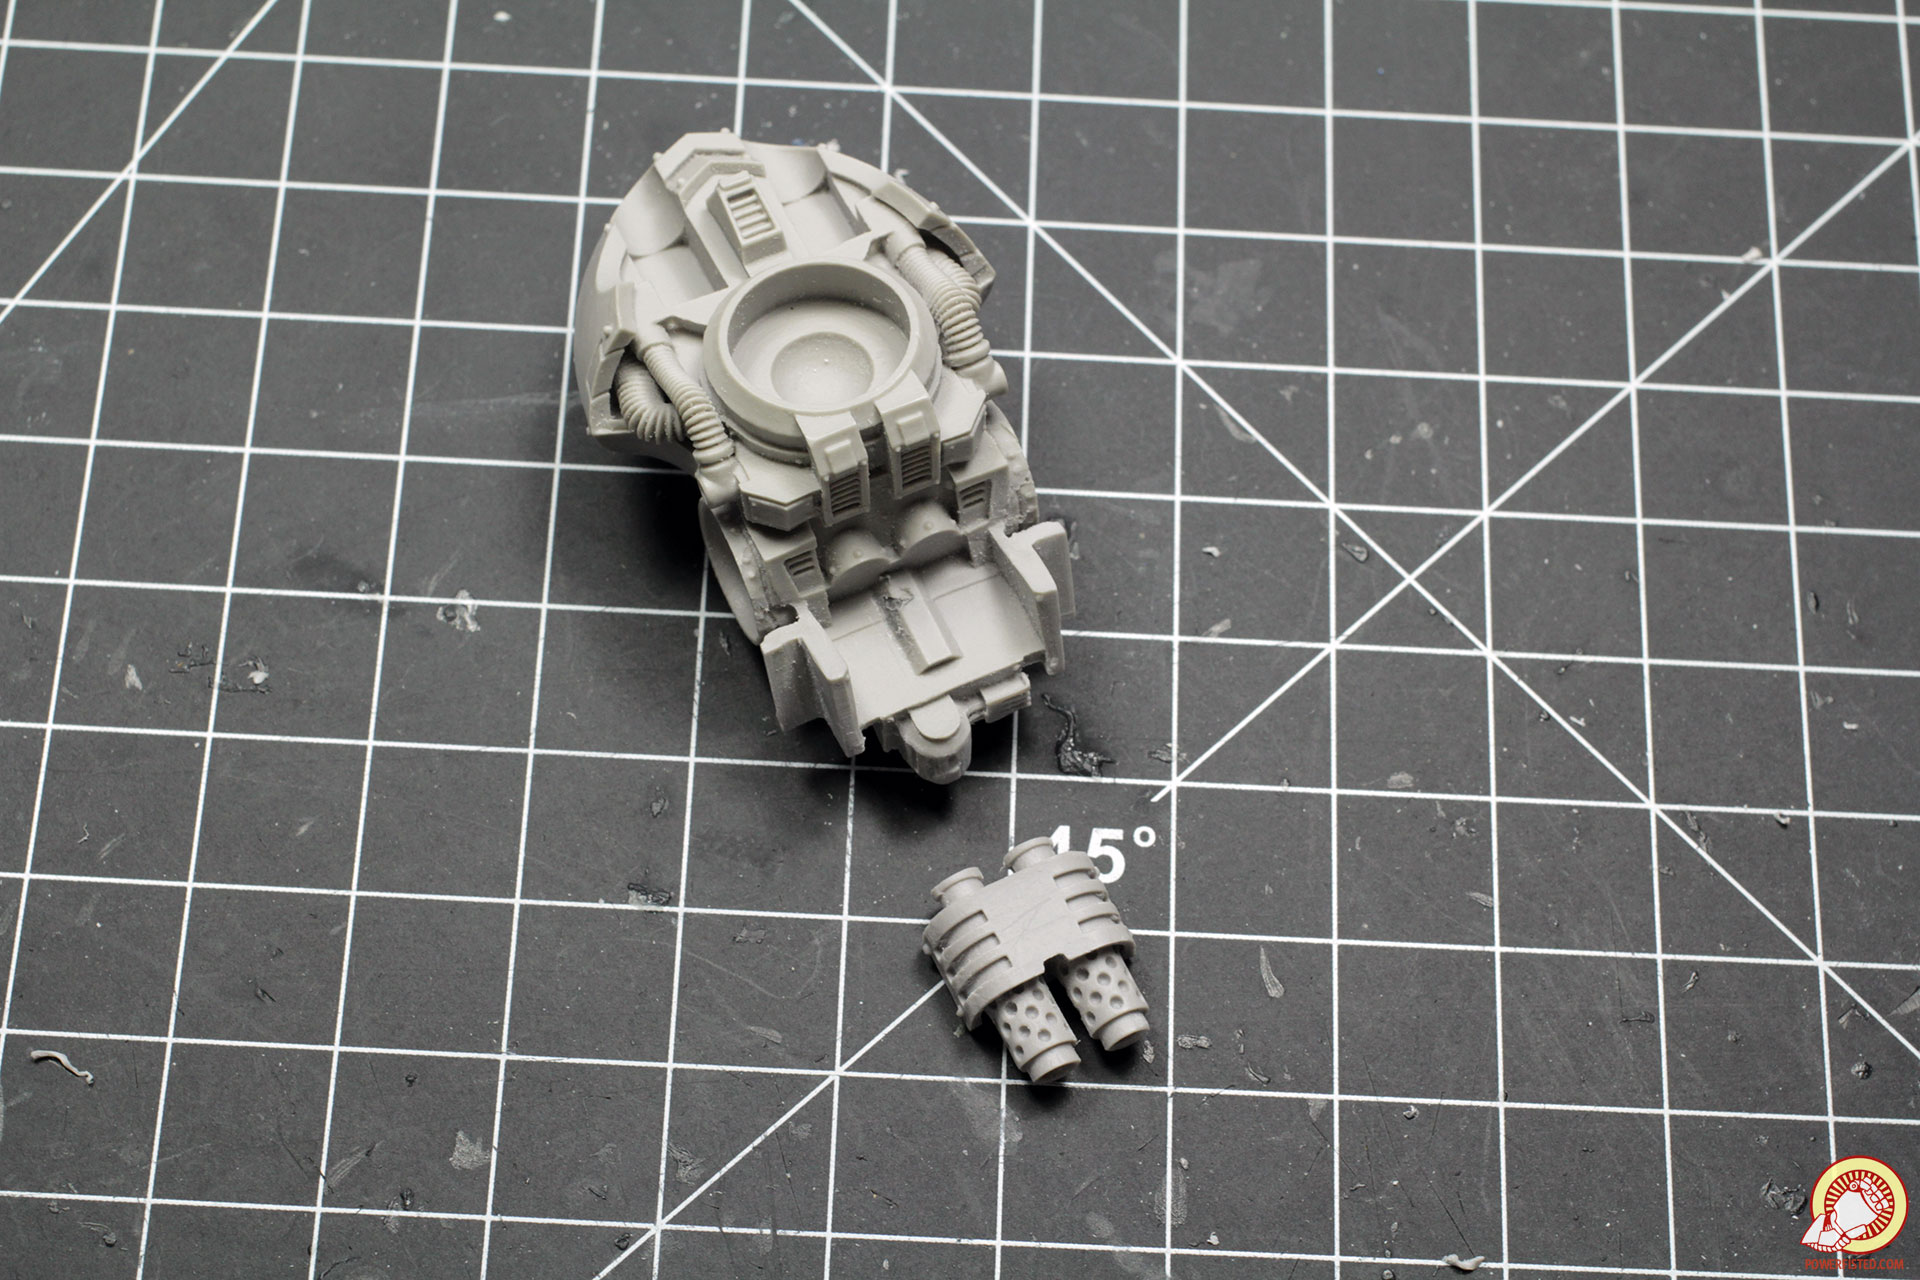
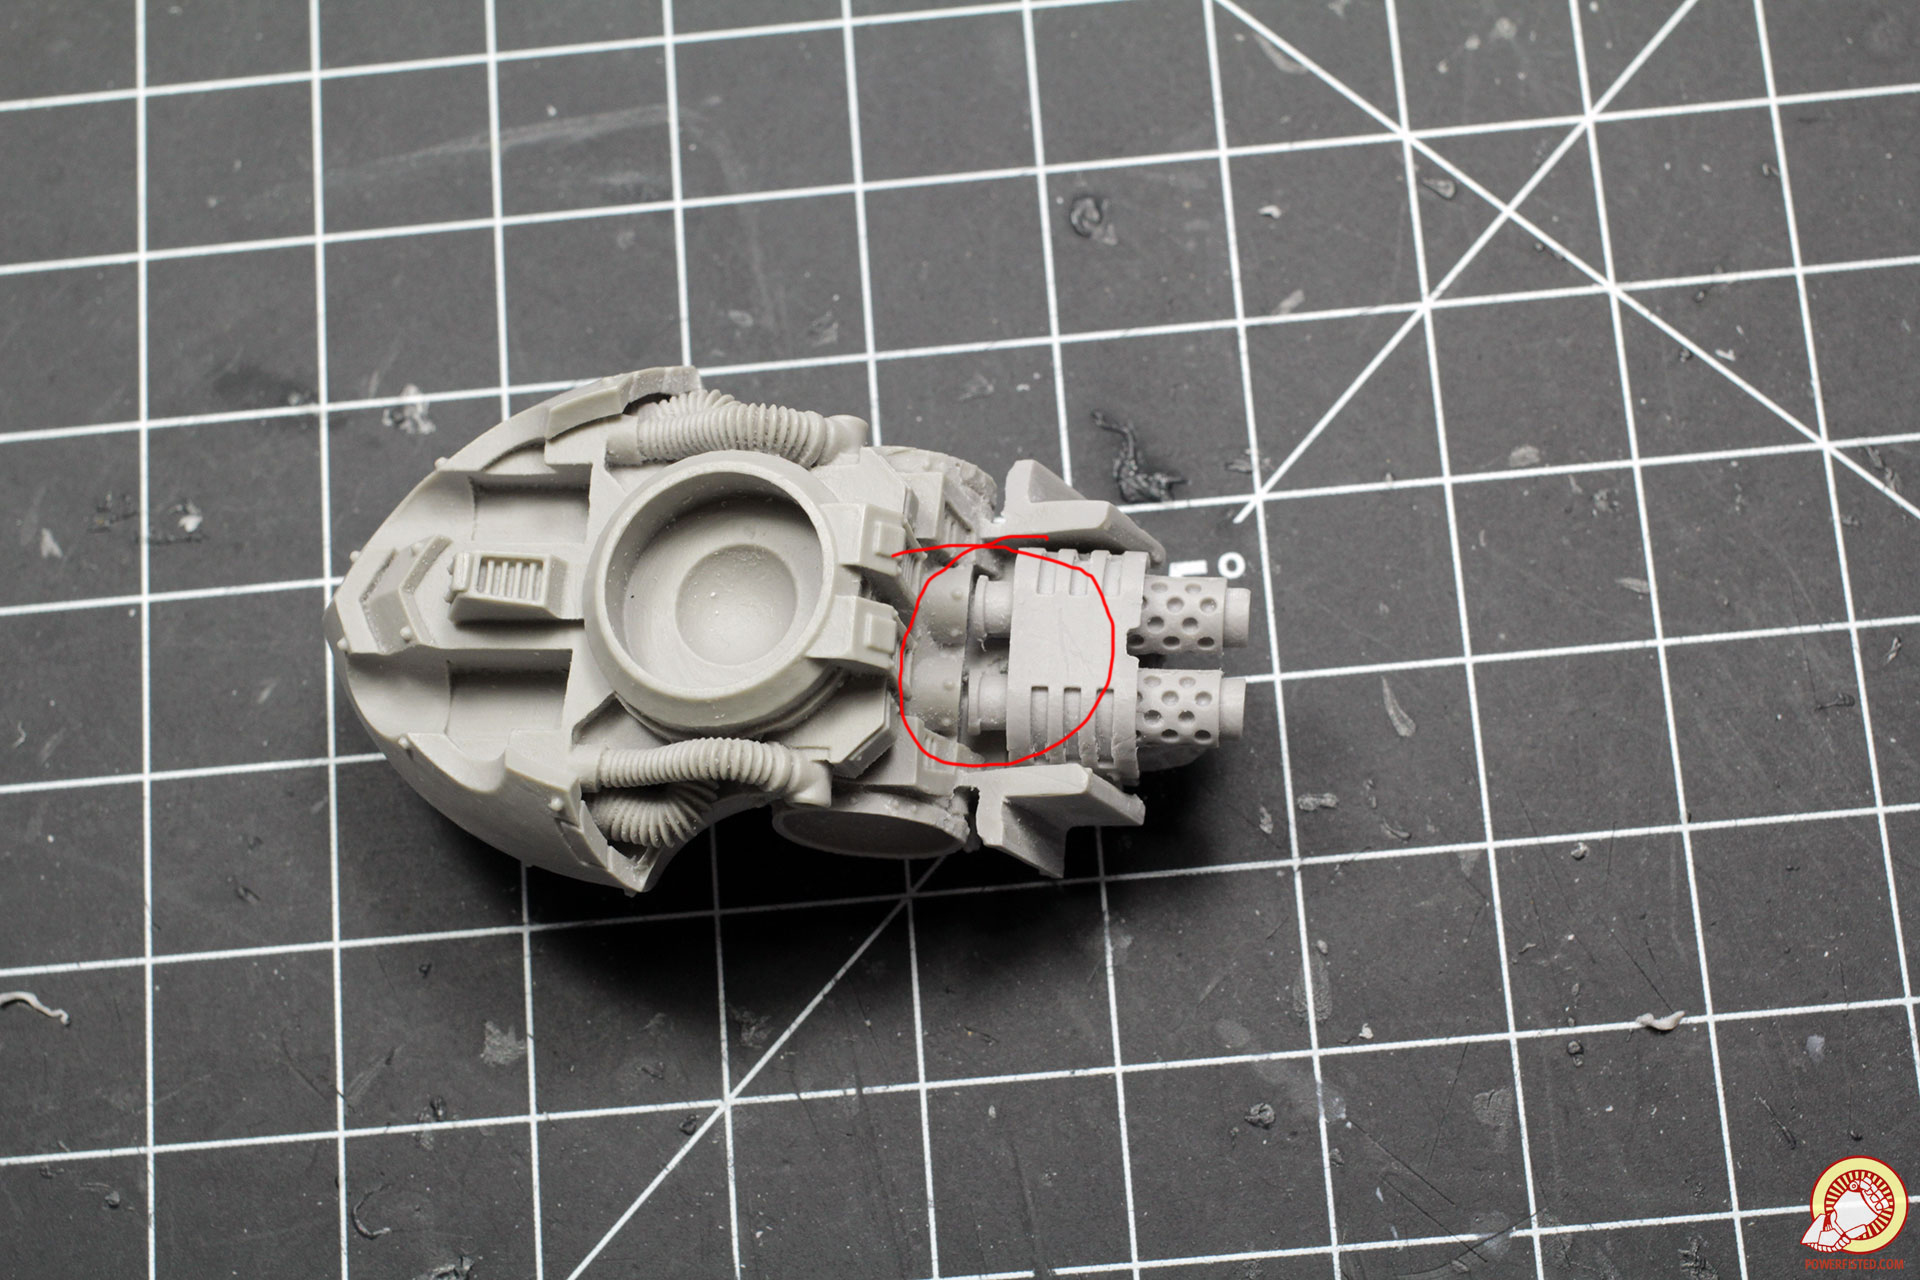
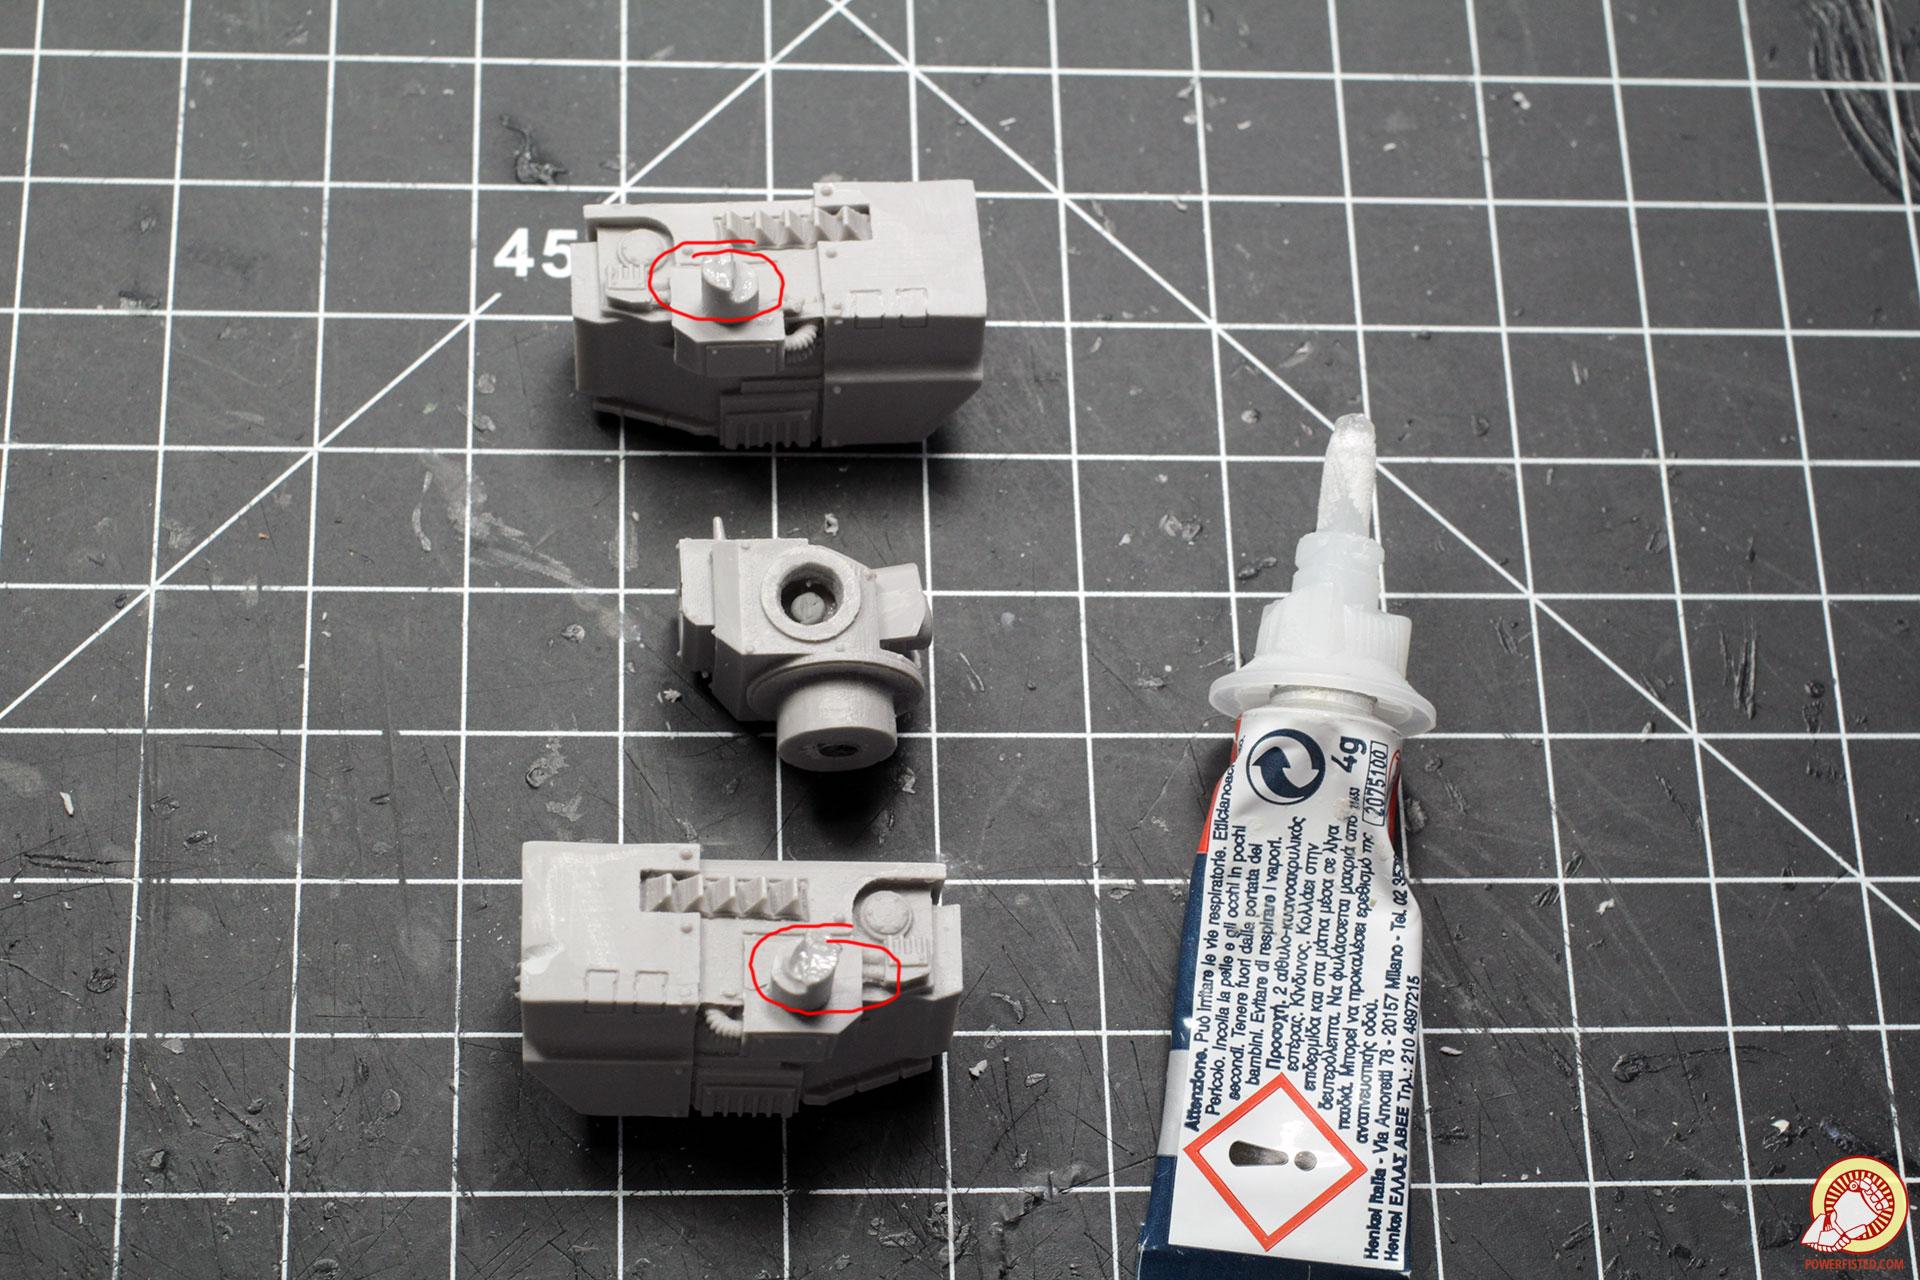
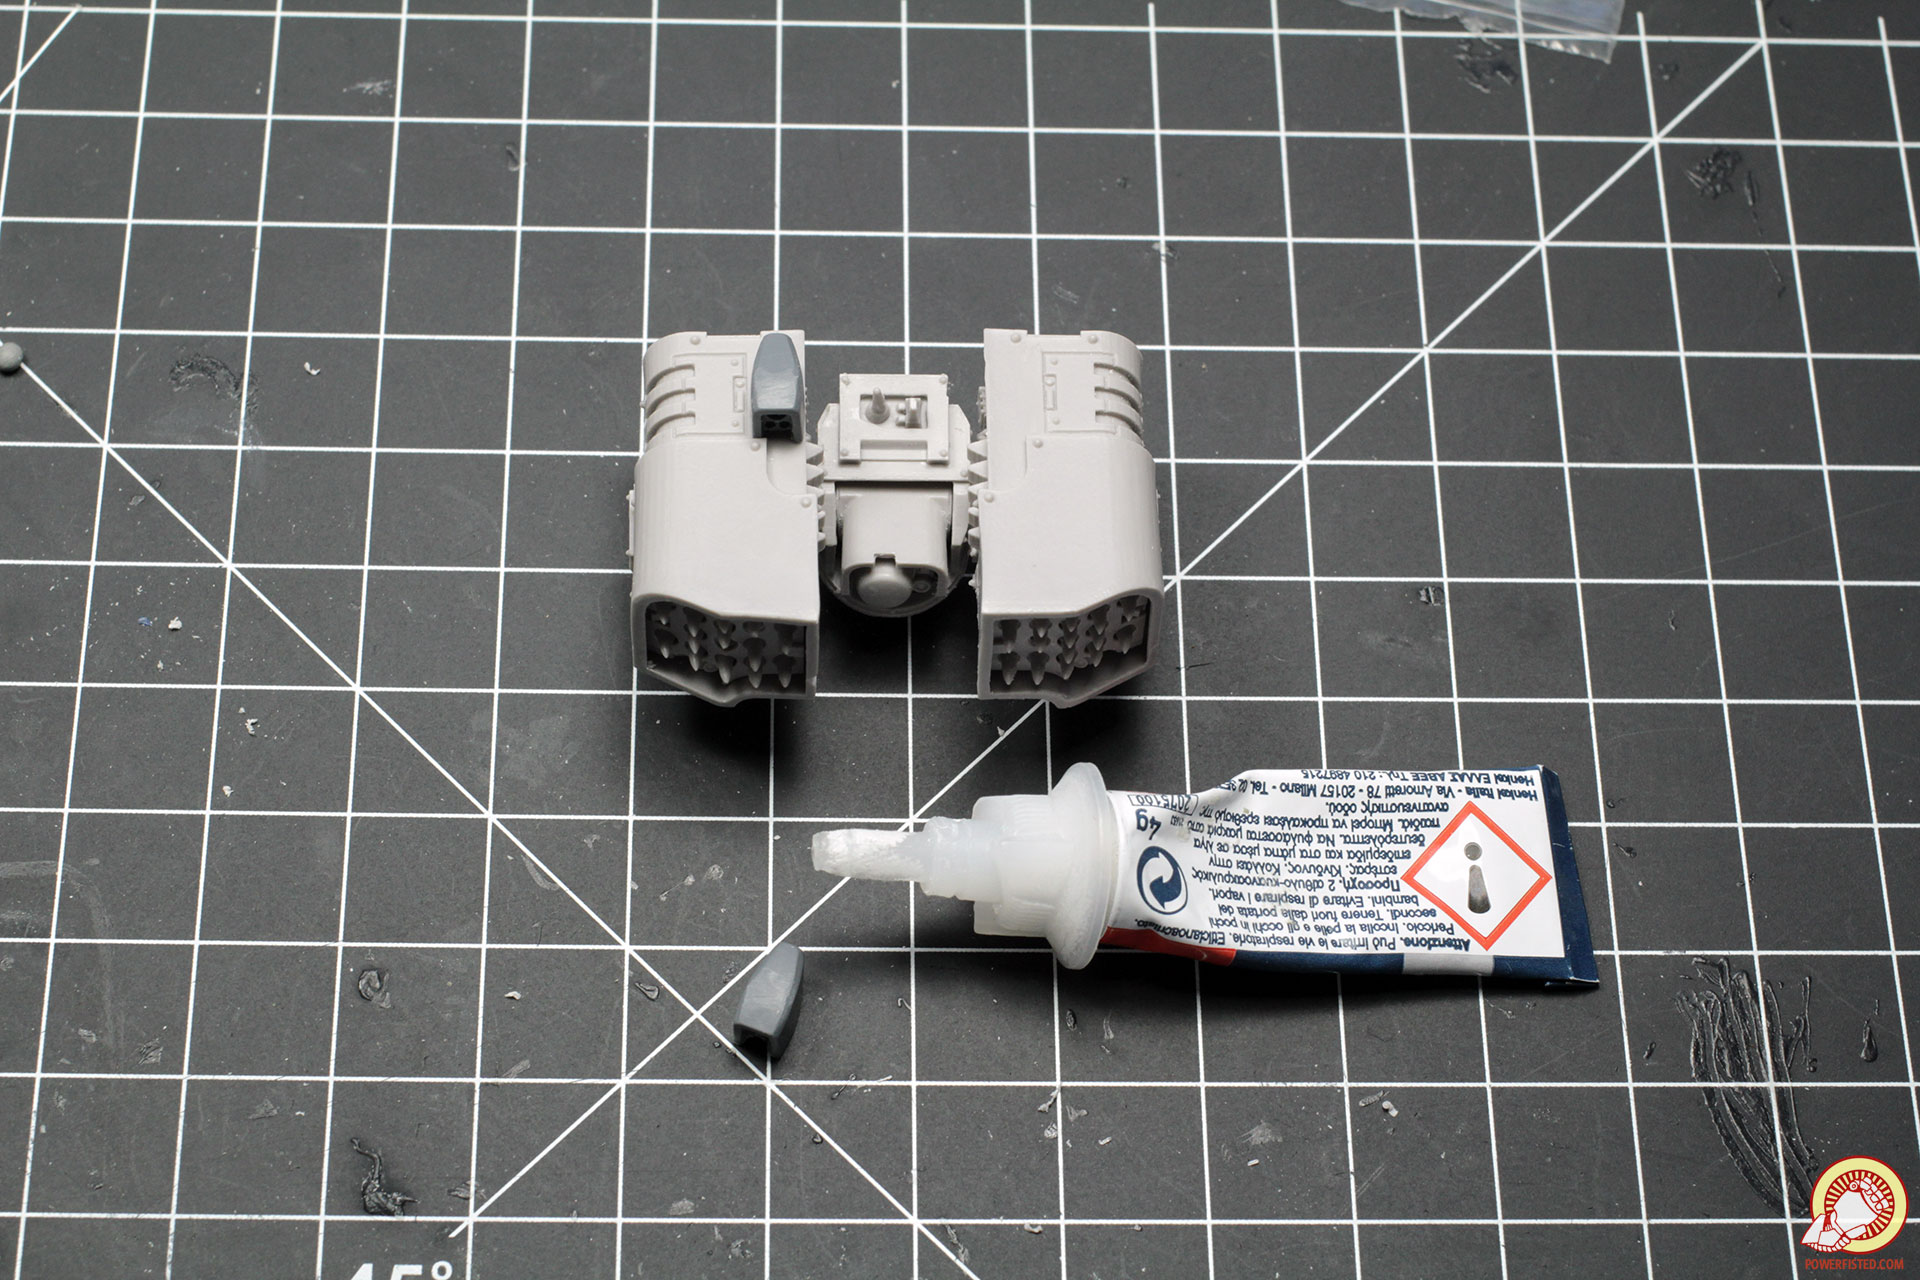
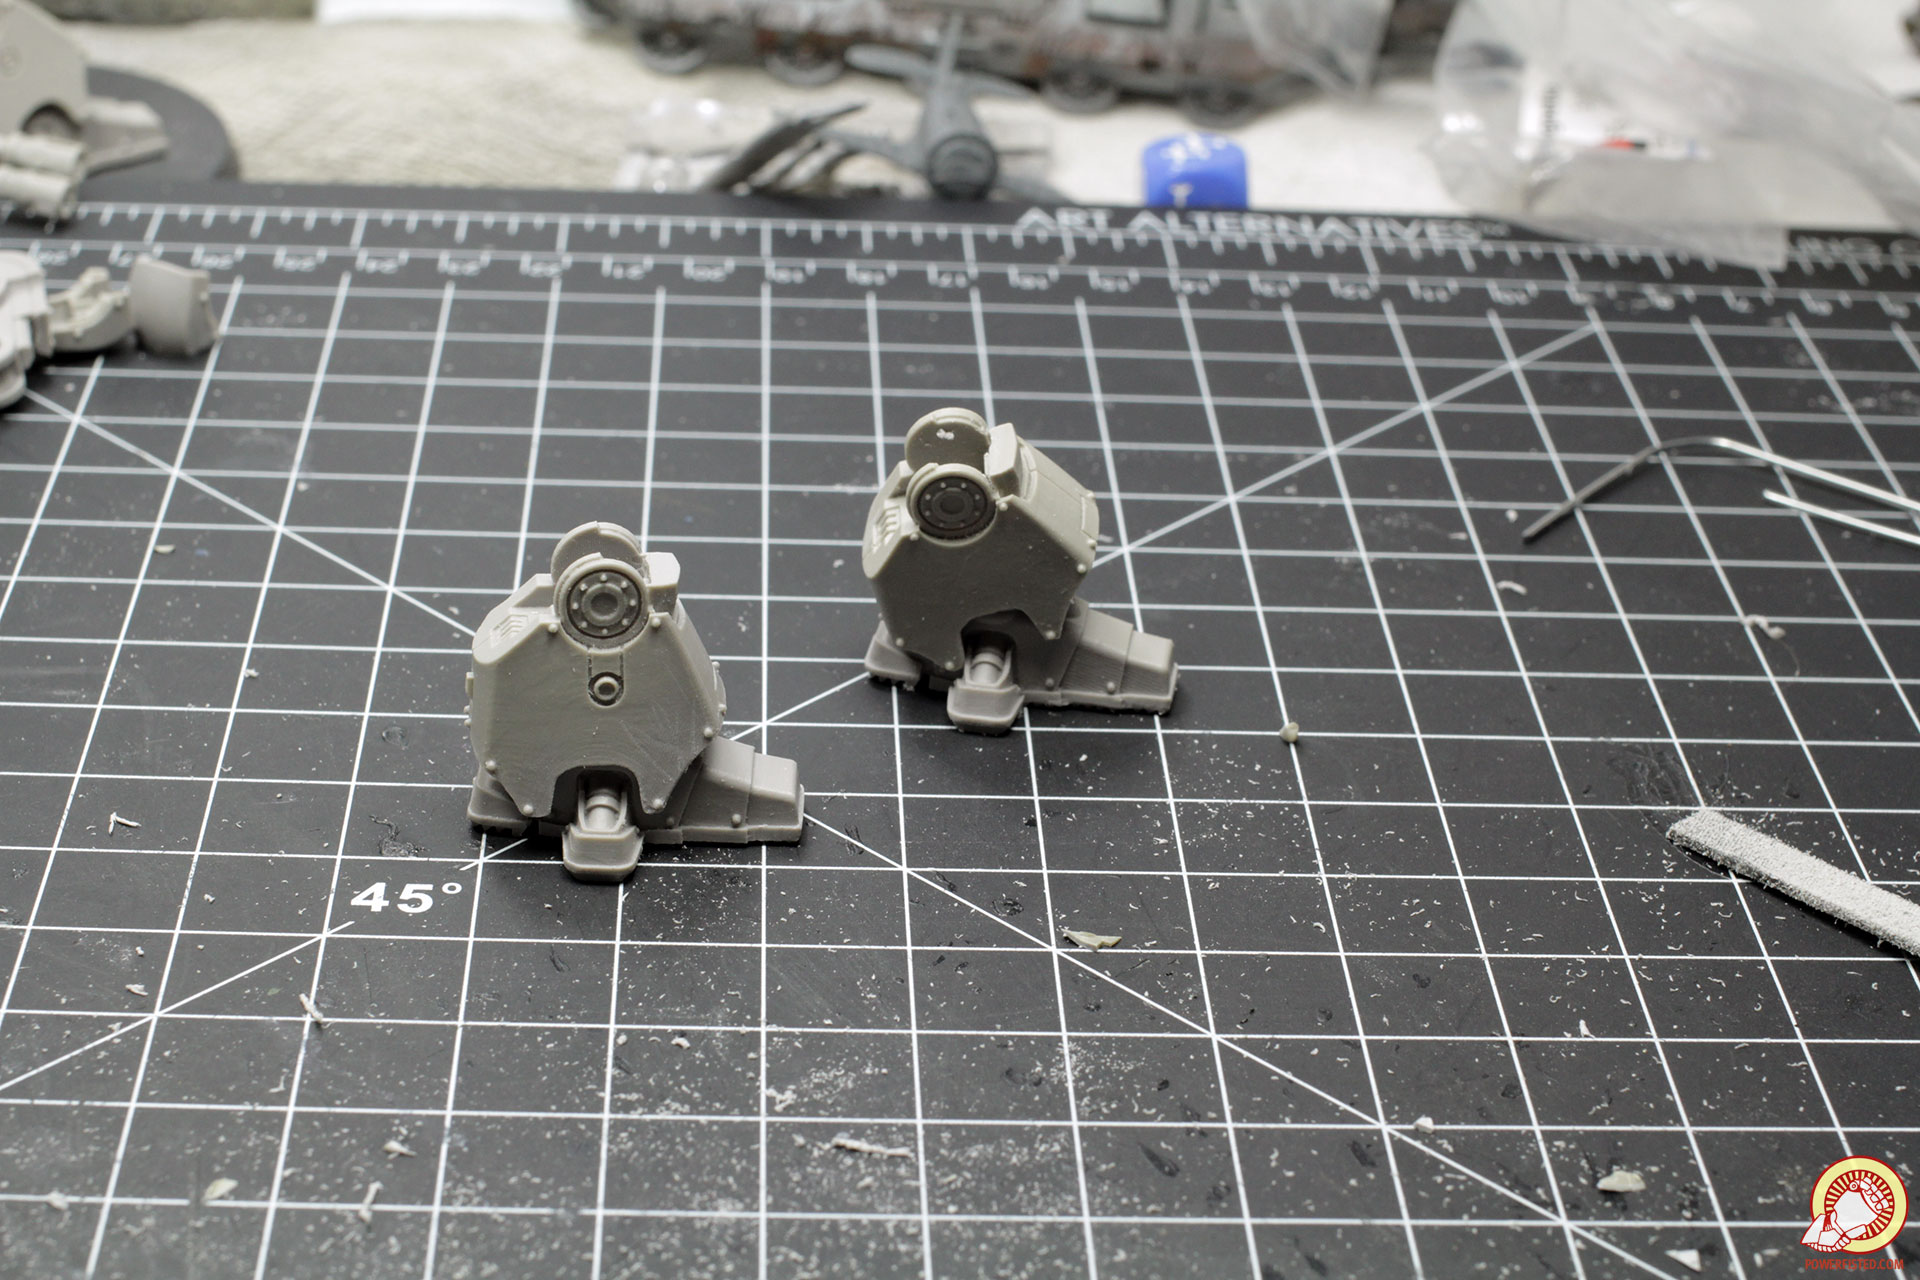
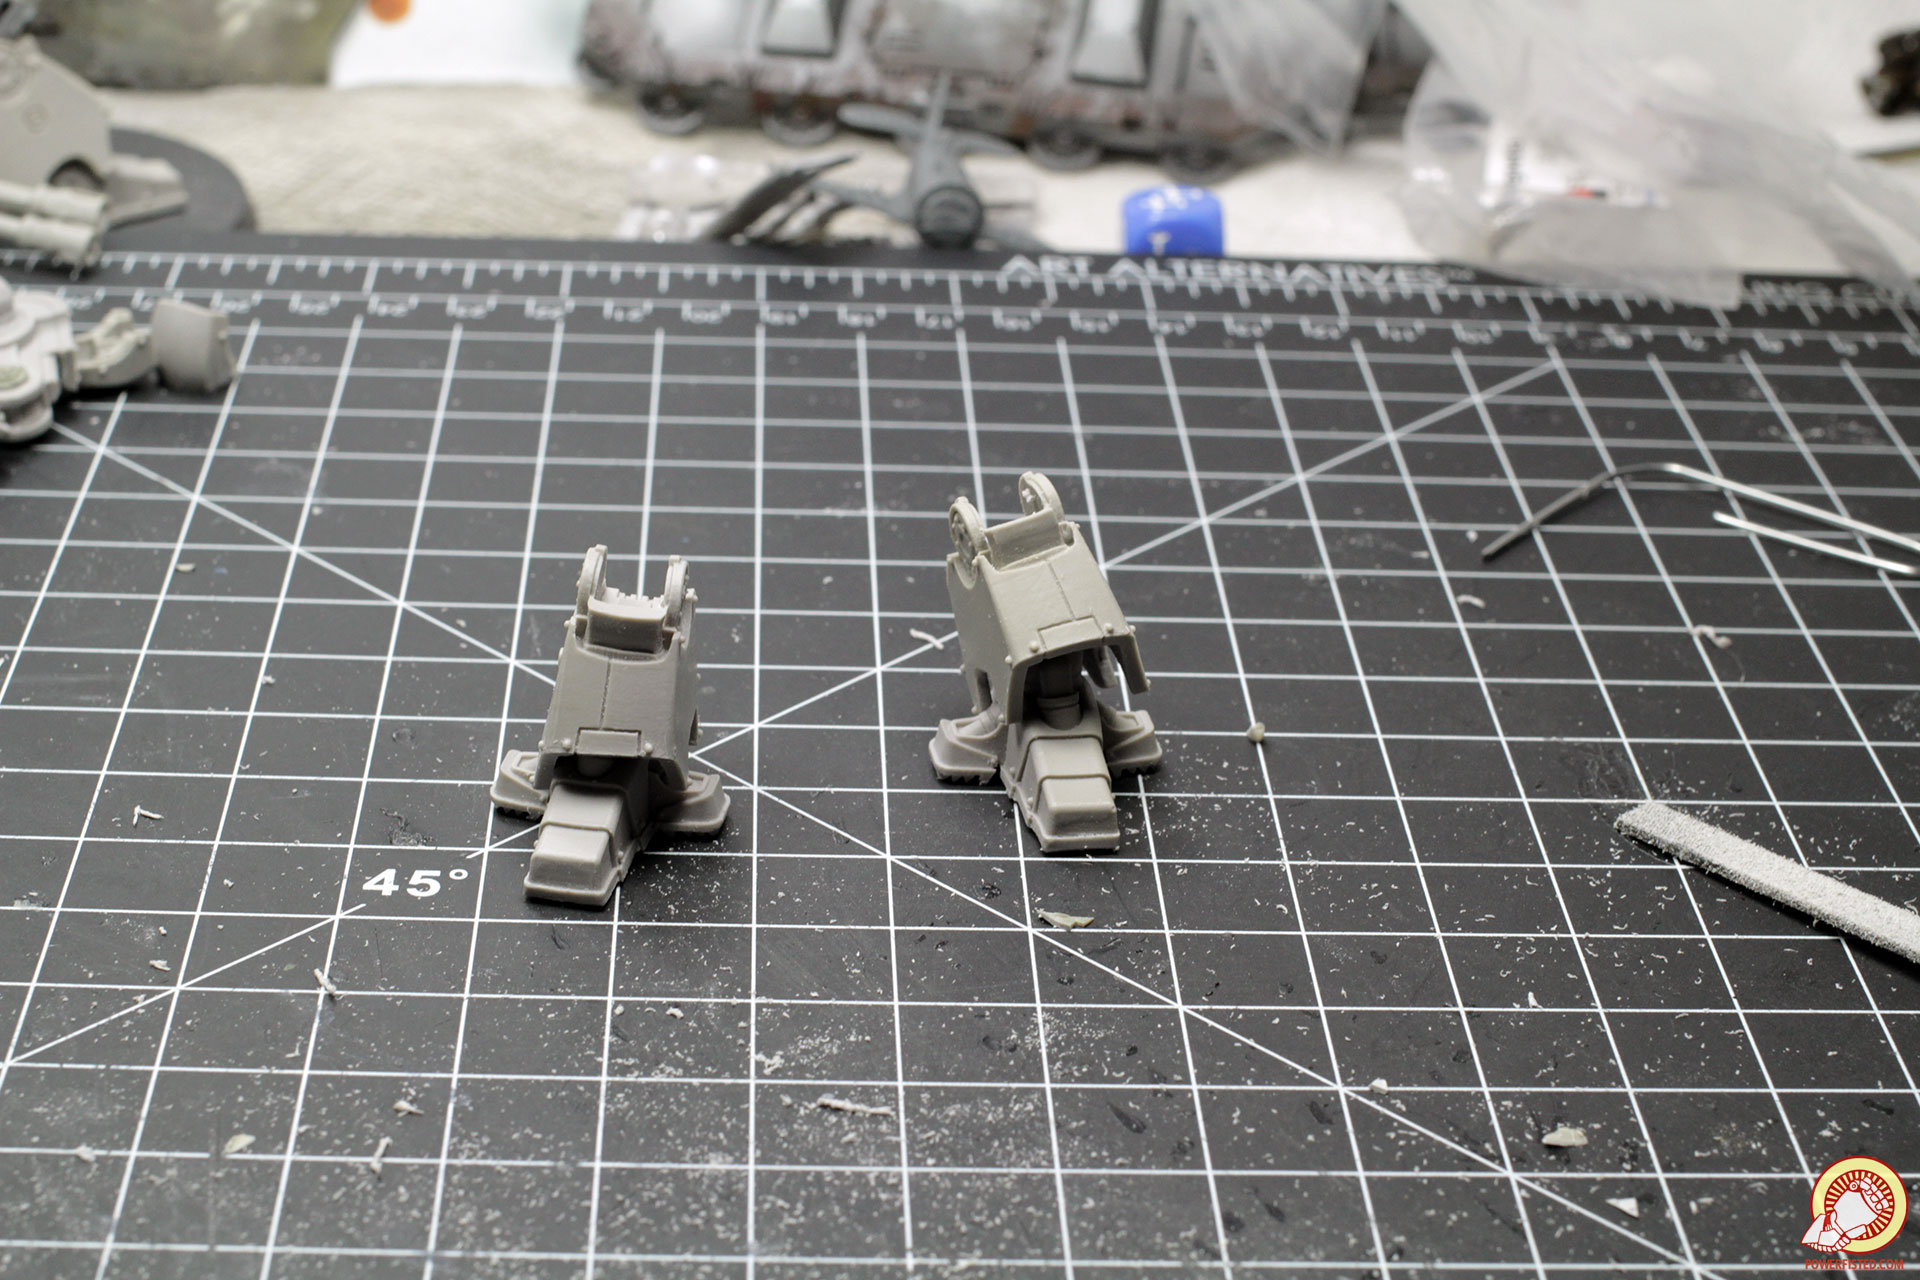
I dry fit all my parts before applying any glue. Sometimes you find problems, such as my dreadnaught’s exhaust stacks not fitting into place without a gap. Luckily the putty technique can be used for some light gap filling.

To solve the gap and glue the bits in one go, I’ll use grey stuff. First I put dabs of glue in the gap and where I expect the two pieces of resin to mate with the most surface area.
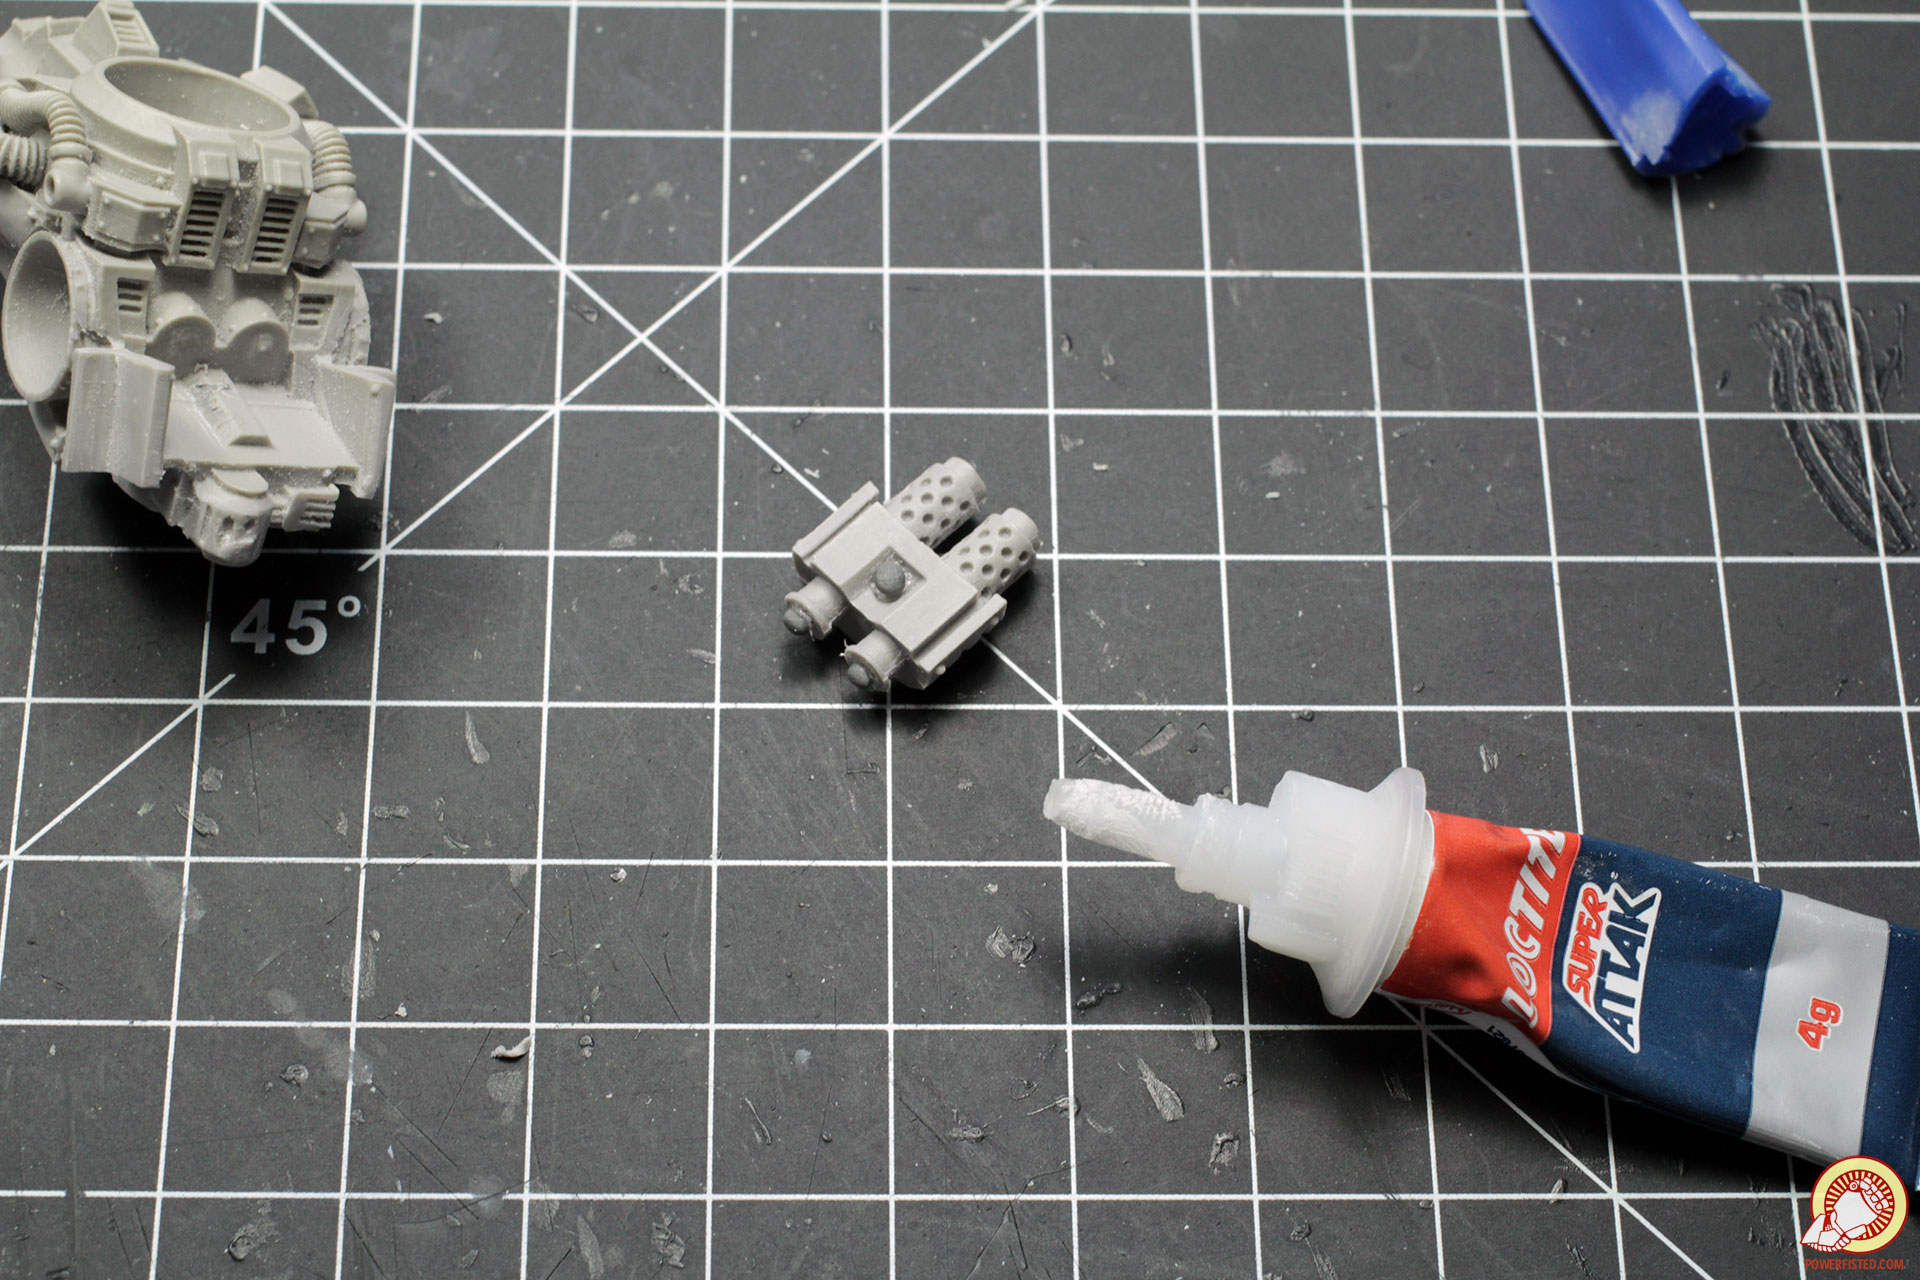
Next, I put little balls of grey stuff onto the glue on one of the pieces. Now it’s ready to get put together.
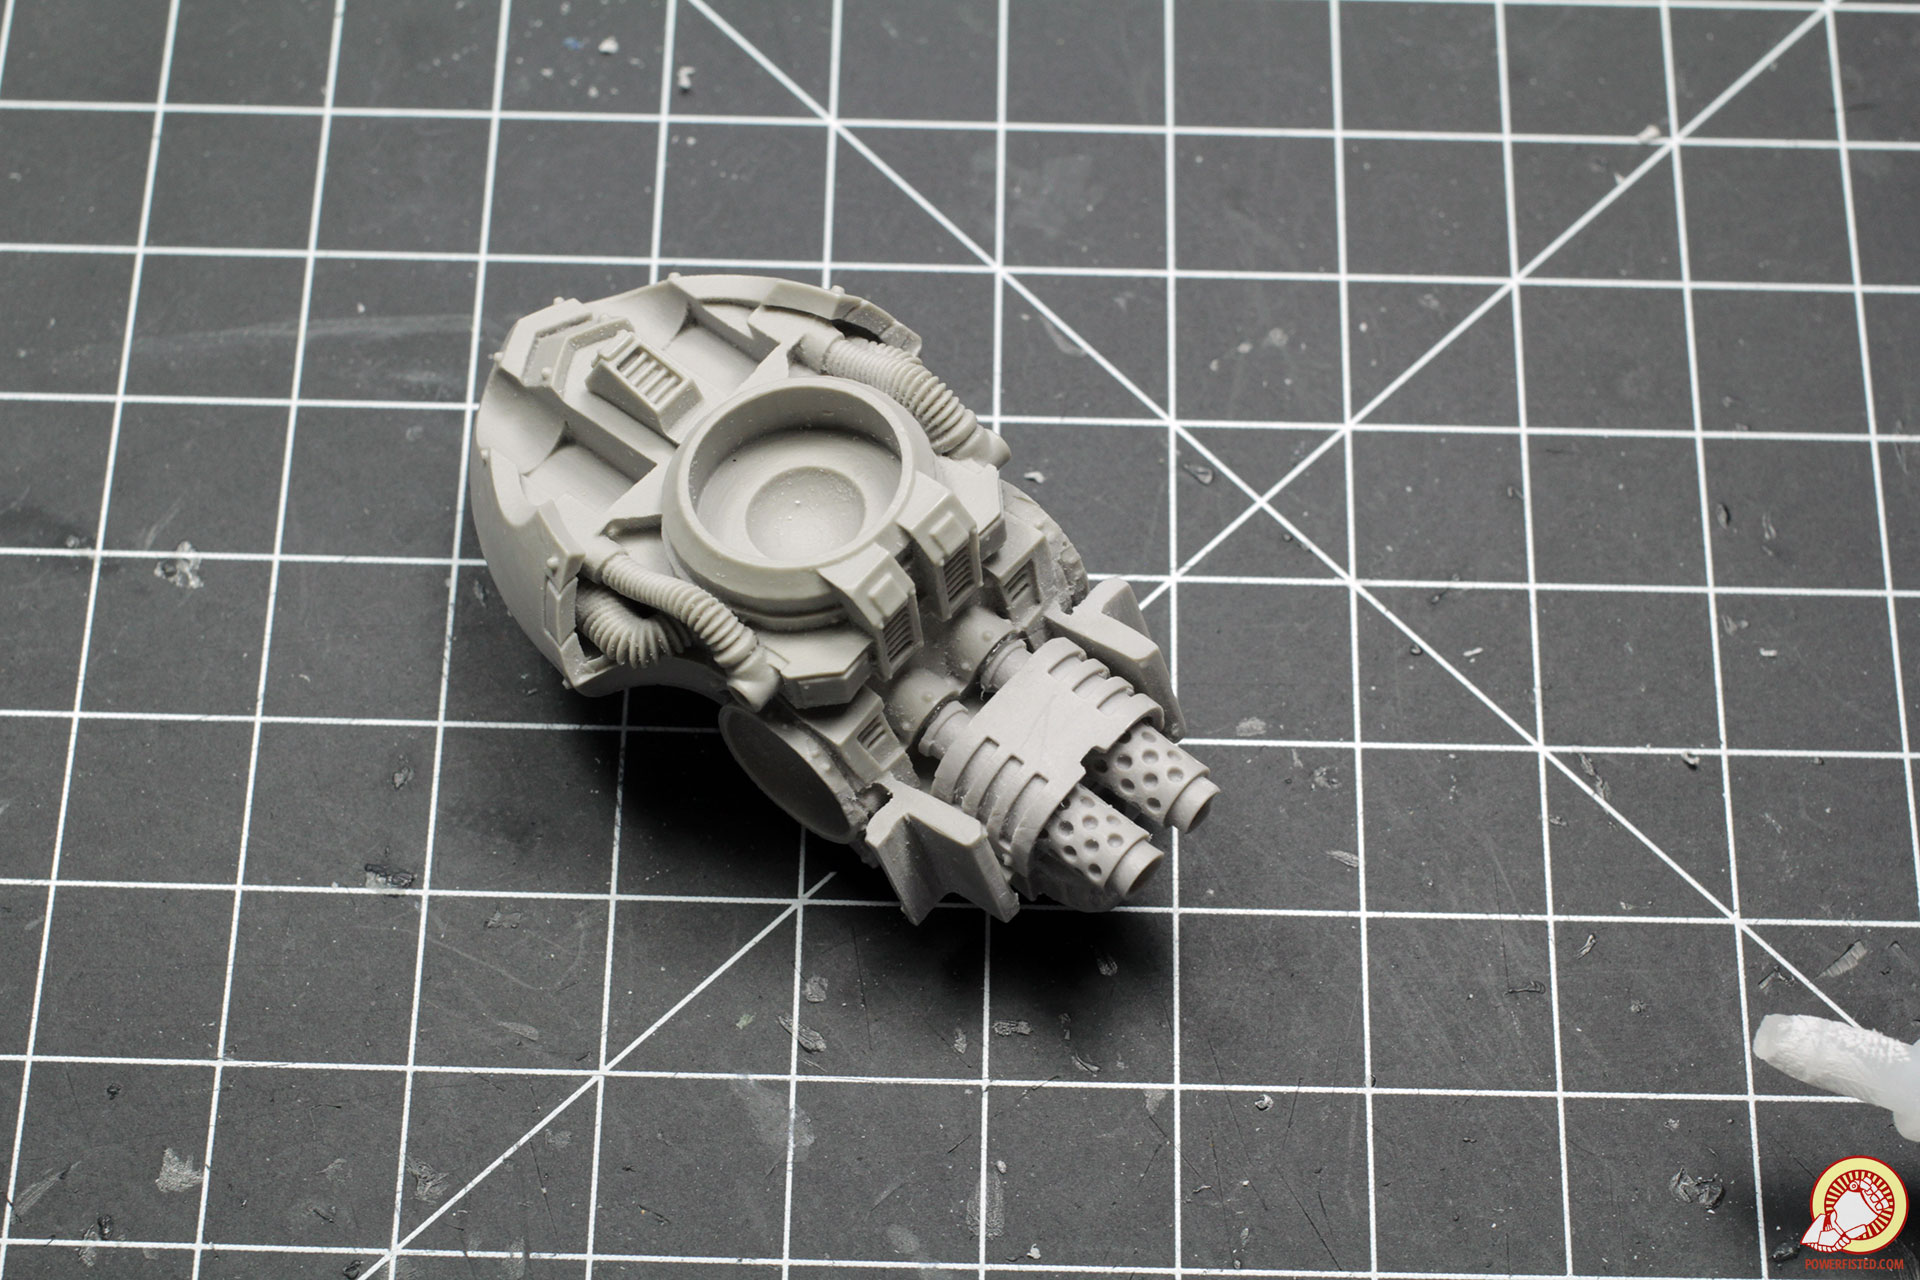
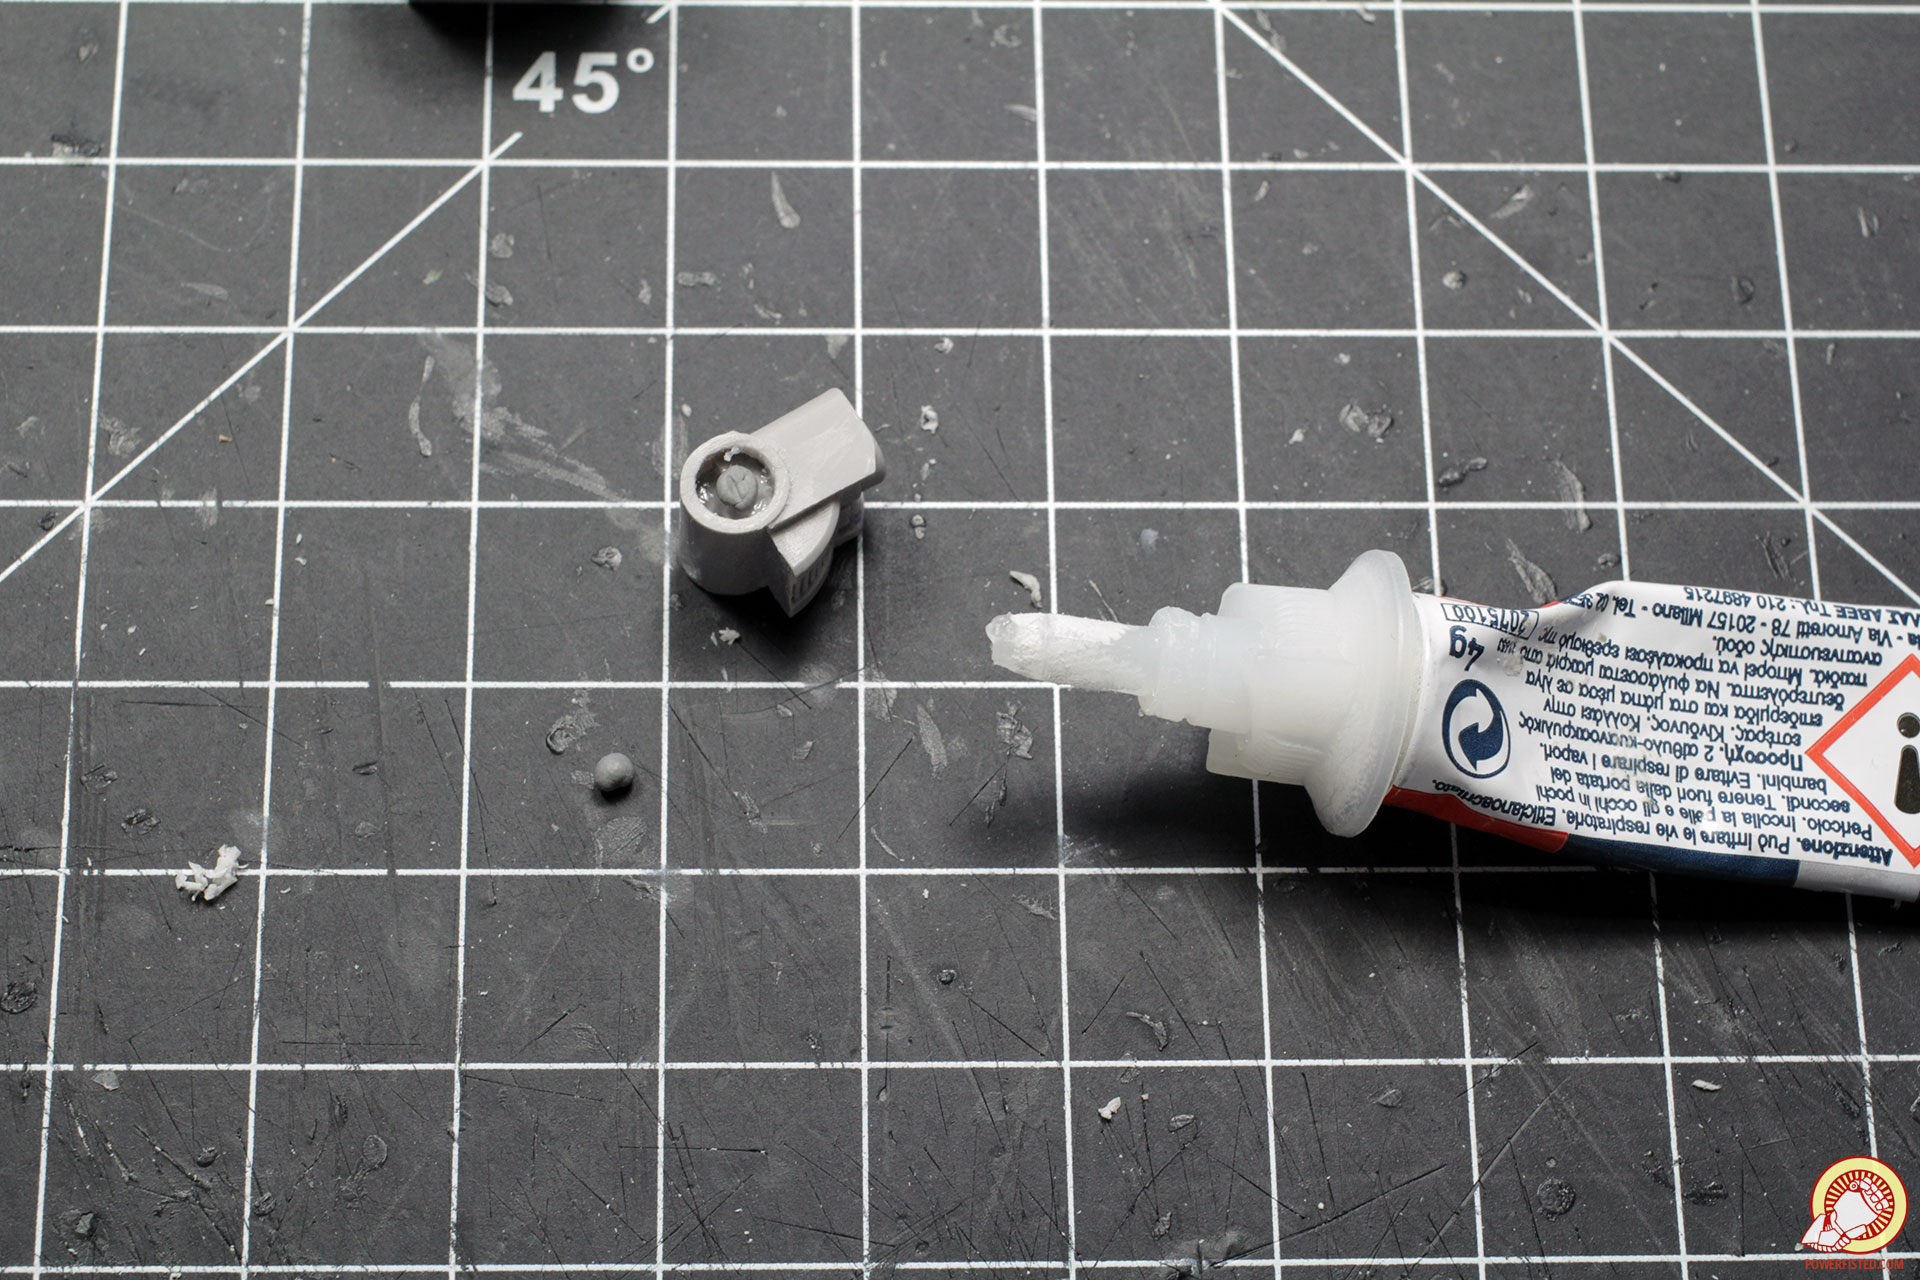
I combine the two parts by gently squeezing them together. This creates a strong bond and a sealed gap. Cool!
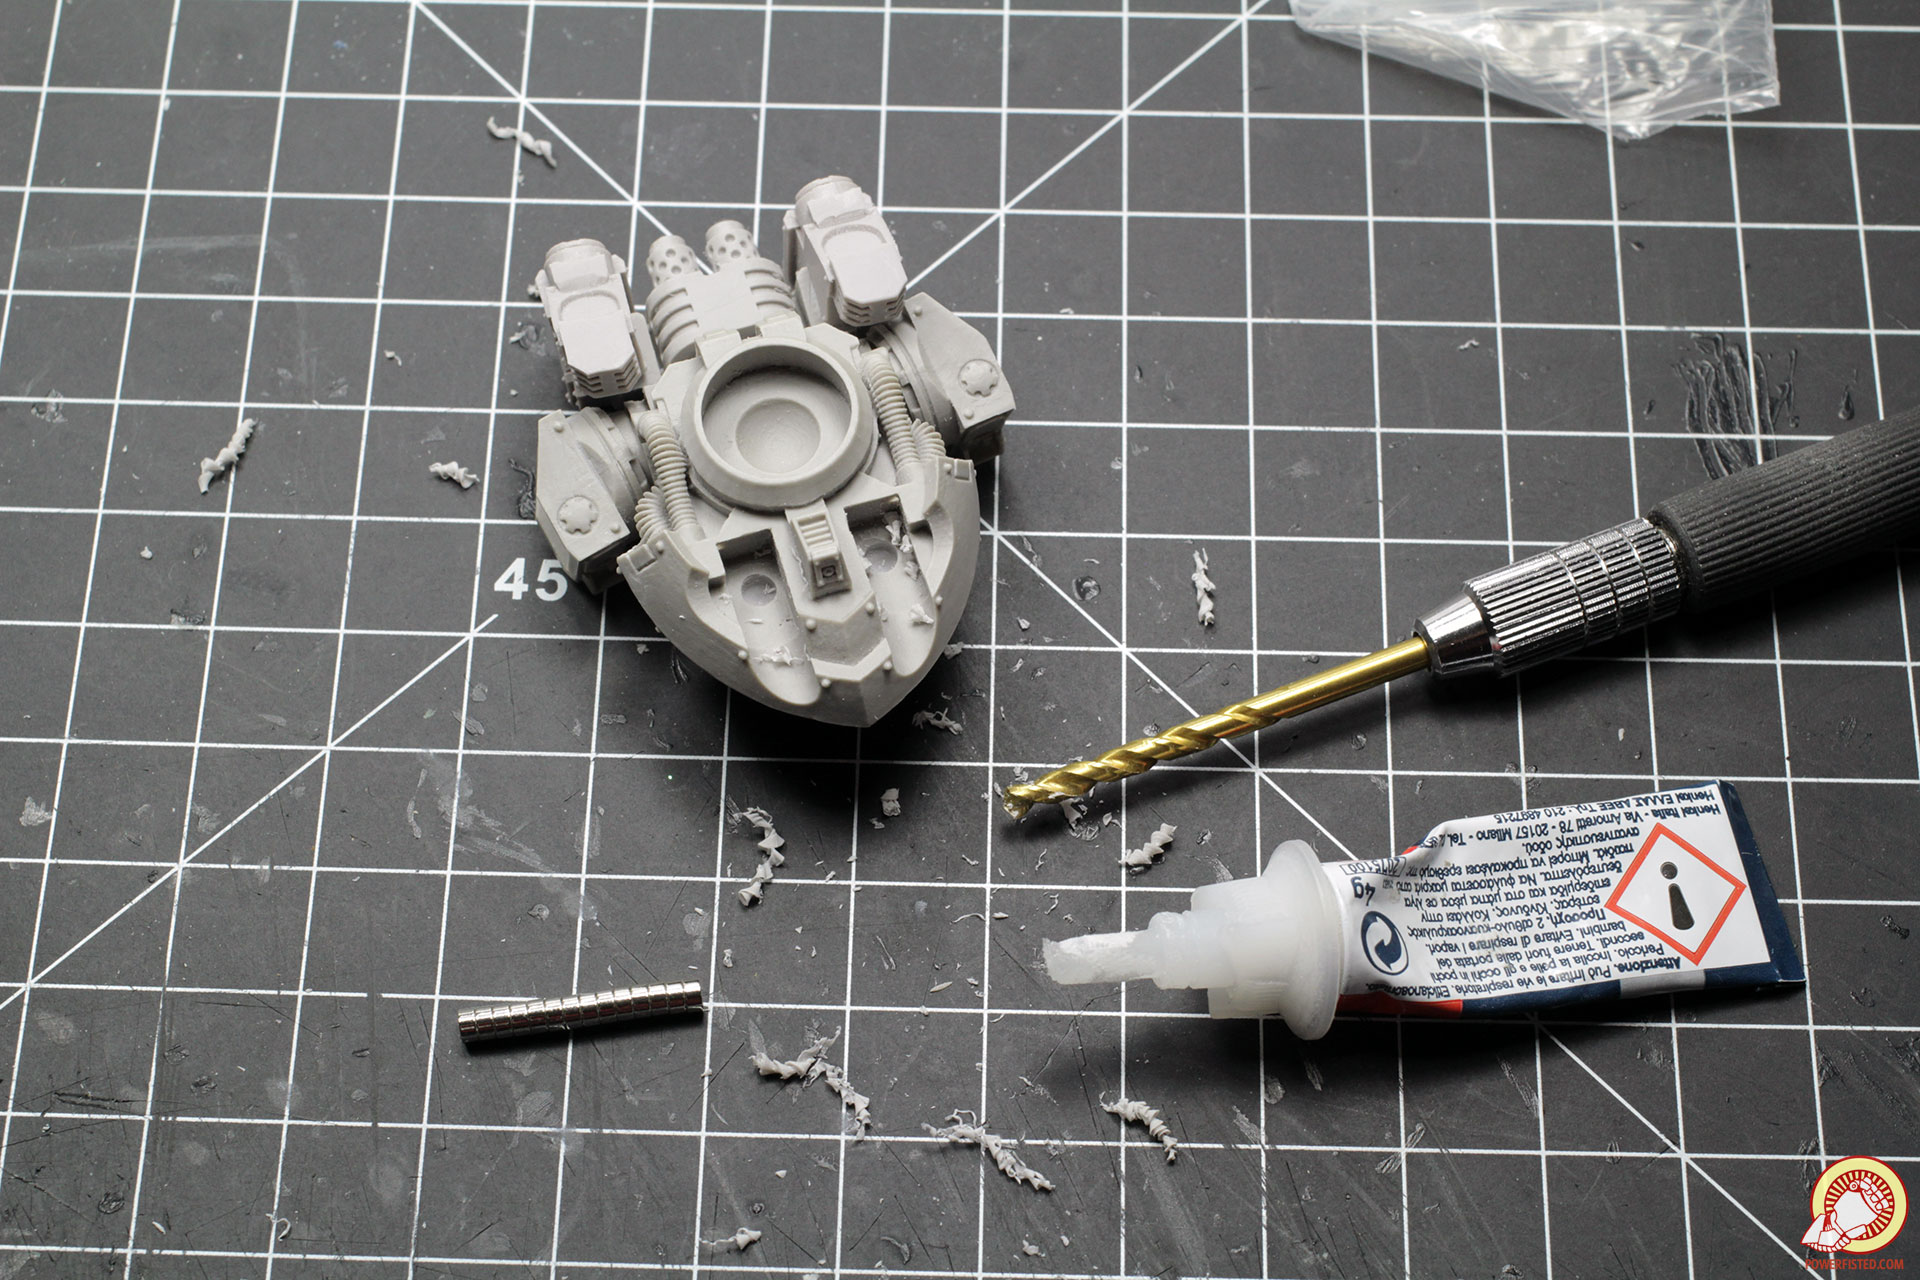
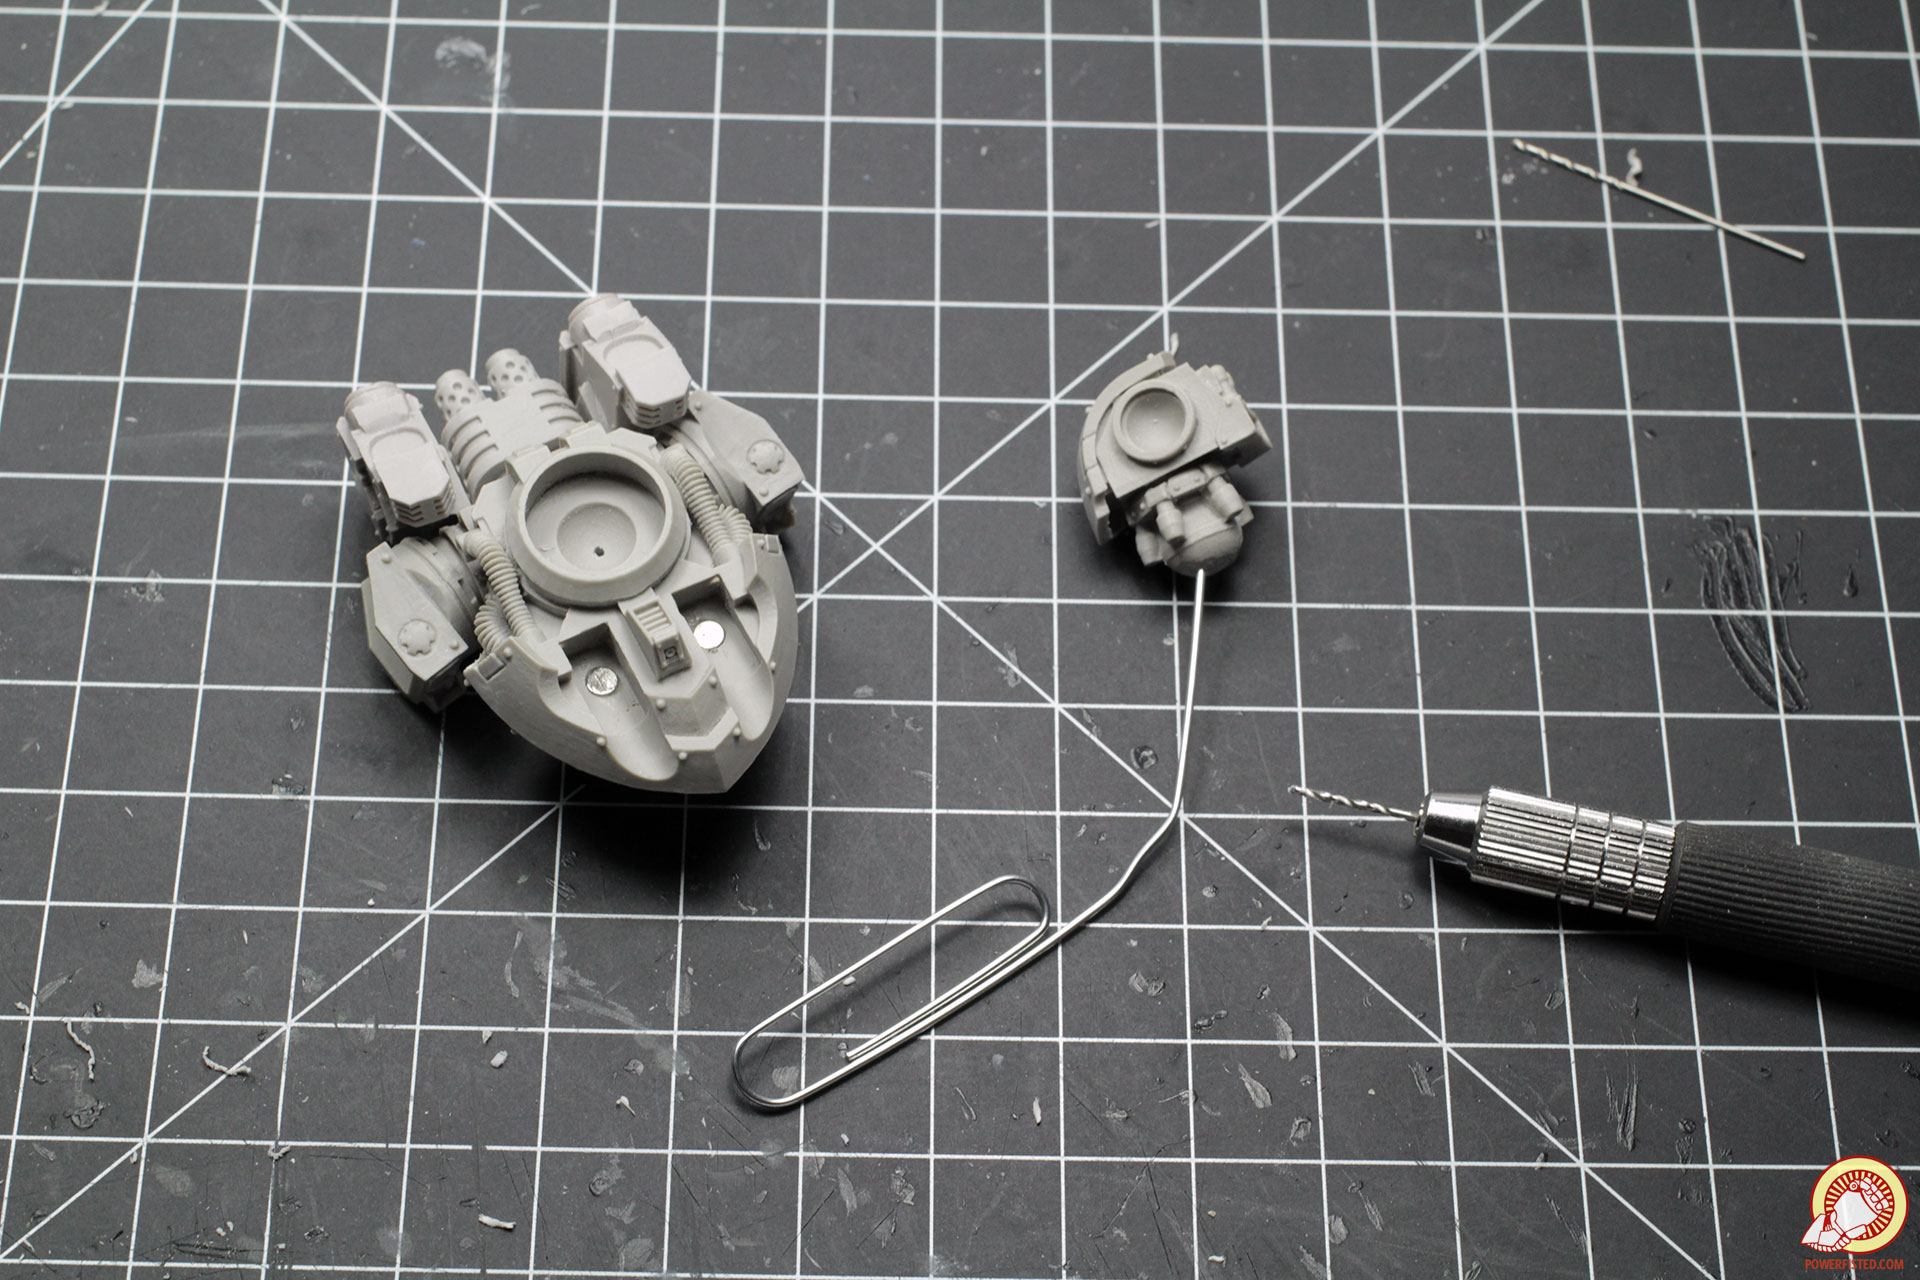
Now it’s time for the aiolos missile launcher. I start by drilling a hole in the base for a magnet and then gluing one in. Make sure the polarity of this magnet attracts the magnet in the dreadnaughts torso. Otherwise you’ll have a hell of a time keeping the parts together.
I apply glue to the backsides of the bits with the aiolos missiles and then apply small sausages of putty to them. I leave space between the putty and any holes so there is no risk of putty oozing out when the bits are squeezed together.
I also put glue and putty balls into the recesses of the missile launcher’s targeter. I prefer to use putty instead of pins in these sorts of situations as dried putty will always provide resistance and ‘hold’ a pose (pins often become loose with time).
The targeter is now ready to receive the missile pods, so I slide it into position and apply another bit of glue to the missile pods before squeezing them into place. When I’m happy with how they feel I glue the targeter bits onto their tops. Make sure to periodically pivot the aiolos unit up and down while it’s drying so it doesn’t lock into place.
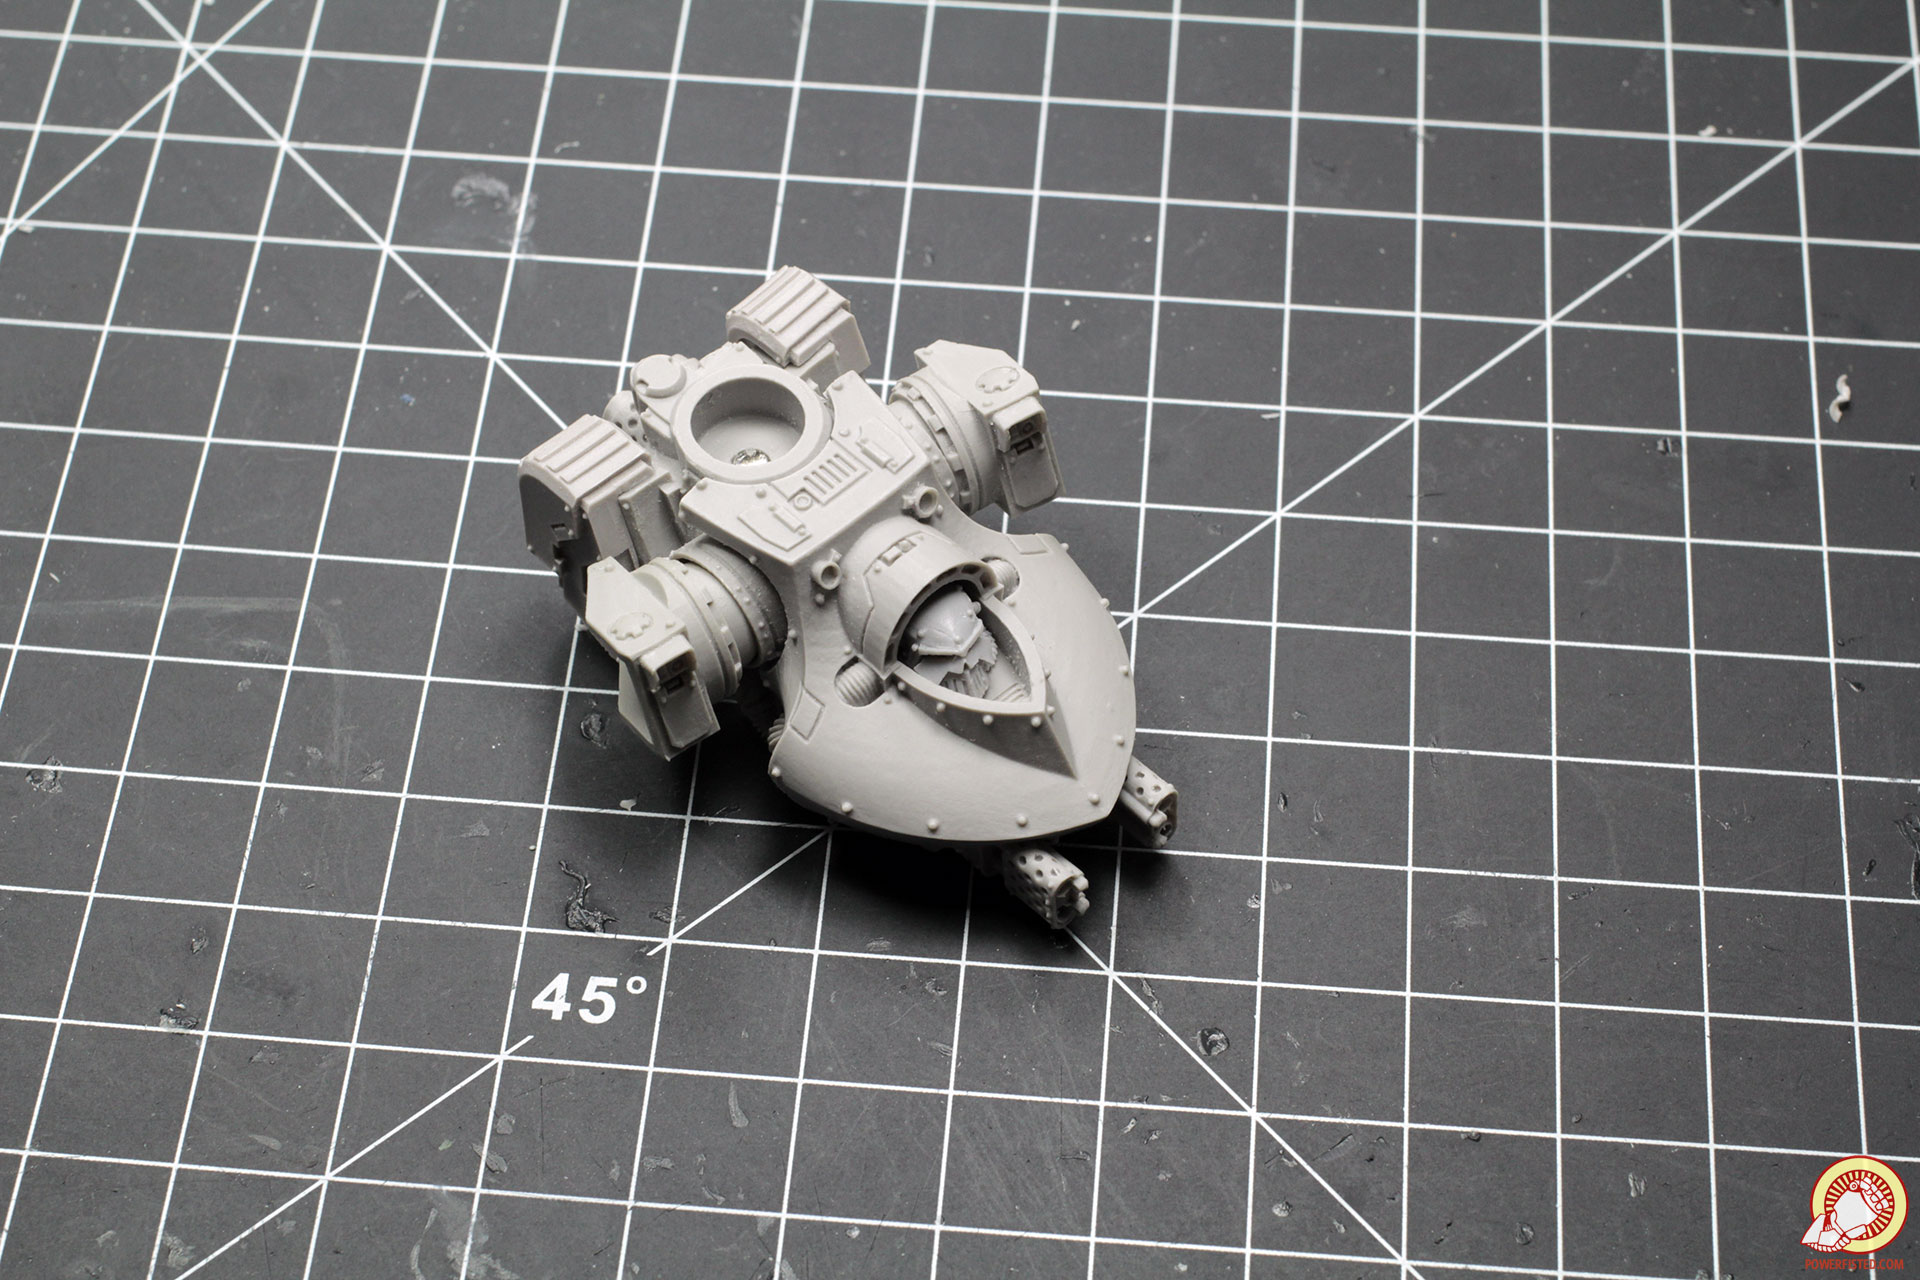
With the ailos launcher is assembled, I install the ammo packs onto the body using the same putty technique.
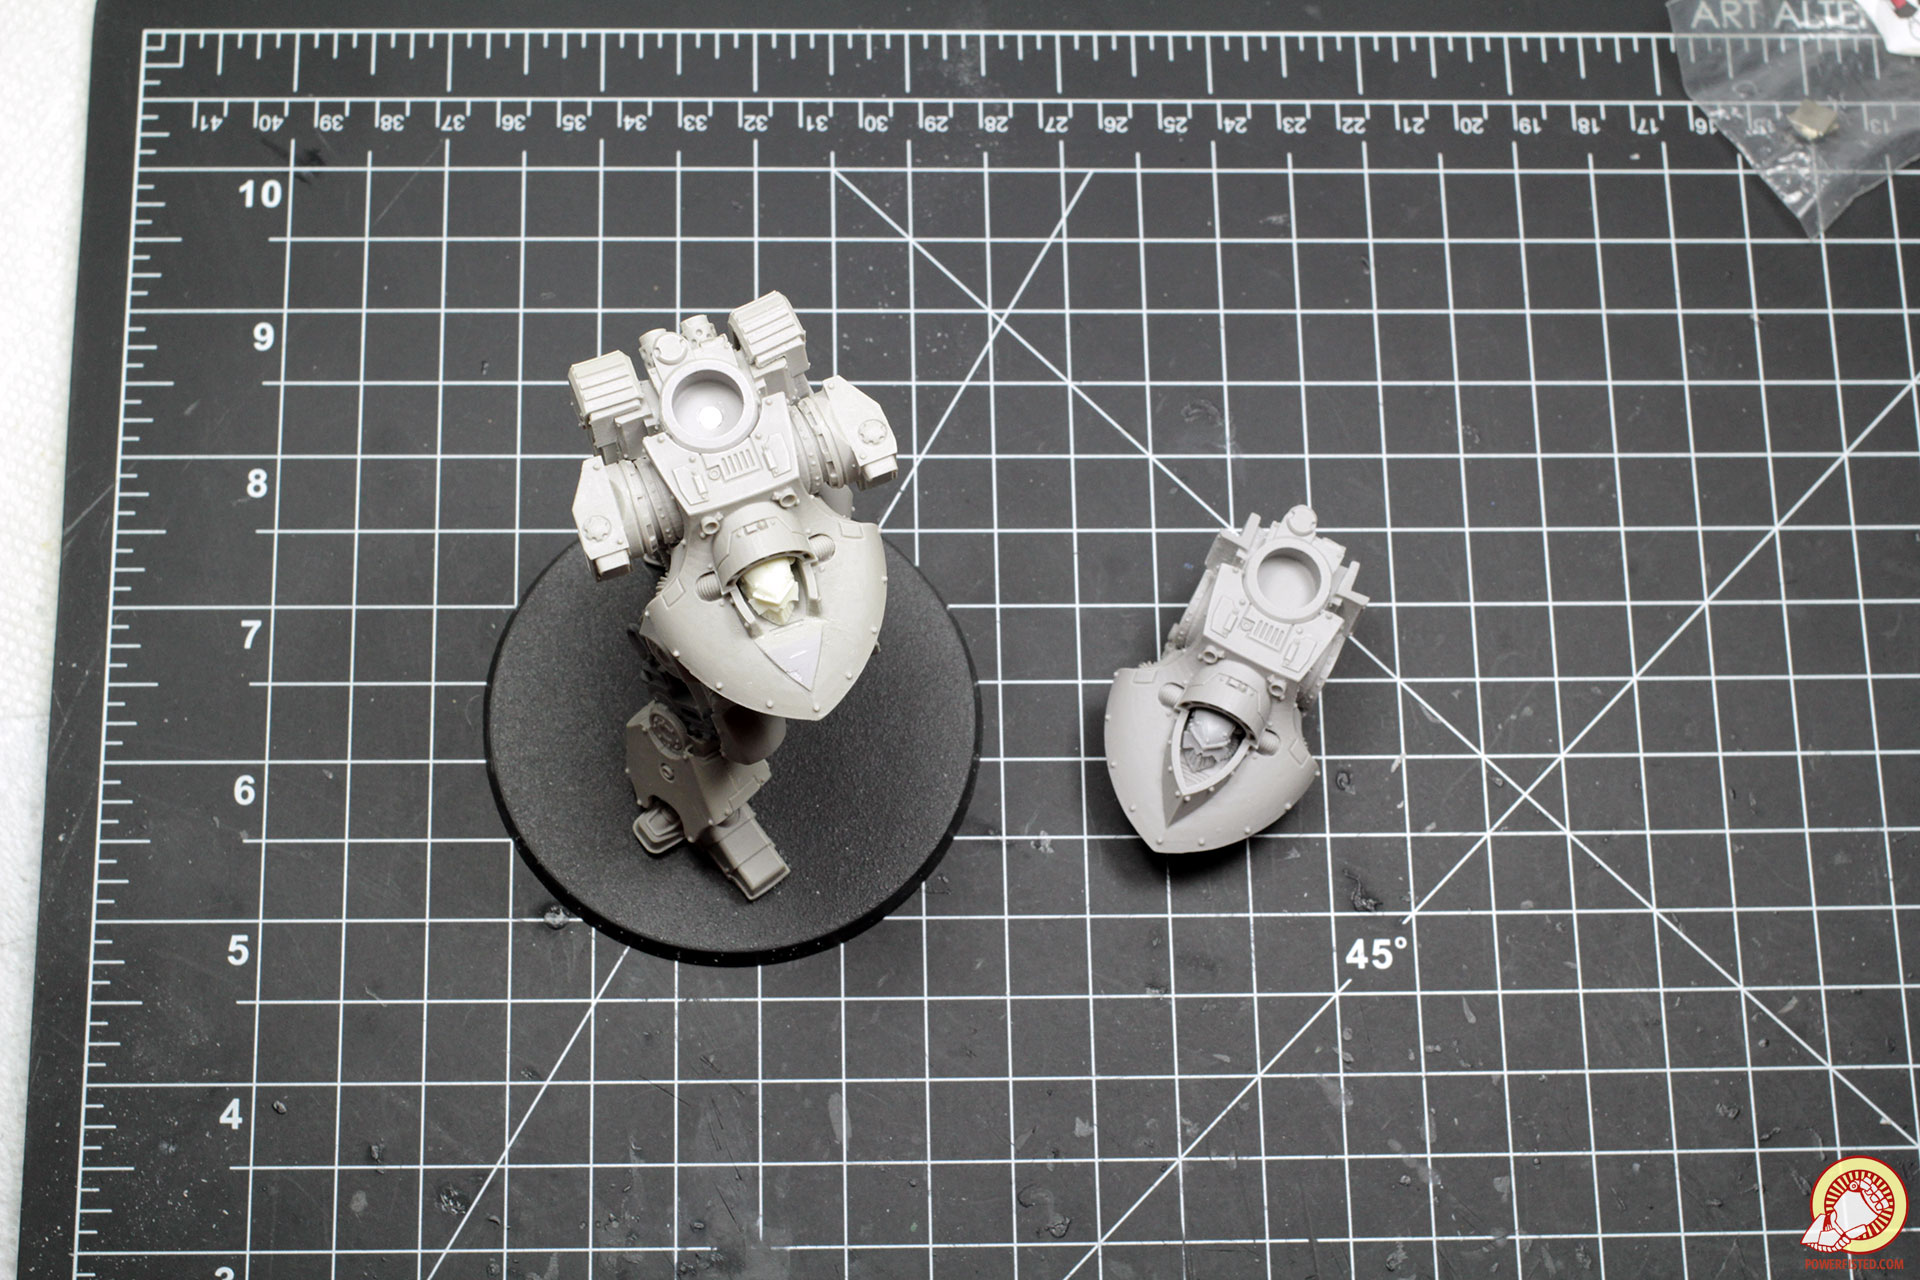
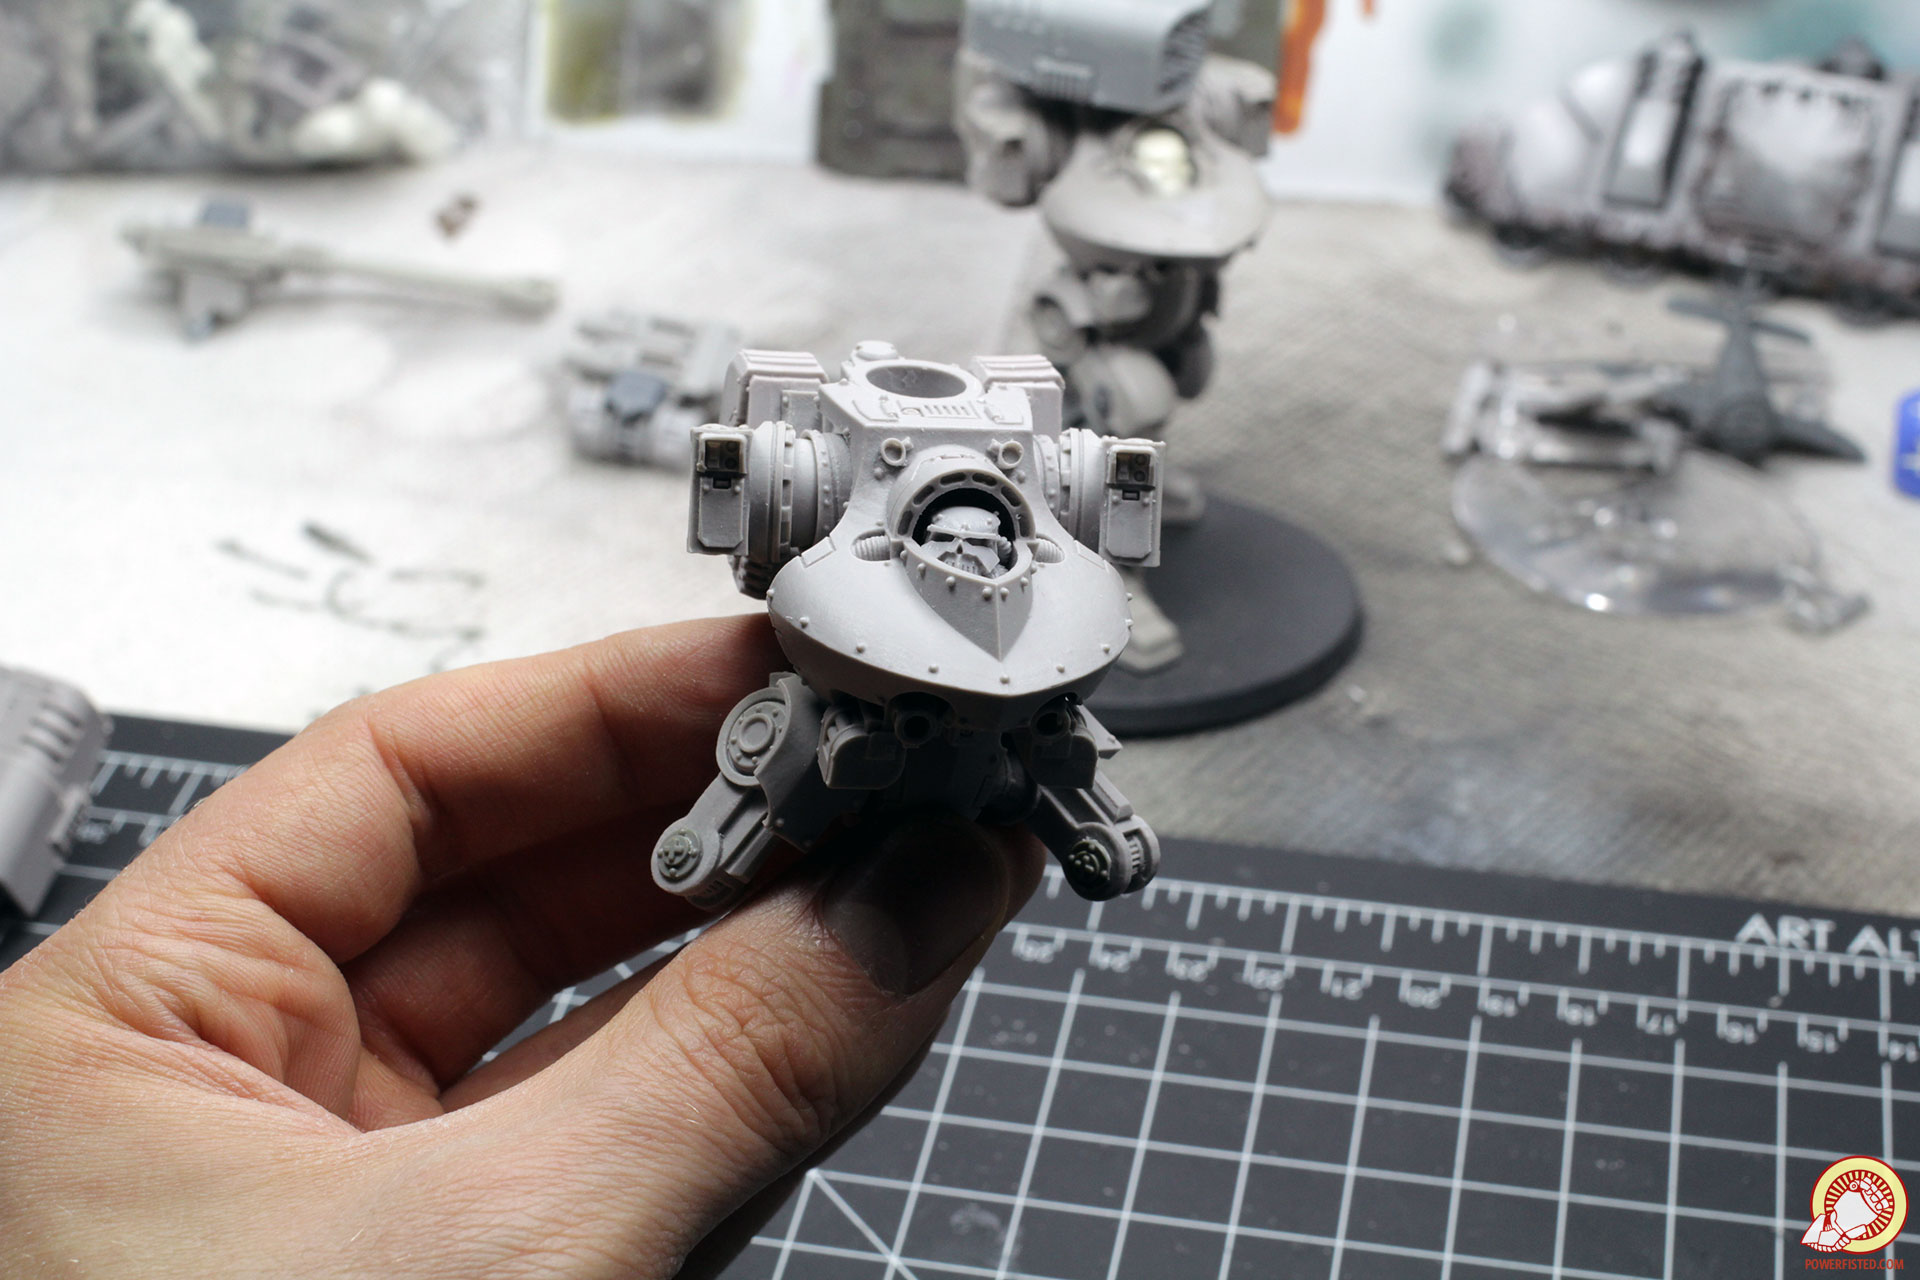
Next up is the head. A significant amount of grey stuff is required on the underside due to the indentation in the body of the deredeo normally used by the stock head.
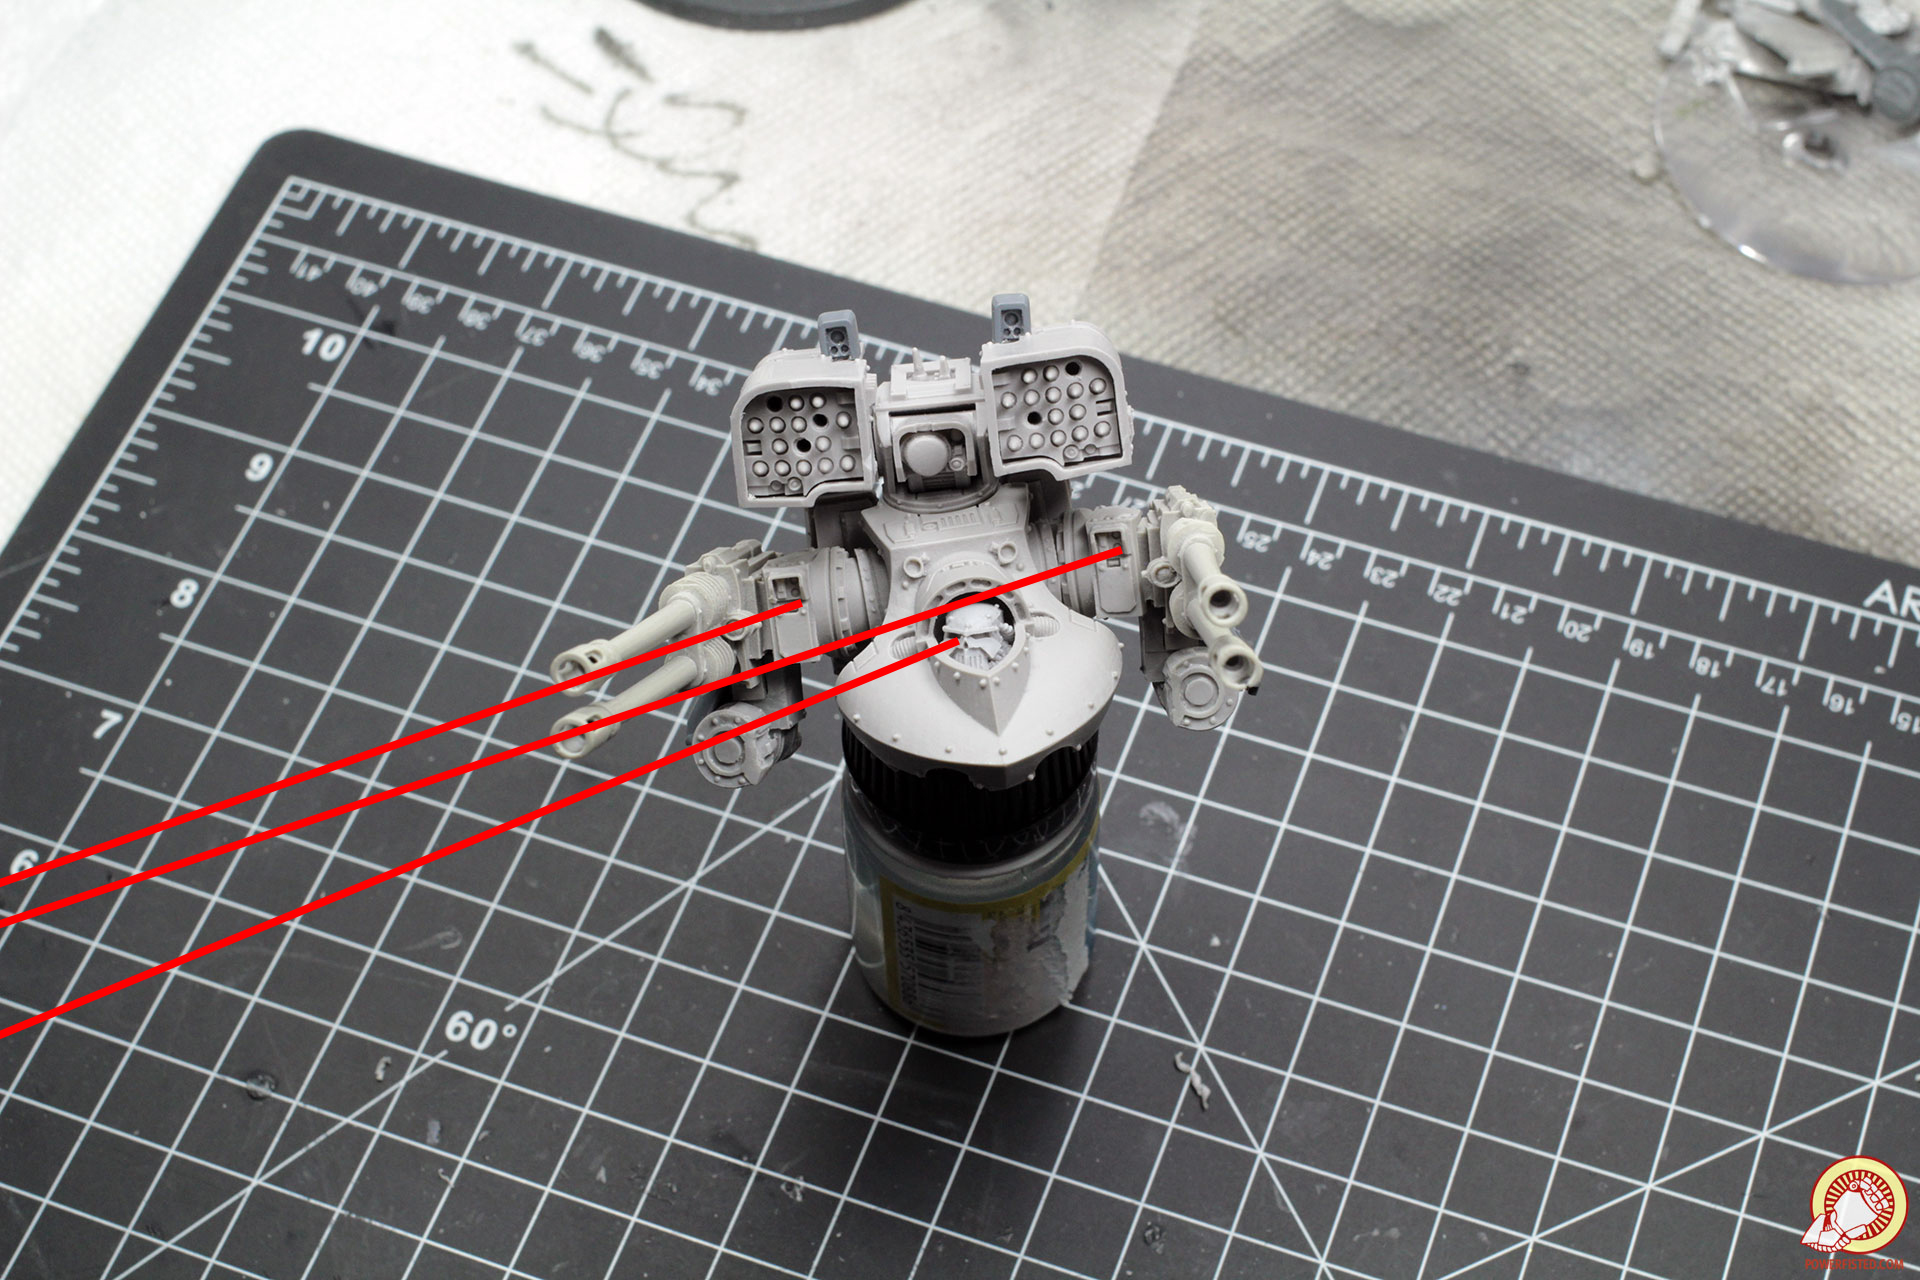
Our human eyes are always drawn to heads and faces. That gives them a lot of power when it comes to posing models. Aligning the head with weapons, targeters, or some focal point on the model are all effective ways of making models feel a bit more realistic. Because I wanted mine to have an aggressive pose, I used blu-tack to temporarily attach the arms. This allowed me to fiddle with all the parts until I was happy with how the head would follow the sight lines of arms and missile targeter.
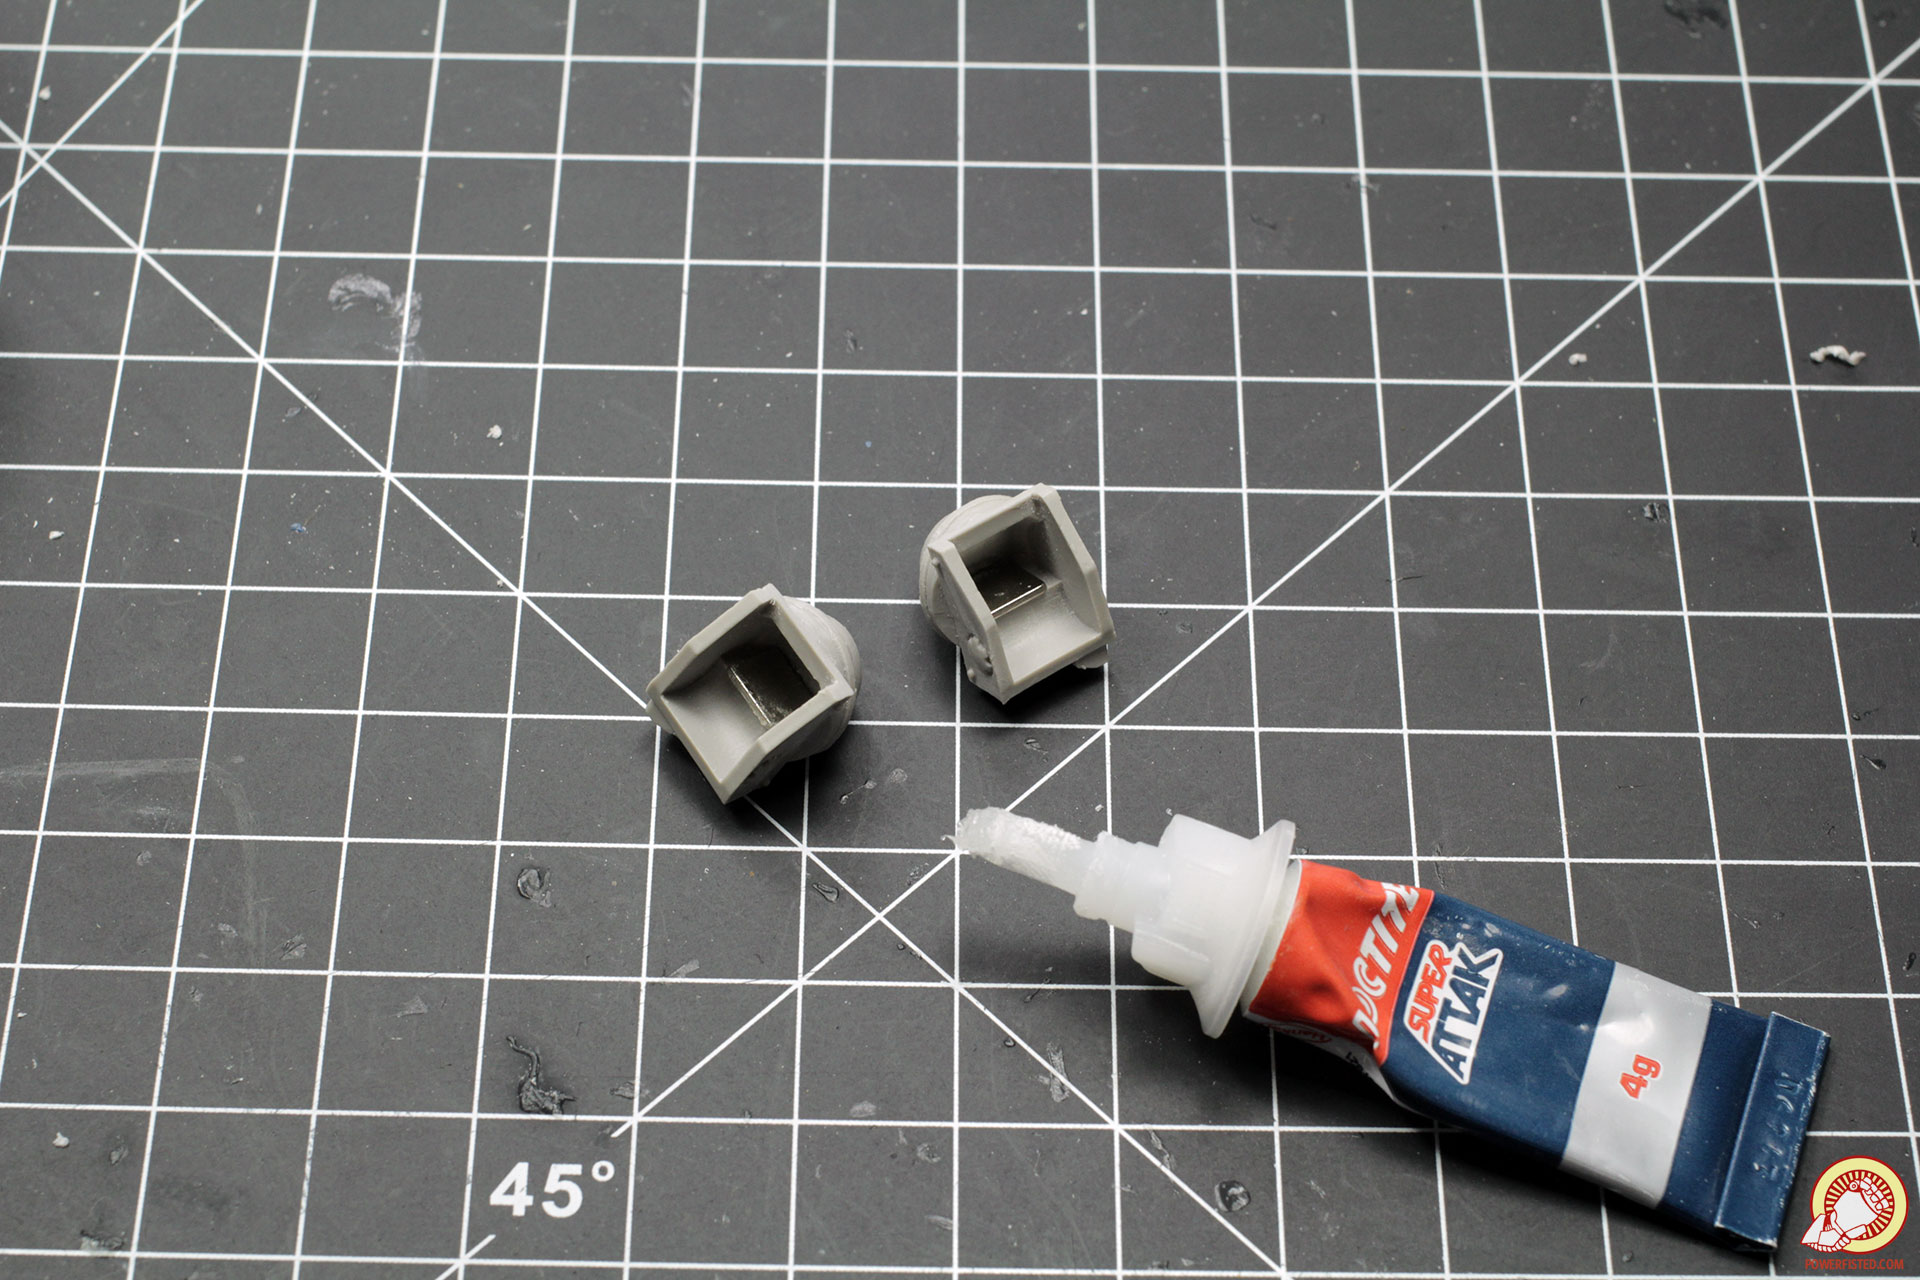
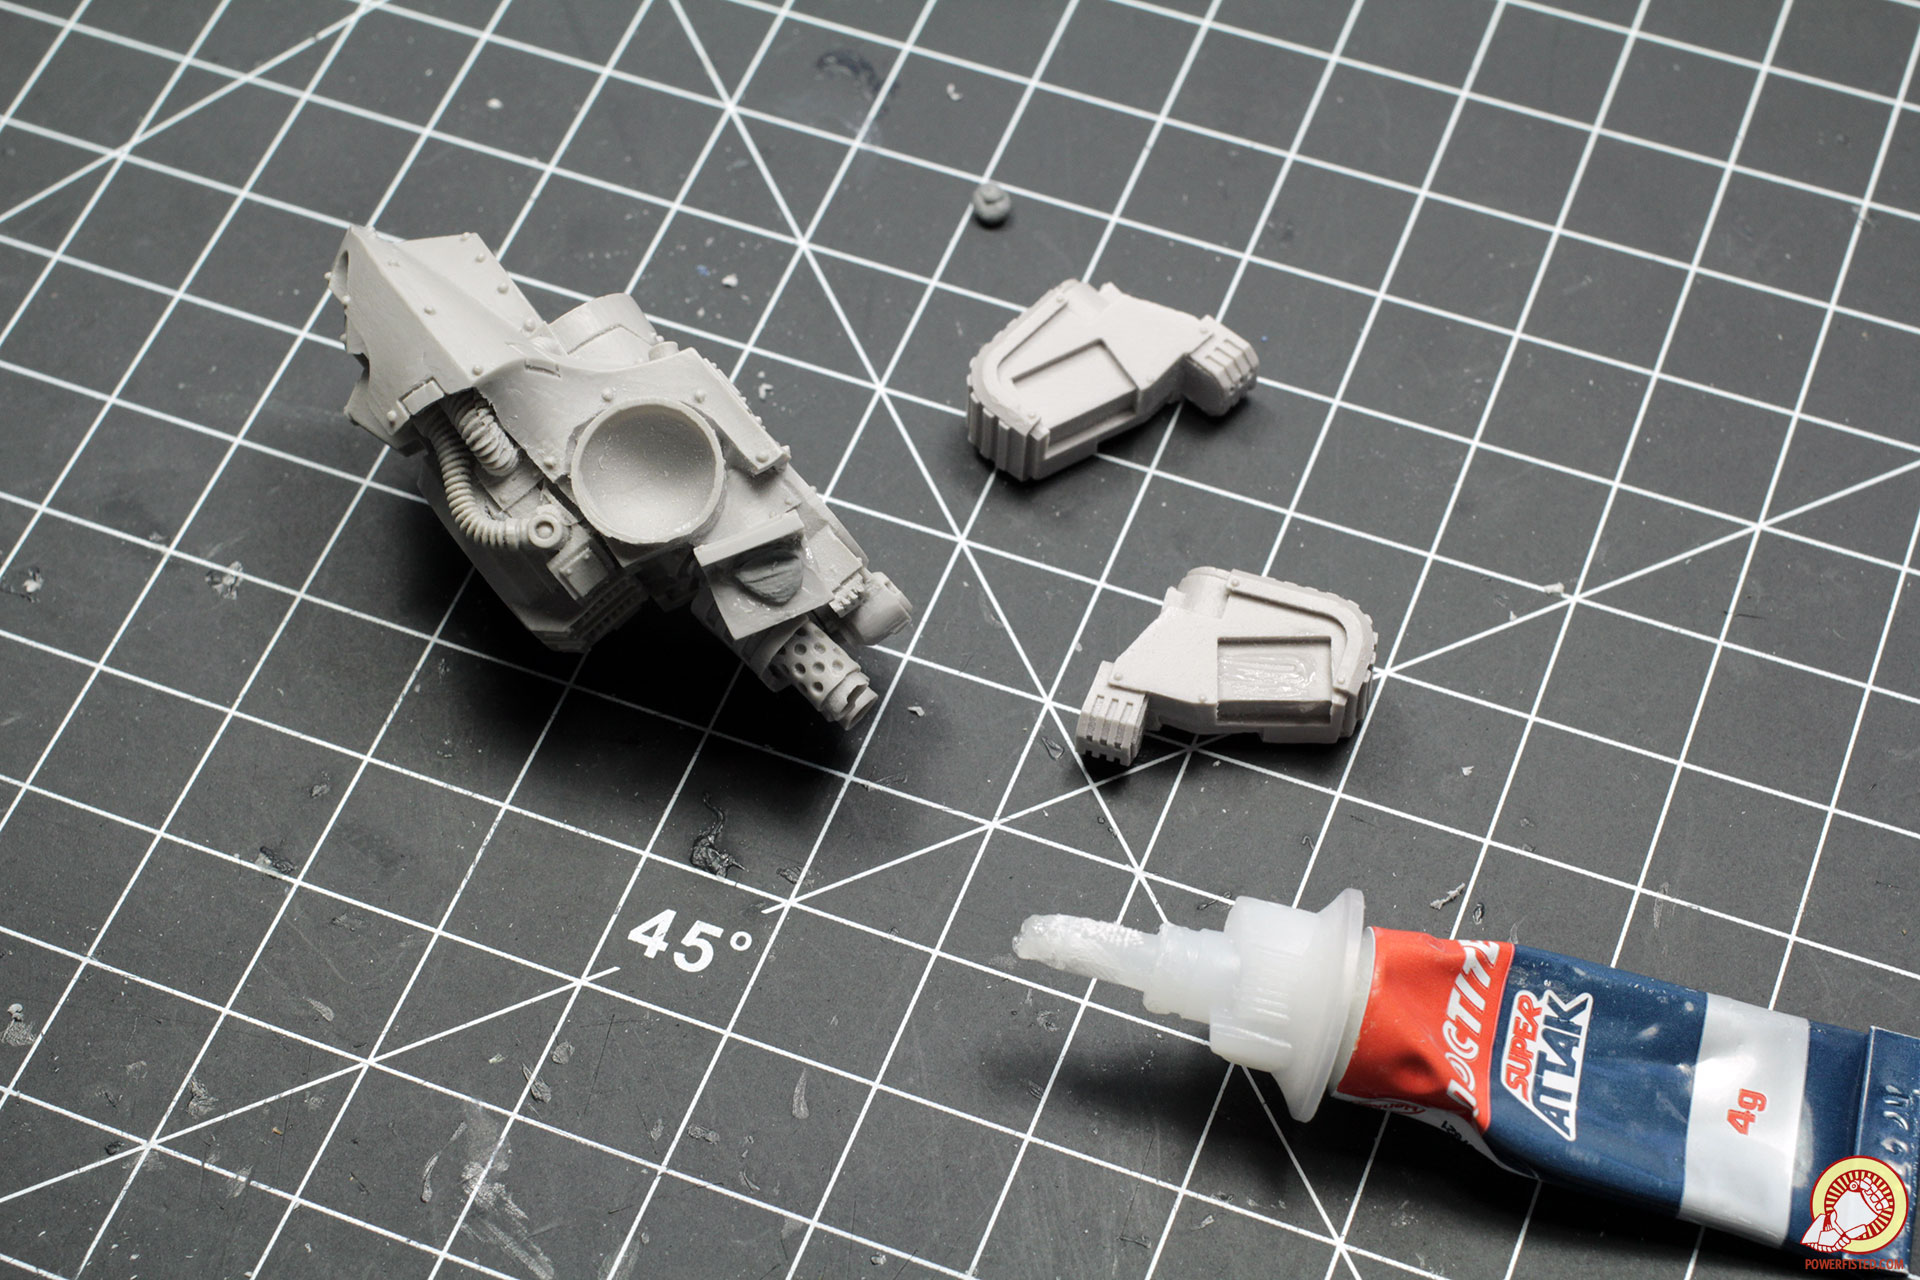
I glued magnets into the arm joints. These large flat ones are an easy fit and don’t require any extra work.
The sockets themselves get a healthy dab of glue followed by a medium ball of grey stuff. If you wanted your weapon arms to rotate up and down you could use pins here instead.
With the sockets ready, I apply a final coat of glue to the grey stuff before squeezing them into place. I fidget with them until they align with the head and follow the pose I created with the blu-tack.
After the putty has had time to dry, I pop in the missile launcher and blue-tack the arms back into place. This lets me fidget with the head and arms one final time before the pose is locked into place.

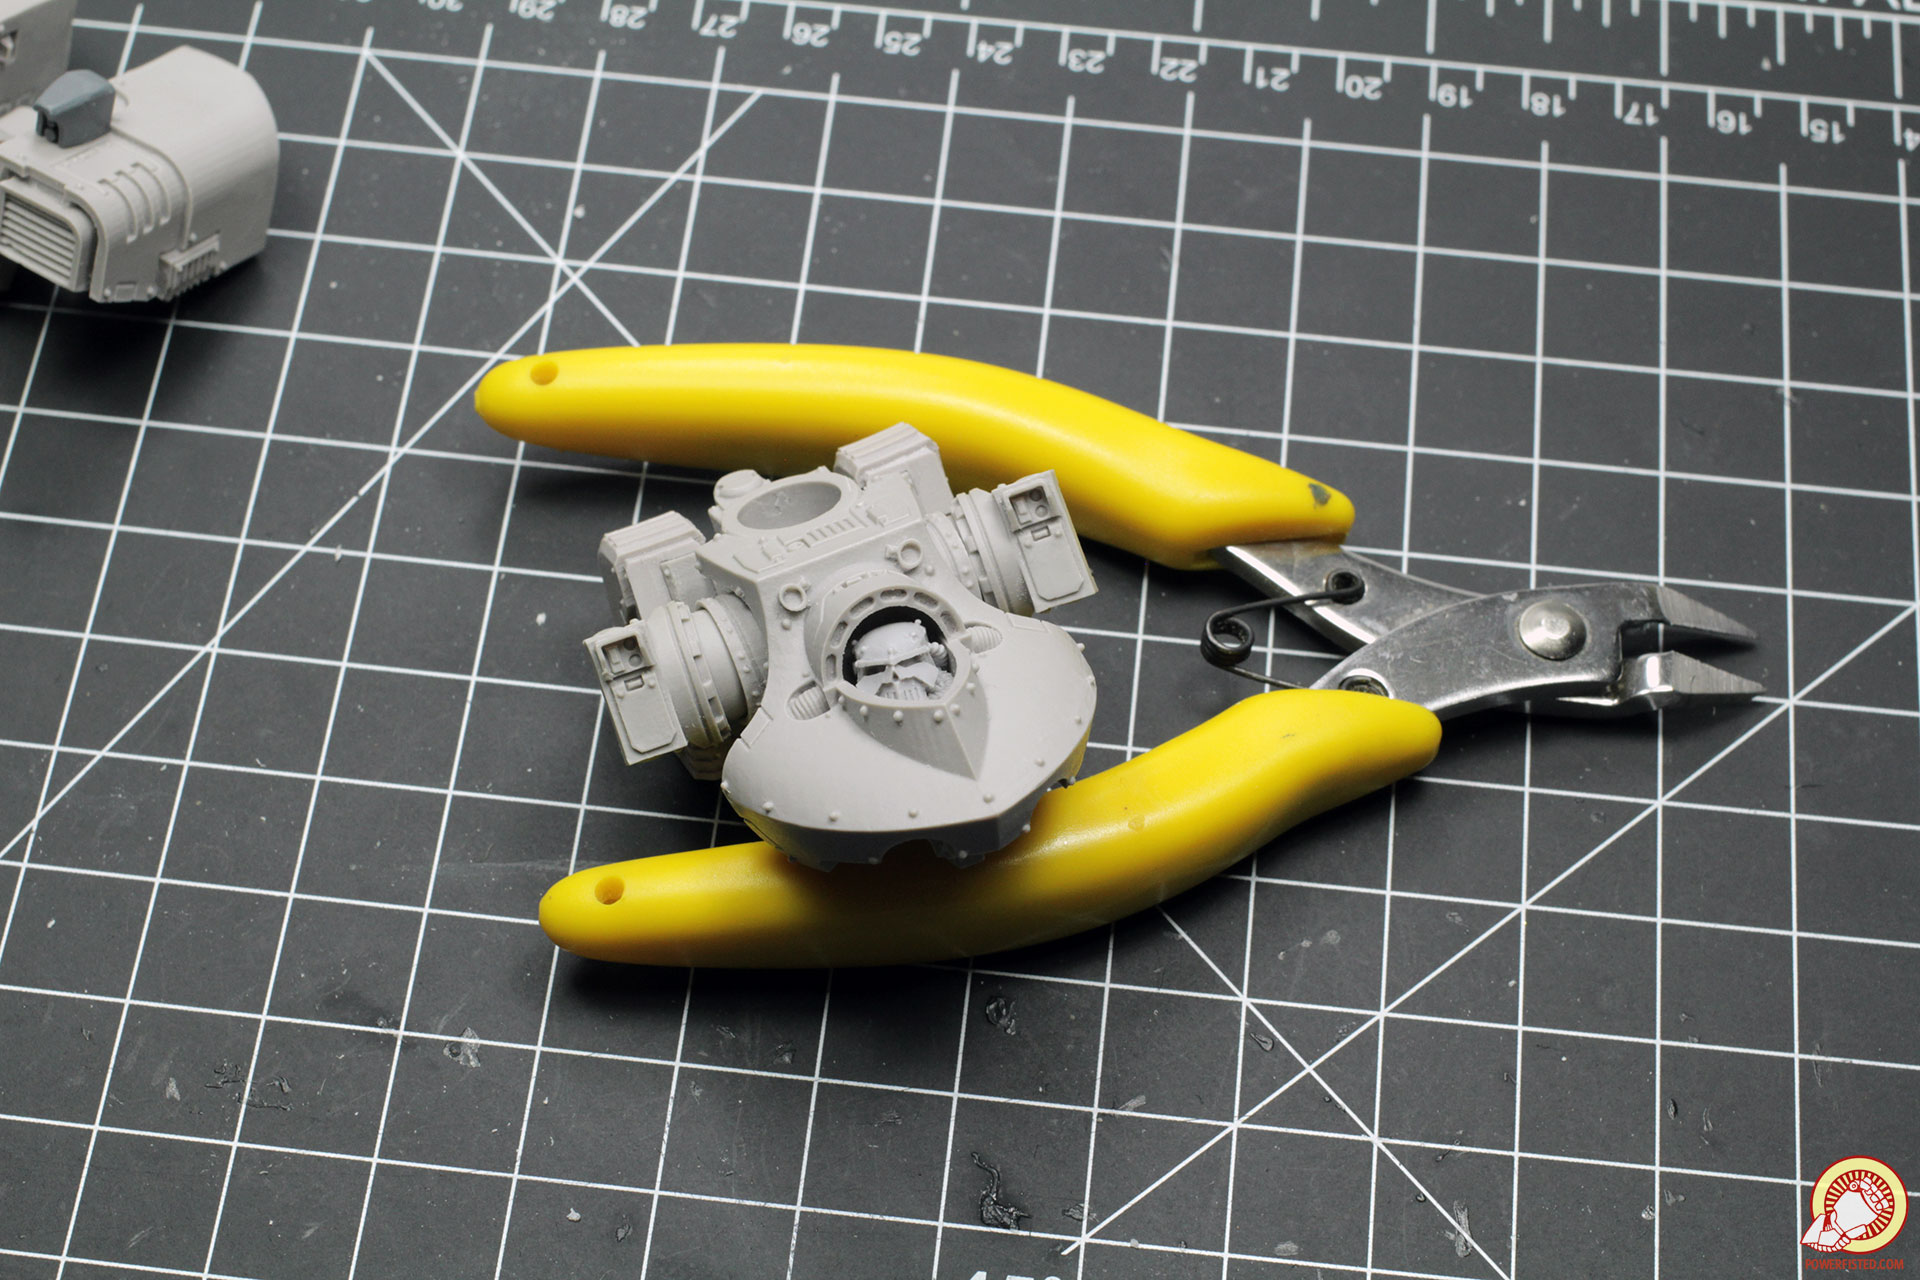
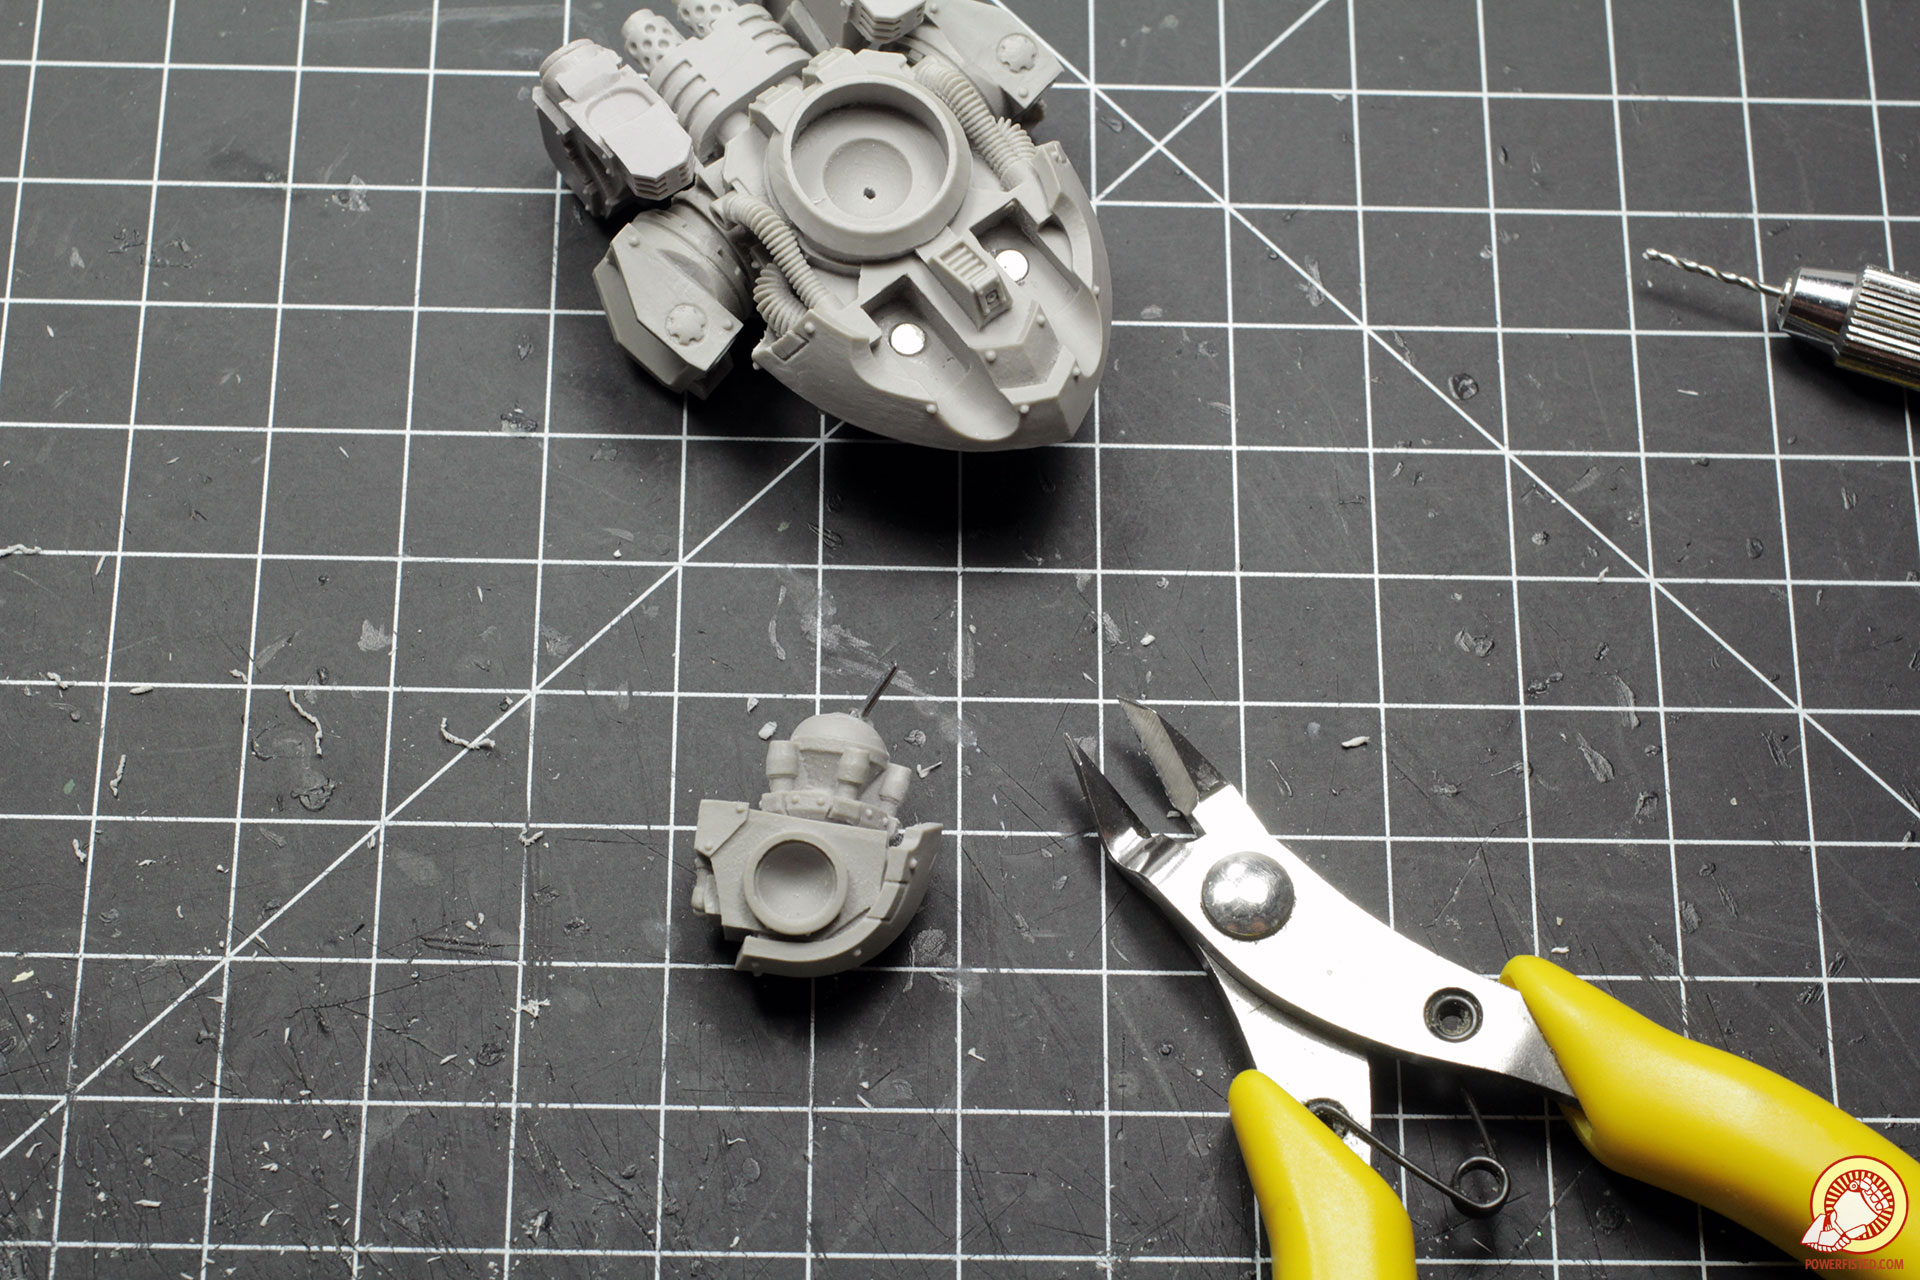
While the putty dries I work on the chest weapons- scouring the centres, drilling pilot holes, widening up the holes, and finally gluing in magnets.
I do the same with the underside of the body. I typically use larger magnets in the body as there is more room for deeper holes.
Unlike putty, super glue is ready to go within a minute or two. The body is really coming together.
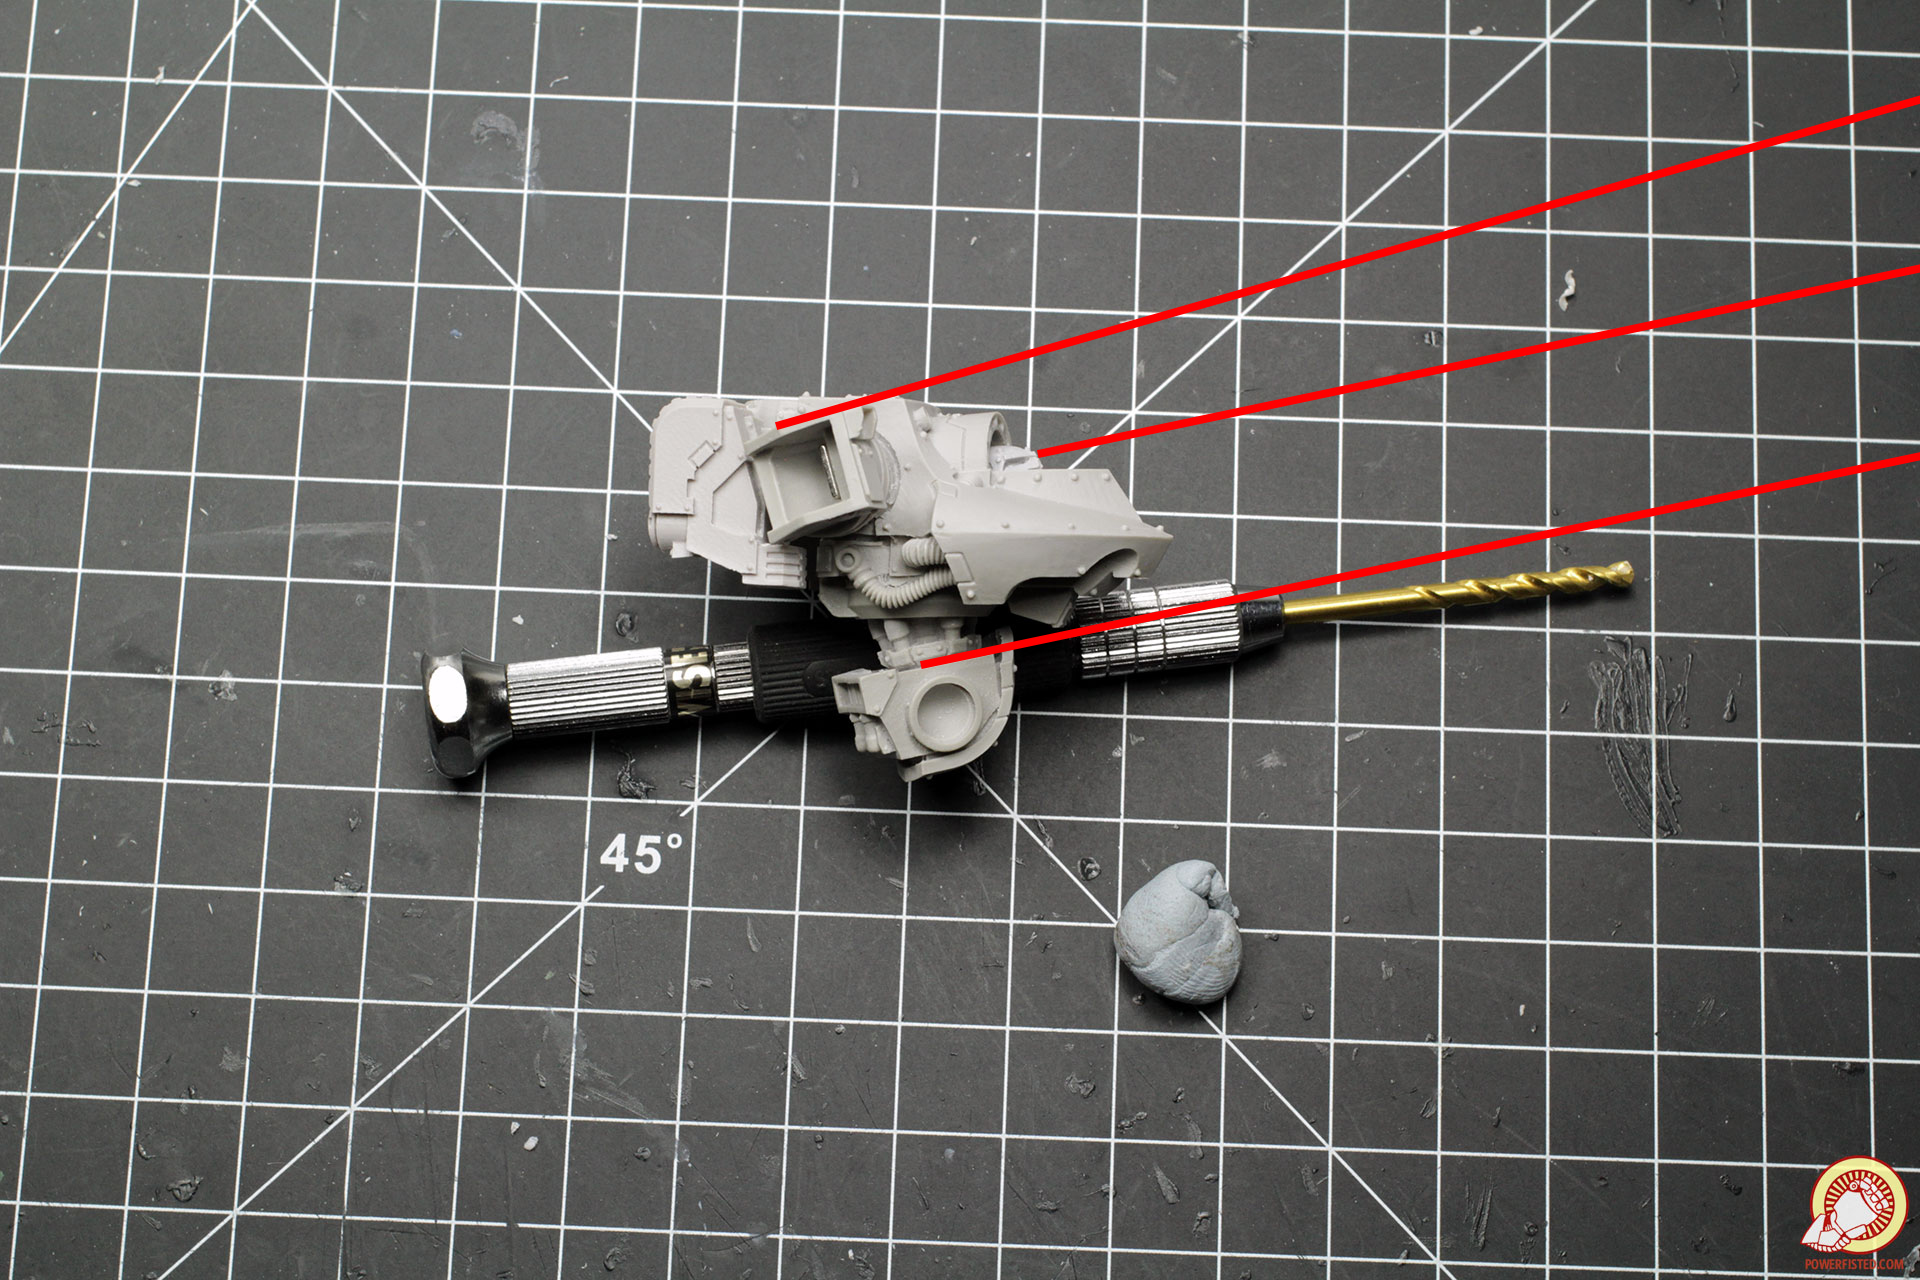
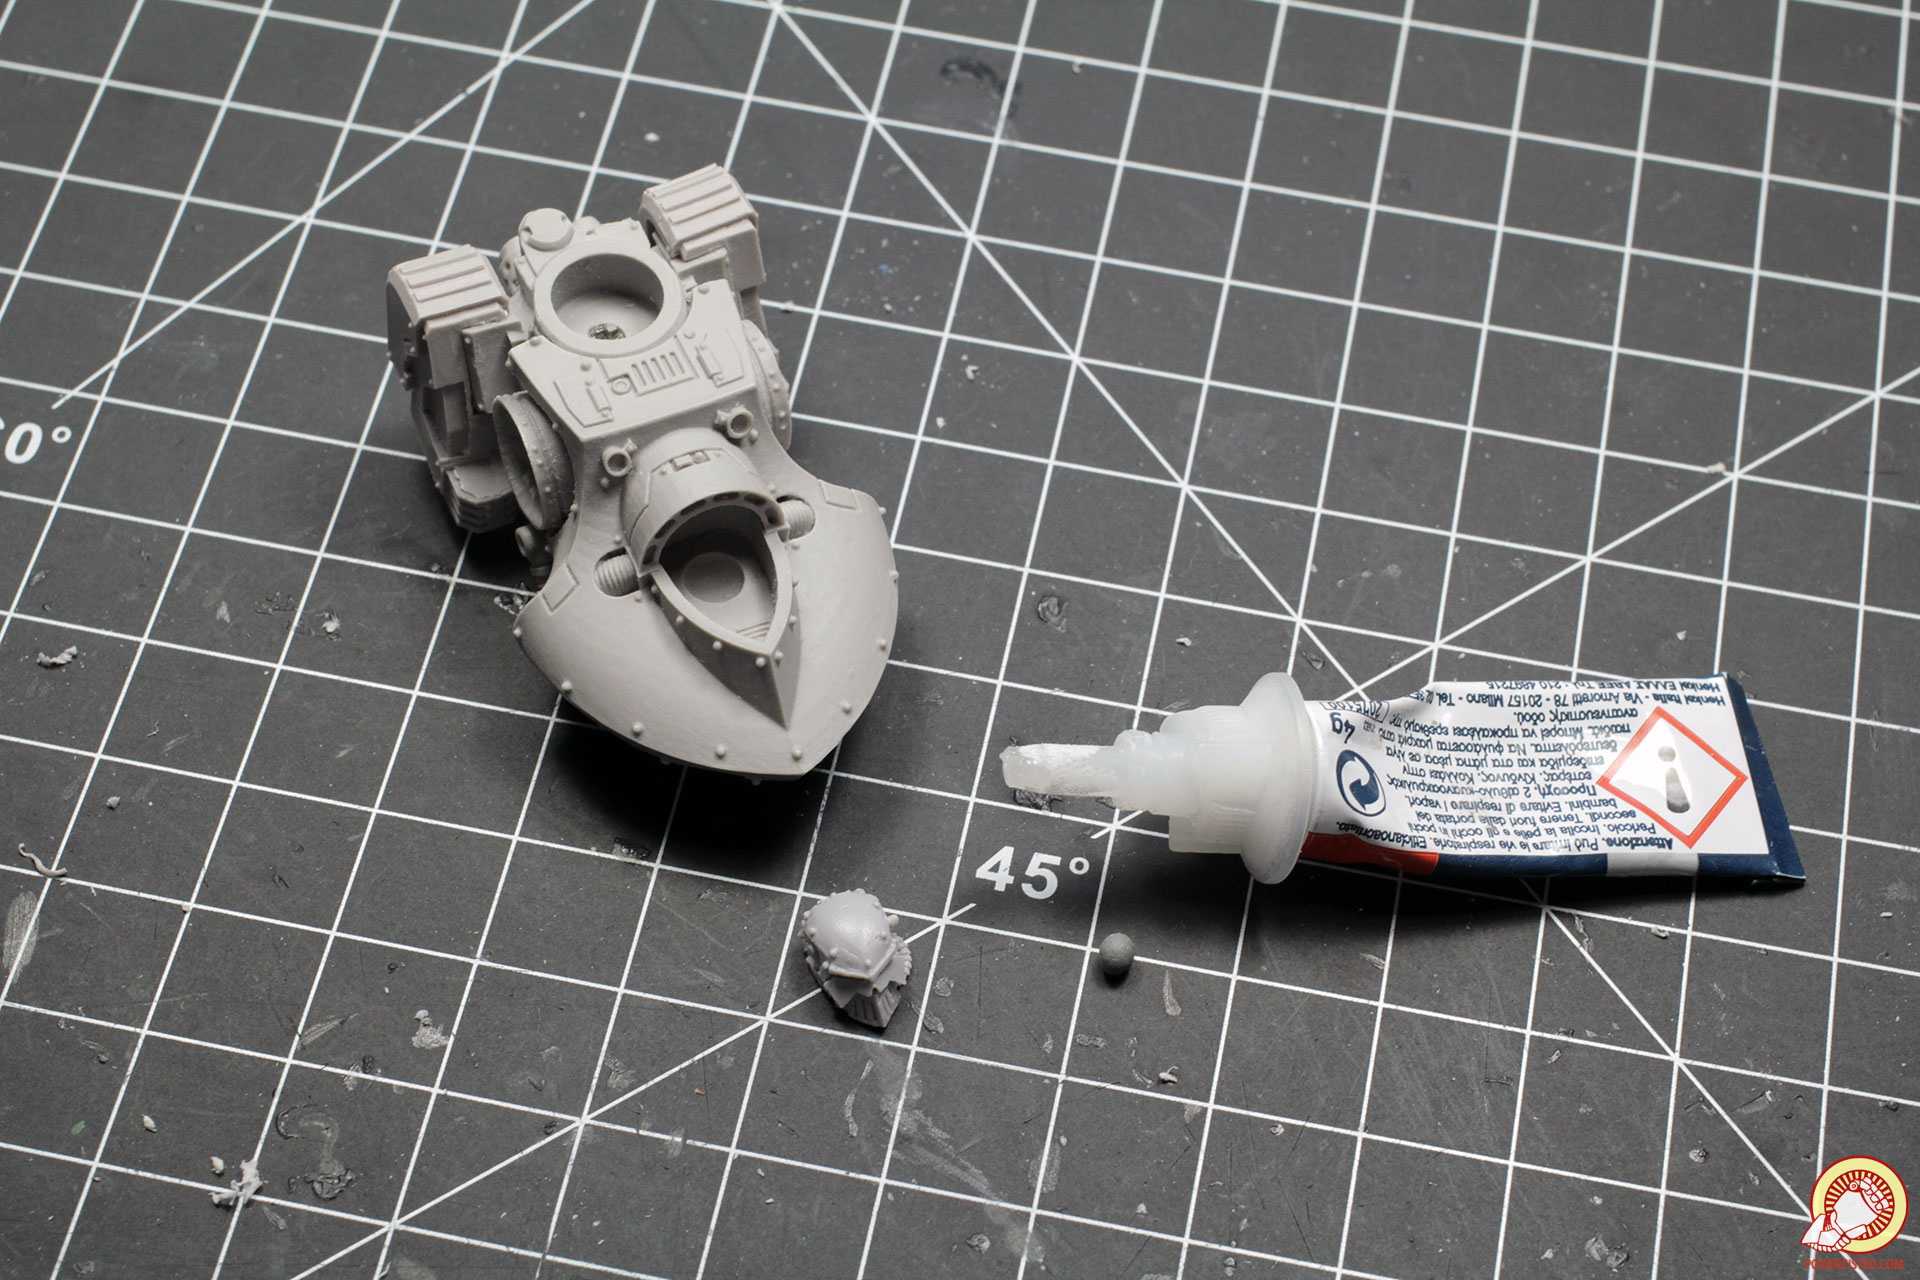
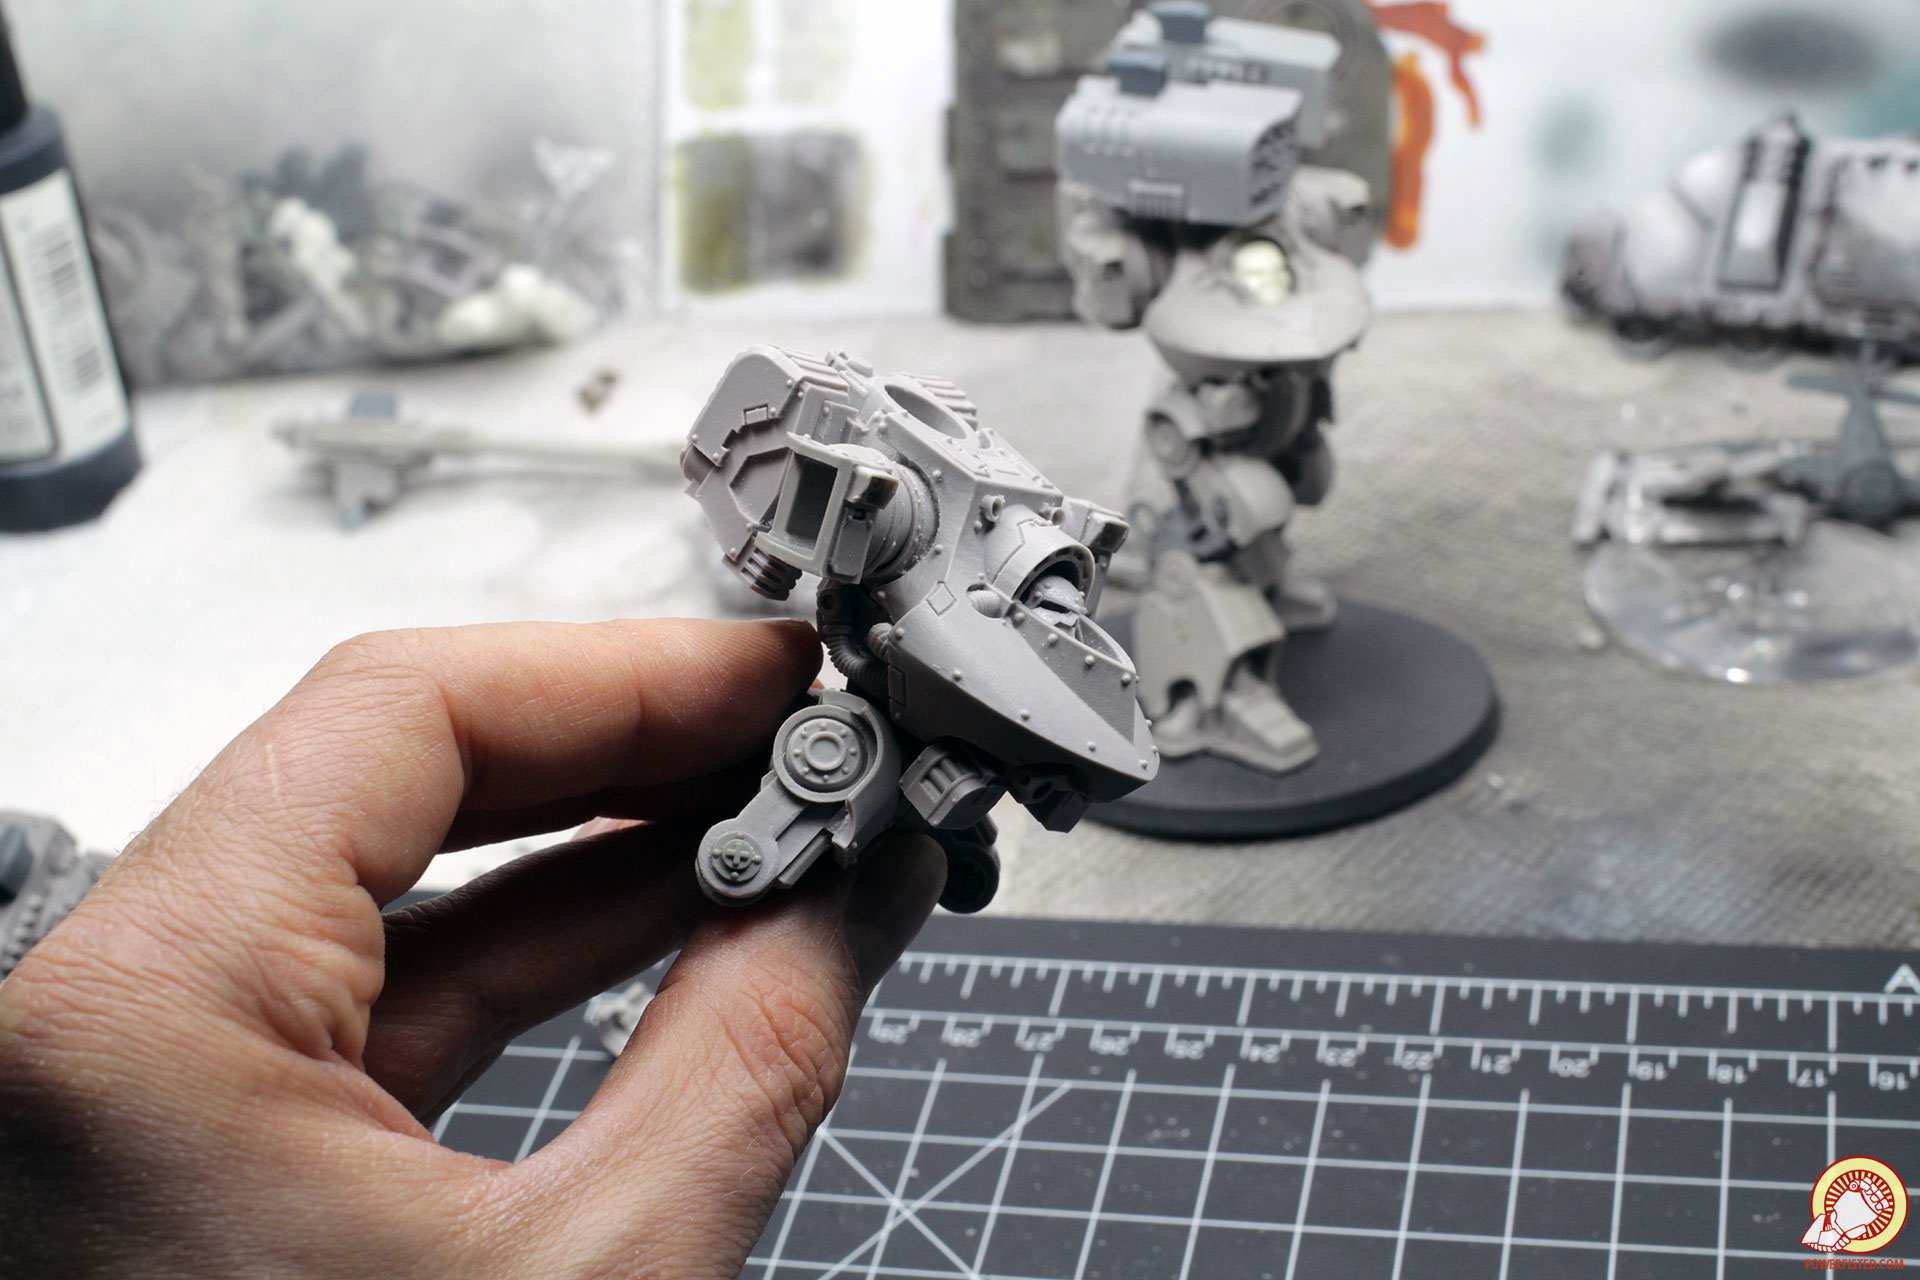
The next step is the pelvis of the dreadnaught. Like the head, this bit dictates the direction of the legs and will play an important role in how the pose of the model comes together. Because I want to tilt the chest downwards, I will need the pelvis to align with the sign lines of the arms and head. I also want the dreadnaught to be stepping in the direction opposite of where it’s looking. This means that the pelvis will need to be rotated in that direction. Use blu-tack to experiment with different poses until you find something that feels natural.
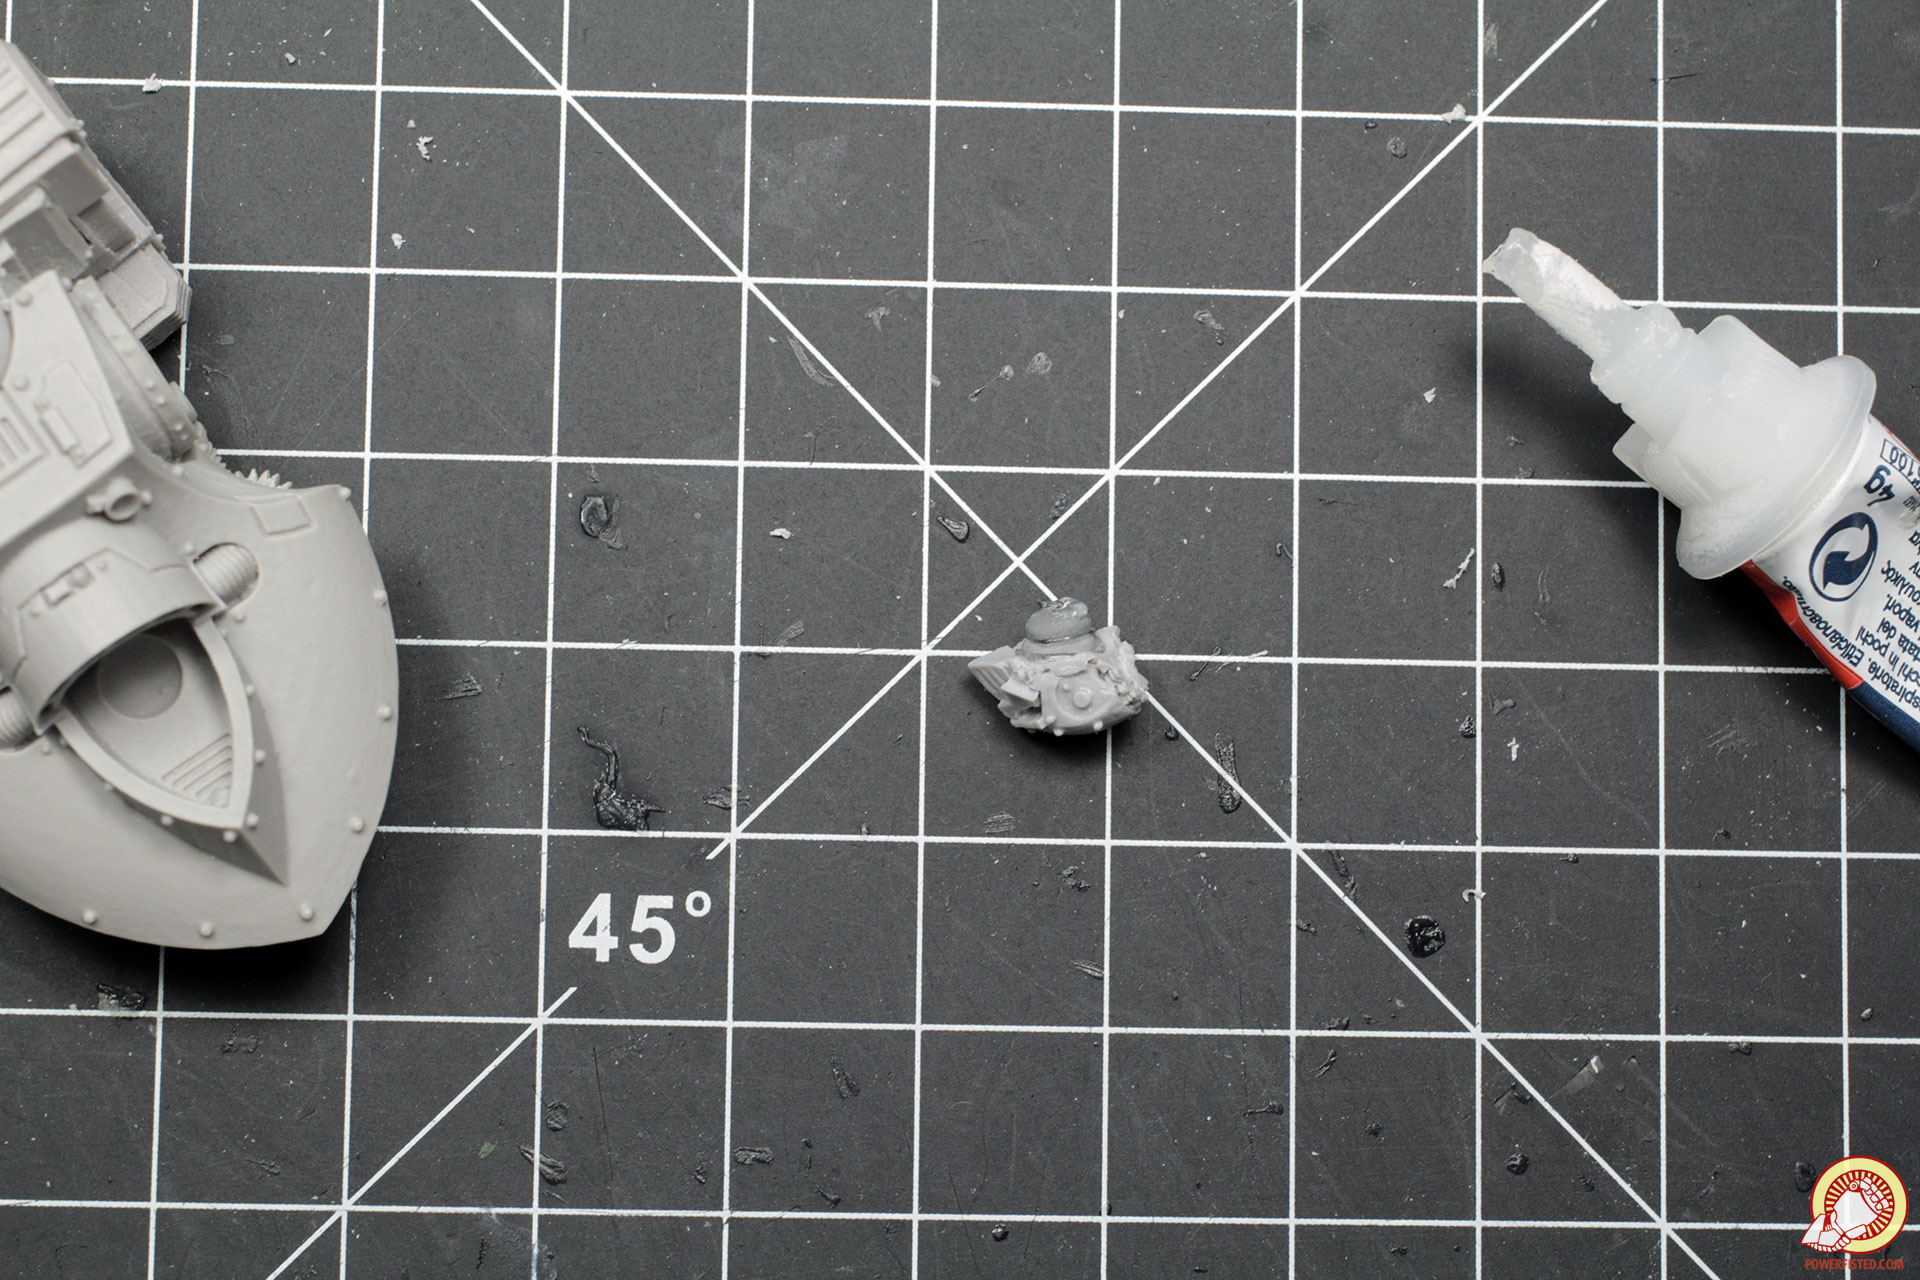
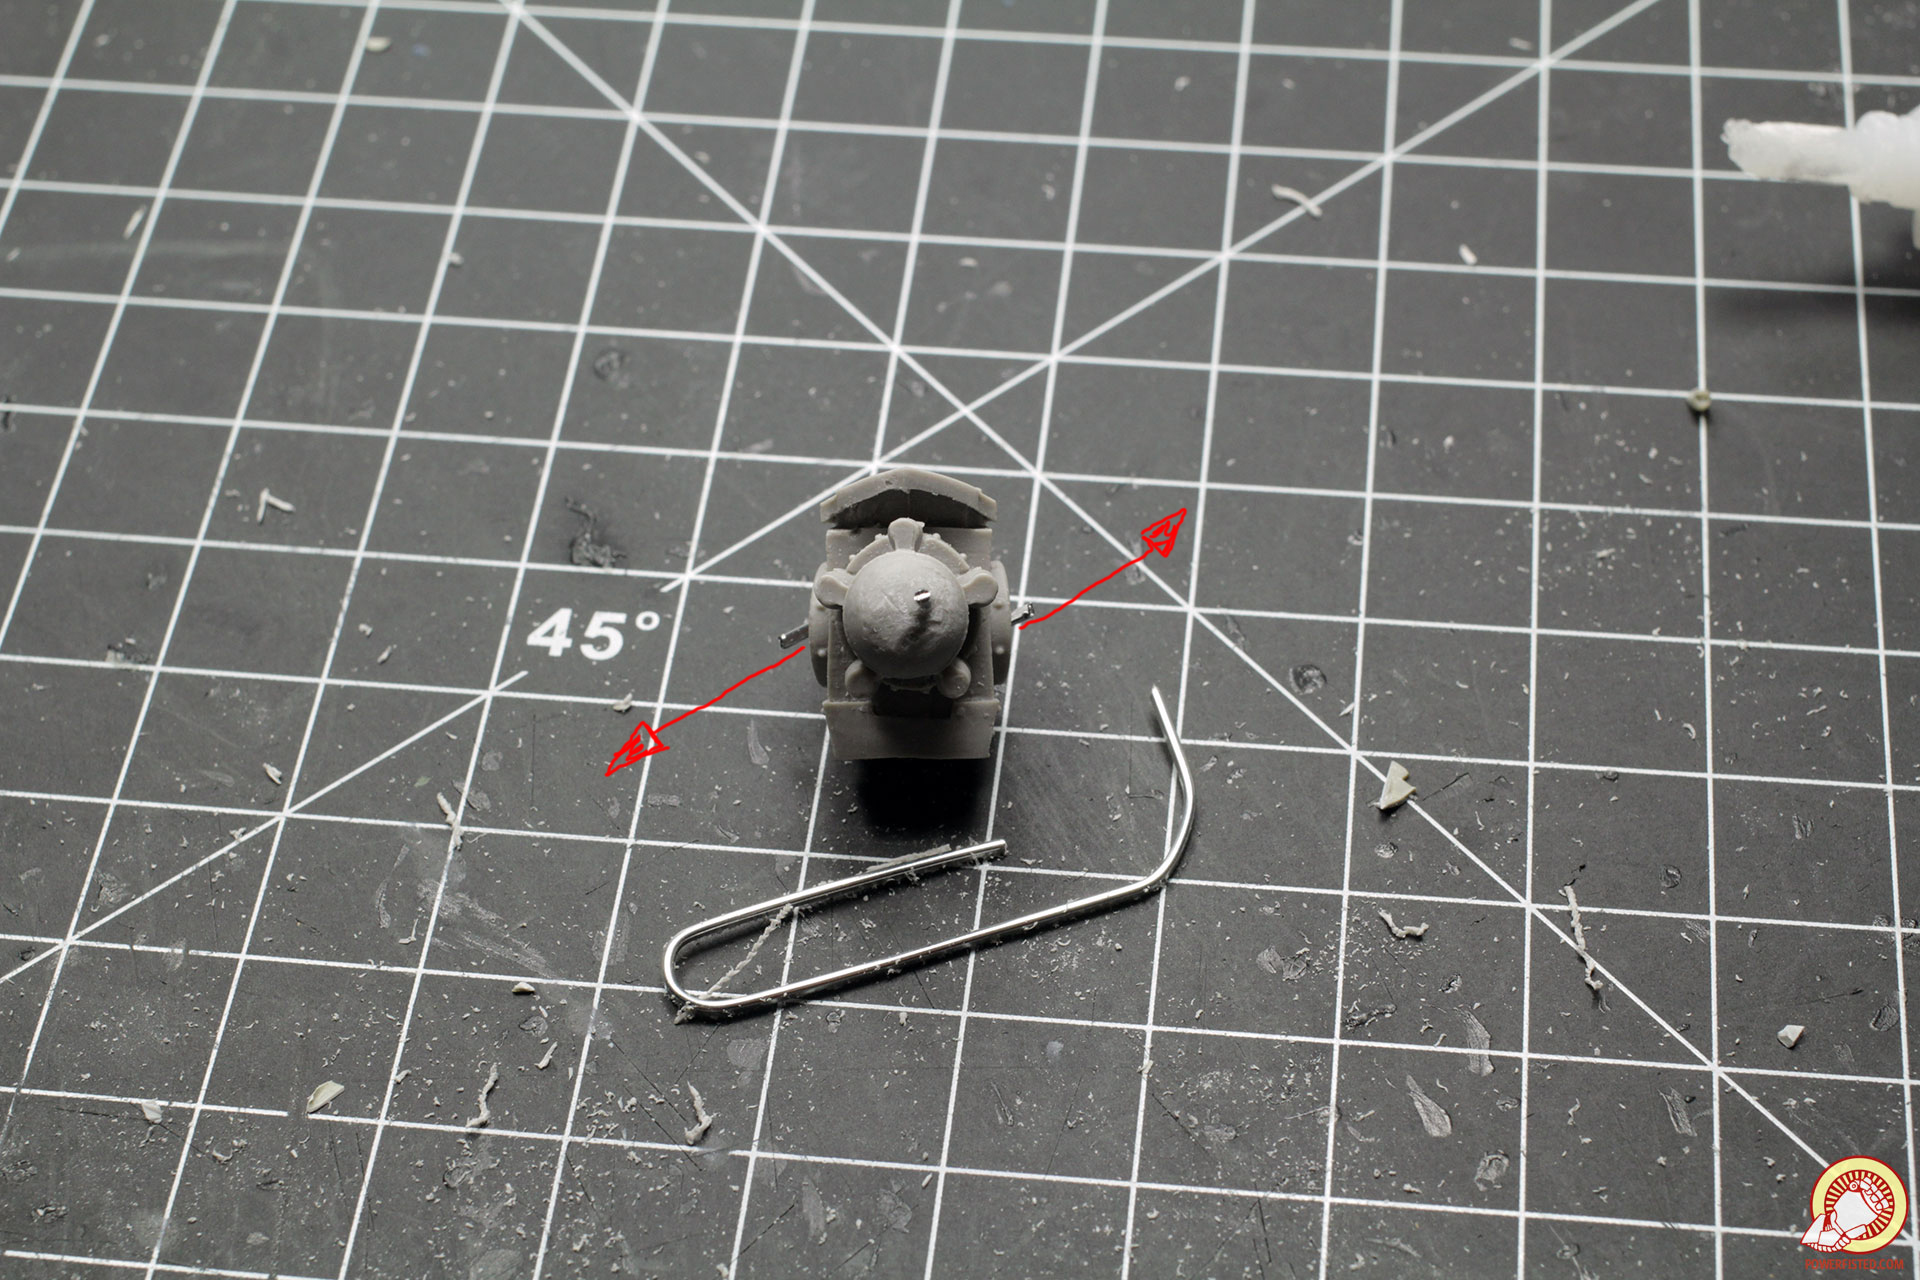
This is the first joint that requires a pin. Pins that are glued only on one end are free to rotate and can be taken apart for storage or painting. To do this I fist drill a hole into the middle of the torso and then a second one, at a slight angle, into the pelvis. Because I blu-tacked the pelvis into a pose before, I have a relatively good idea of where the pin needs to go in order to achieve the pose I want. After drilling I apply glue to a paper clip and shove it into the pilot hole of the torso. After the glue sets, I clip off the remaining paperclip (making sure there’s sufficient length to get up into the torso).
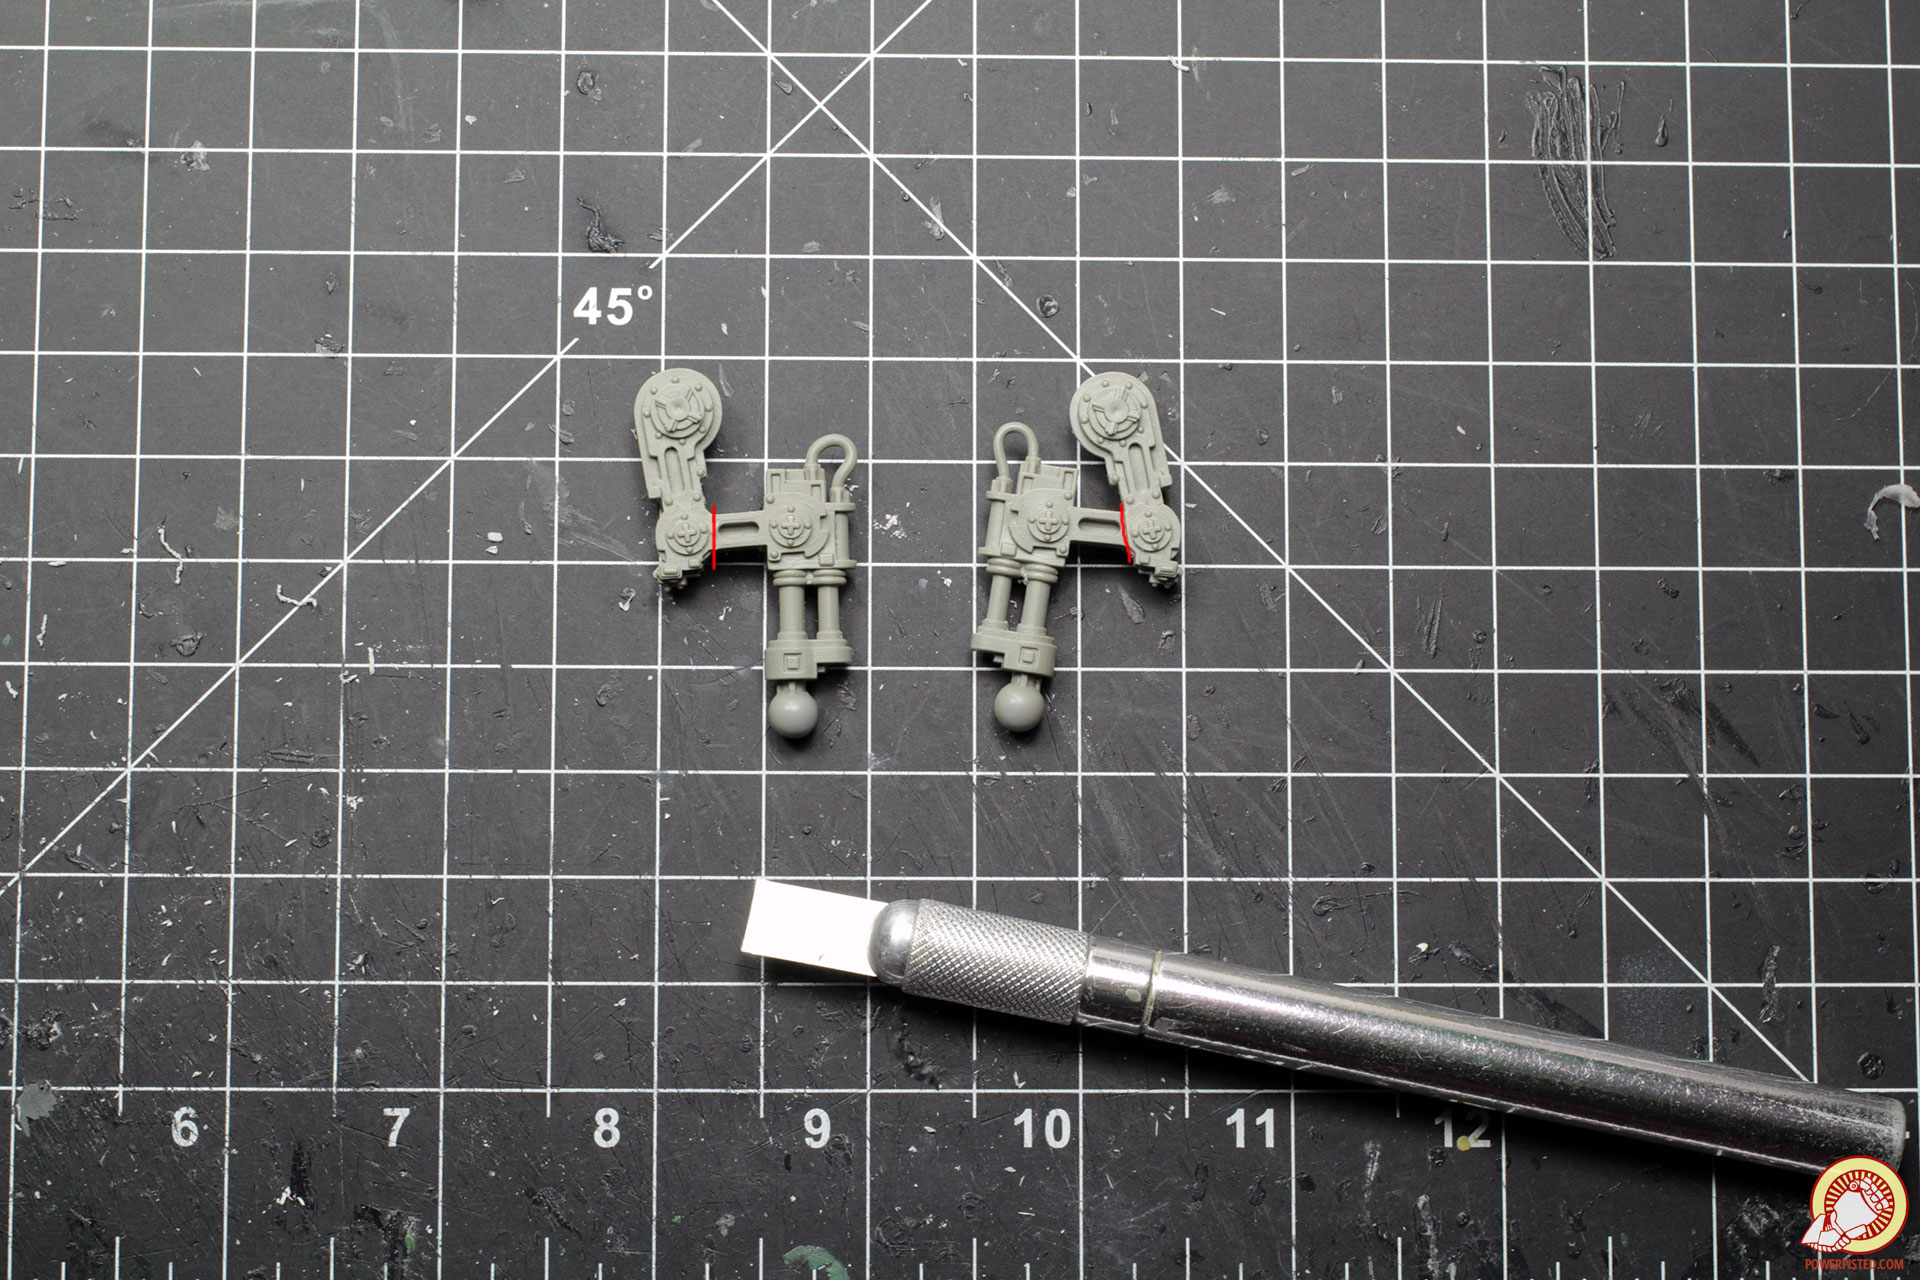
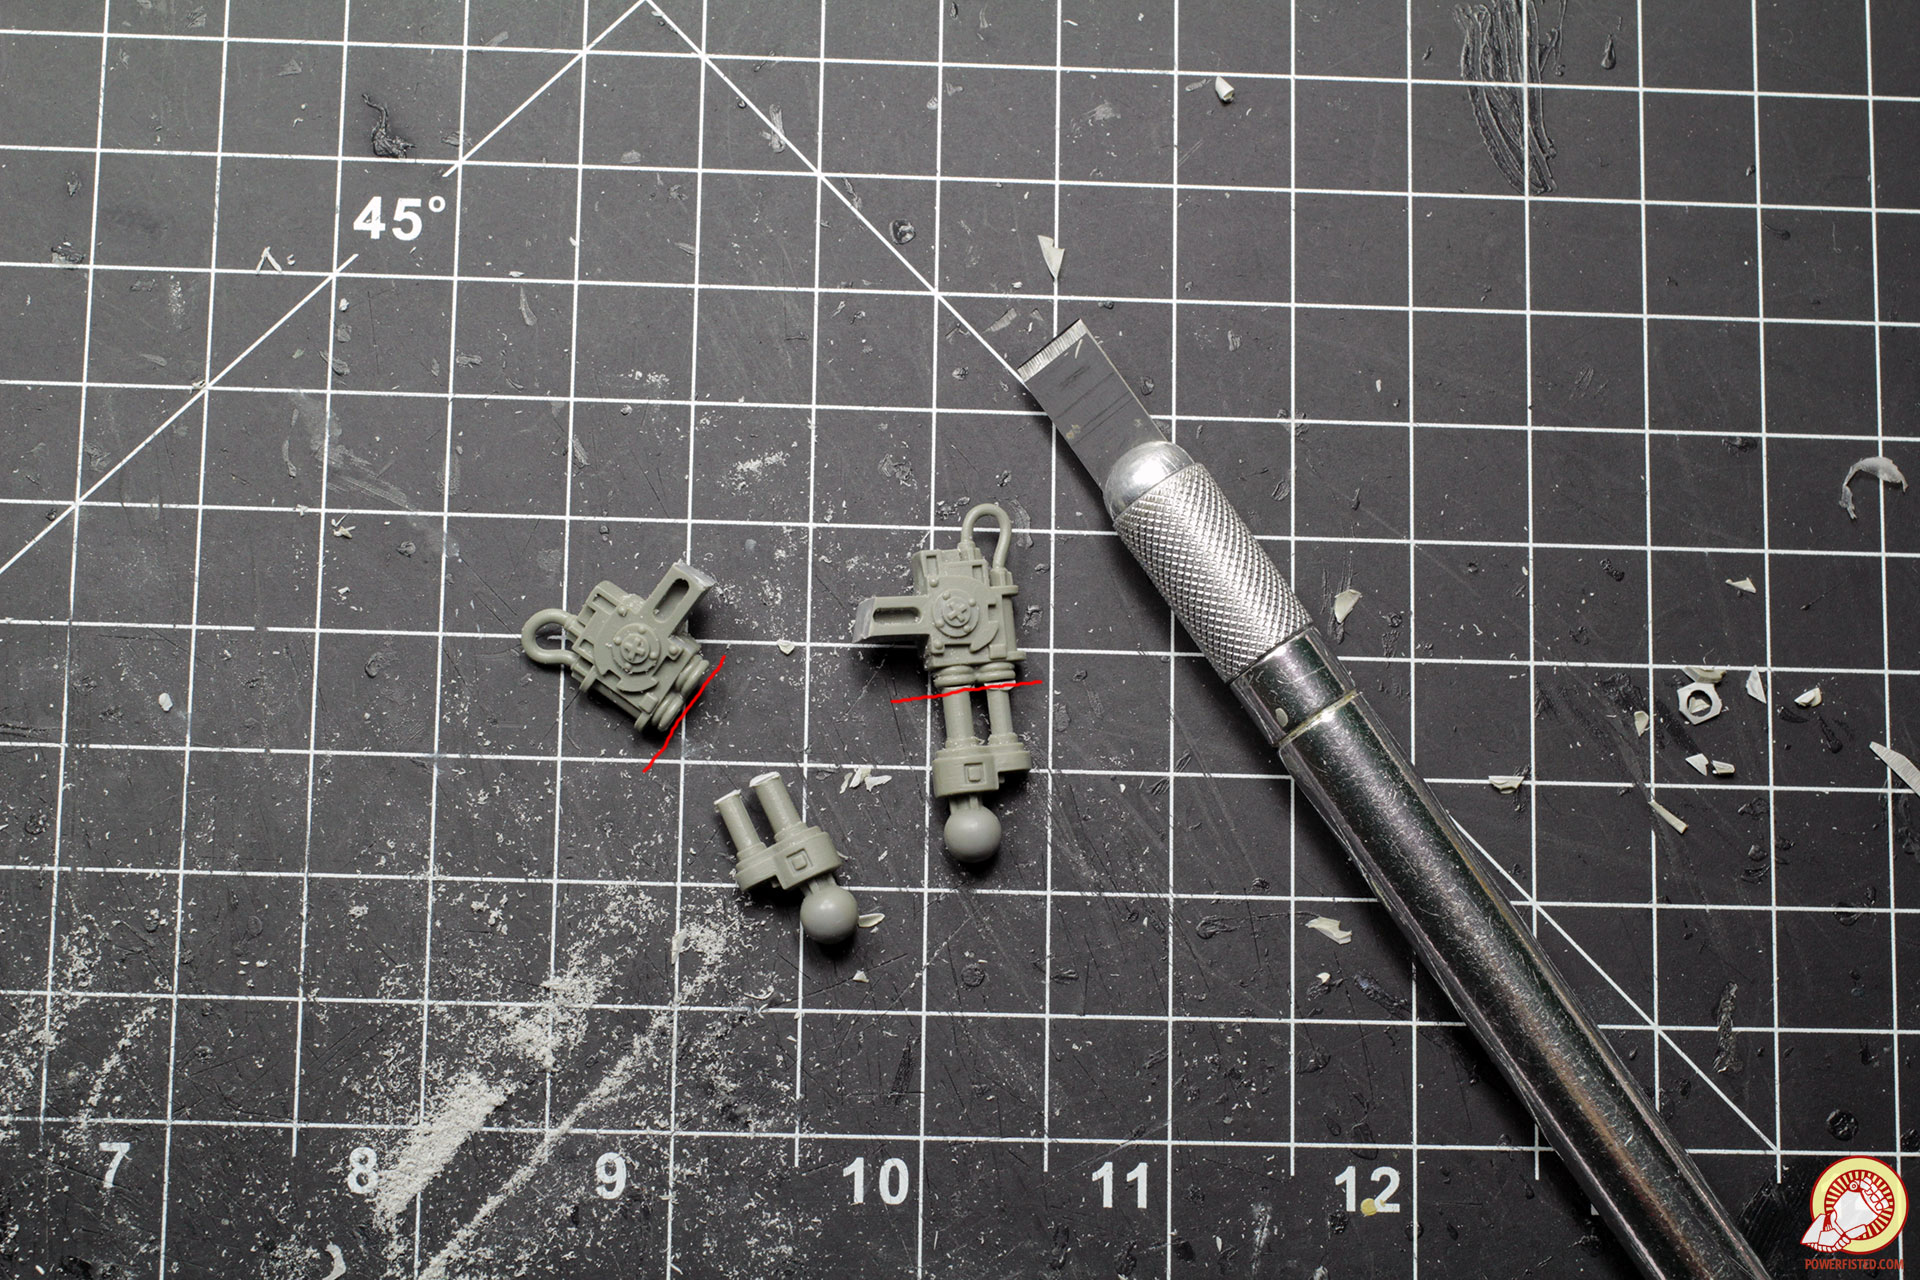
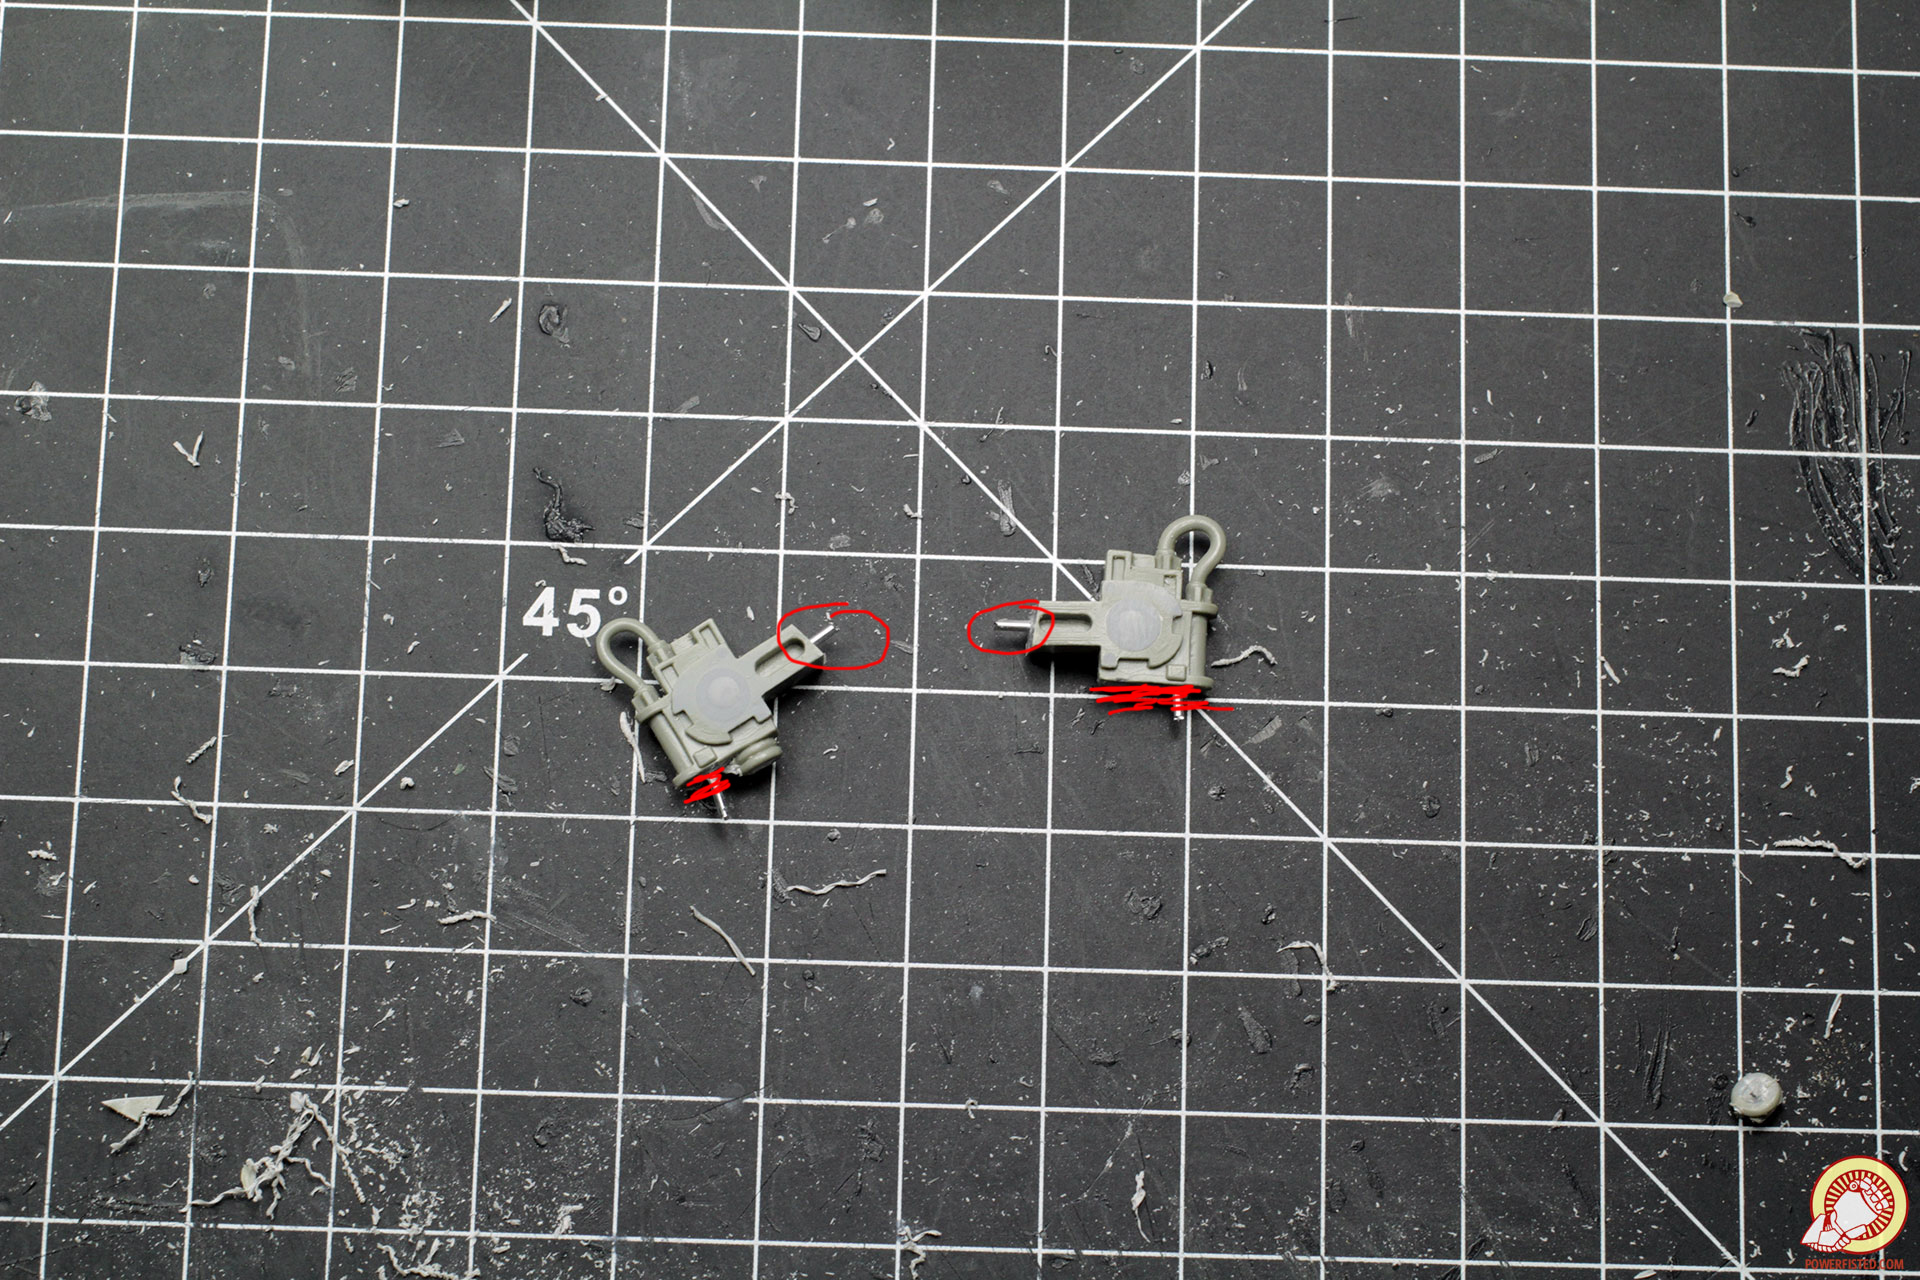
The sentinel legs need to be cut in two spots. For each cut I will use a heavy duty xacto chisel to get the straightest chop possible. Before cutting I scour the cut lines on both sides of the bit.
After a cut is made, I smooth out any imperfections with a miniature file.
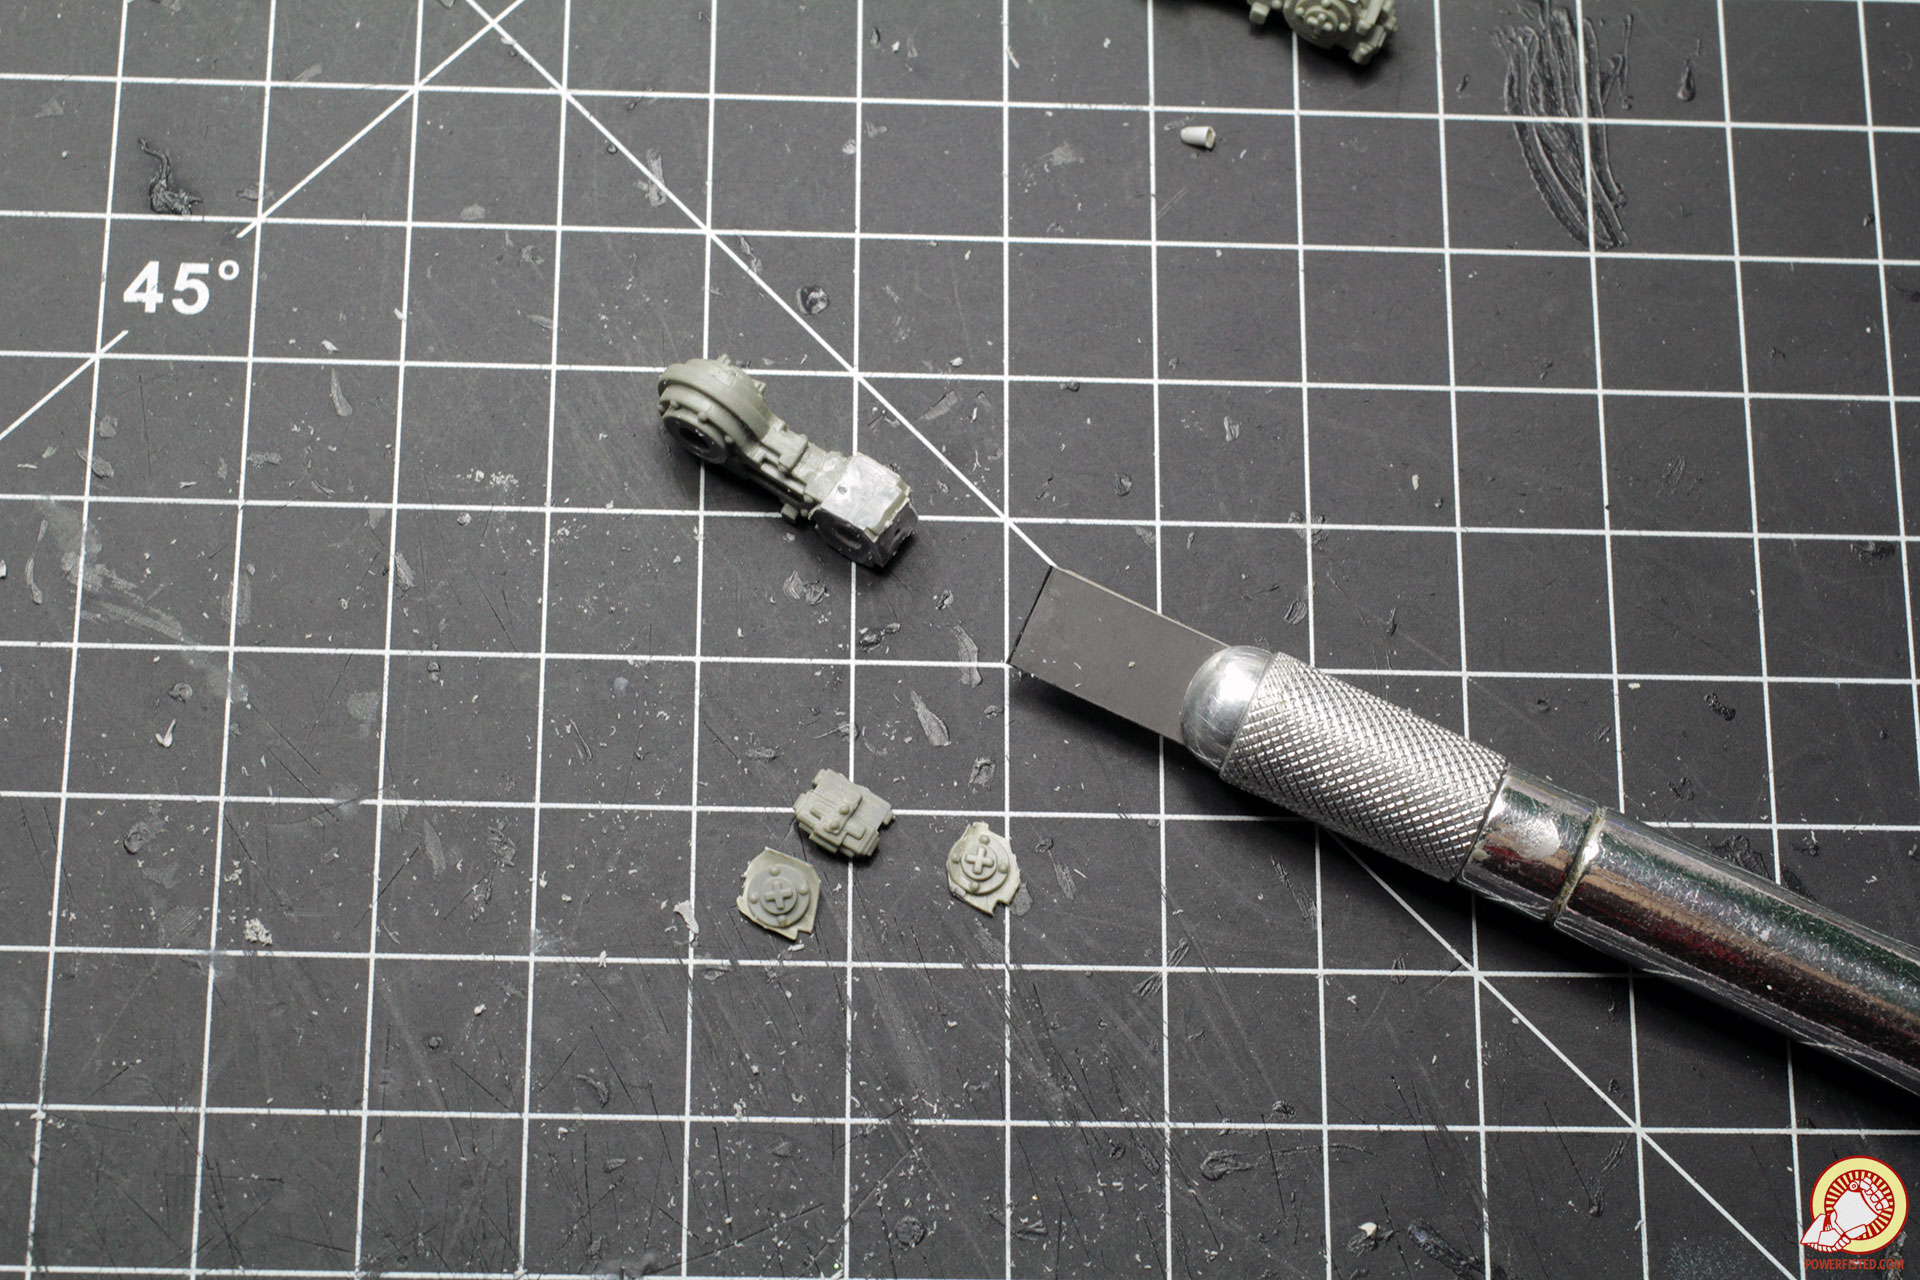
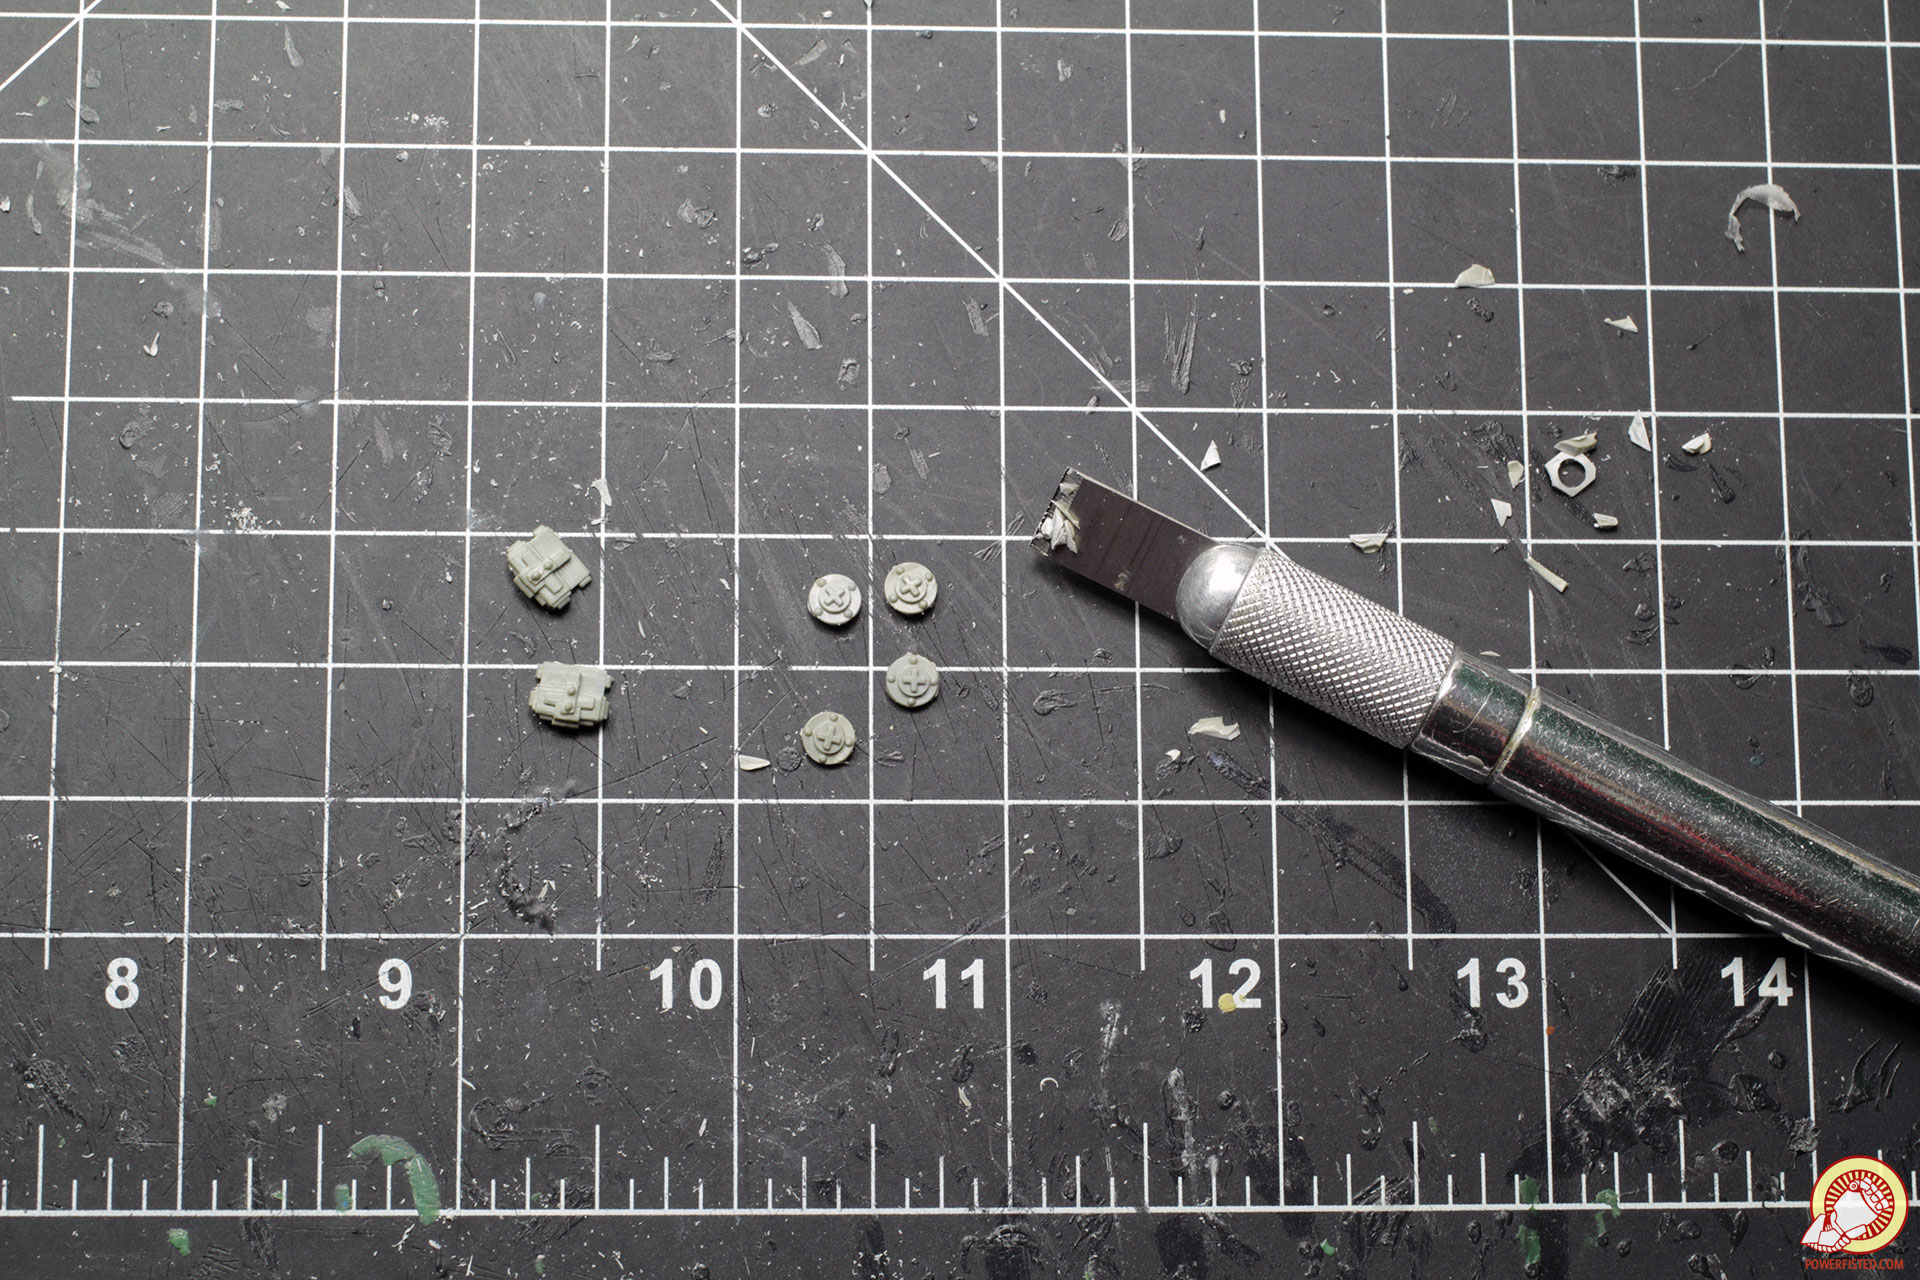
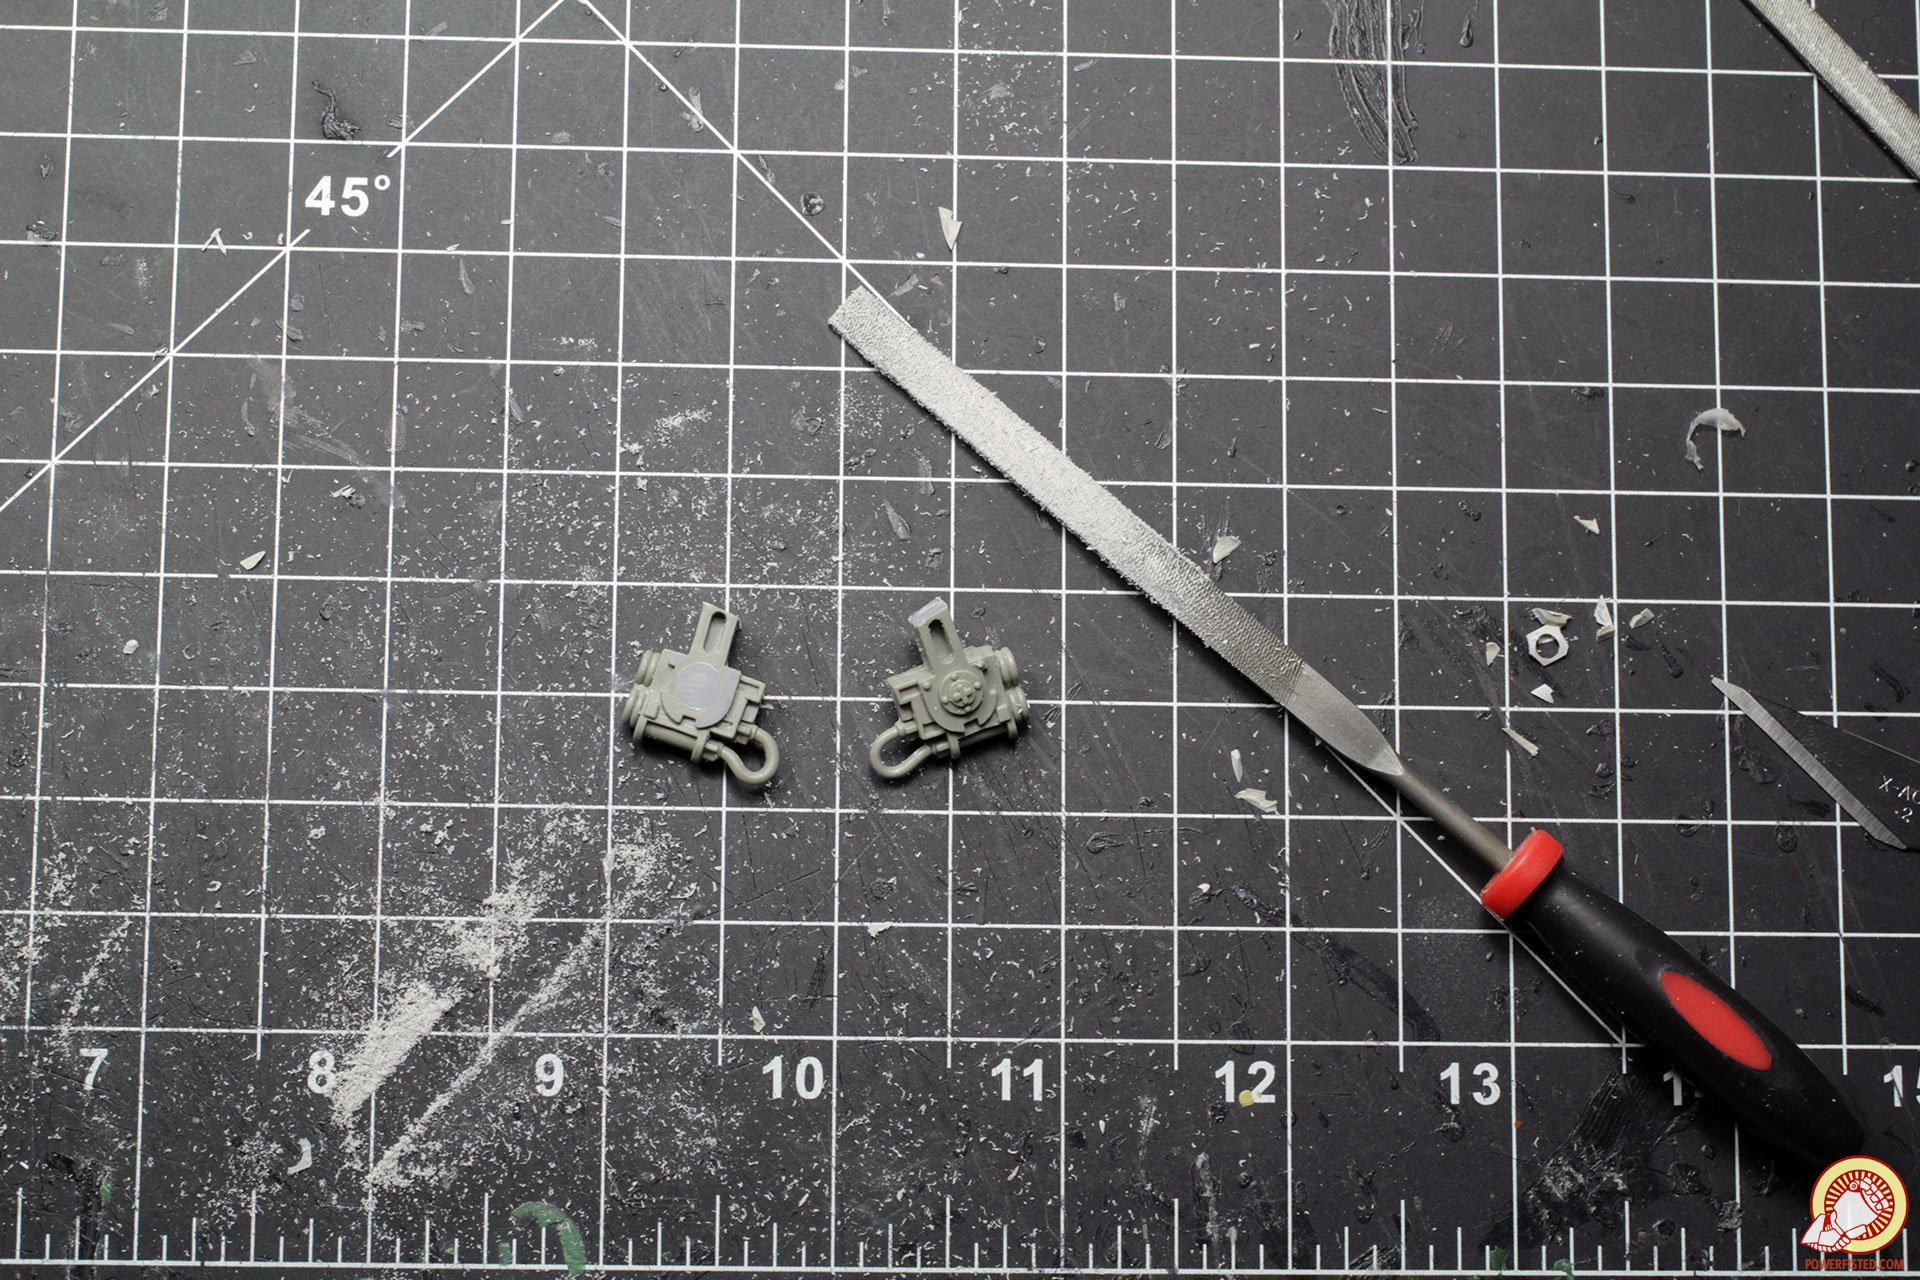
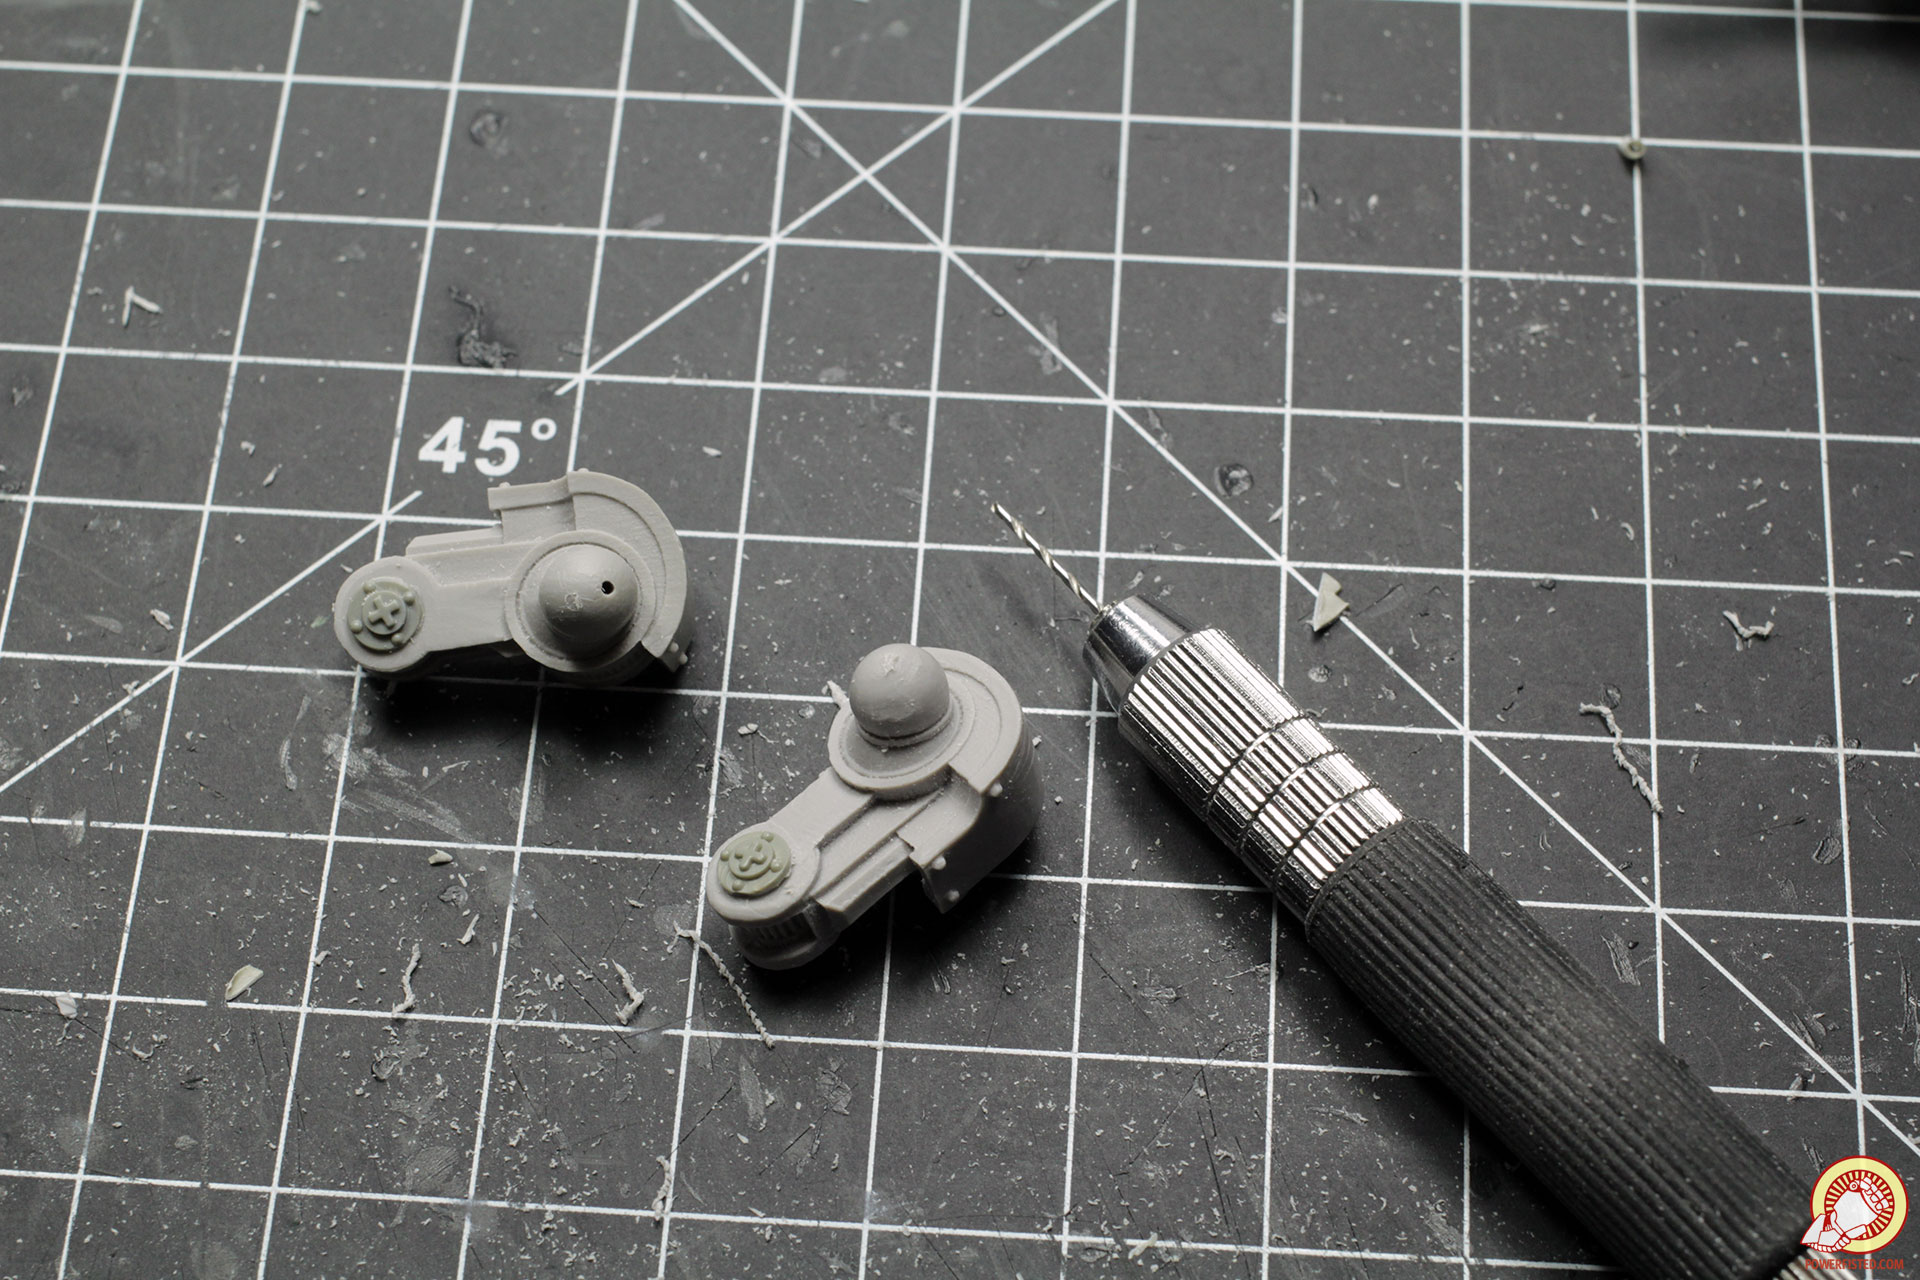
I use the same chisel to remove the hubcaps and a small detail piece from the orphaned sentinel legs. I chop off any excess material and file the undersides flat by rubbing the bits against my miniature file. If you’re using a course file, be careful not to remove too much material.
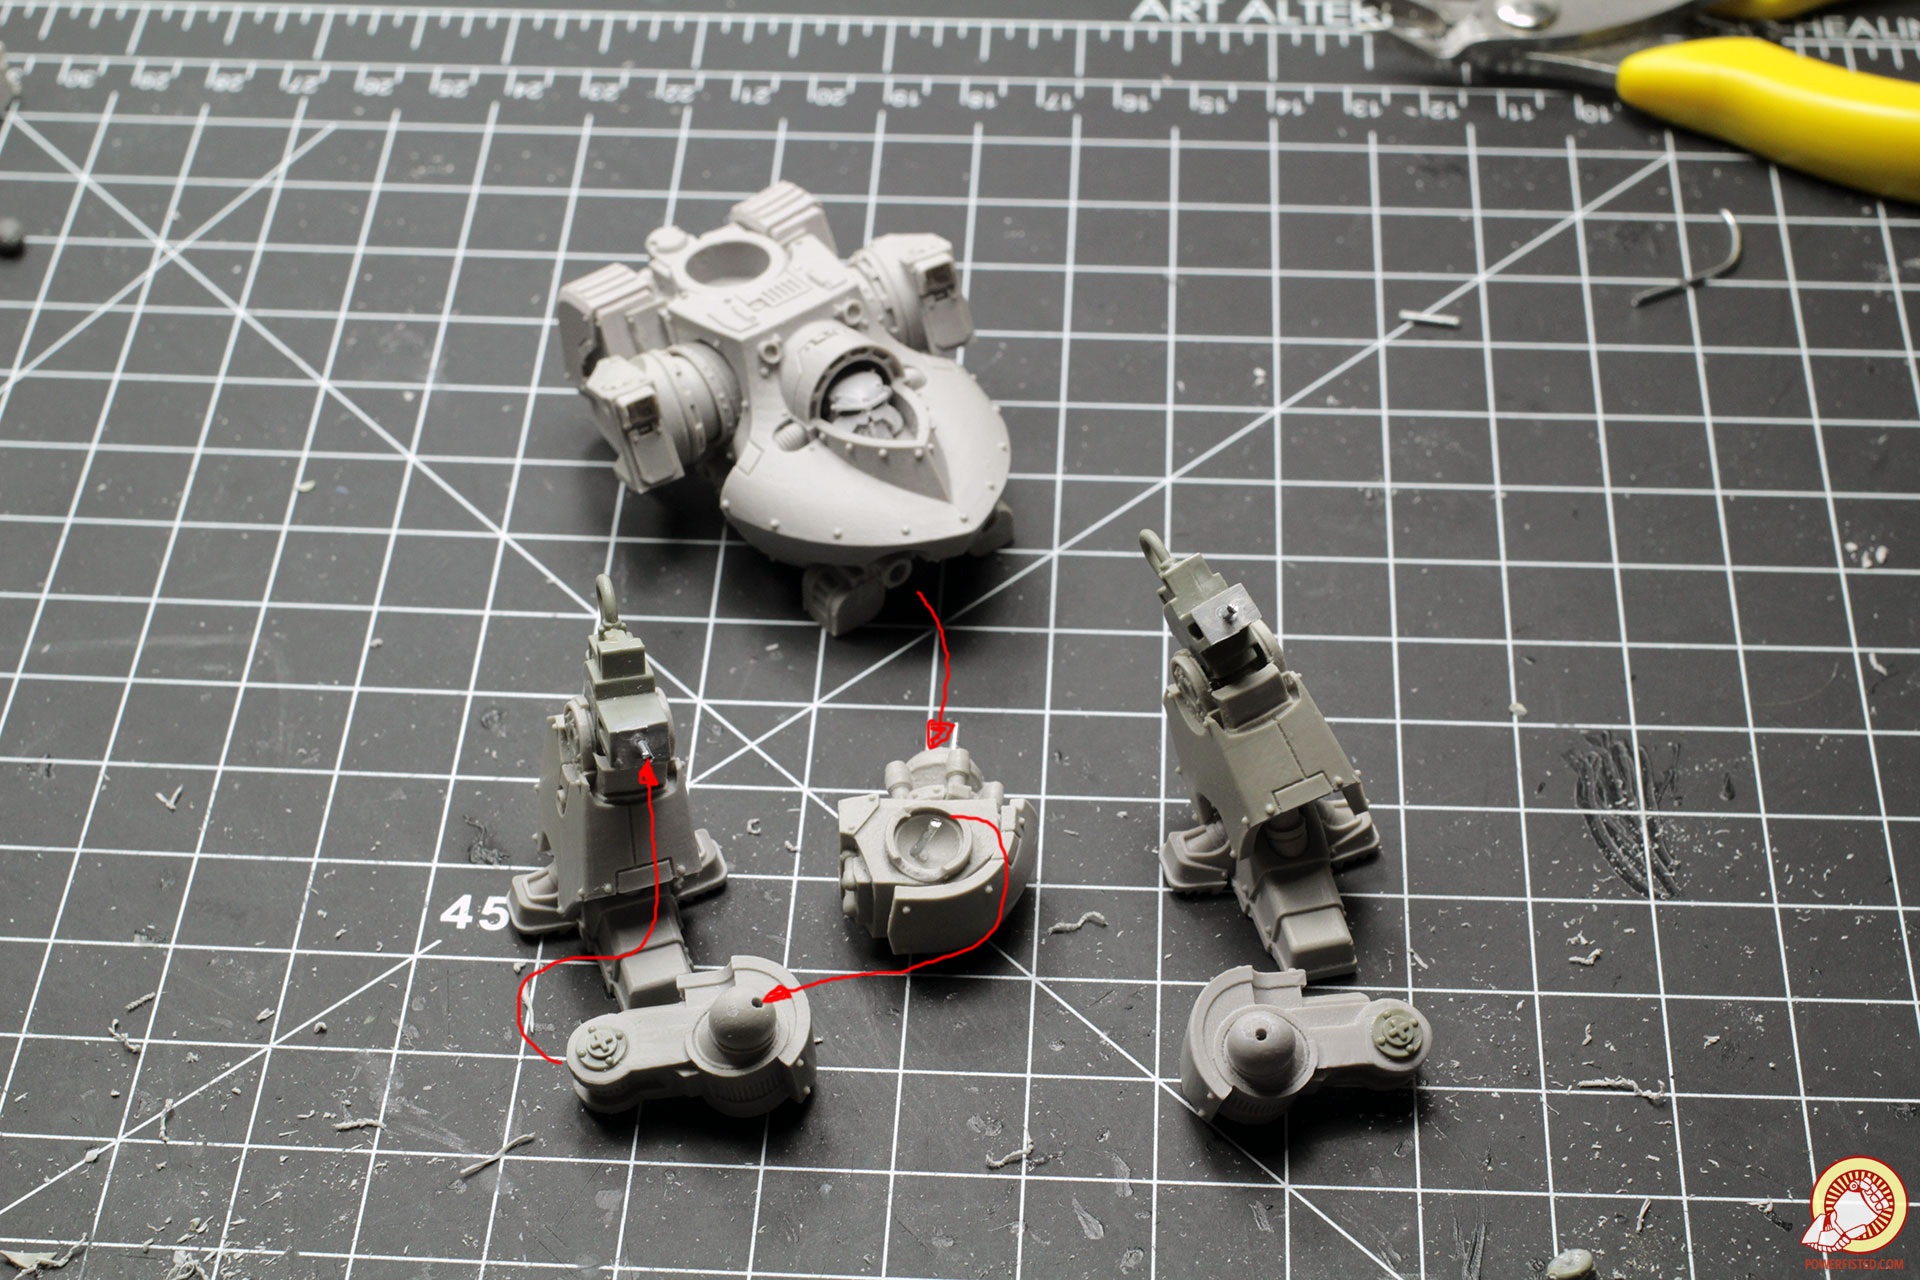
The hubcap bits can now be glued onto the lower ends of the upper legs.
I scour and then make the second cuts into my sentinel legs. Depending on your pose, you may need to take additional length off these down the road. At this point keep your cuts conservative- it’s easier to remove material than to add it. Follow up all cuts with a file in order to smooth out any imperfections.
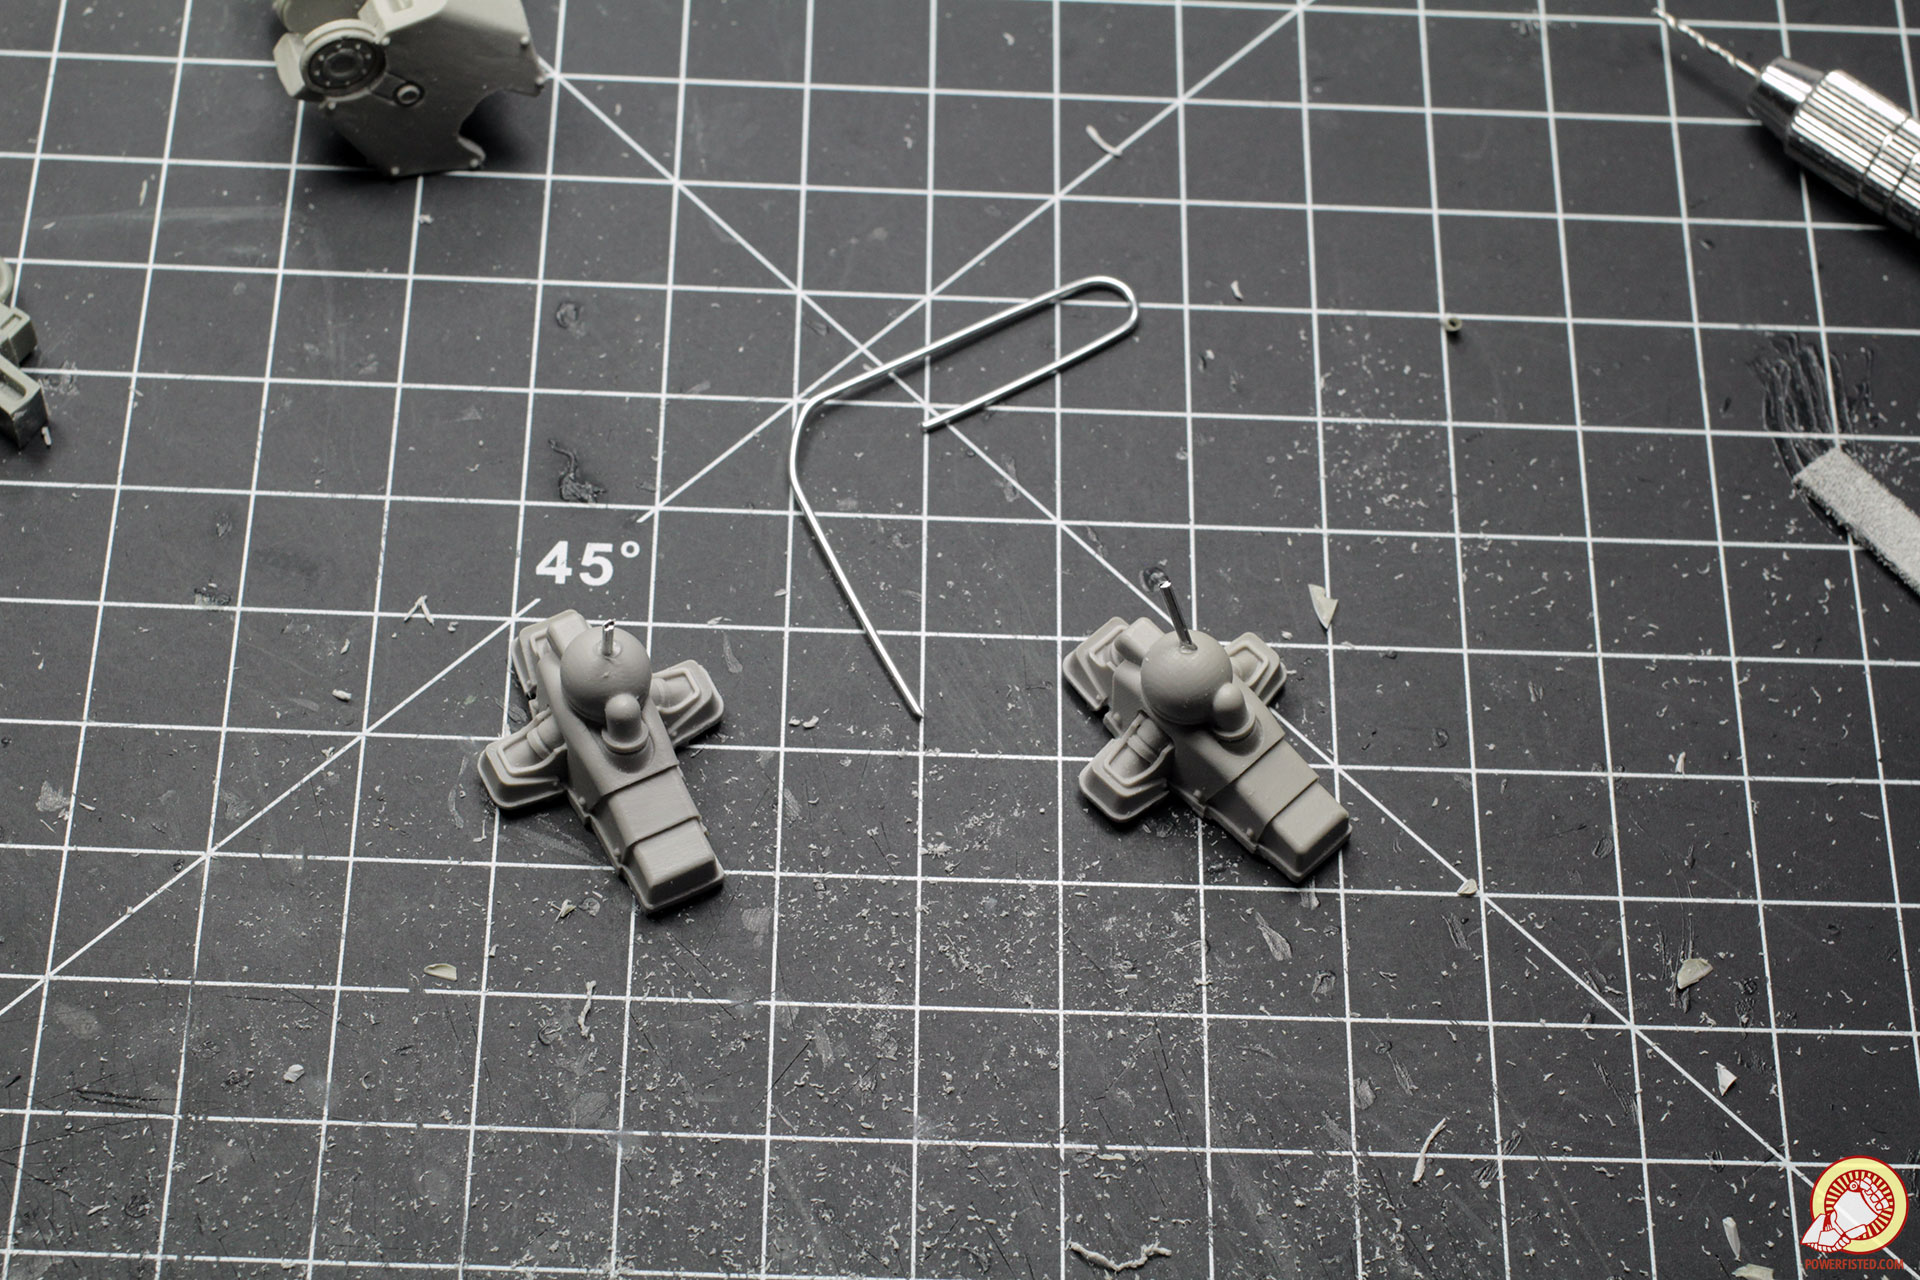
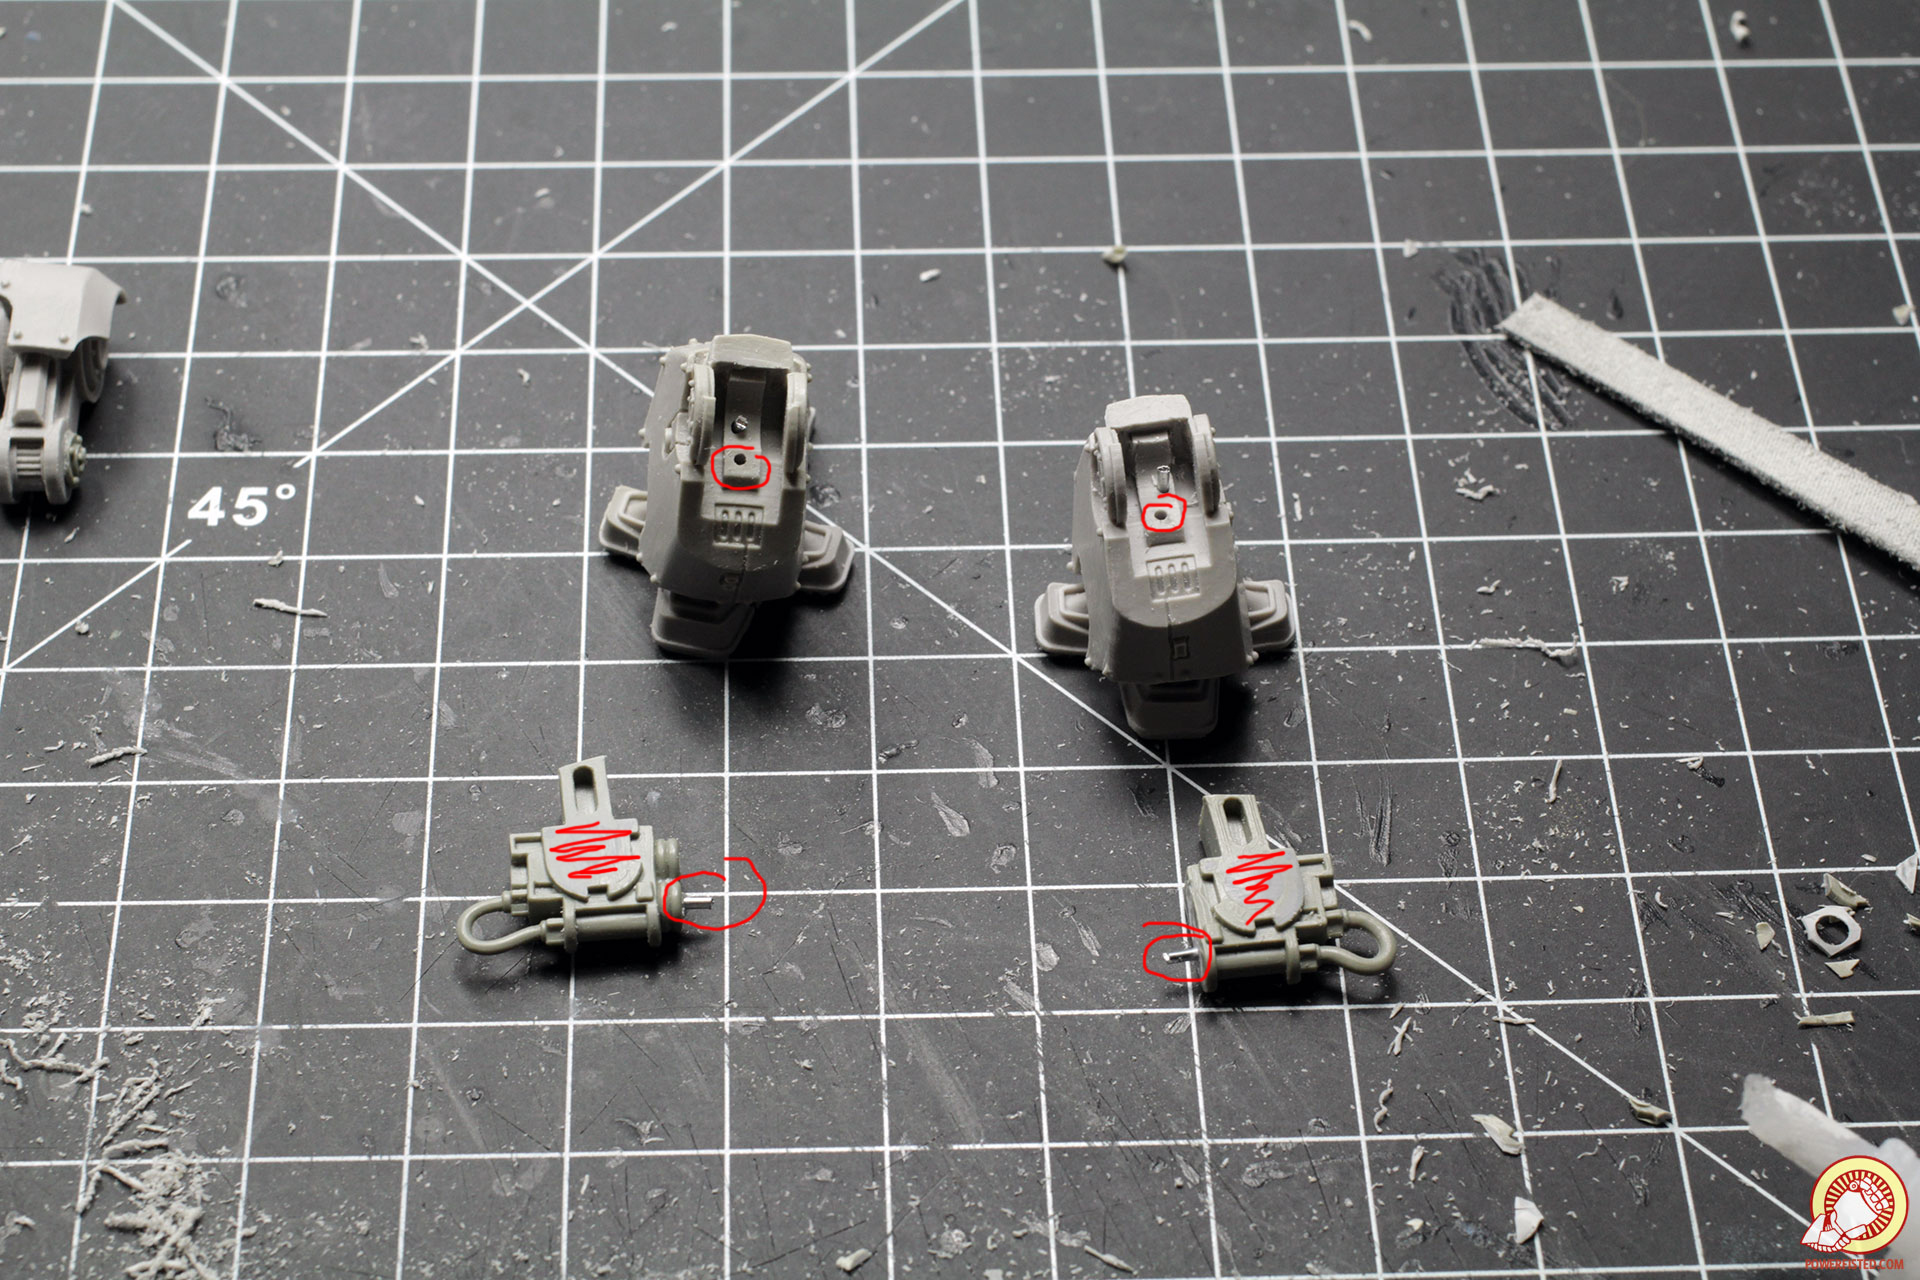
From here we can assemble the rest of the legs starting with the feet. Pin the joints on these based on how you expect the feet of your deredeo to be planted. In my case, the right foot will be further outwards so the pin is done at an angle.
After the pins are in place, pose the calves ontop of the feet in the way that makes the most sense for your pose. Apply pressure and use the feet pins to scour the exact spots you will need to drill your pilot holes. This is a nifty trick for when you need to mark a pin hole on angled or irregular joints. After the pilot hole is scoured, drill it out, and attach your feet to your calves.
If your pins come out from the tops a little, it’s no problem. If they come out too much, clip them back. Bend and adjust them as needed to achieve a realistic and natural looking pose for the lower legs.
At this point I glue pins into the hip joints of the pelvis. Because of my specific pose, I angle them in at an angle that favors the opposite directions that each leg will be pivoted. Avoid using a single pin to connect both legs to the pelvis as it will not easily allow you to make adjustments during the final stages of assembly.
Using the scouring technique that I used to mark the pilot holes in the calves, I scour and drill out holes in the upper legs.
Dry fitting the upper legs to the pelvis… looks pretty good. If yours doesn’t, don’t worry- you’ll have more opportunities to make adjustments later.
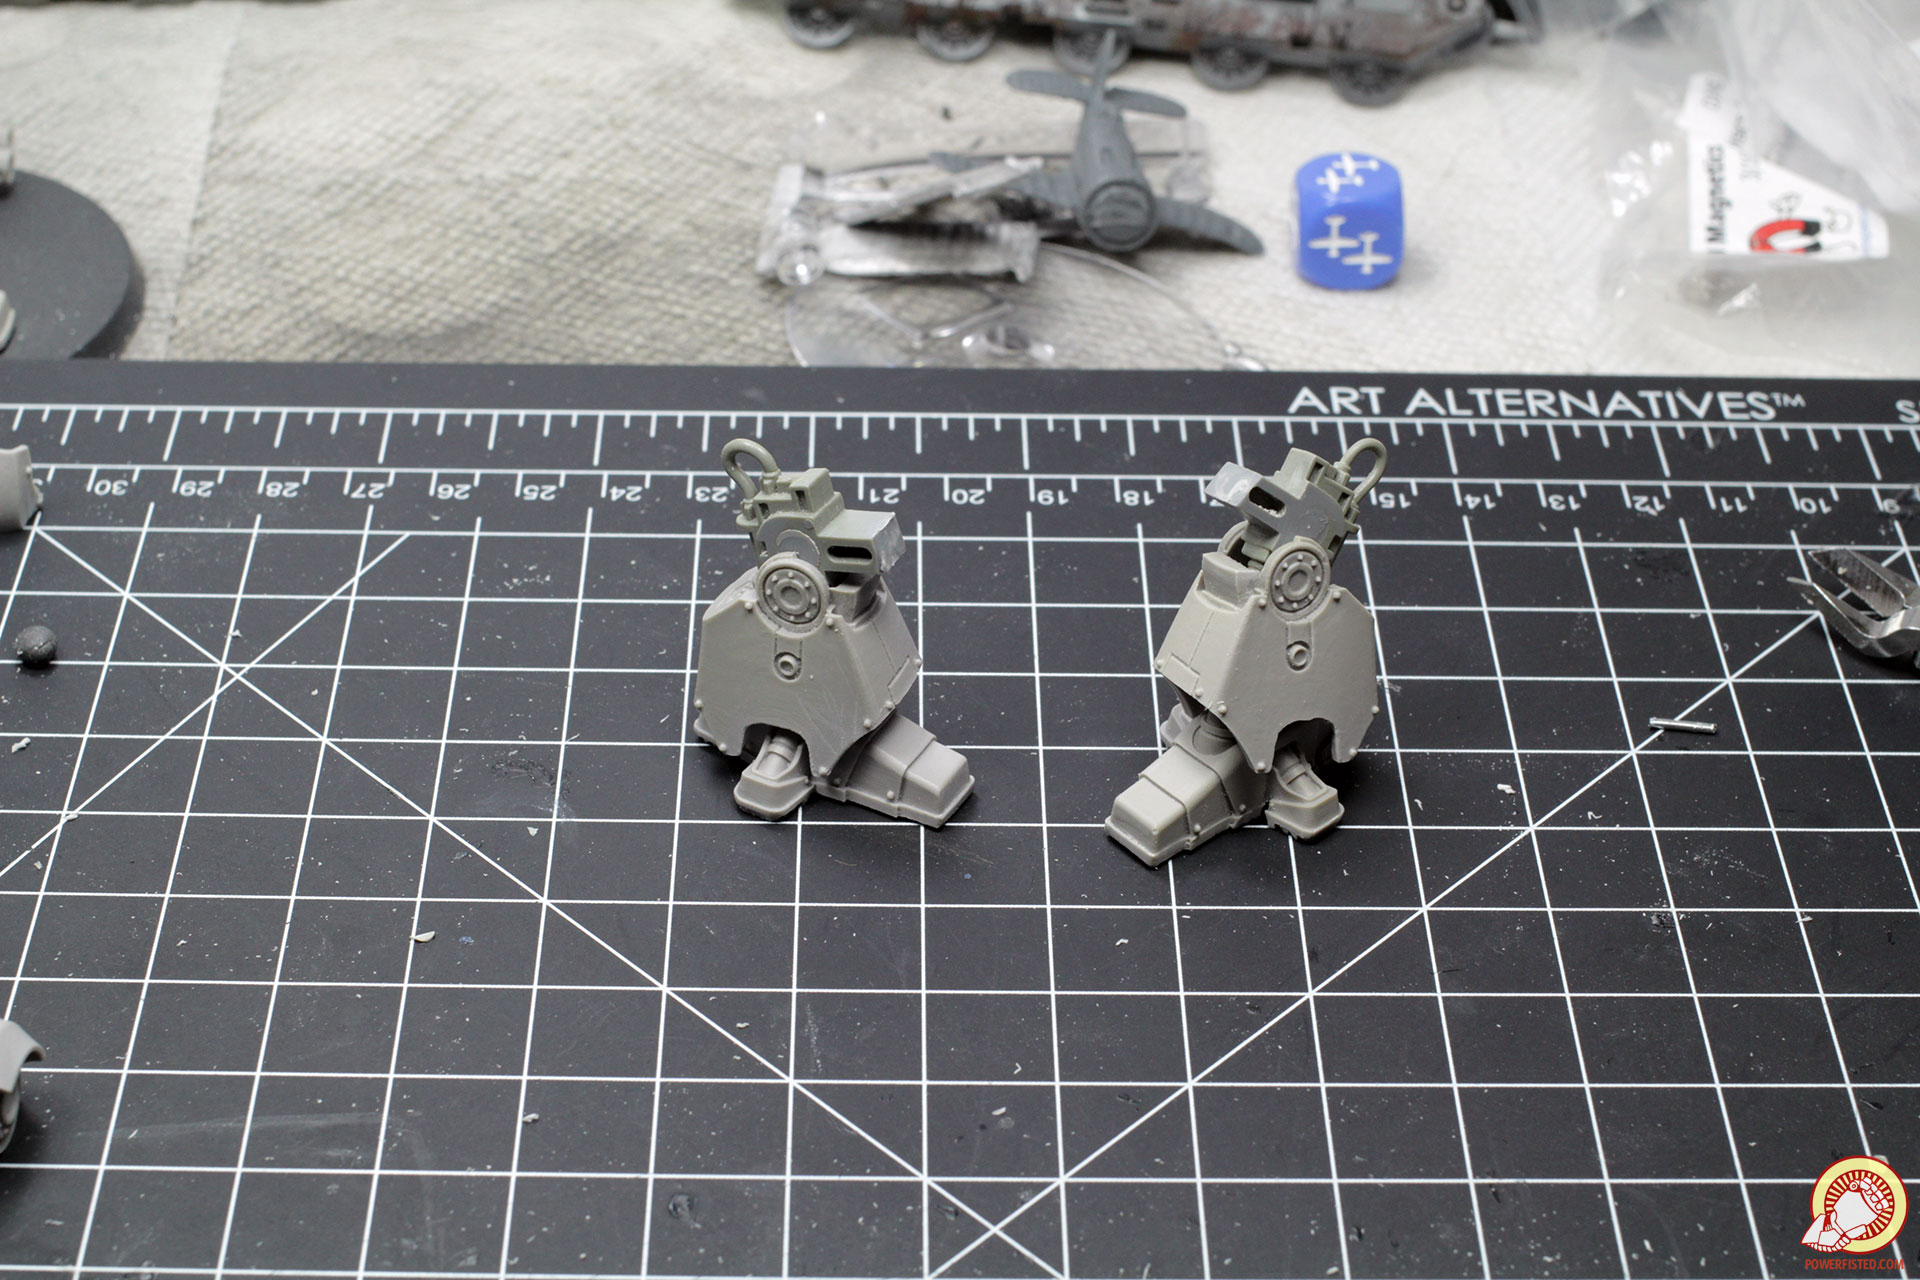
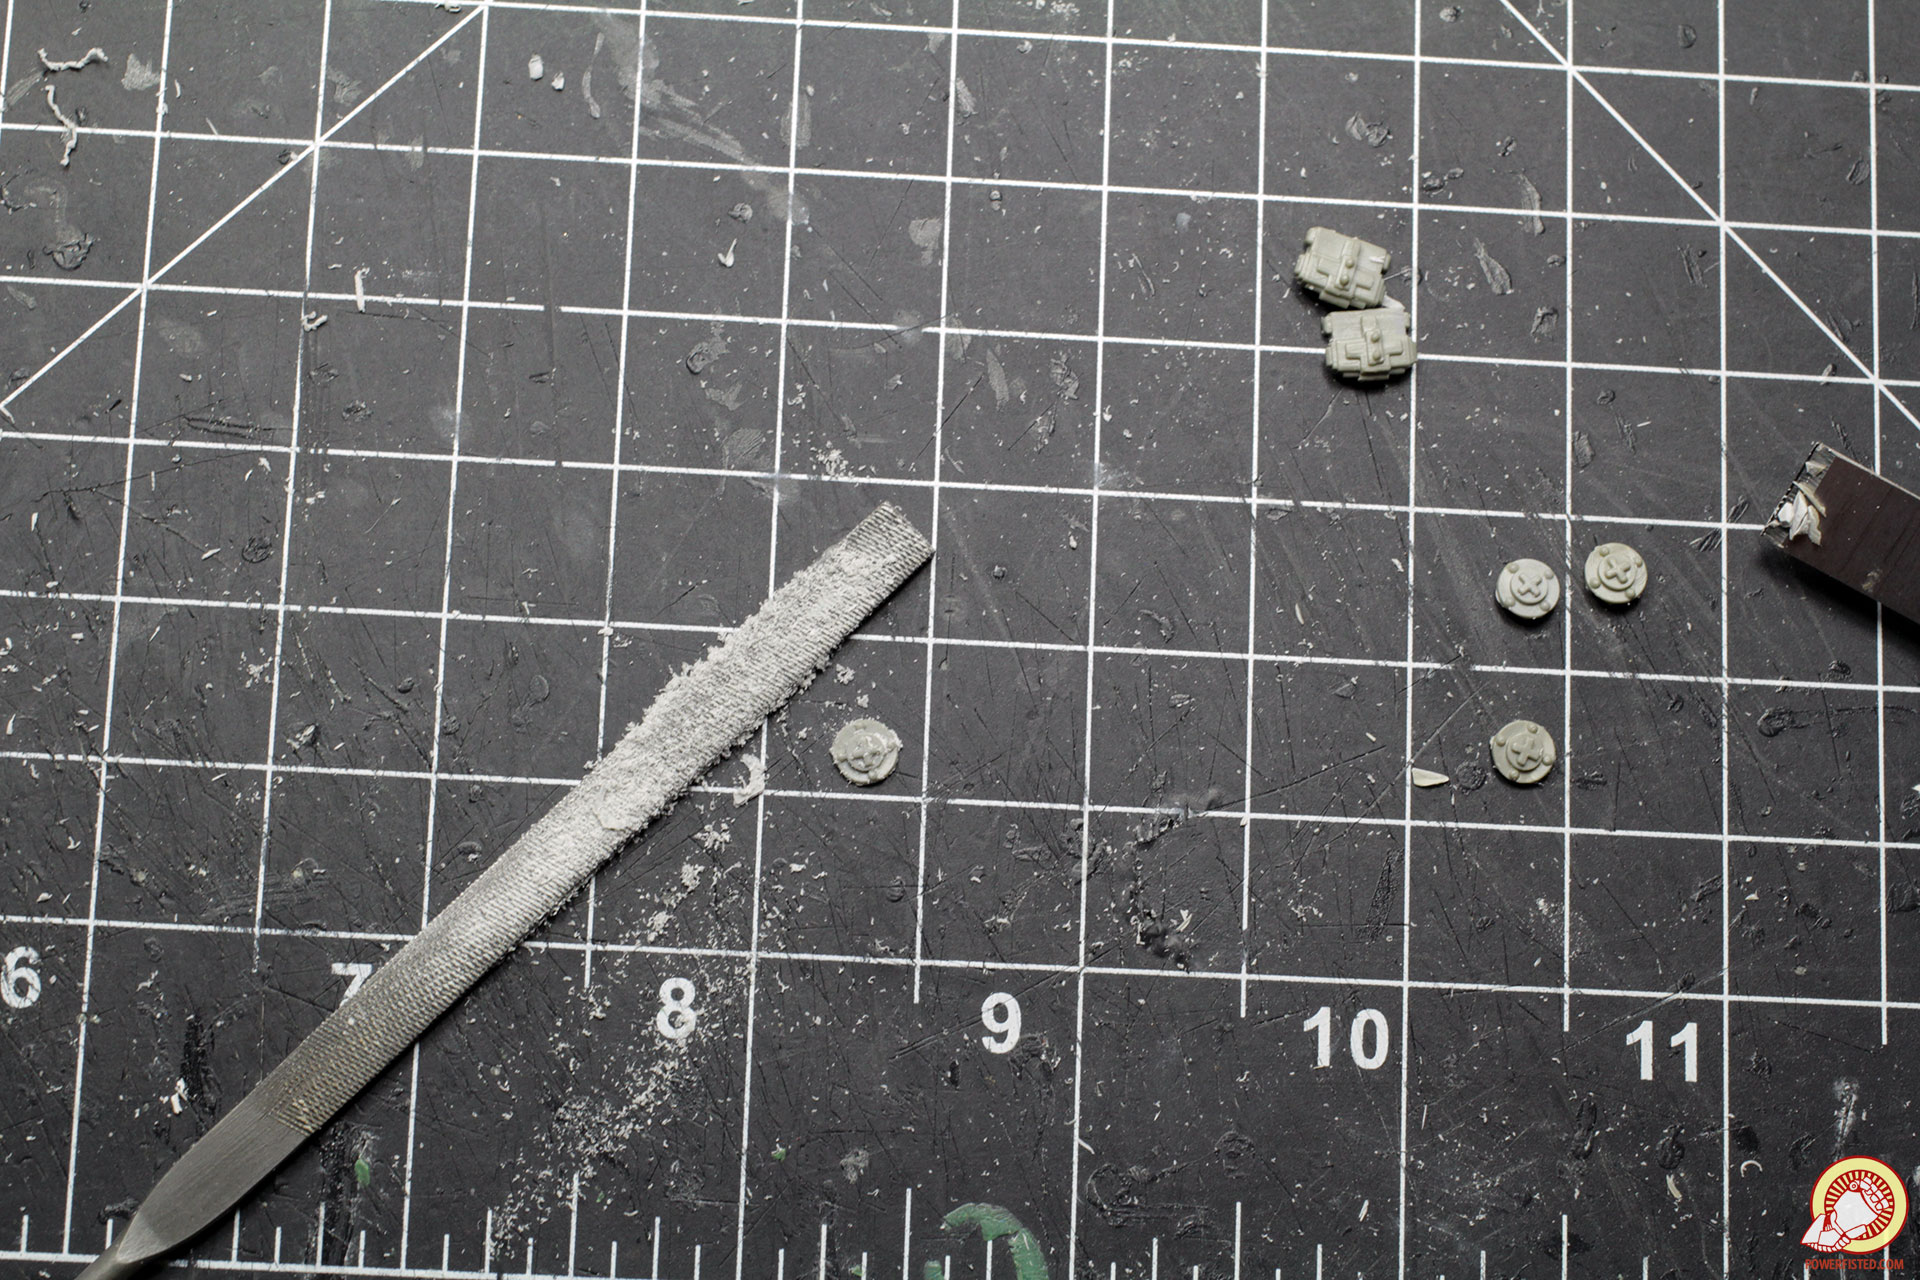
Using a miniature file, I removed the hubcaps from the sentinel leg bits. The pieces fit perfectly into the calves now, but to hold up the rest of the dreadnaught required a pin. To do this, I glued pins into the bottoms of the sentinel legs and drilled a second set of pilot holes in the calves.
The pieces should now fit nearly perfectly, but may require some adjustment based on the pose. In my case I had to remove a bit of material near where I put the lower pins. Because these are the pieces that connect the legs, the sides connecting to the upper legs will also need to be pinned. Carefully glue pins into the upper ends while making sure a healthy amount is left to connect into the pilot hole you will drill into the lower upper leg.
Here we go. We’re ready to put together all the puzzle pieces: the pelvis to the upper legs, the upper legs to the sentinel legs, the sentinel legs to the calves, and the calves to the feet. Because you’ve only glued in one end of the pins, you have many degrees of movement and an ability to adjust the pose of your legs on the fly. When you’re ready, apply glue and balls of grey stuff to the hip joints. Put them together and then continue downward- applying glue to the unglued pins, putting them into their pilot holes, and then adjusting the pose to make sure it looks good. This may require some fiddling on your part, but once complete, your deredeo will finally stand on it’s own legs!
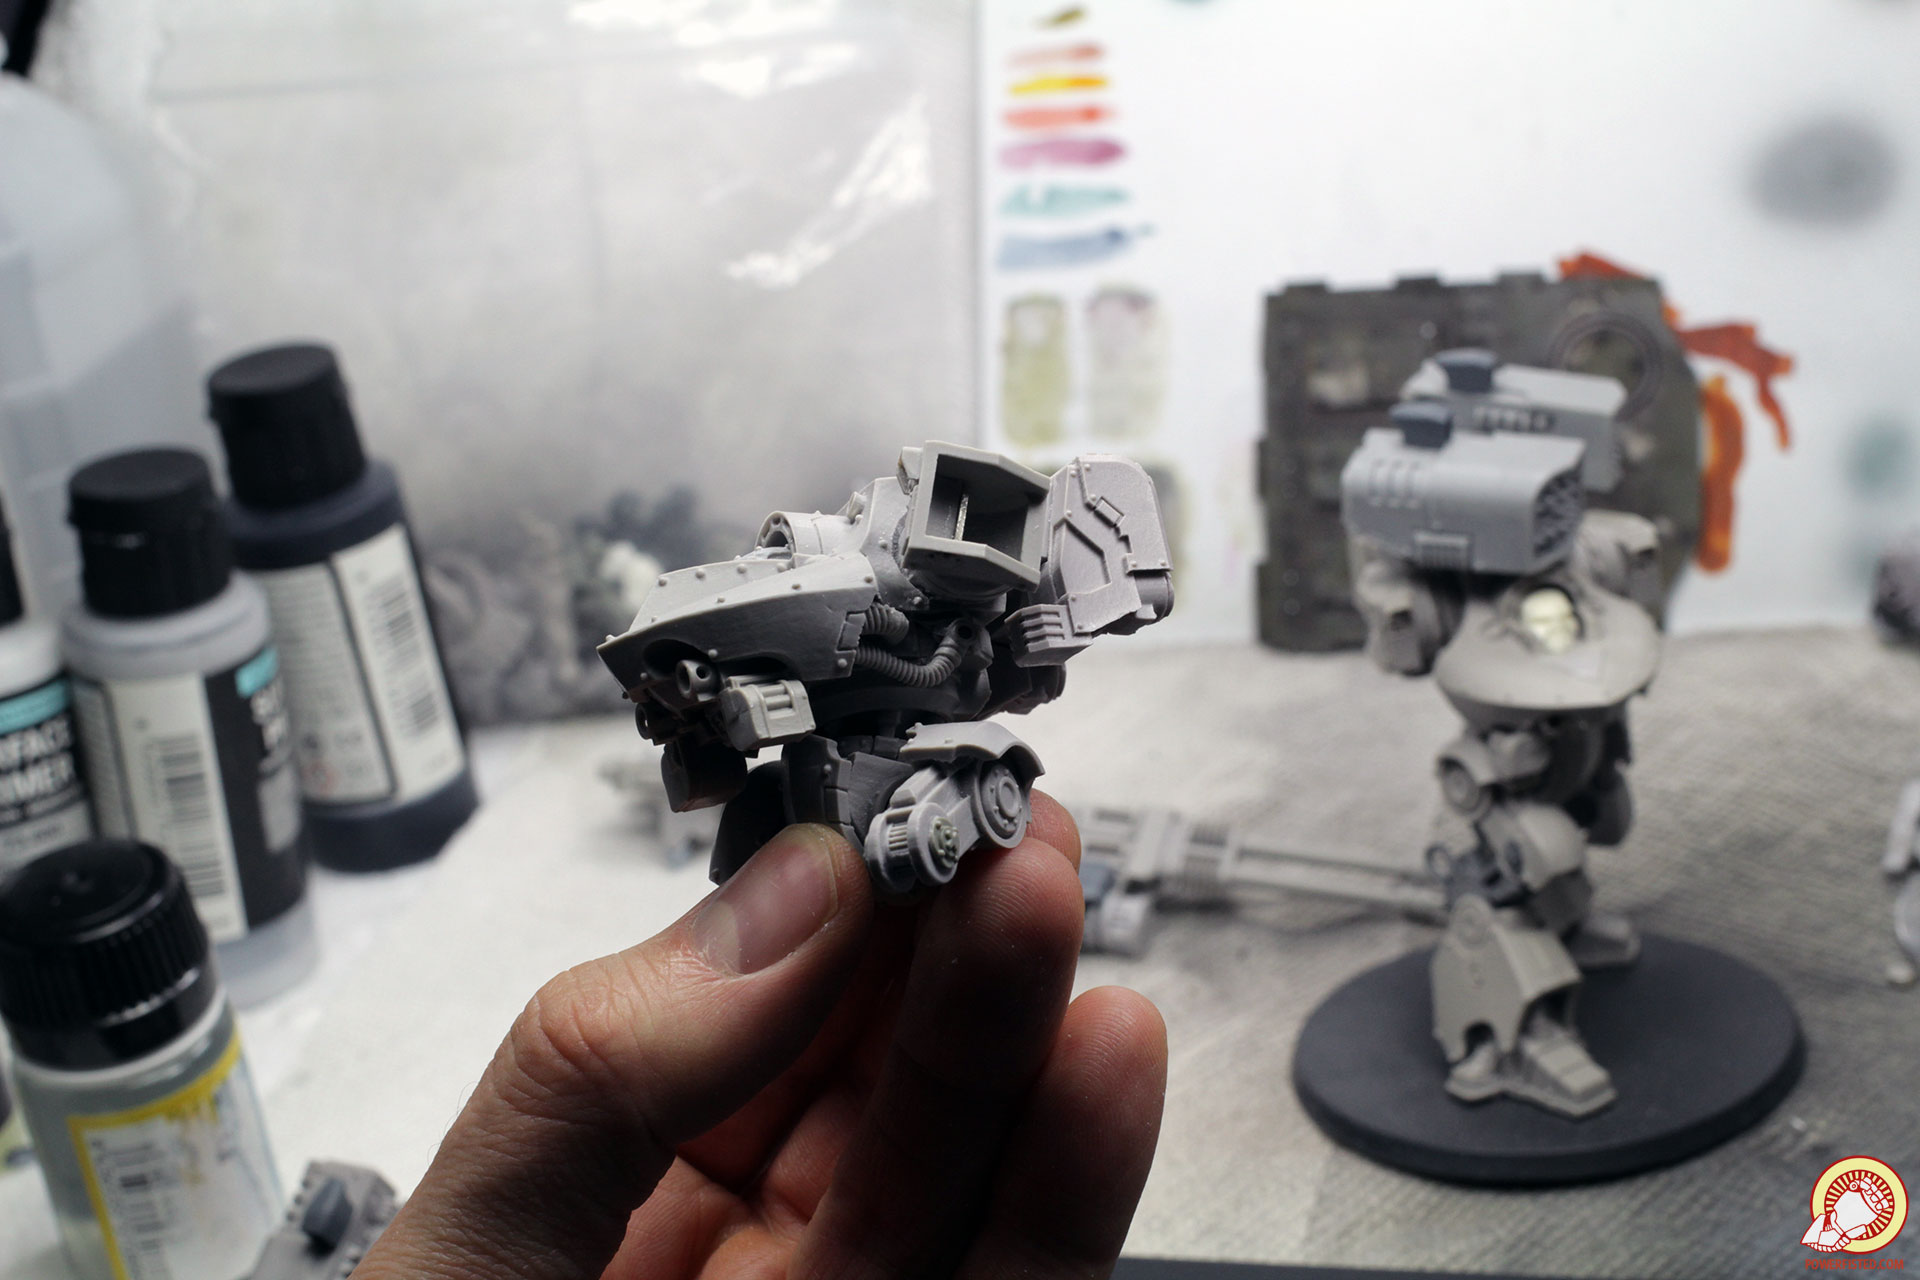
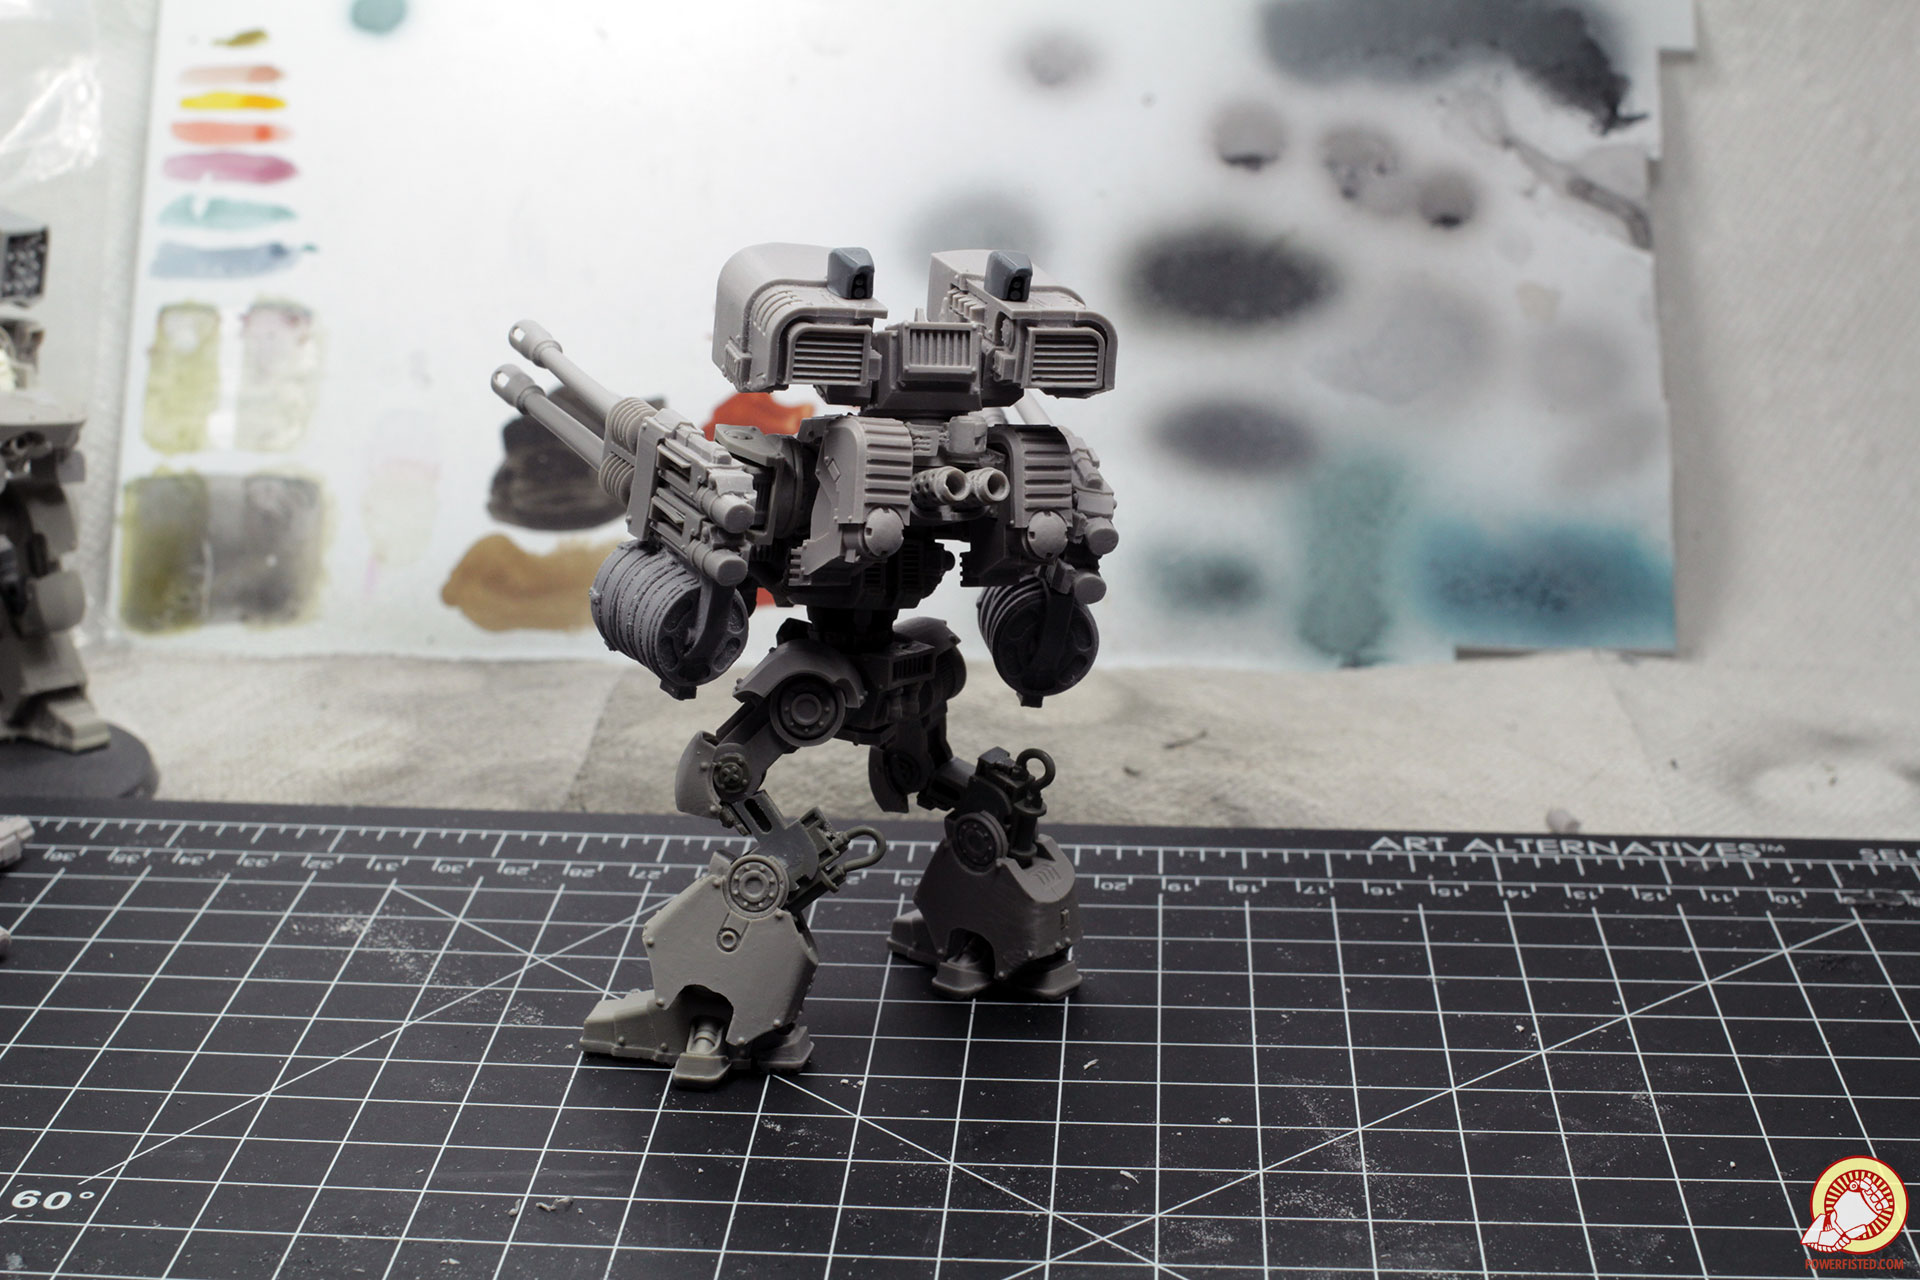
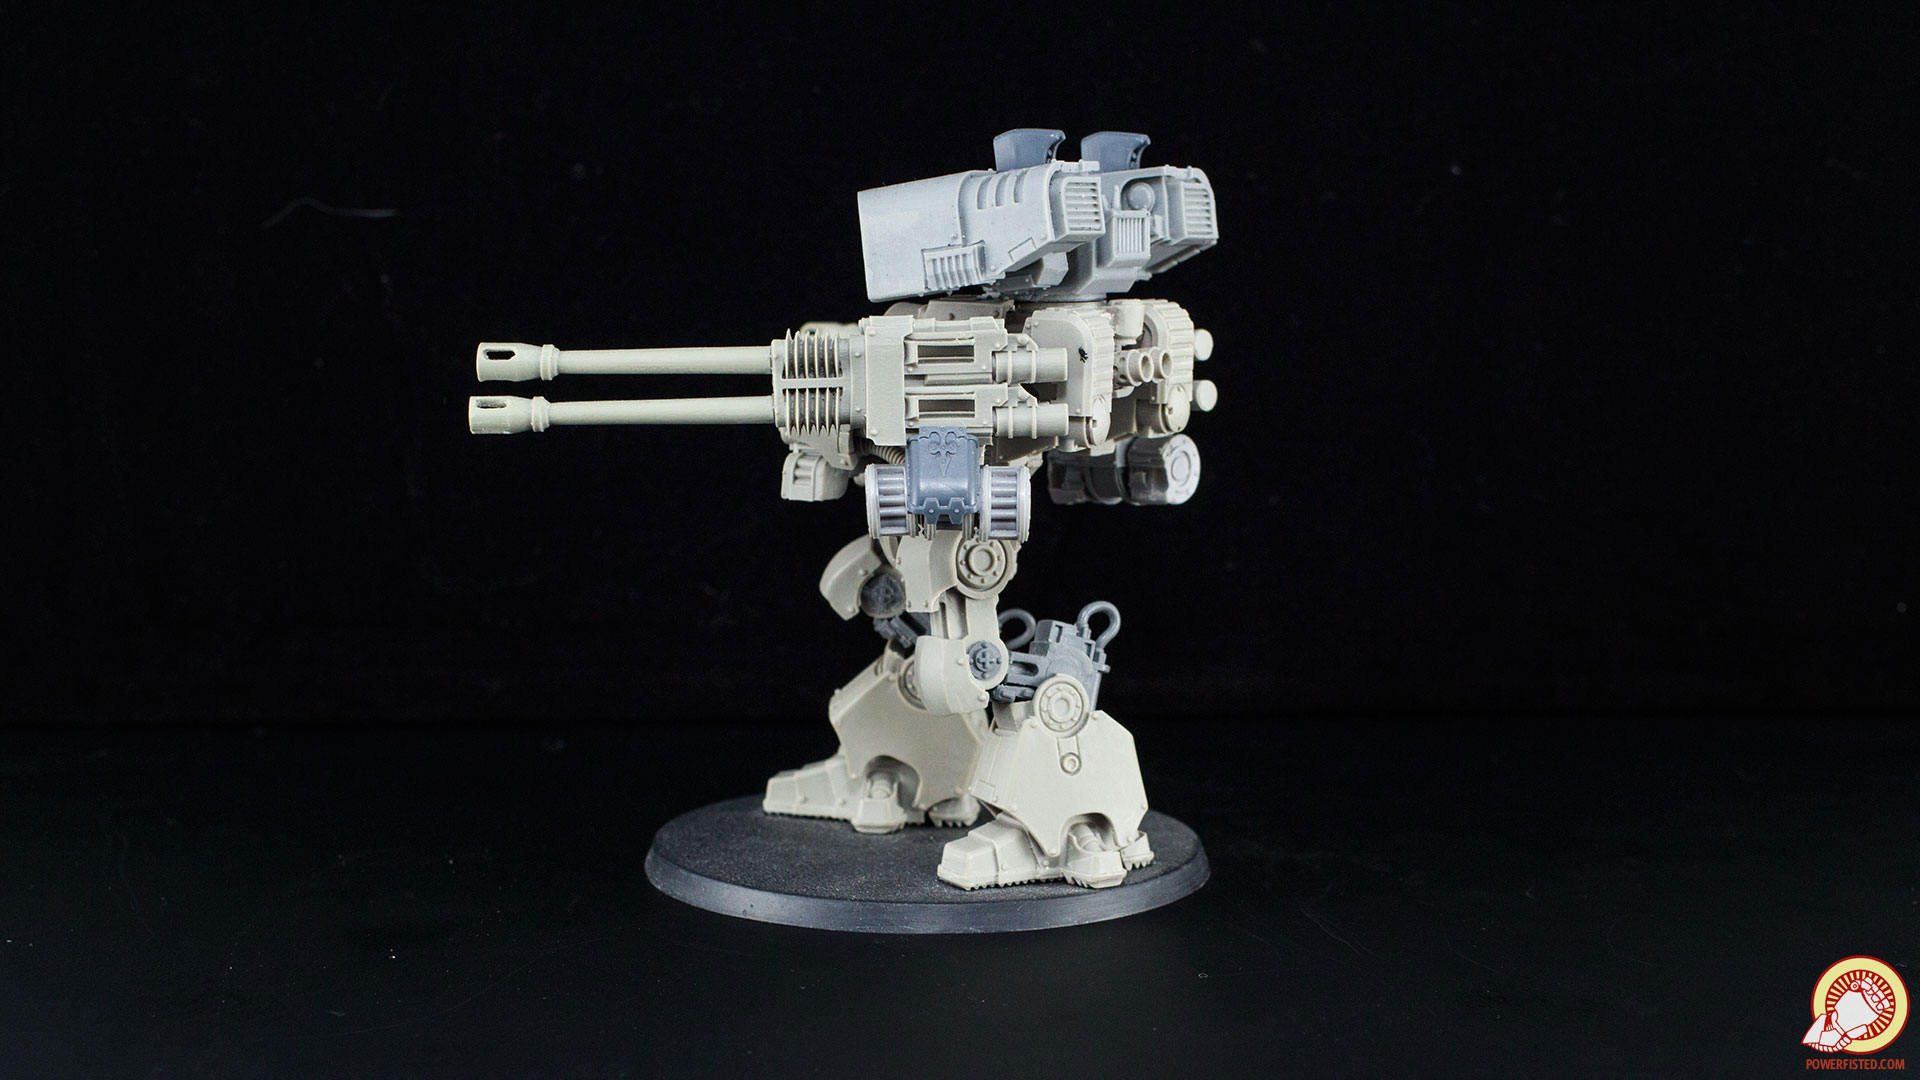
Here’s how mine turned out. Not bad at all.
With the hardest part complete, the knees are easy business. I used a miniature file to widen the mounting groves on the reverse sides. After dry fitting, I glued them into place along with the square detail sections from the orphaned sentinel legs.
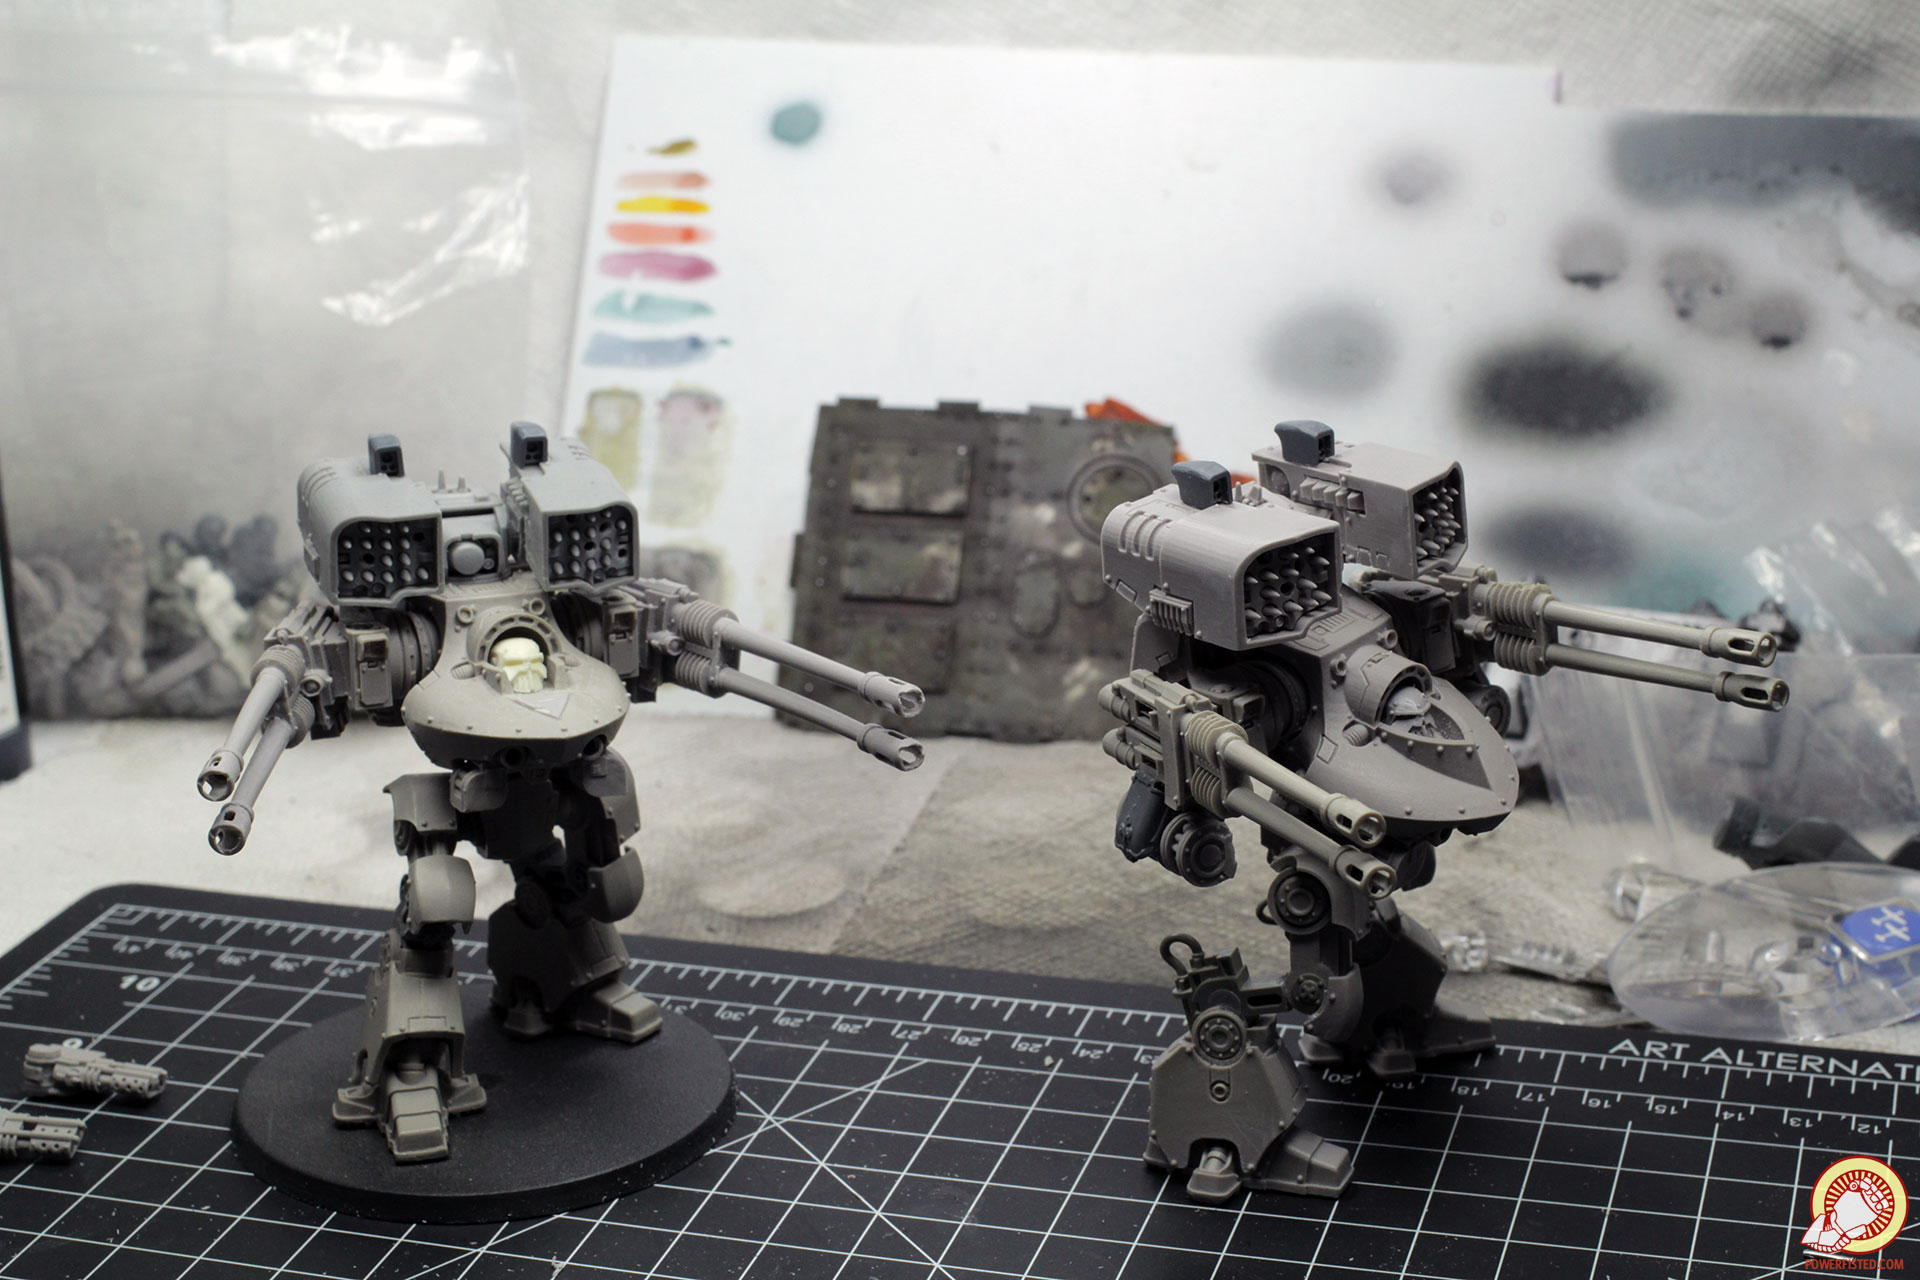
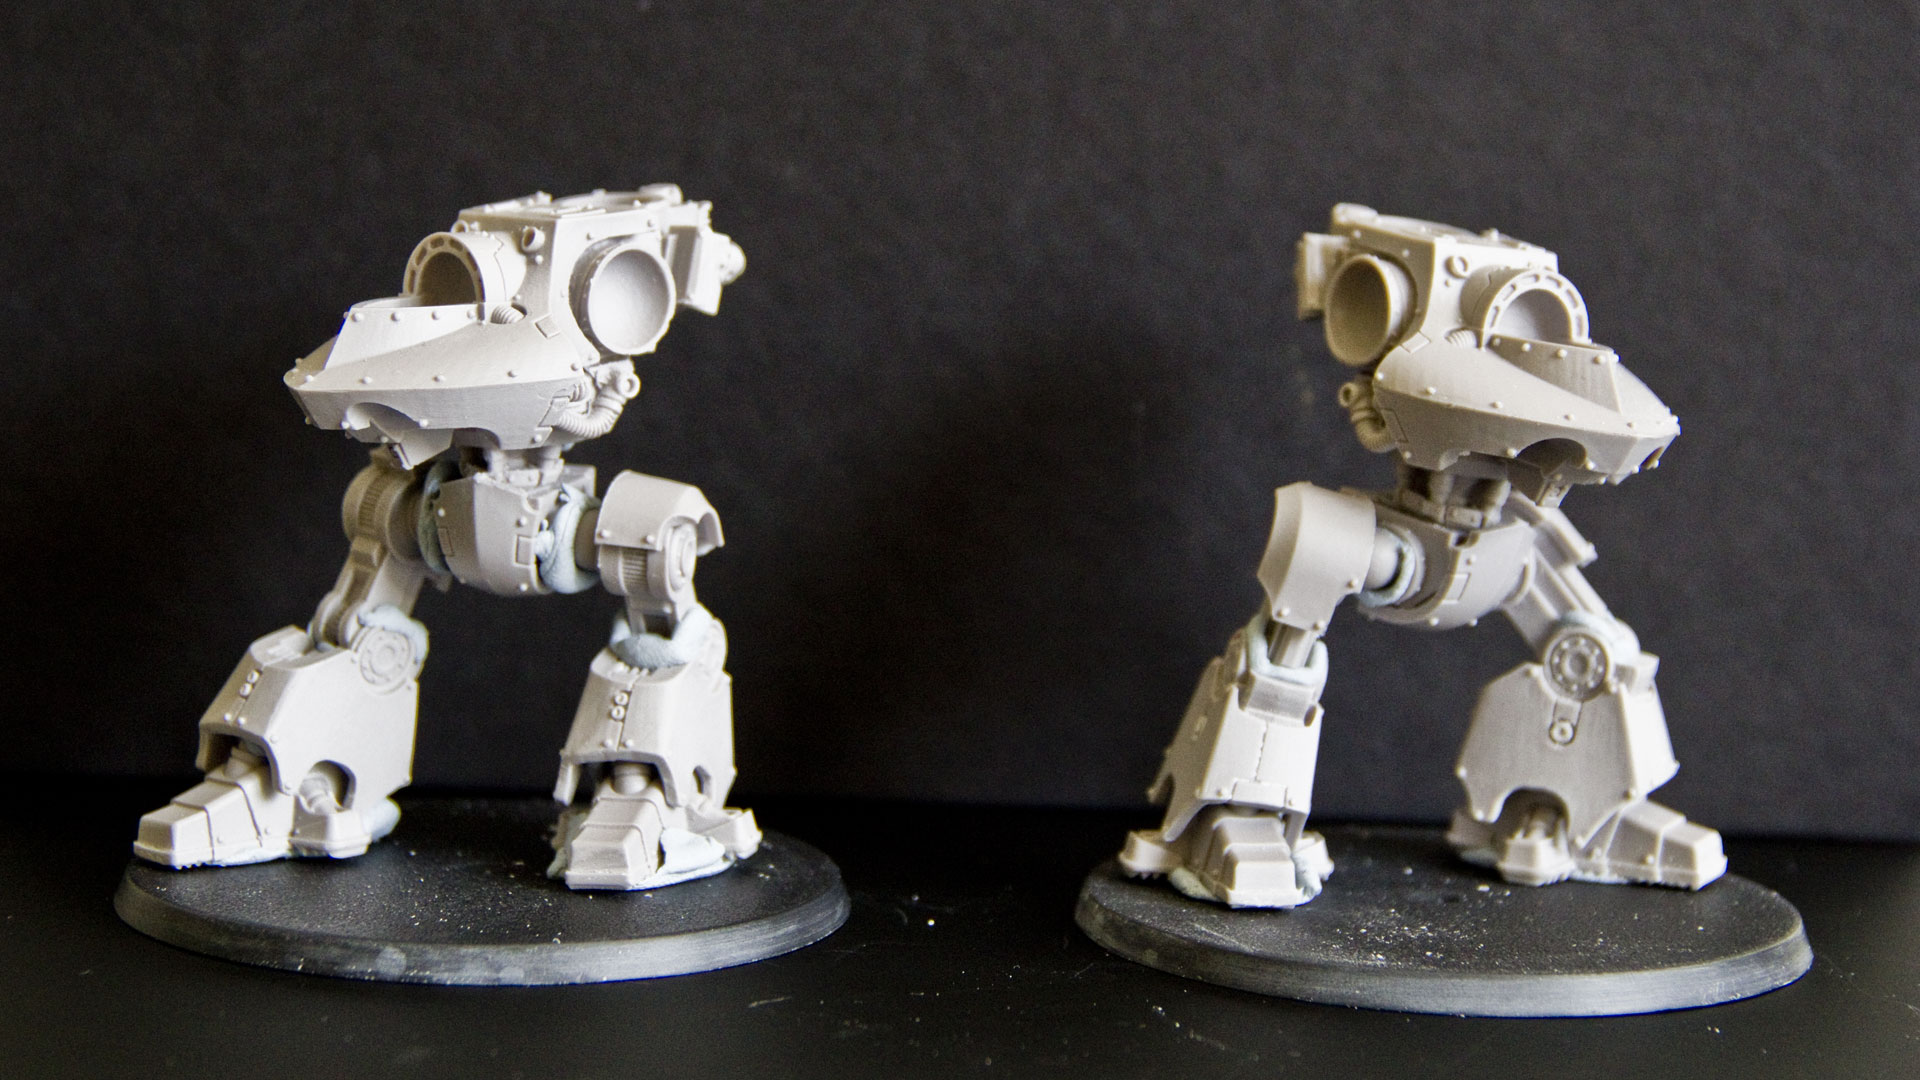
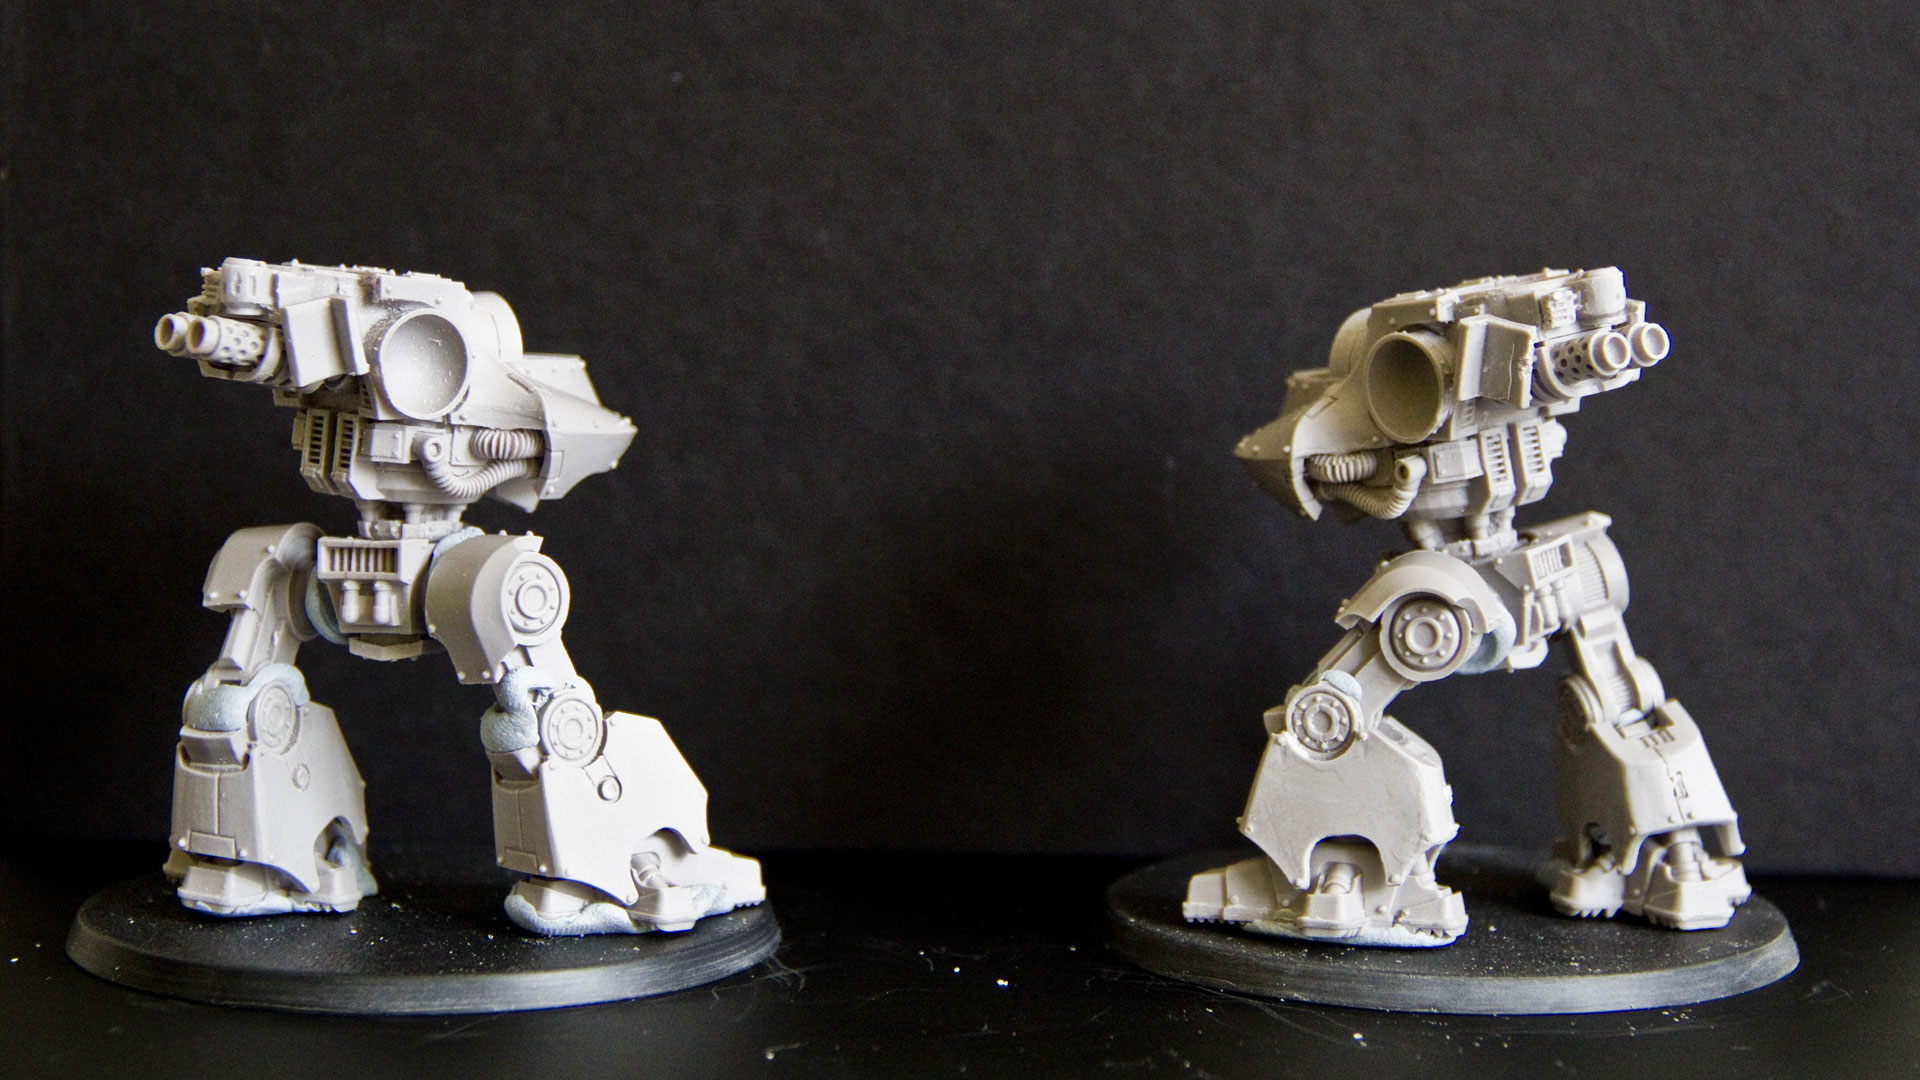
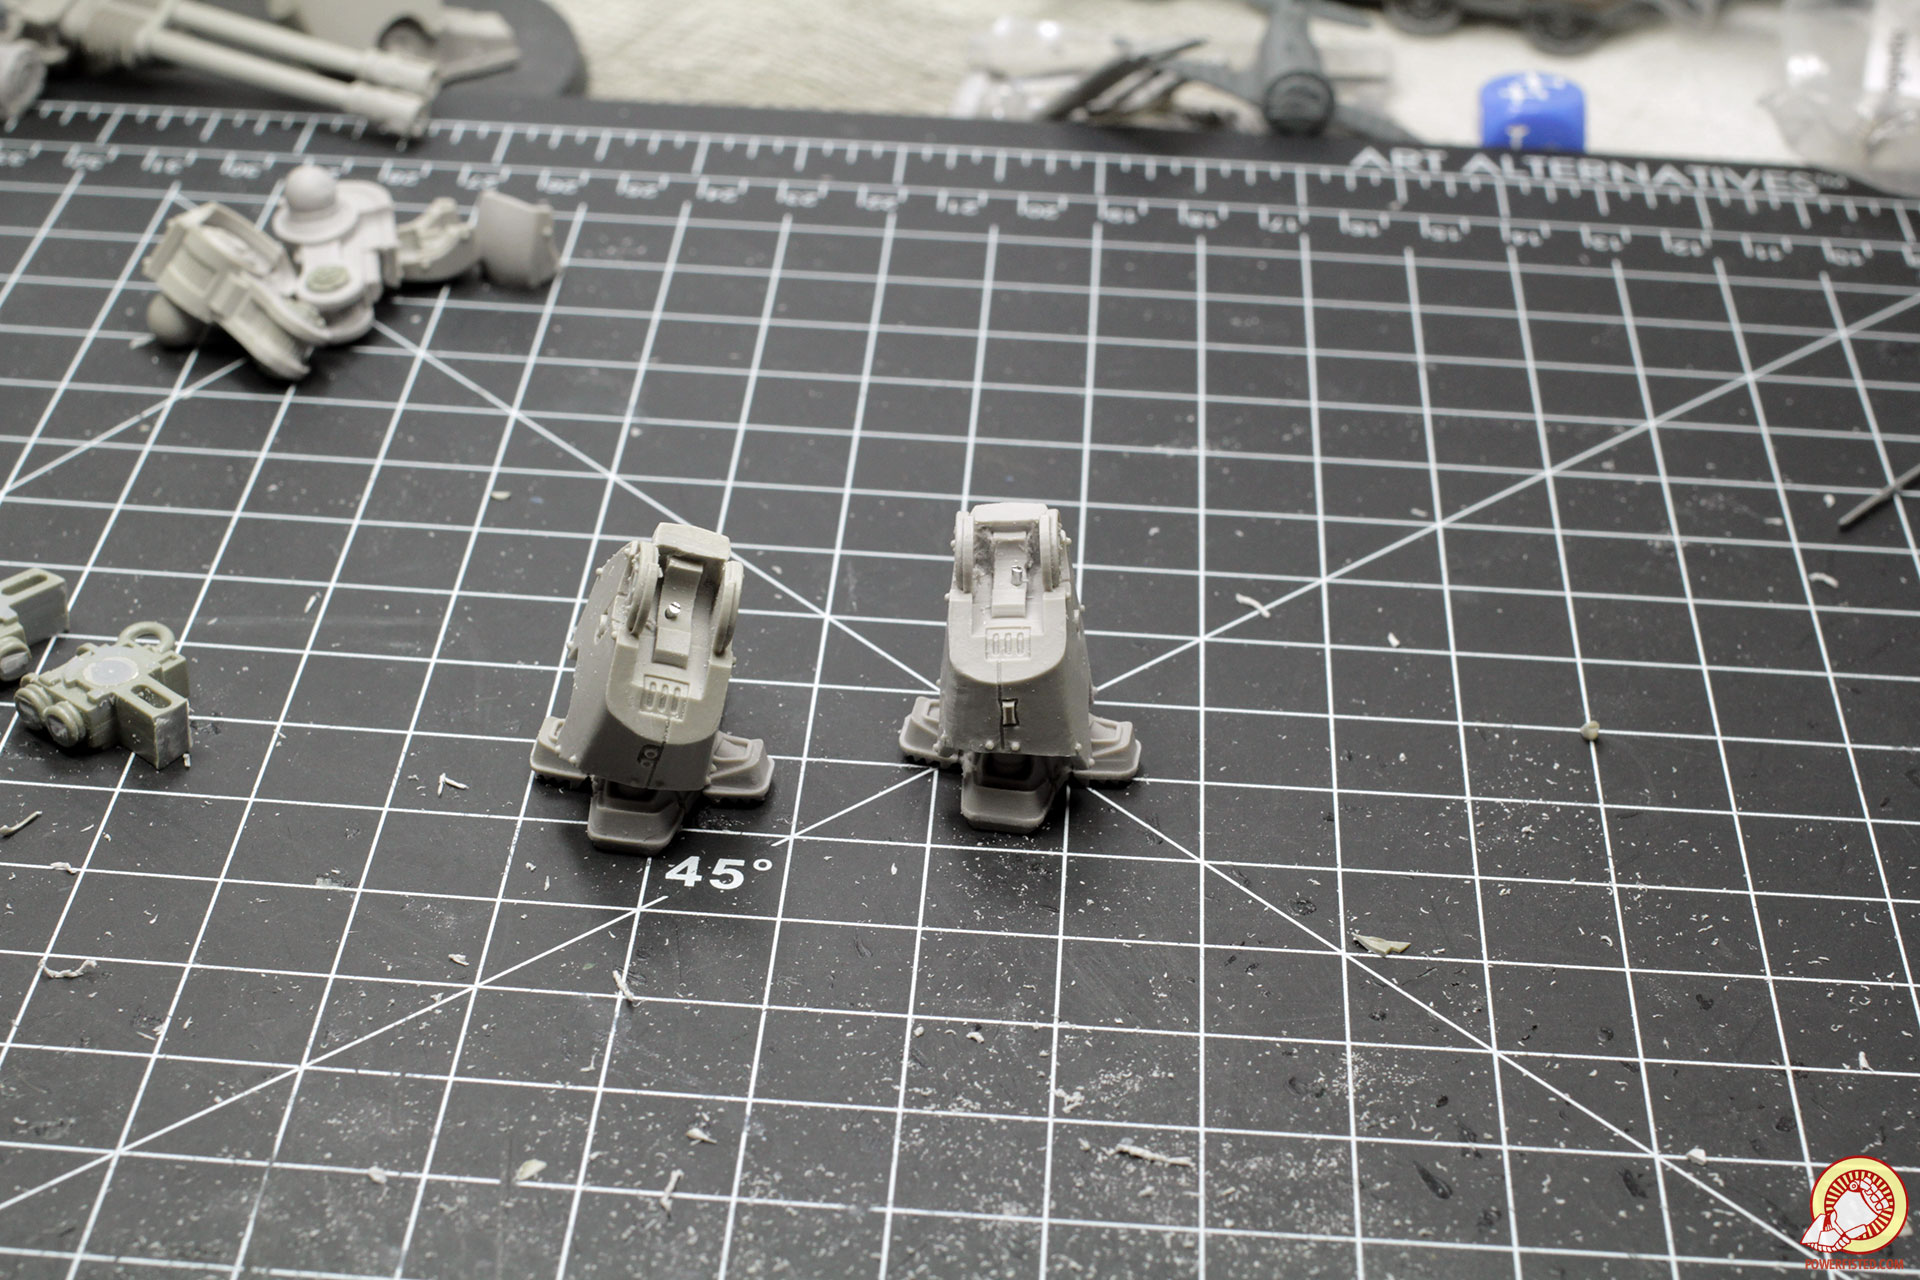
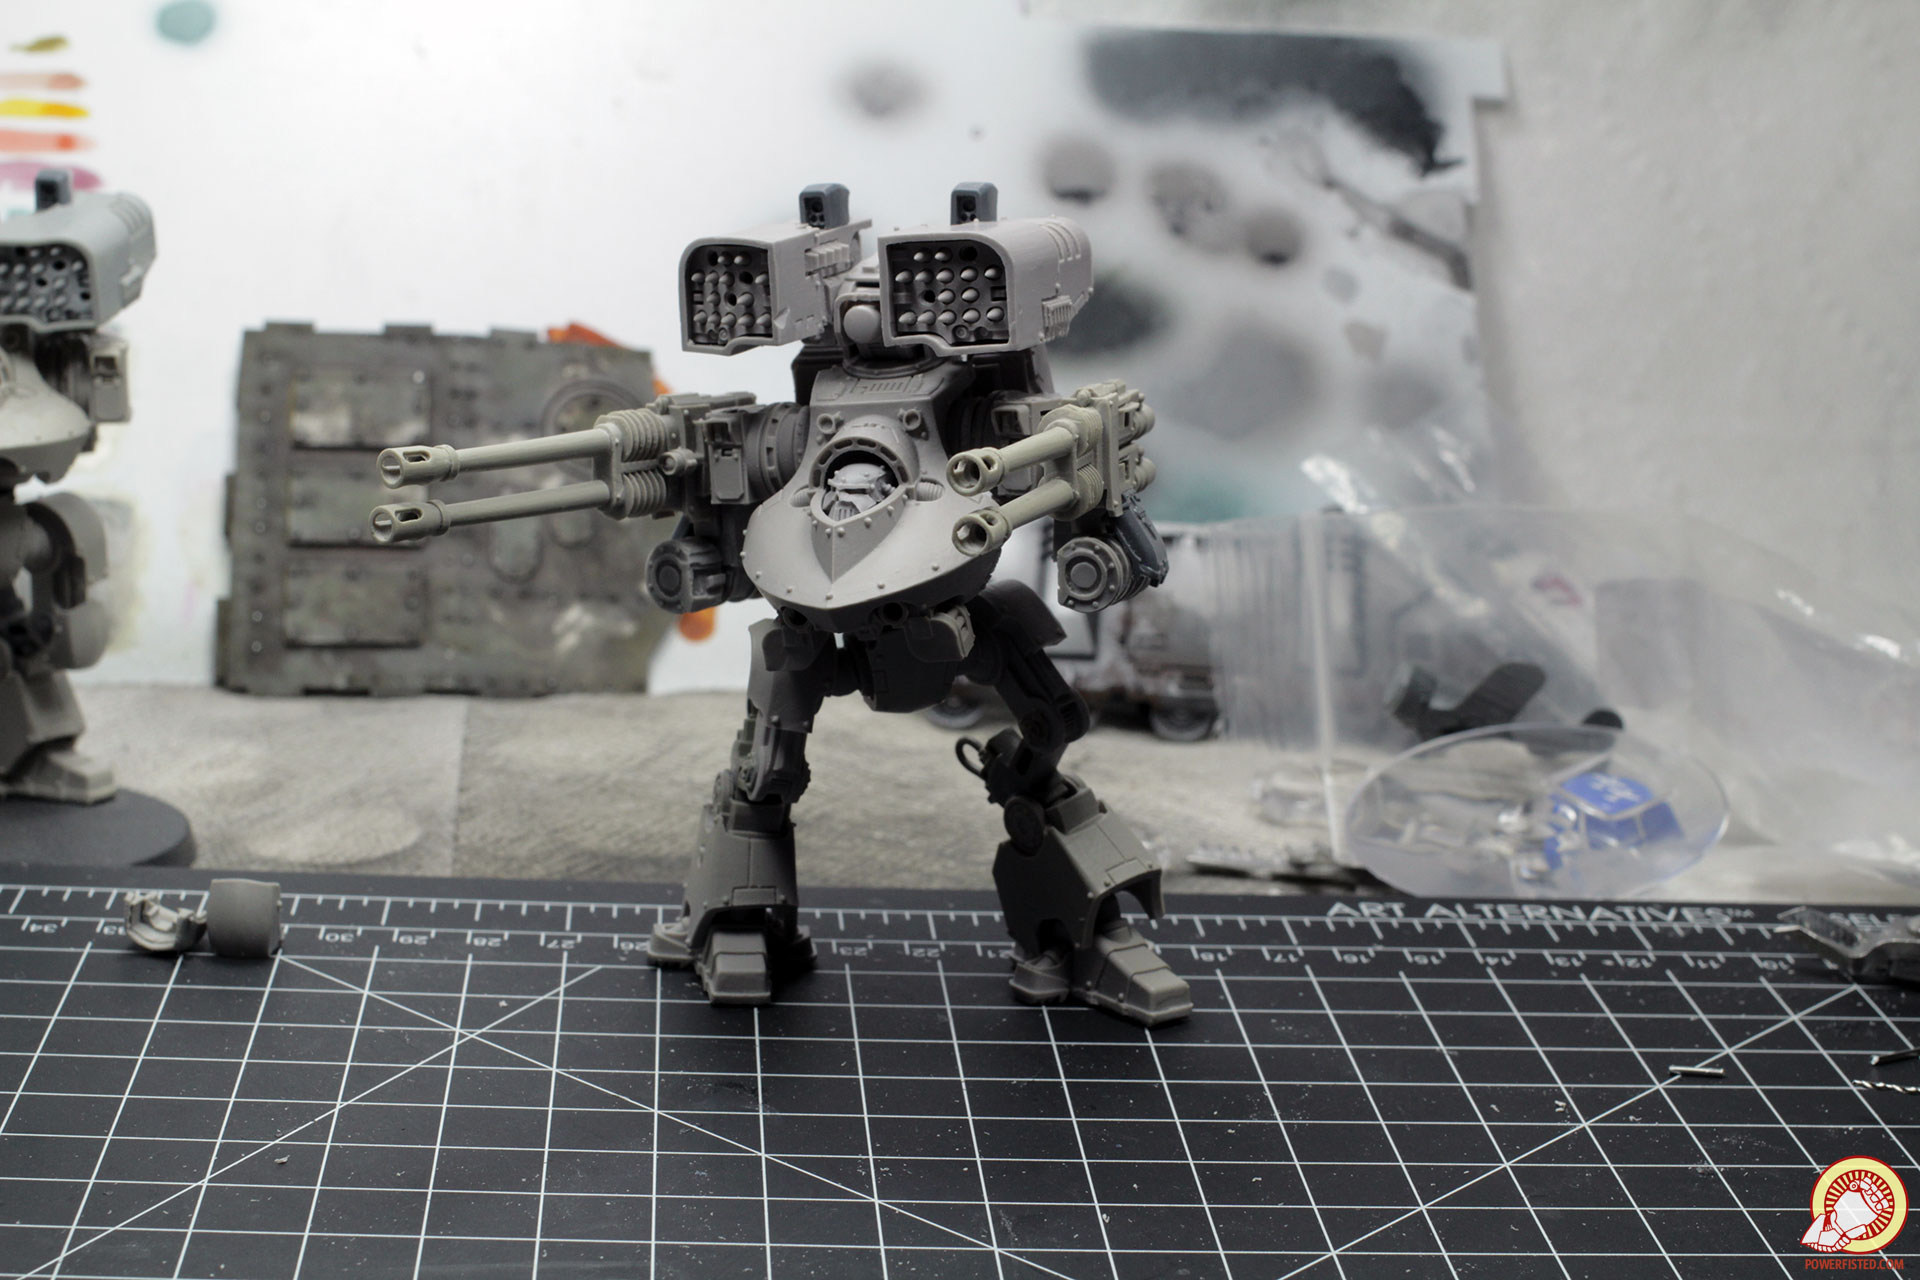
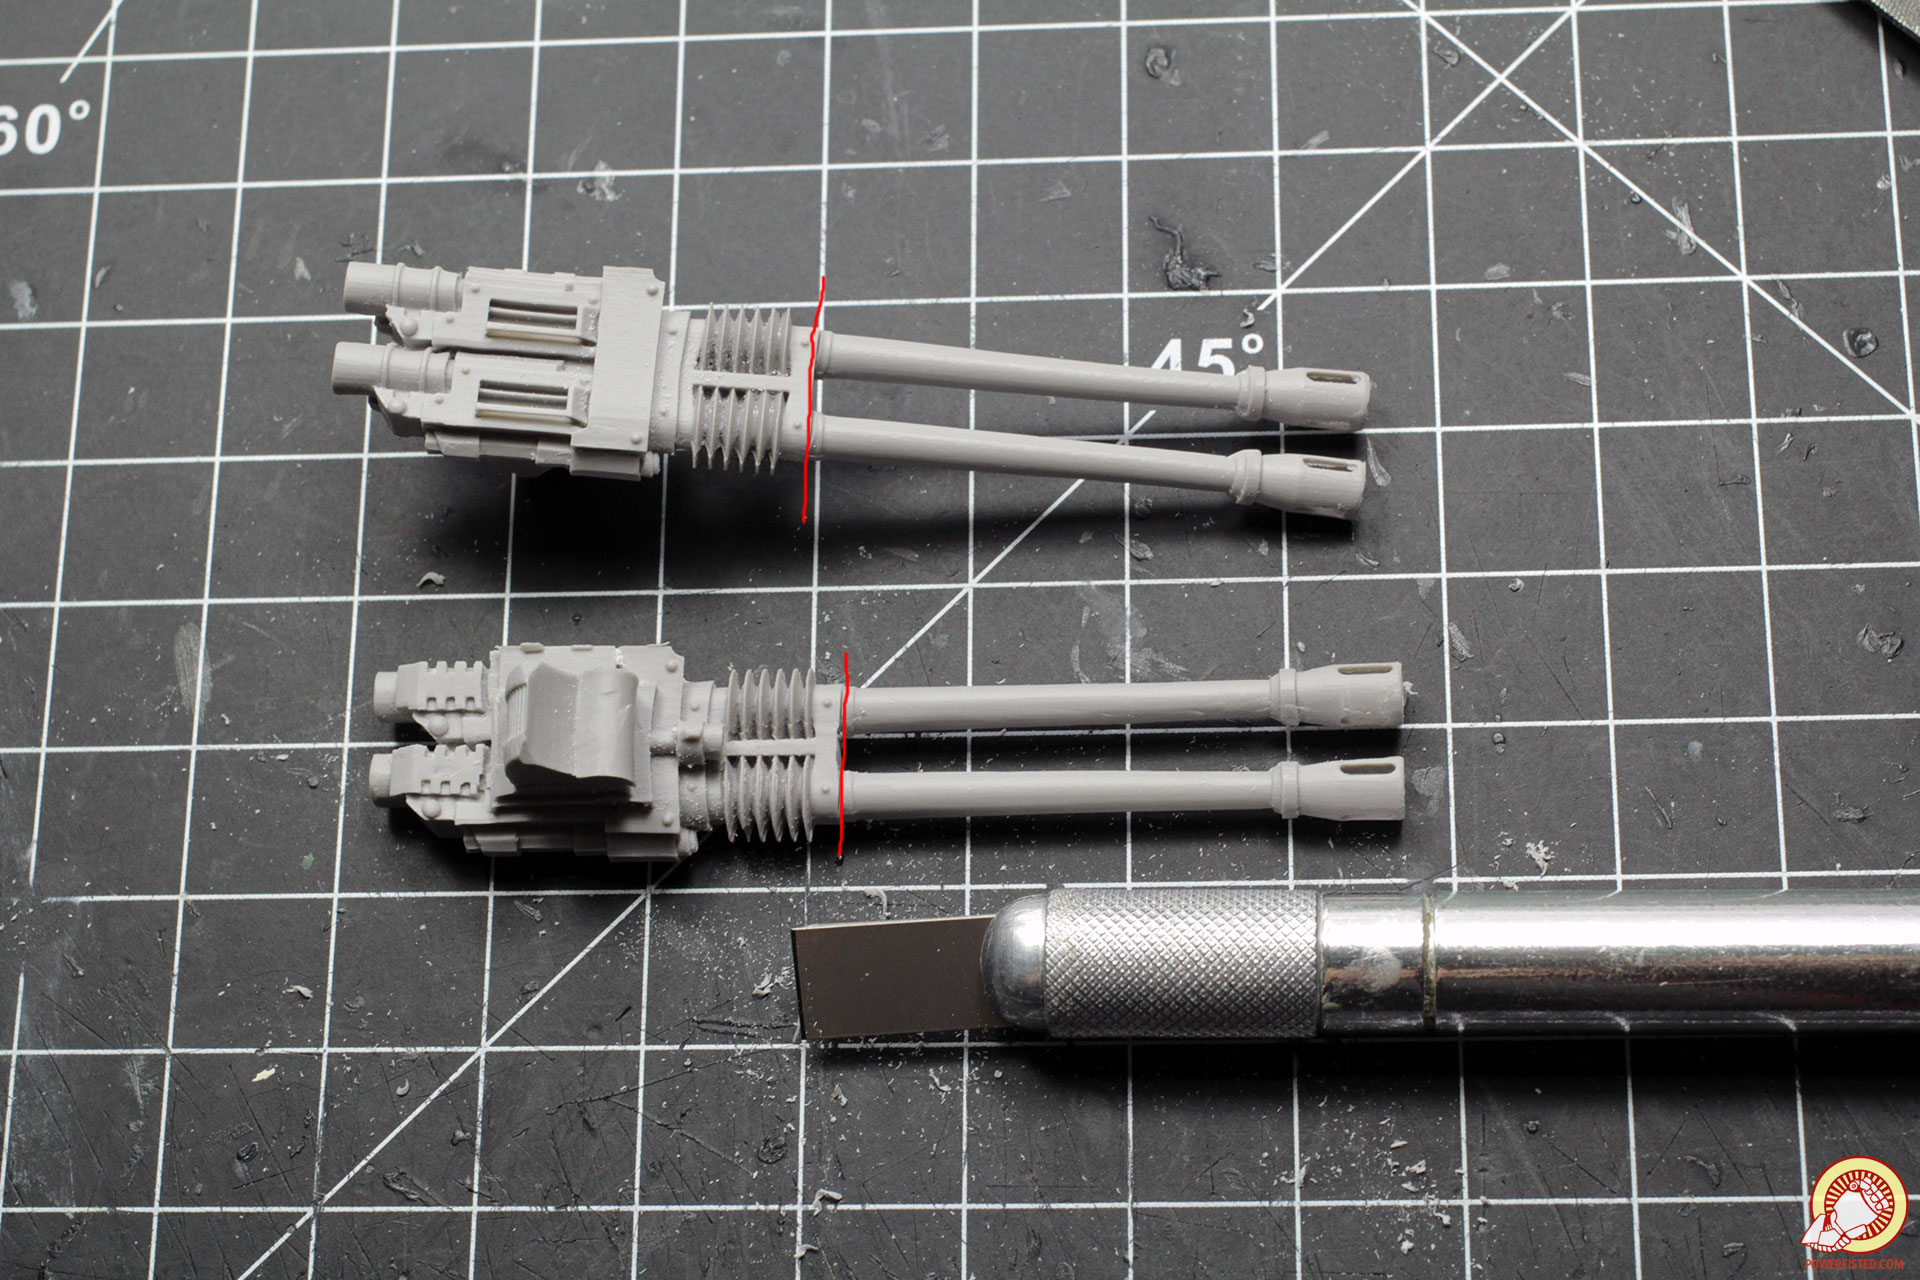
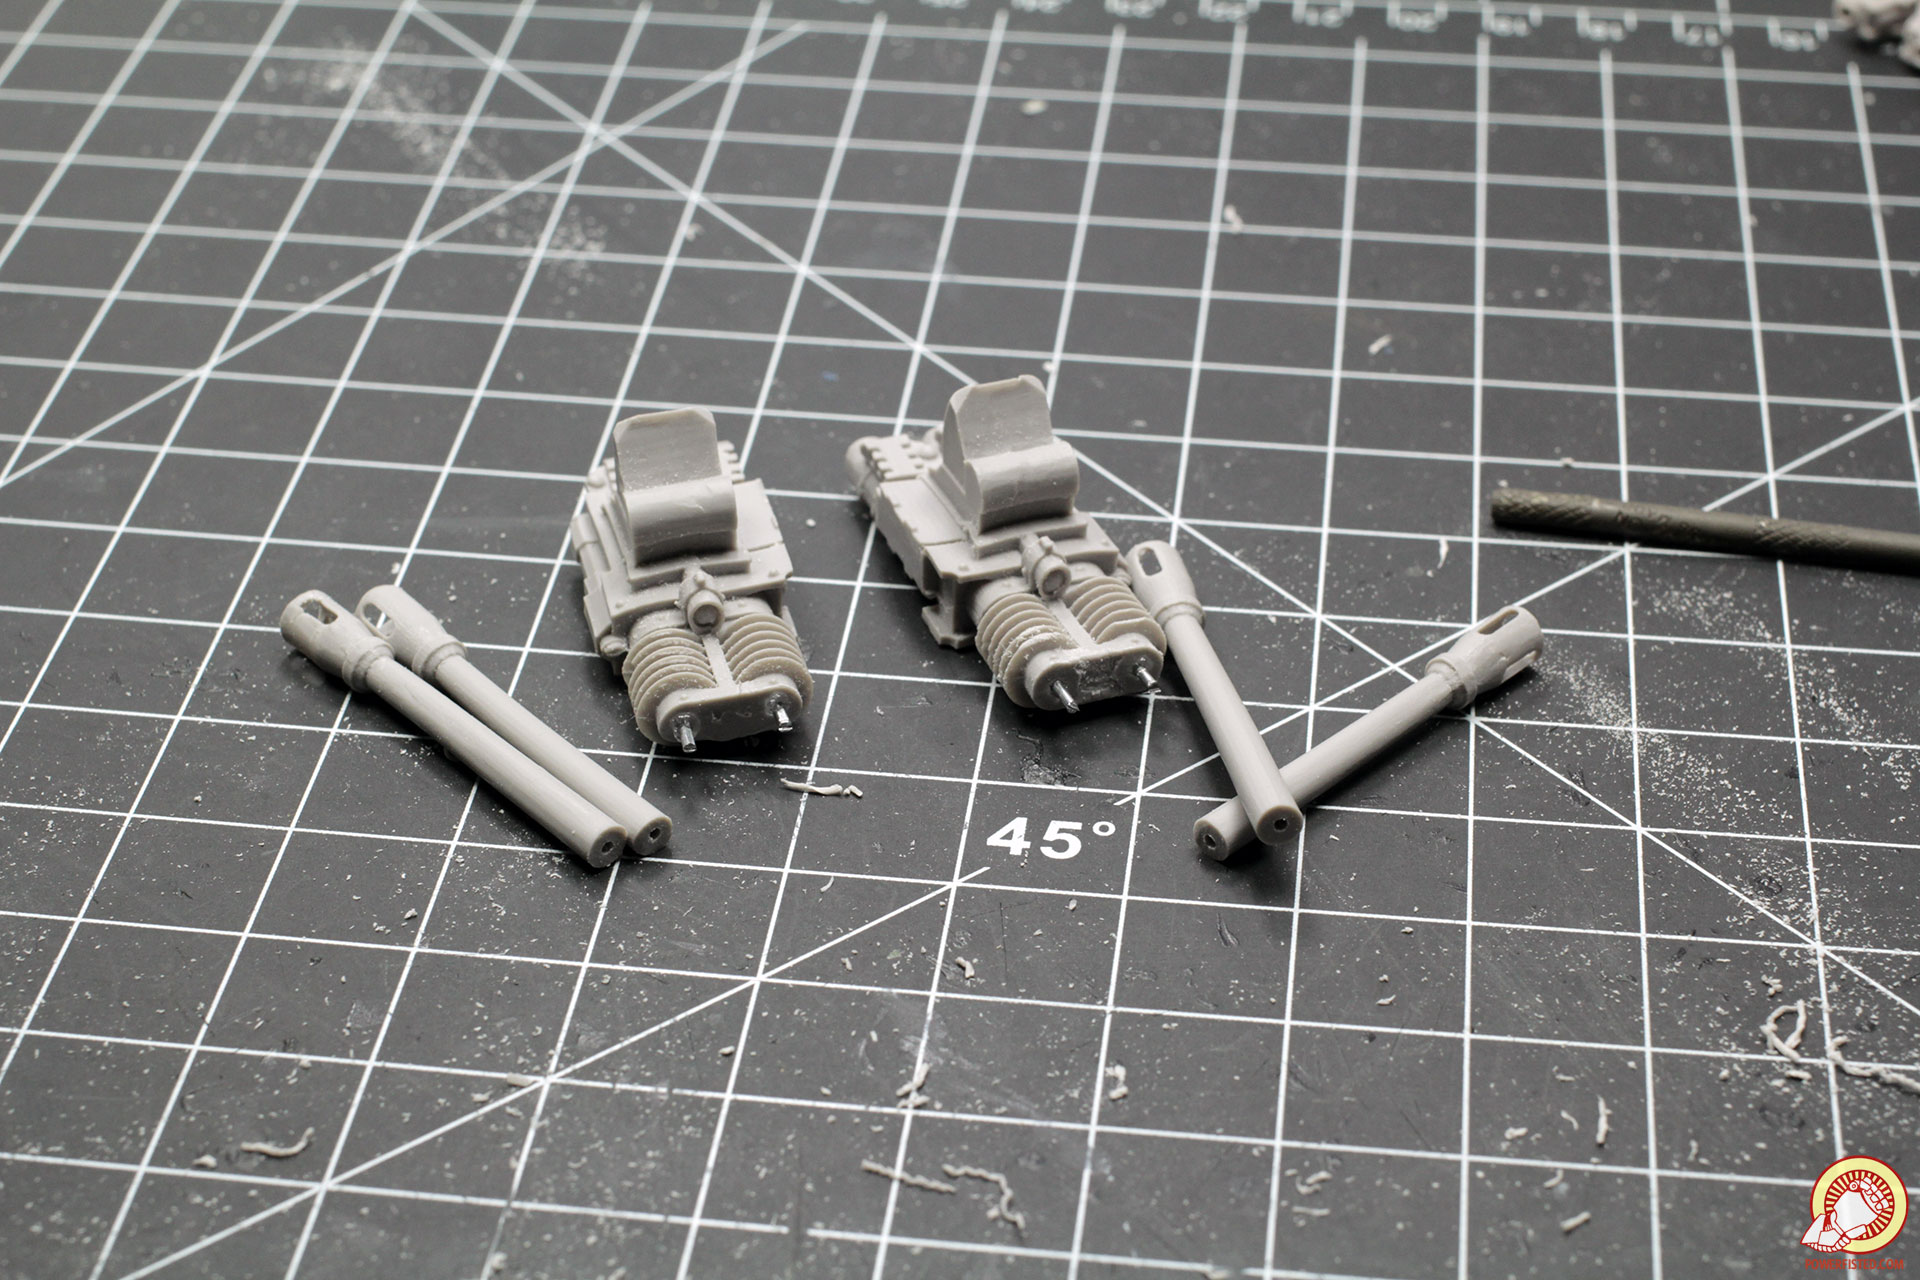
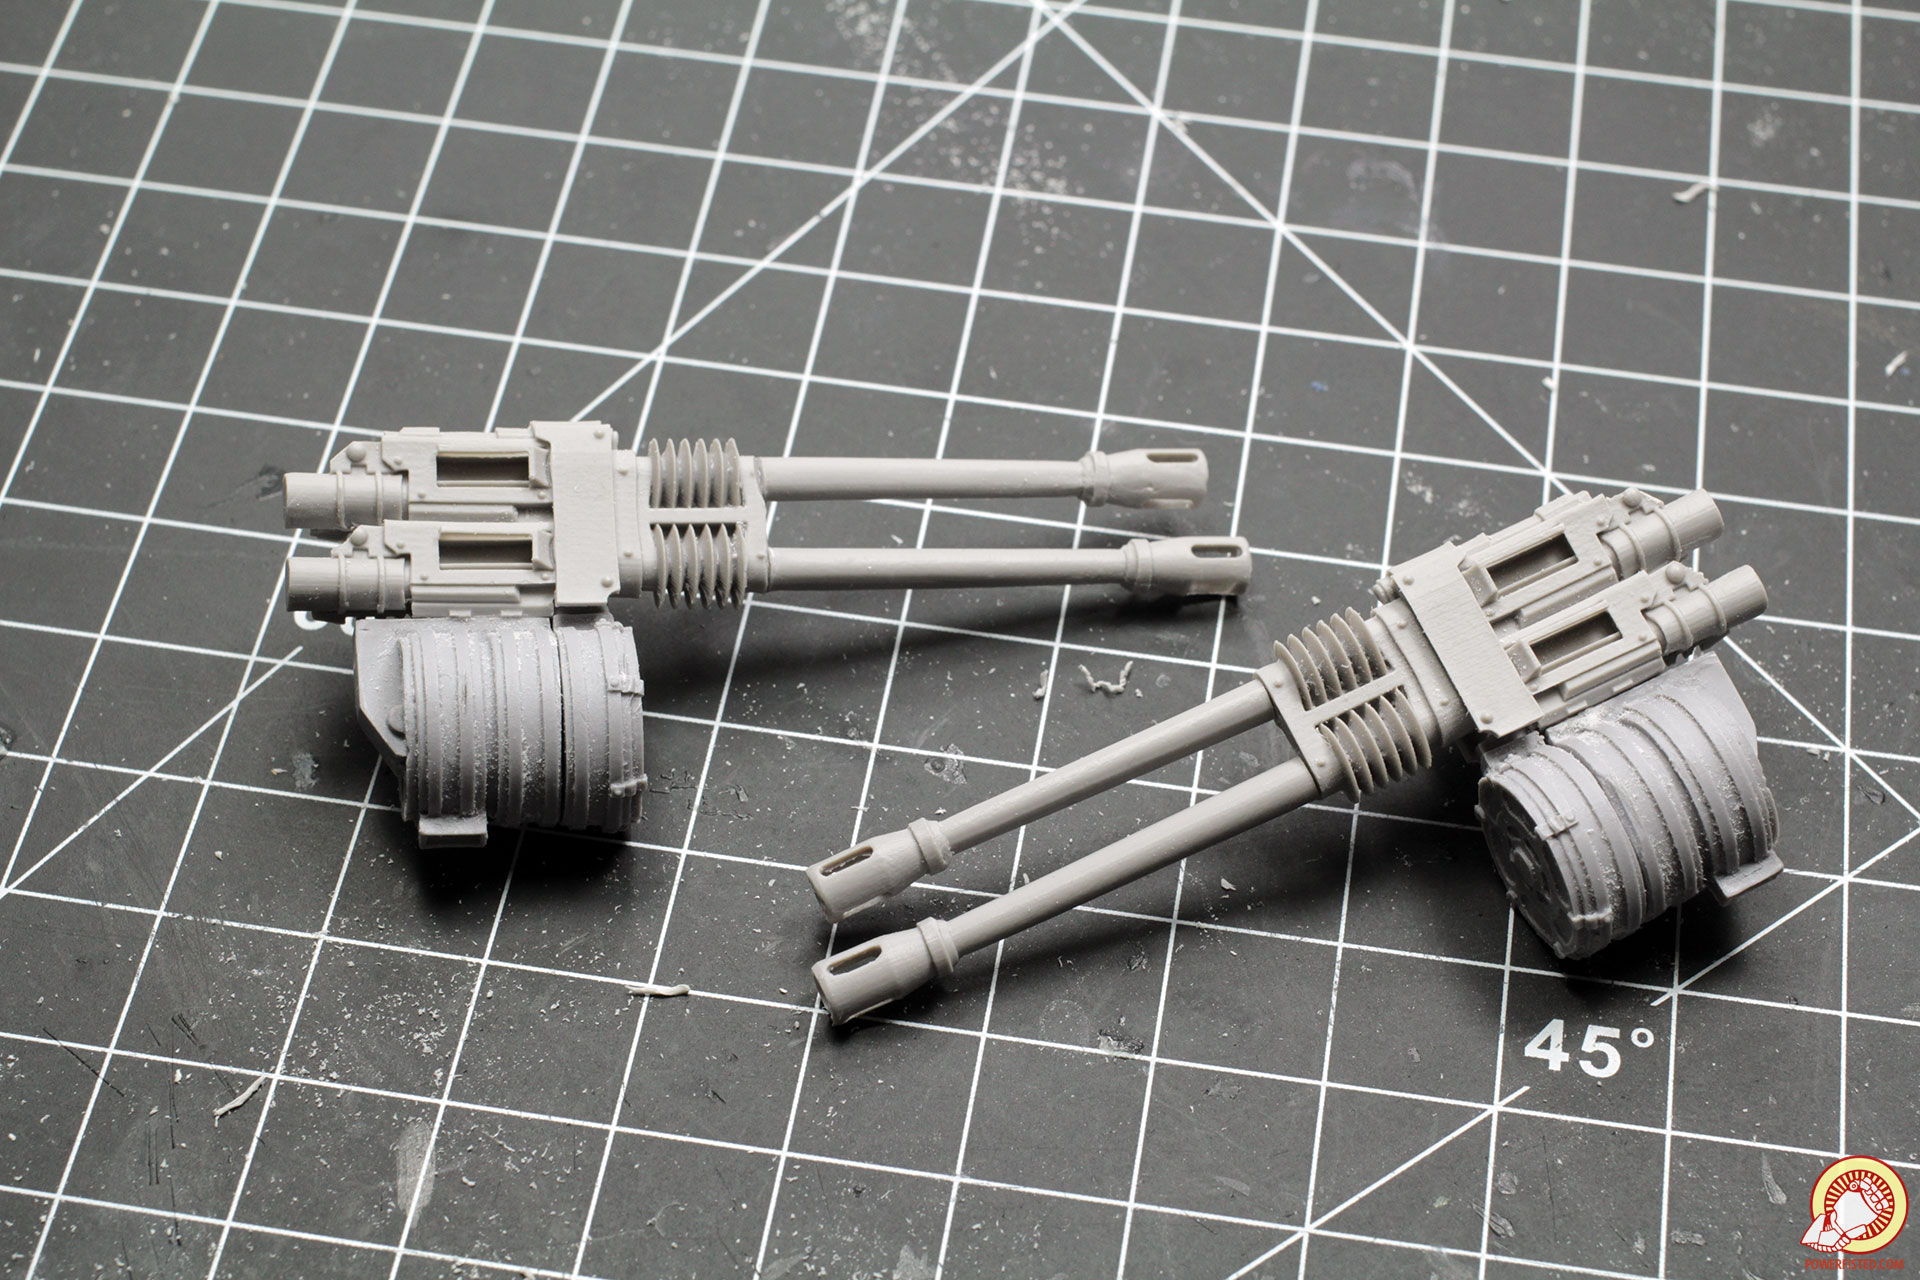
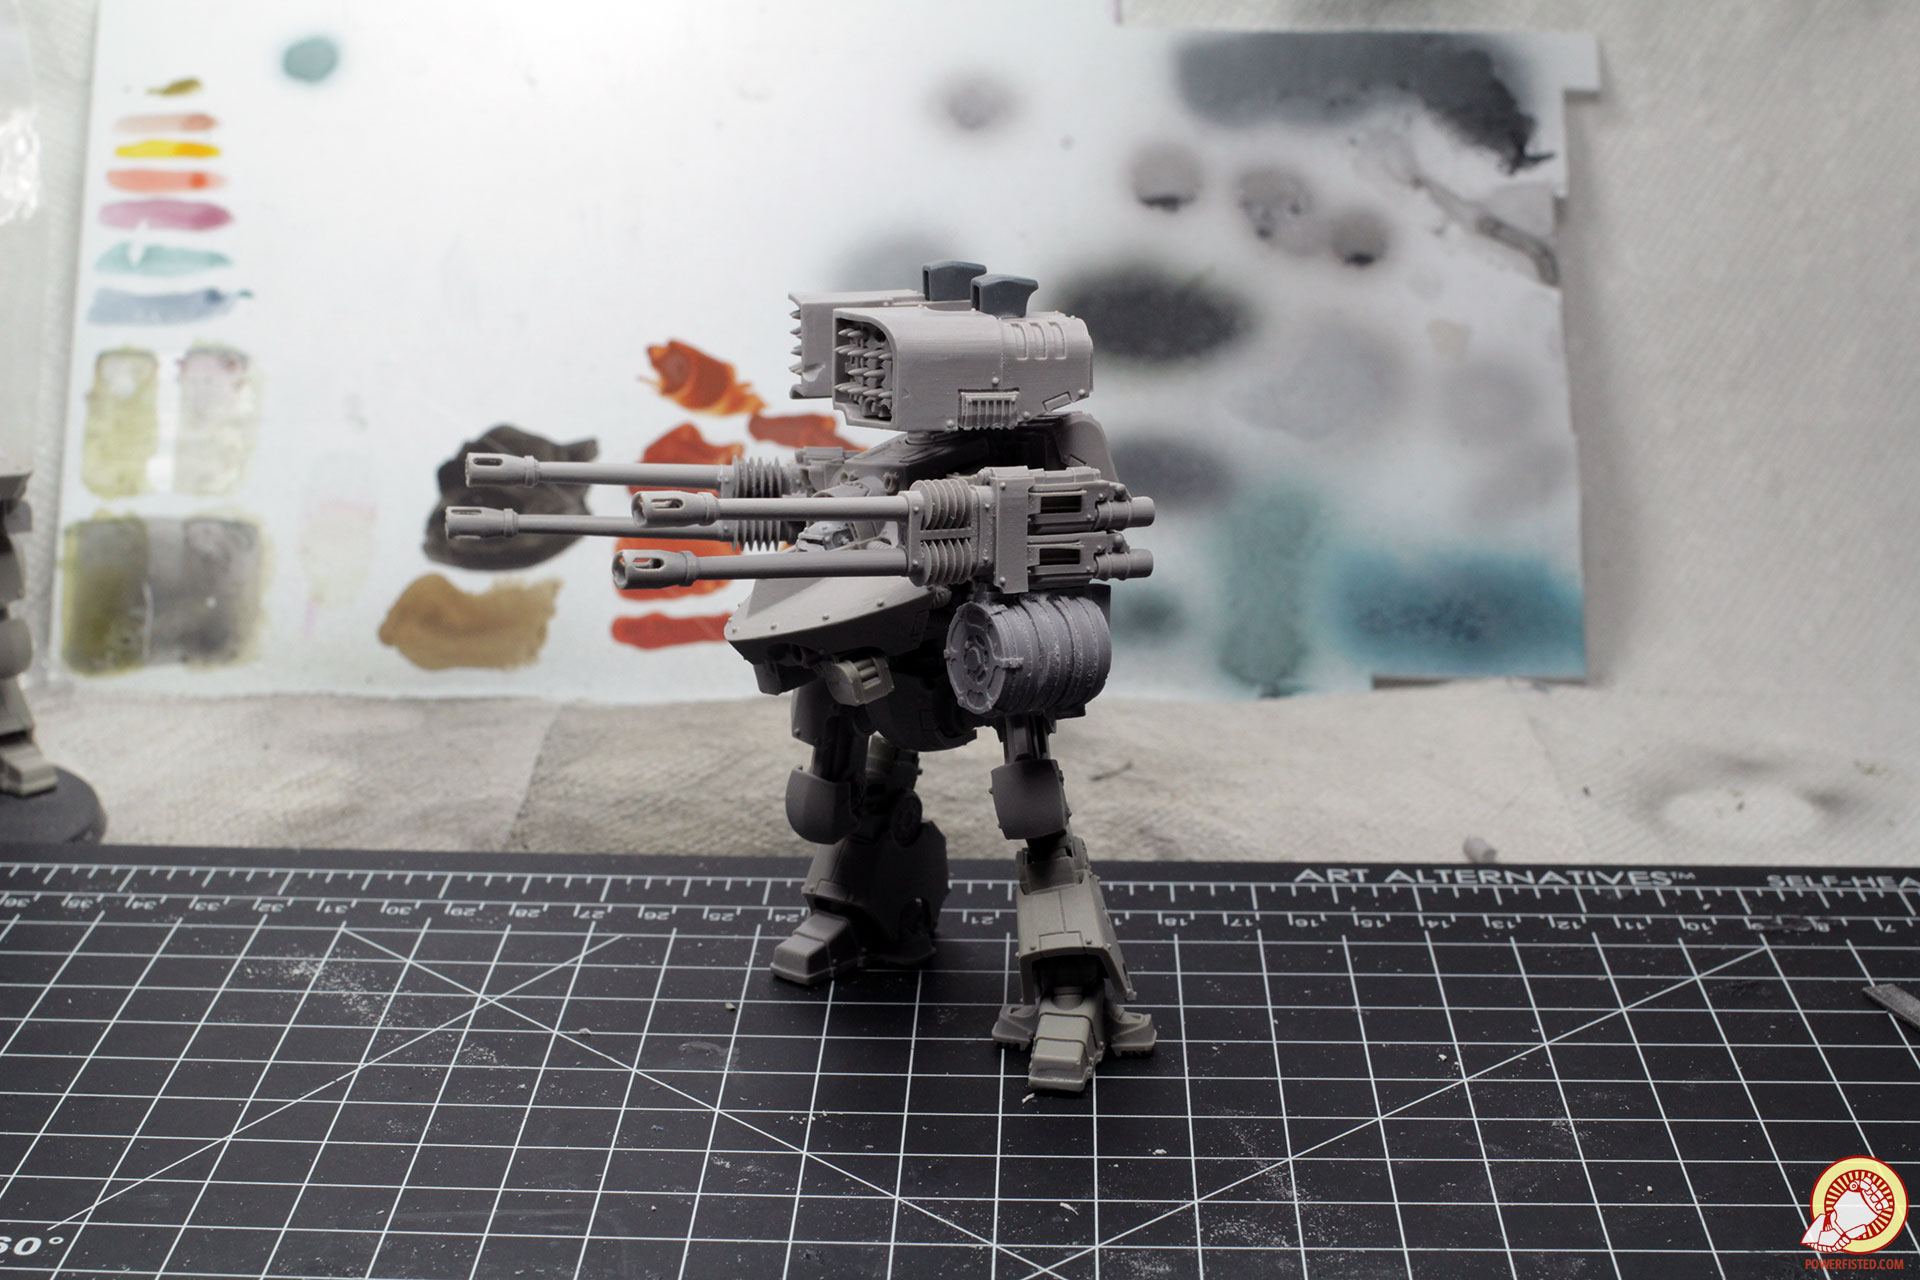
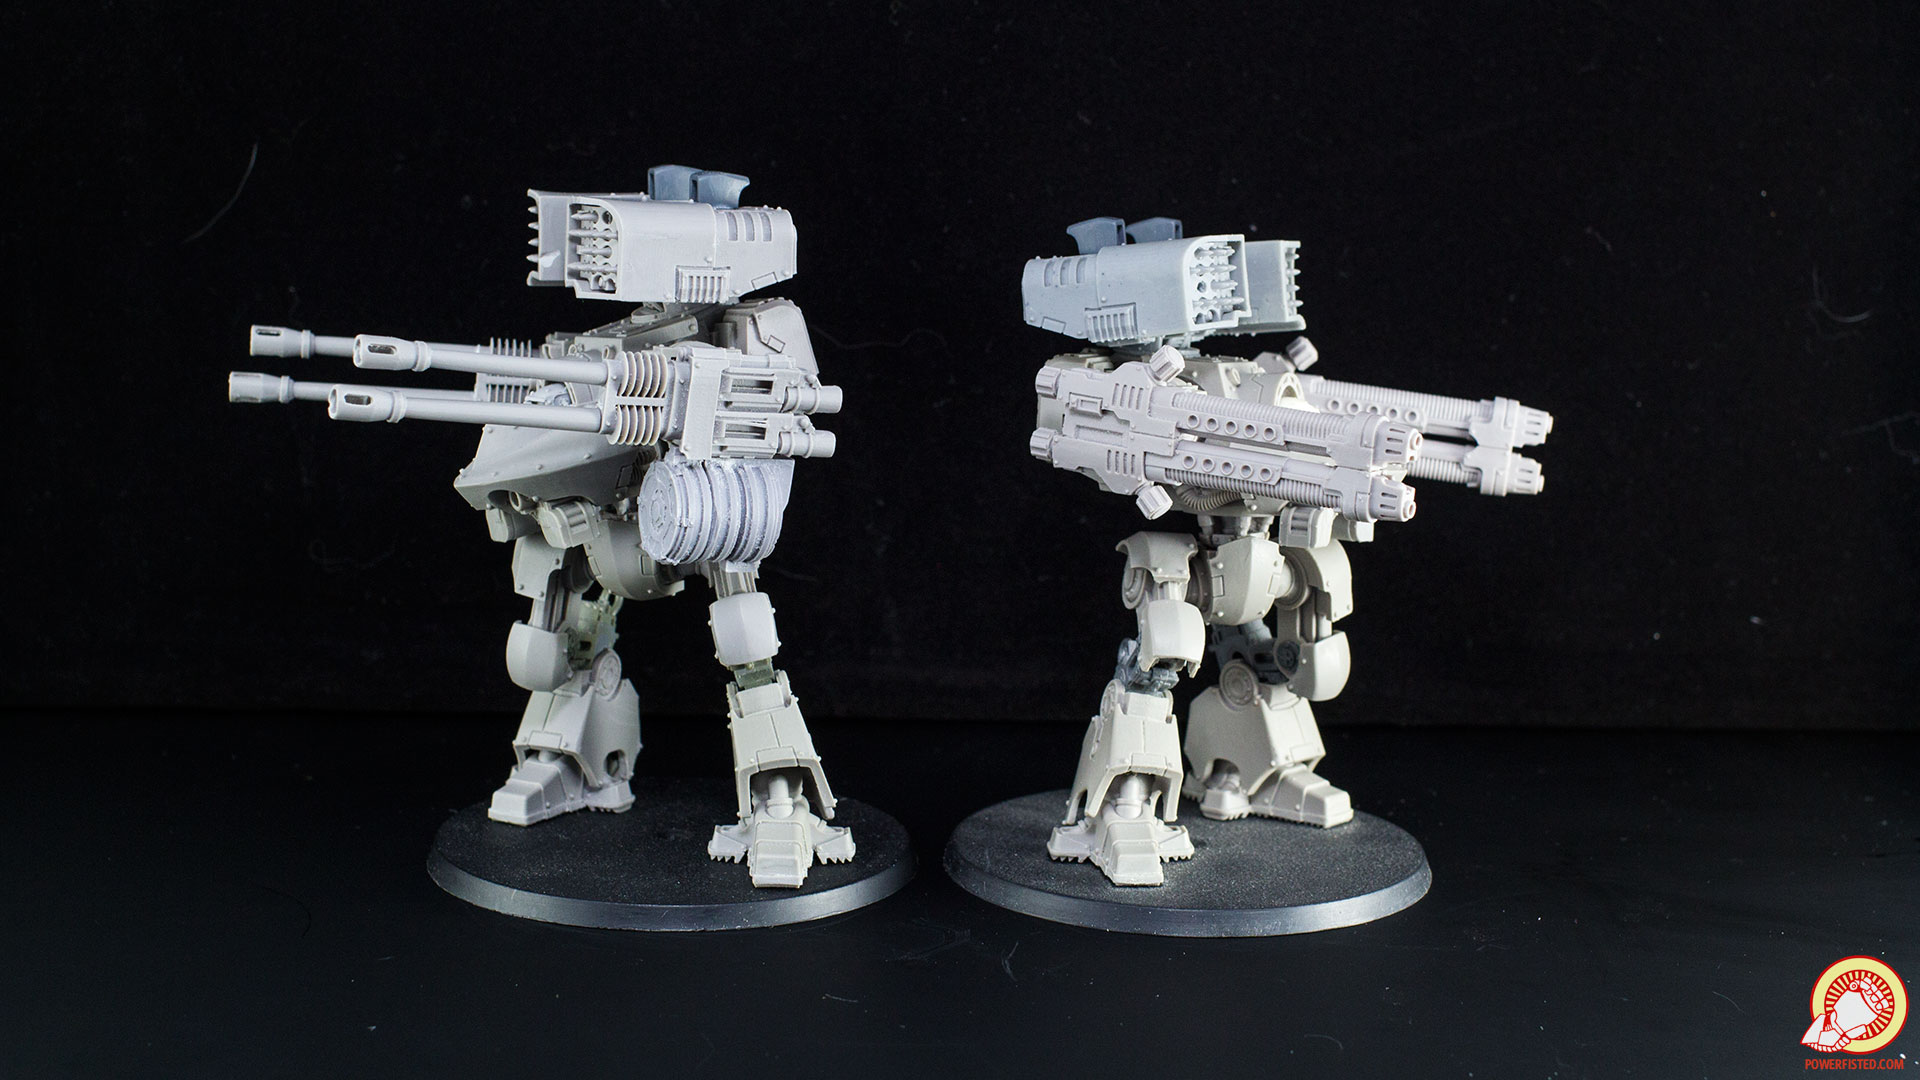
The deredeo is now mostly complete. All that remains are those damn massive autocannon arms. The arms on the left are stock while the ones on the right are slightly shorter.
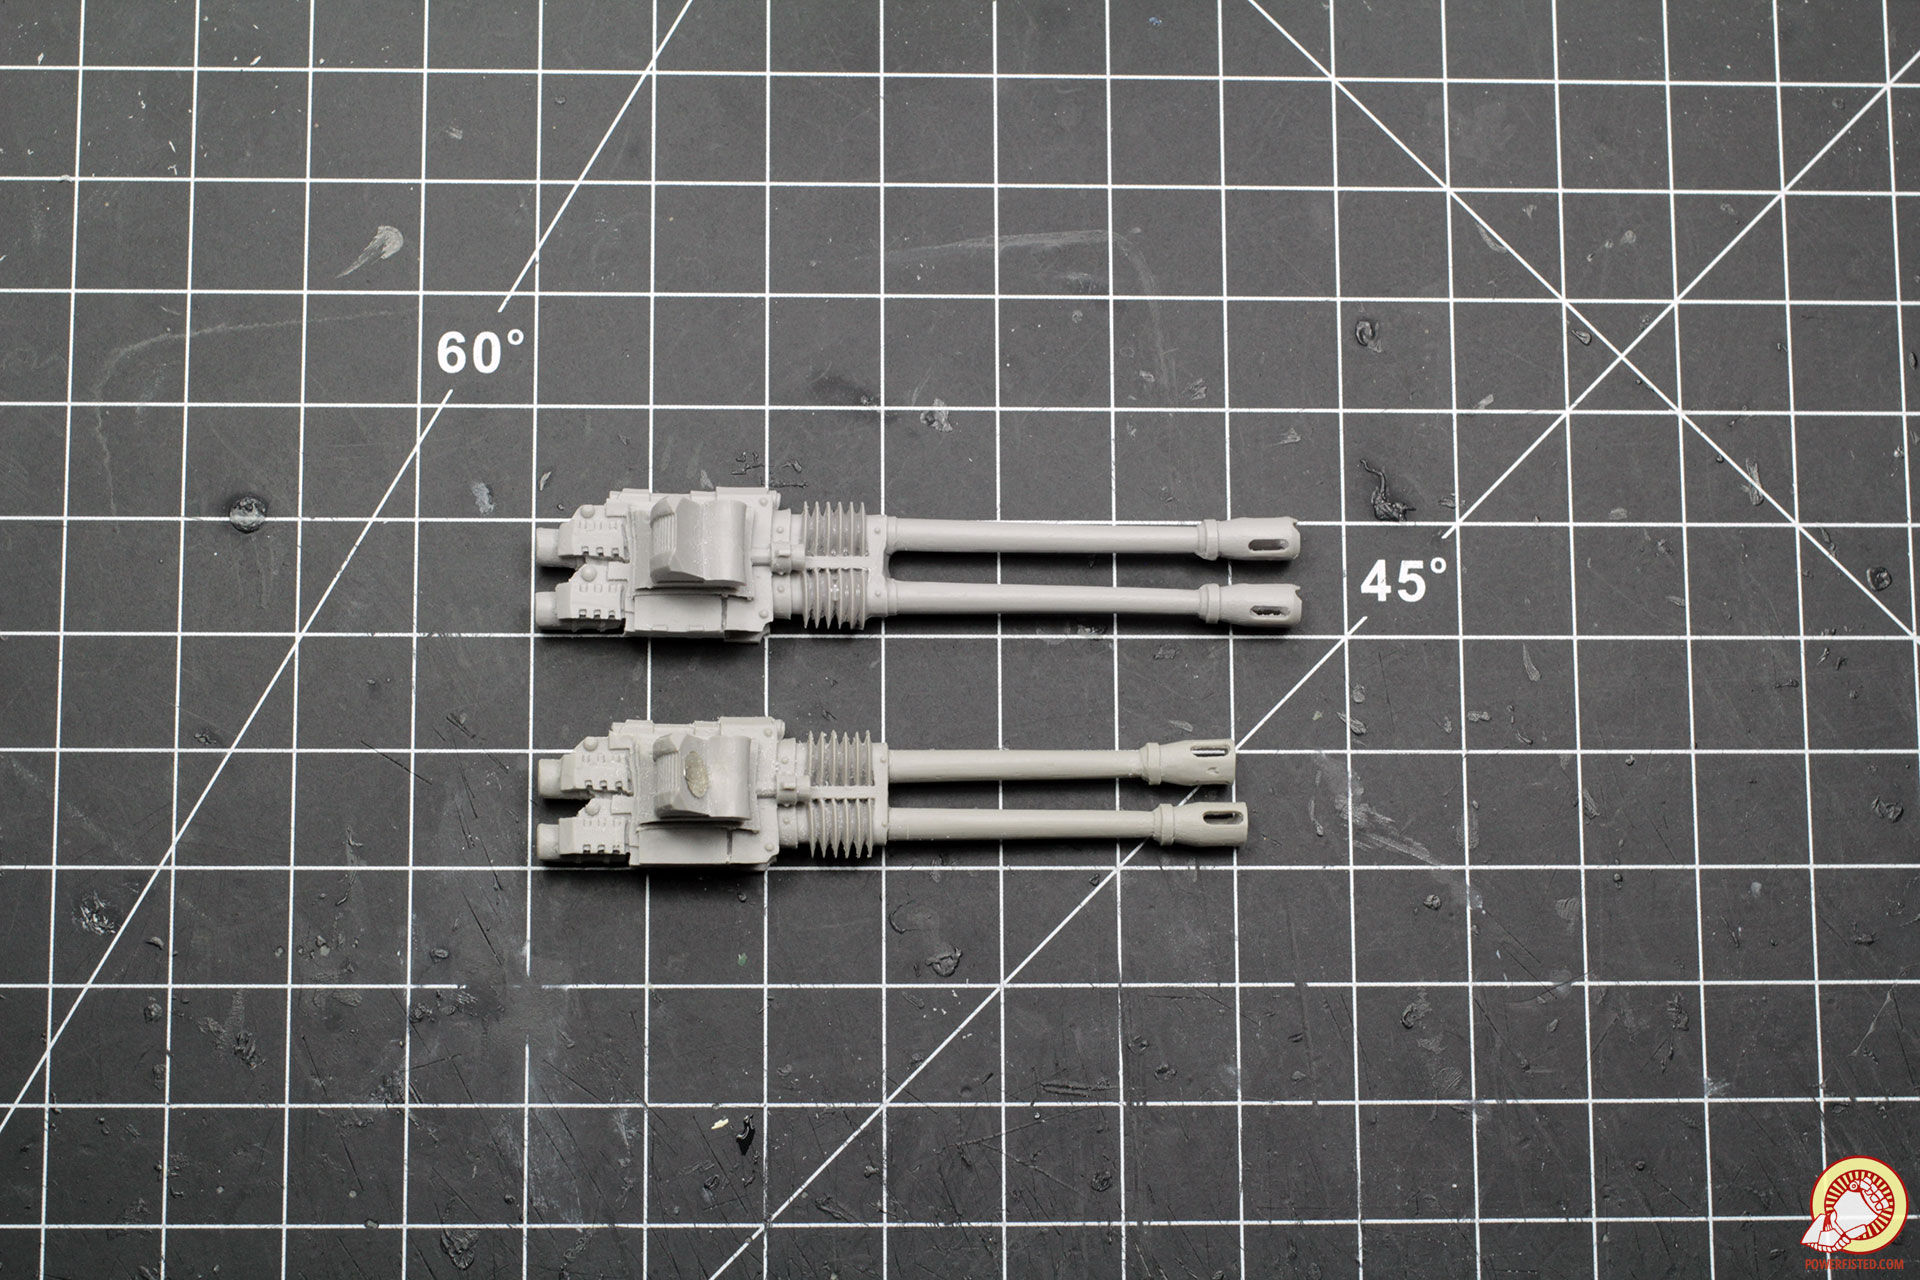
While the difference in length isn’t massive, it’s noticeable enough to improve the proportions. While we’re at it, we can also stagger the barrels. I’ve always liked that look after seeing it on the land raider Proteus’ sponsons. If you prefer them equal in length, just cut them to the same length.
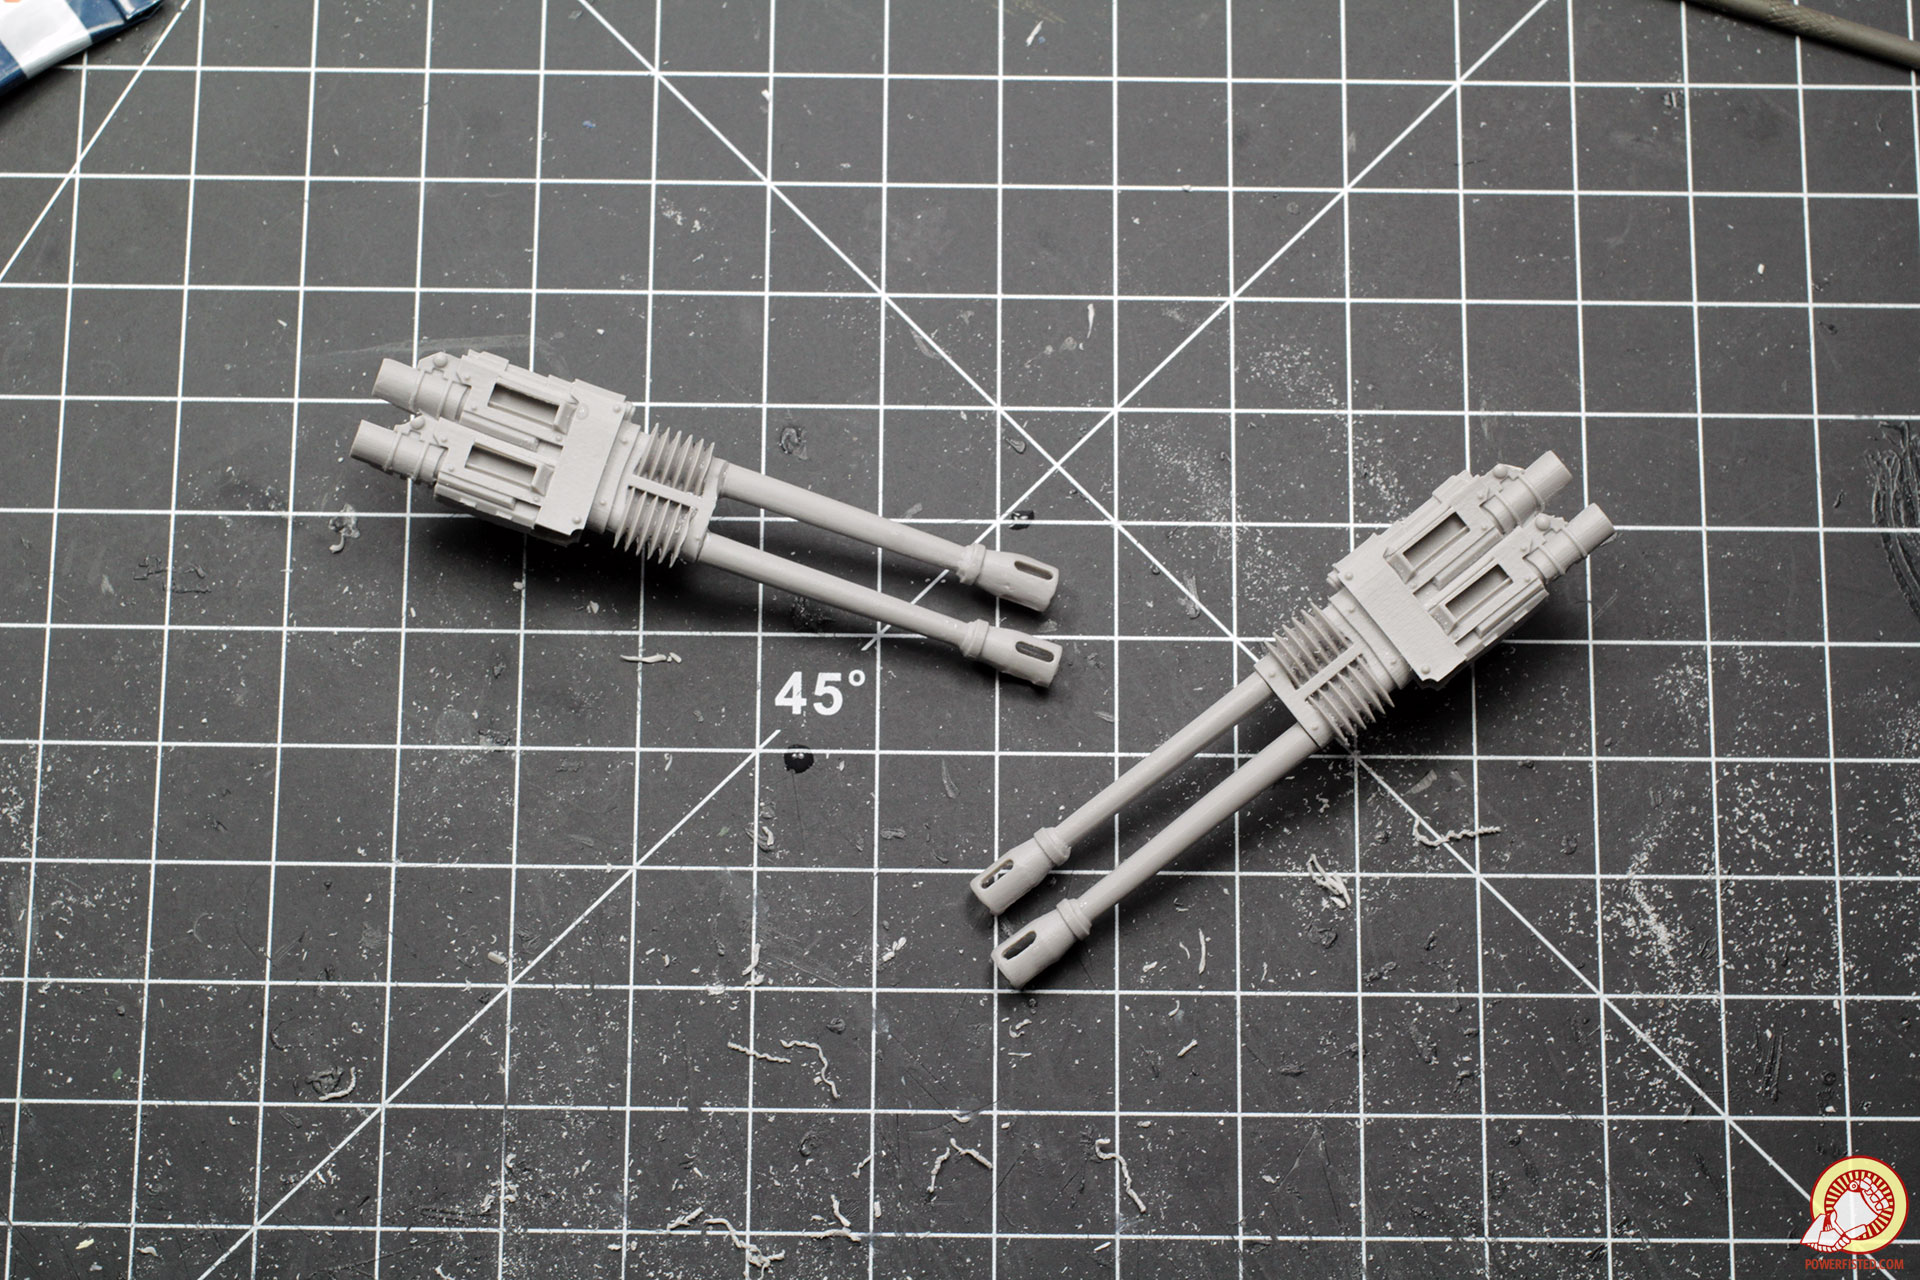
Before doing any chopping, make sure the barrels aren’t bent like these. Use hot water to straighten out the barrels and if you haven’t already, chisel and then file smooth the ammo feeds at the bottoms of the autocannons.

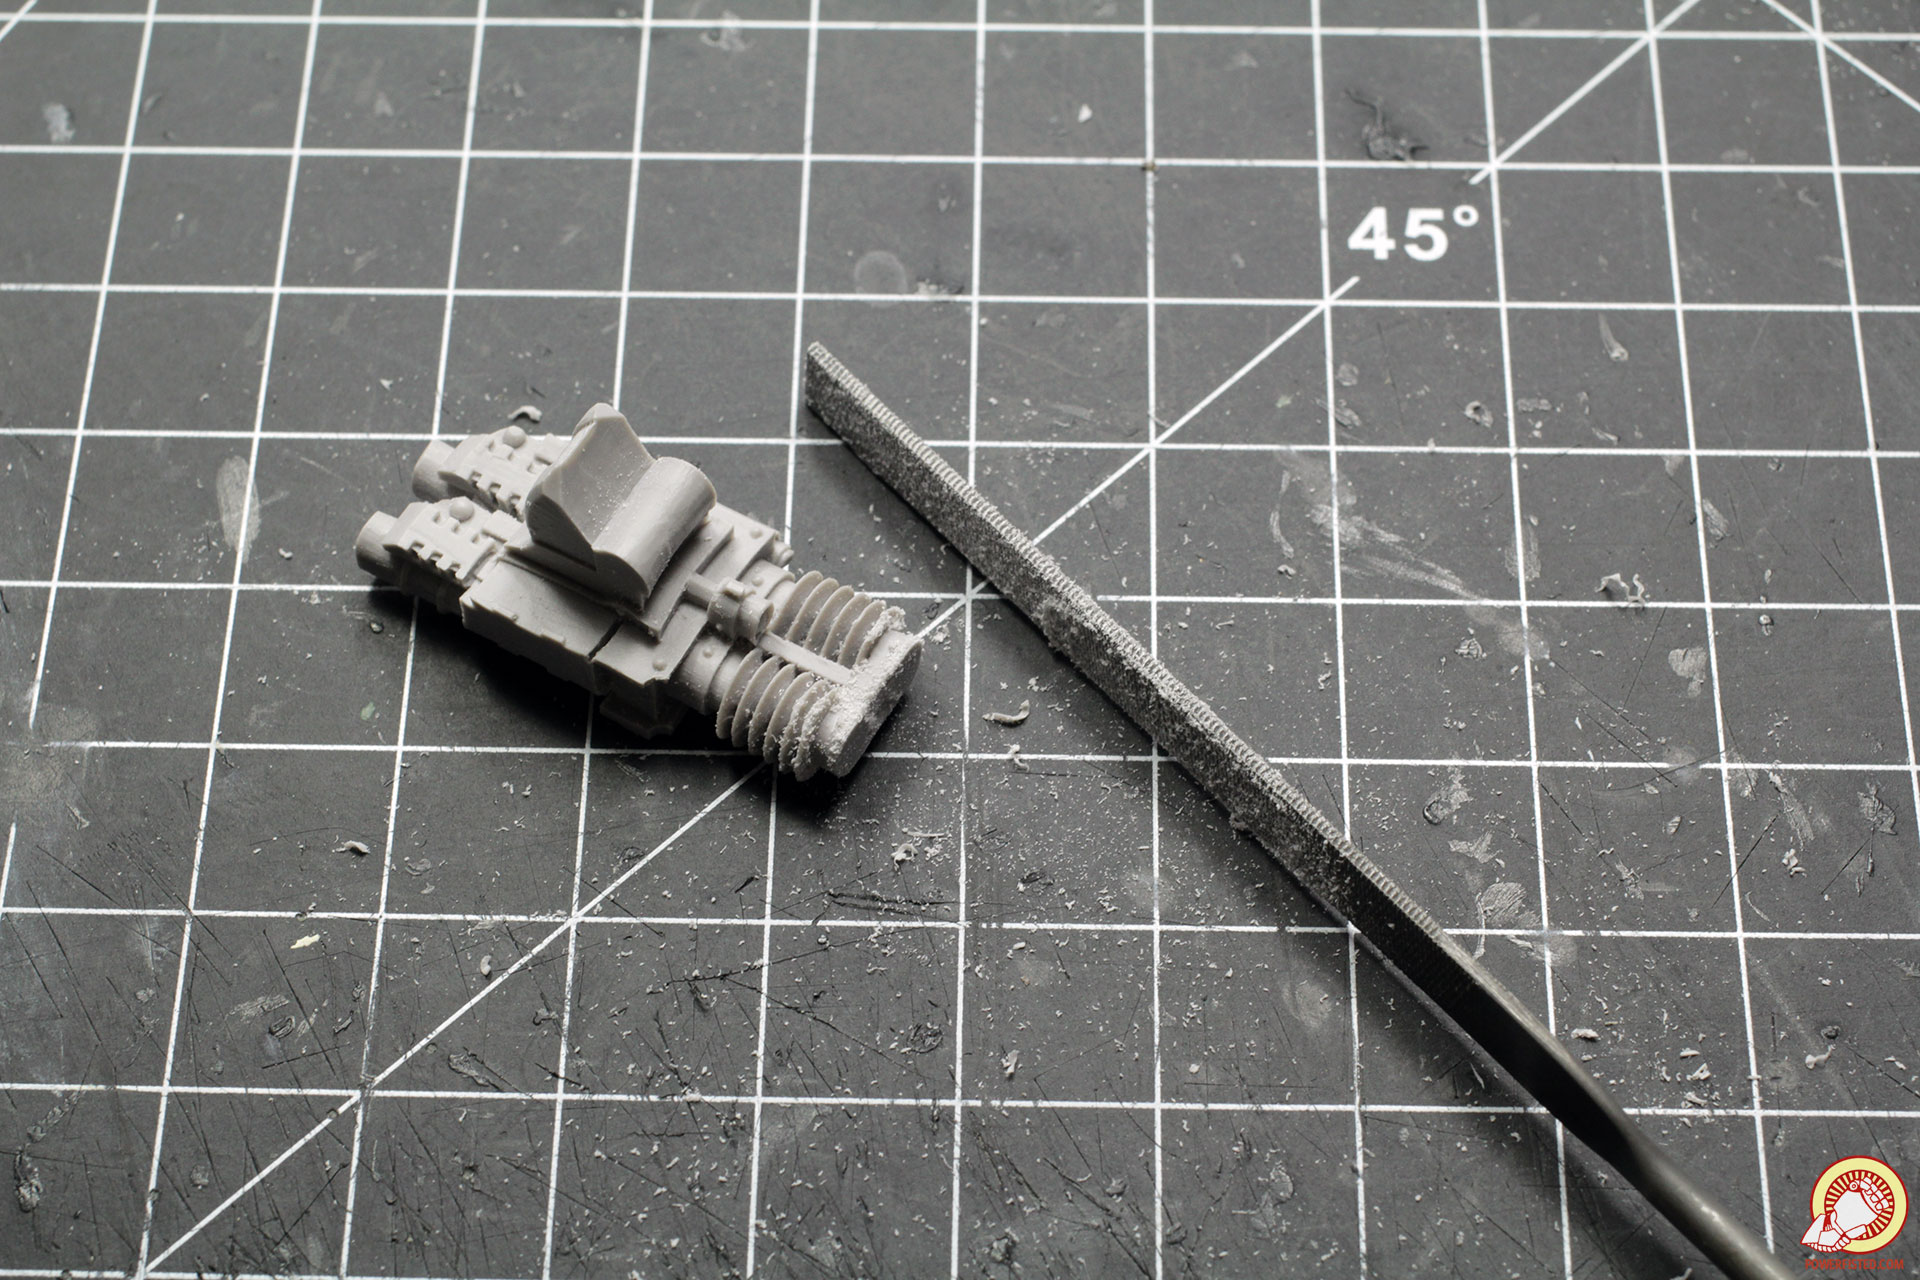
I never understood the flower petal design of the compensators, so I gently file away the tips of my autocannons. Now’s also the time to drill out the barrels of the autocannons if you procrastinated earlier.
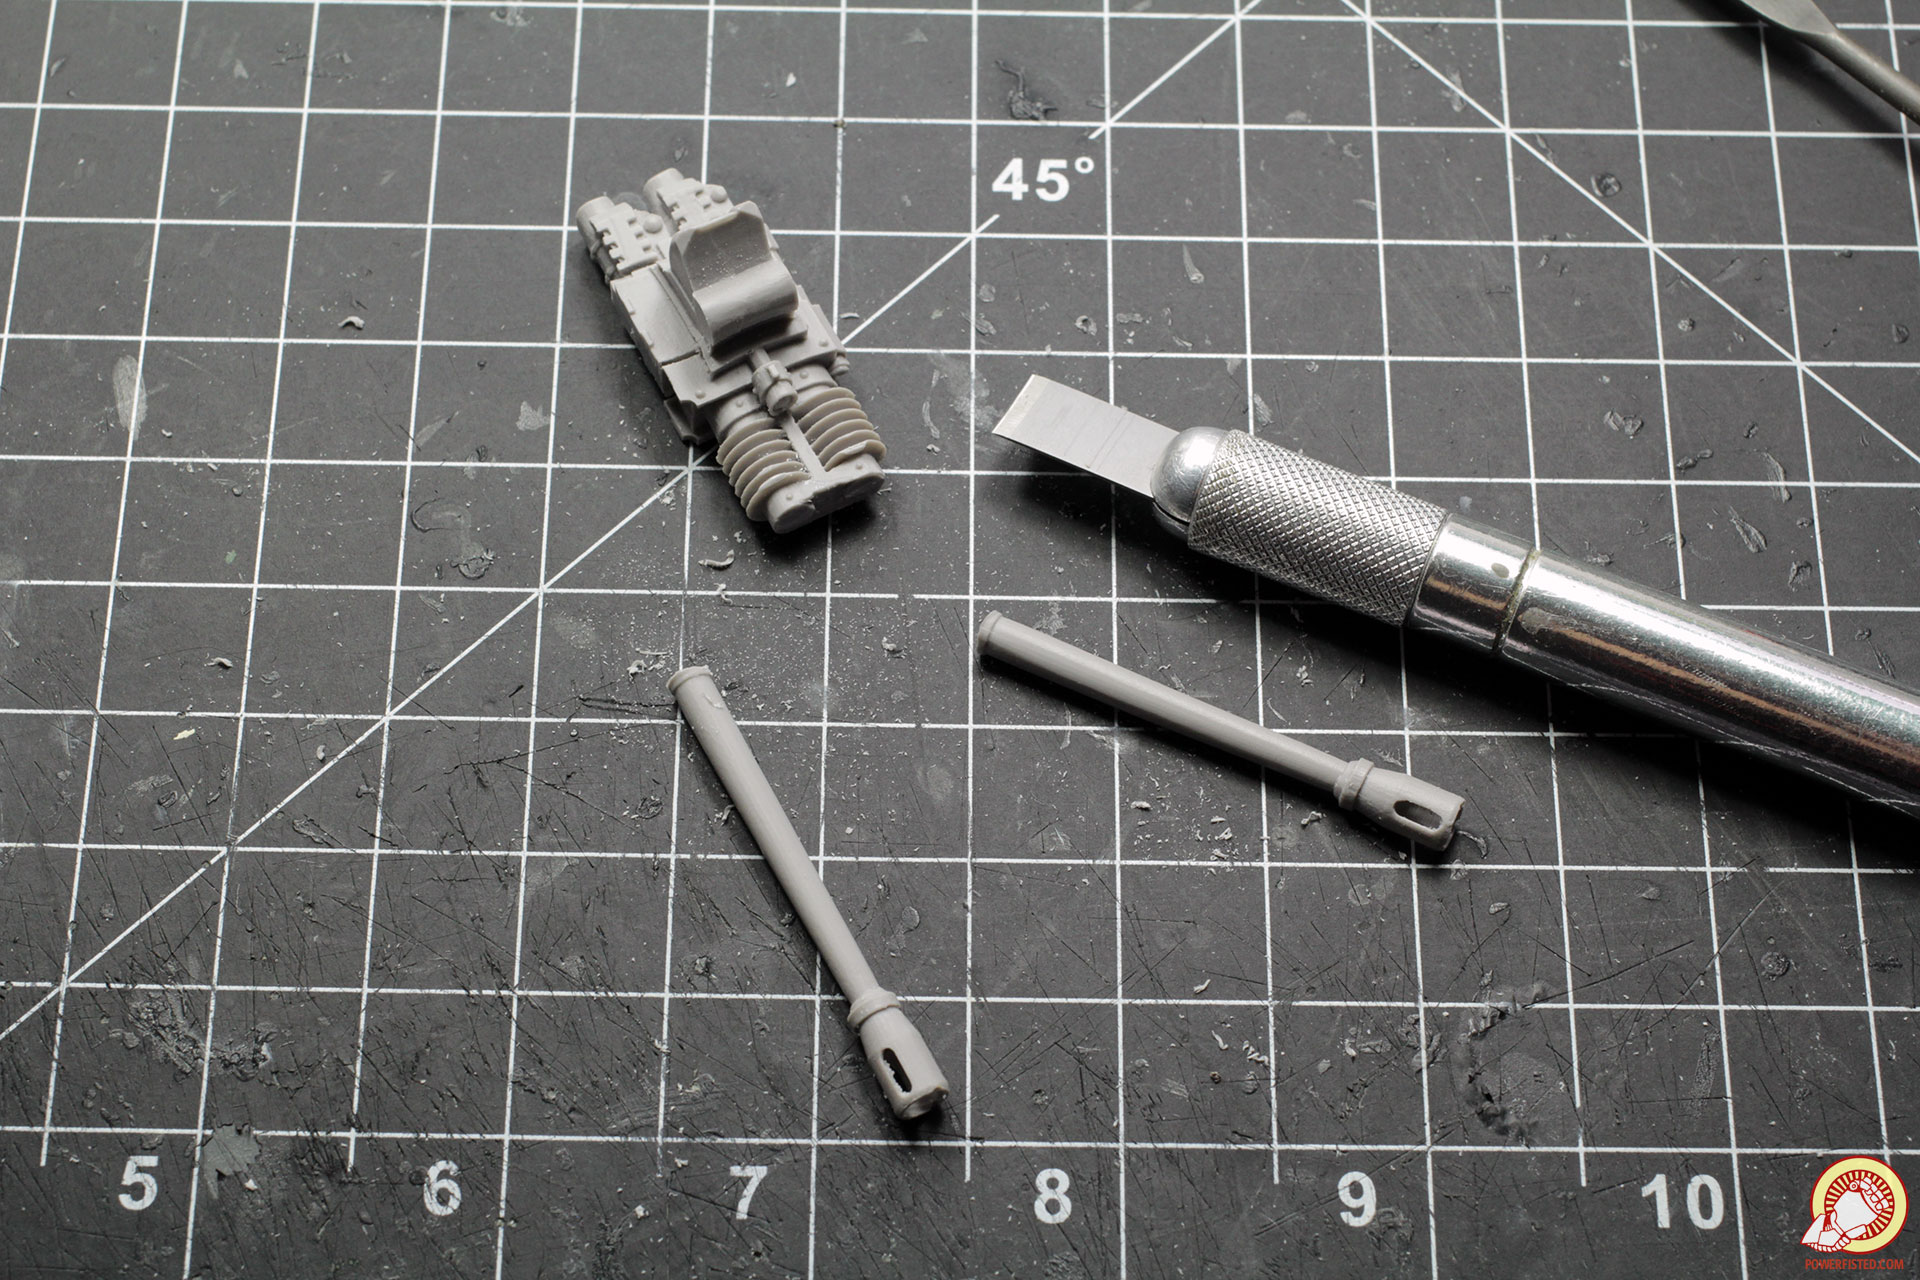
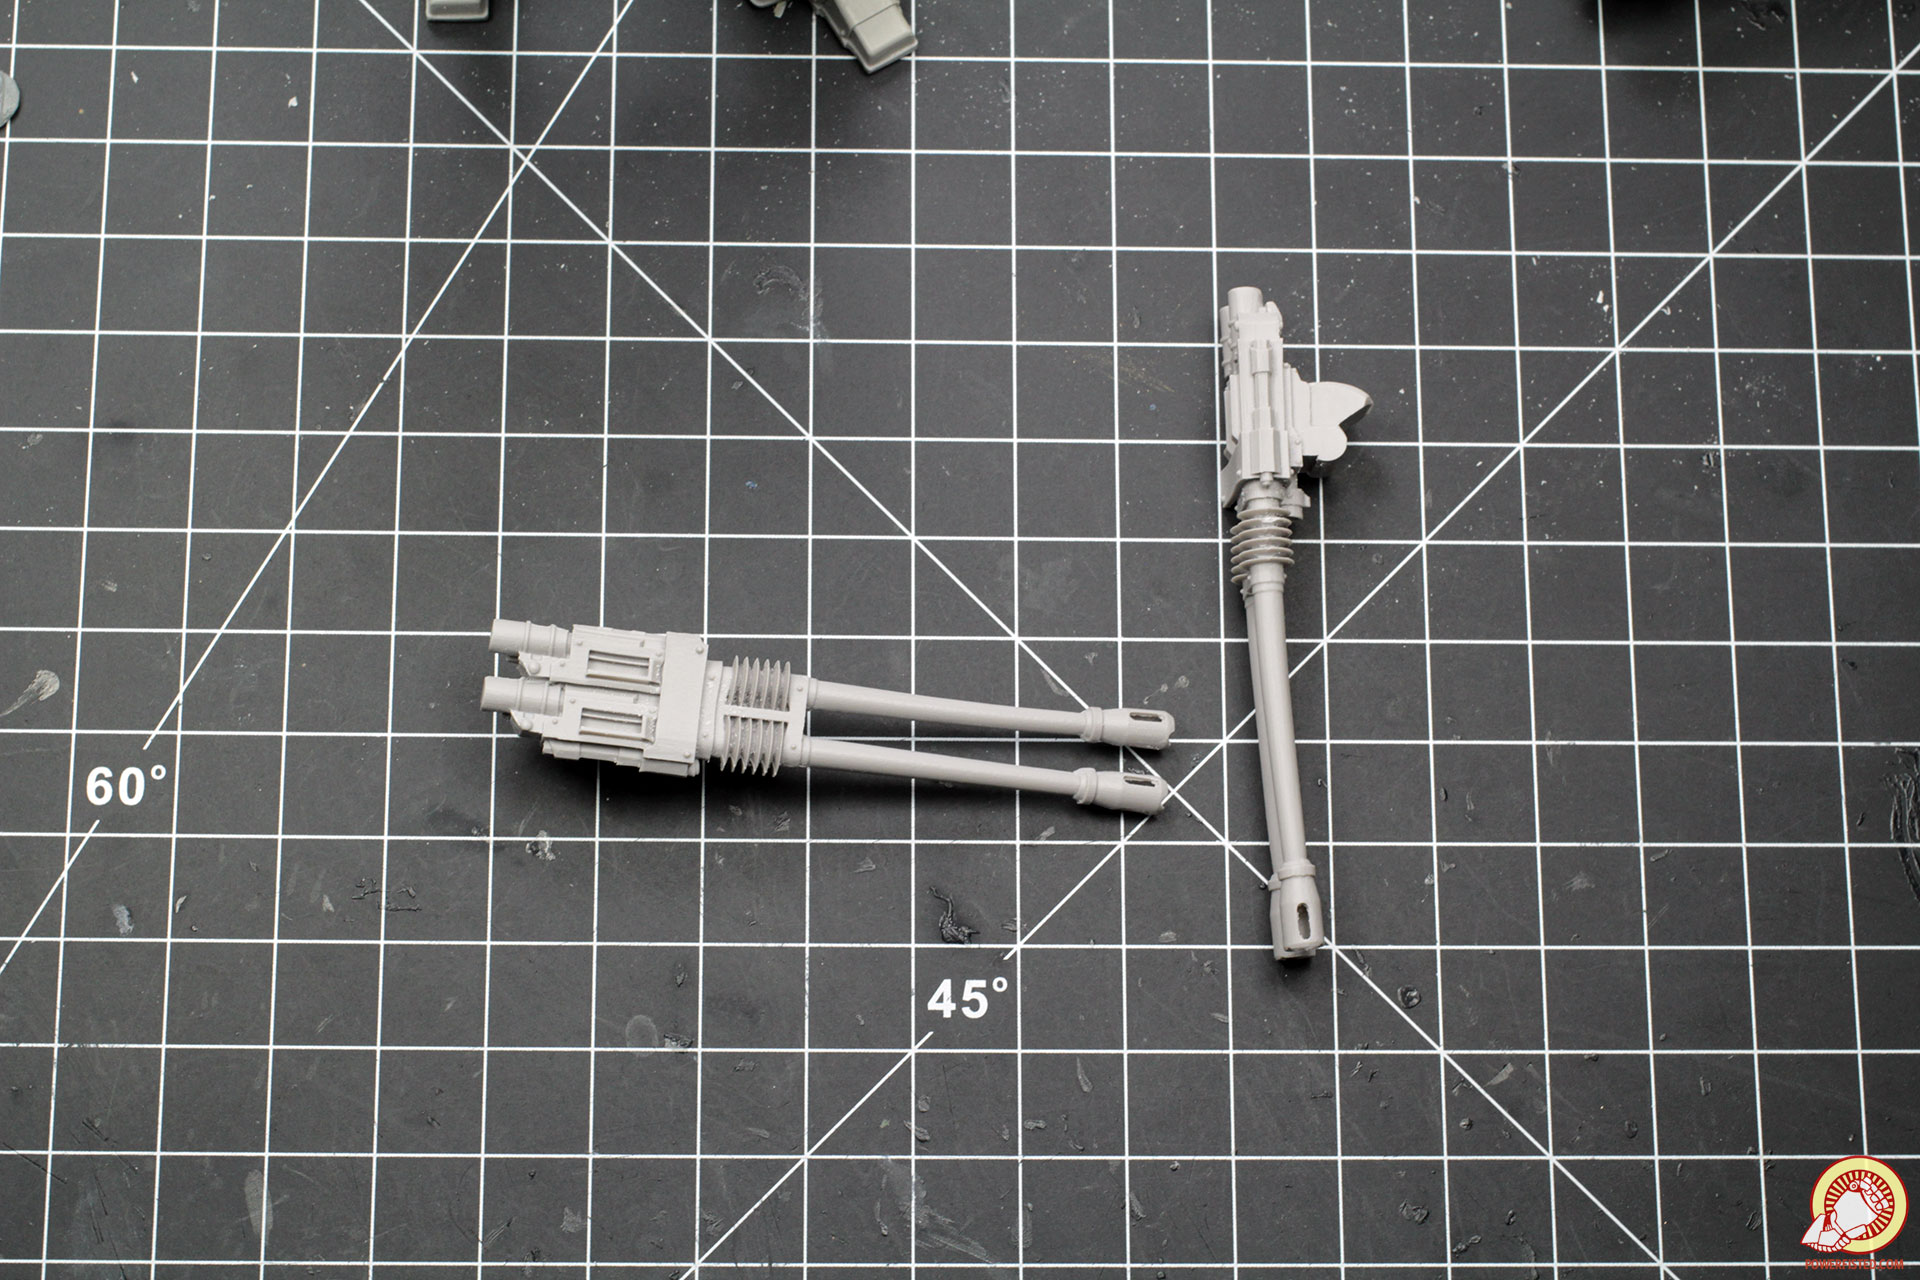
As before, I use a heavy duty chisel to scour and chop the barrels into two parts. Then I follow up with micro files to smooth out any imperfections.
I measure the new length of the autocannon barrels, mark, cut, and file them. If you stagger the barrels you’ll want to make sure one is longer than the other.
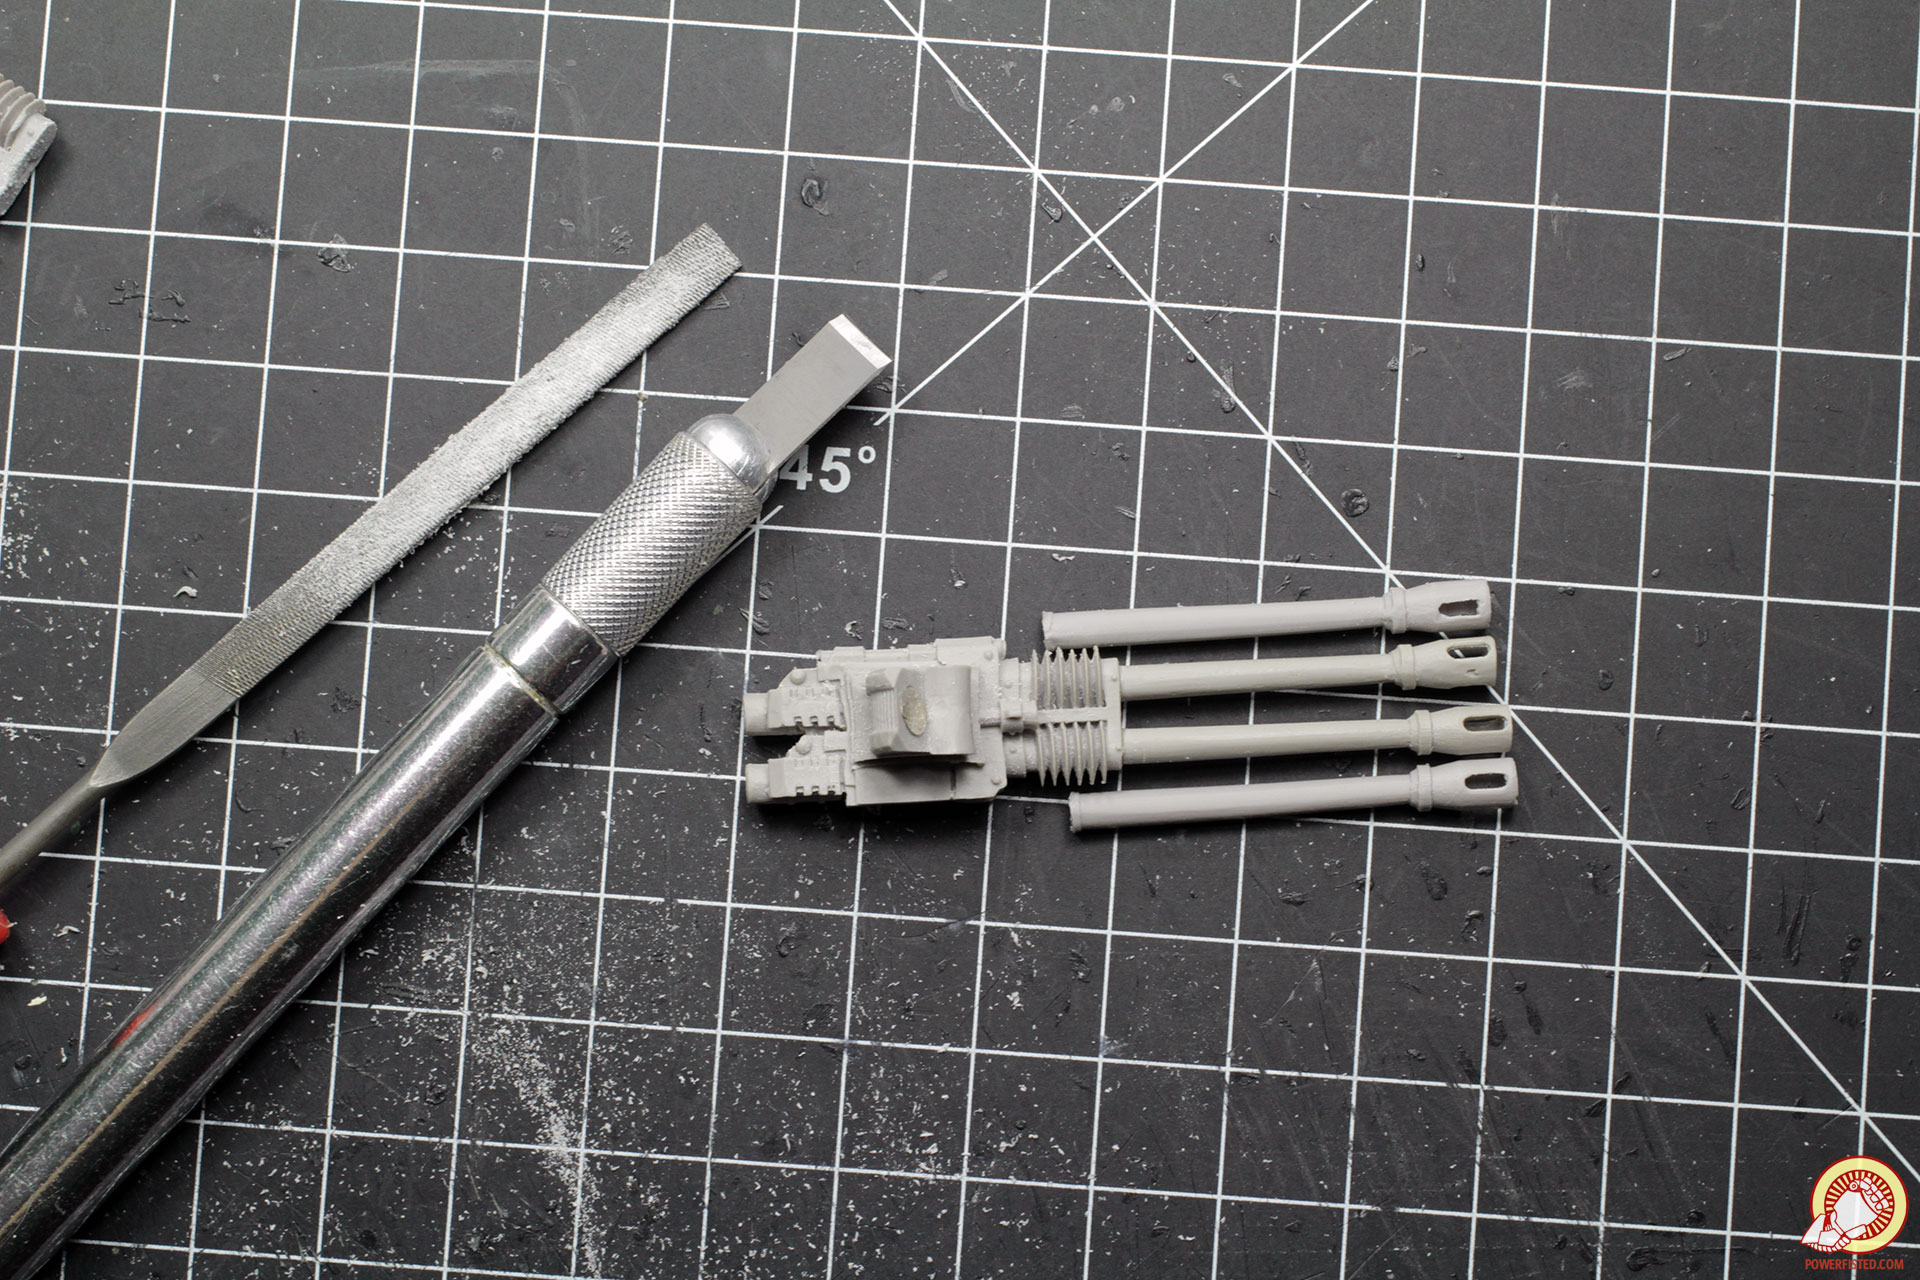
In order to have straight barrels I scour, drill pilot holes, and pin the barrels to the autocannons.
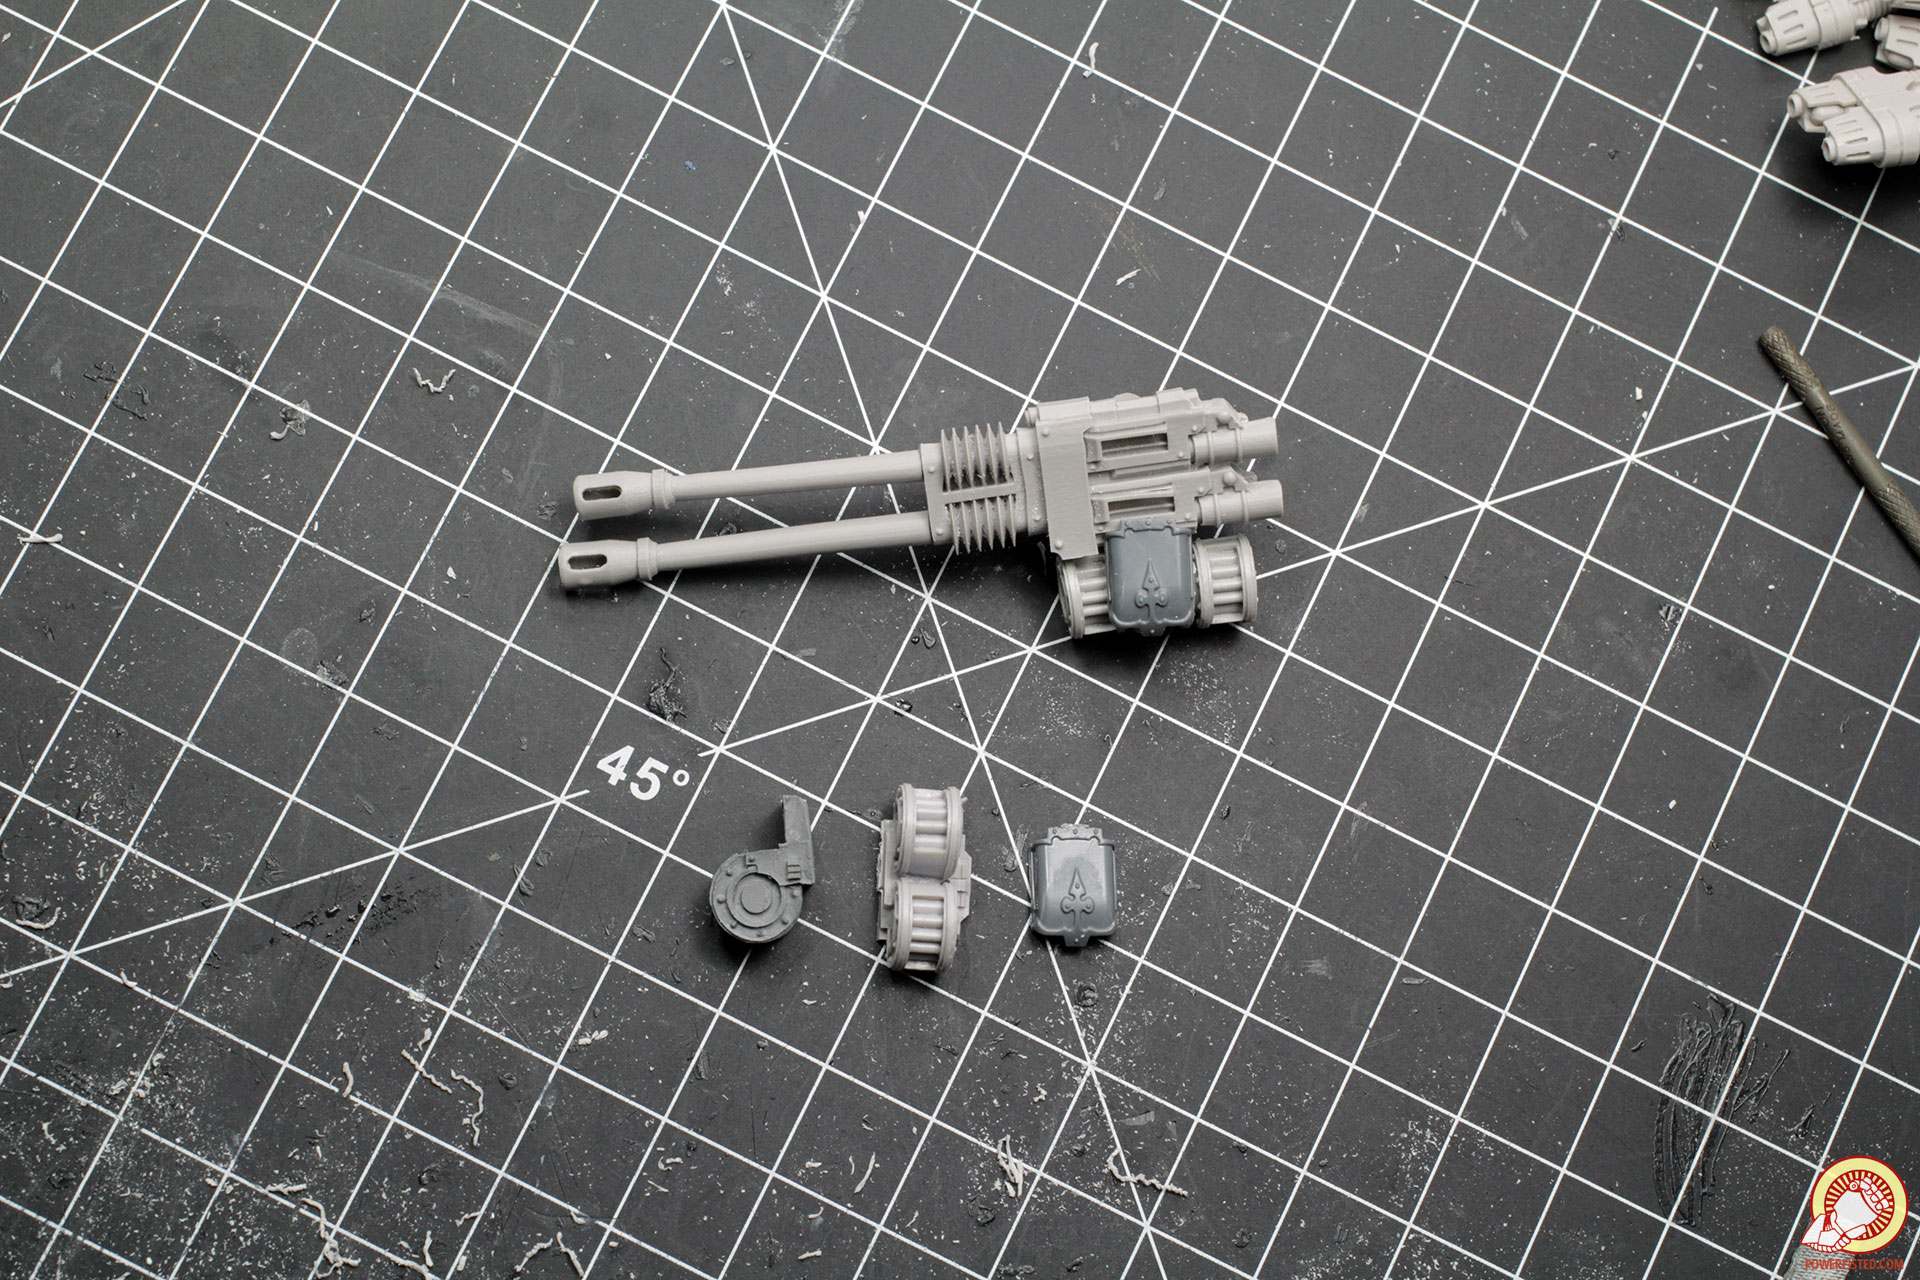
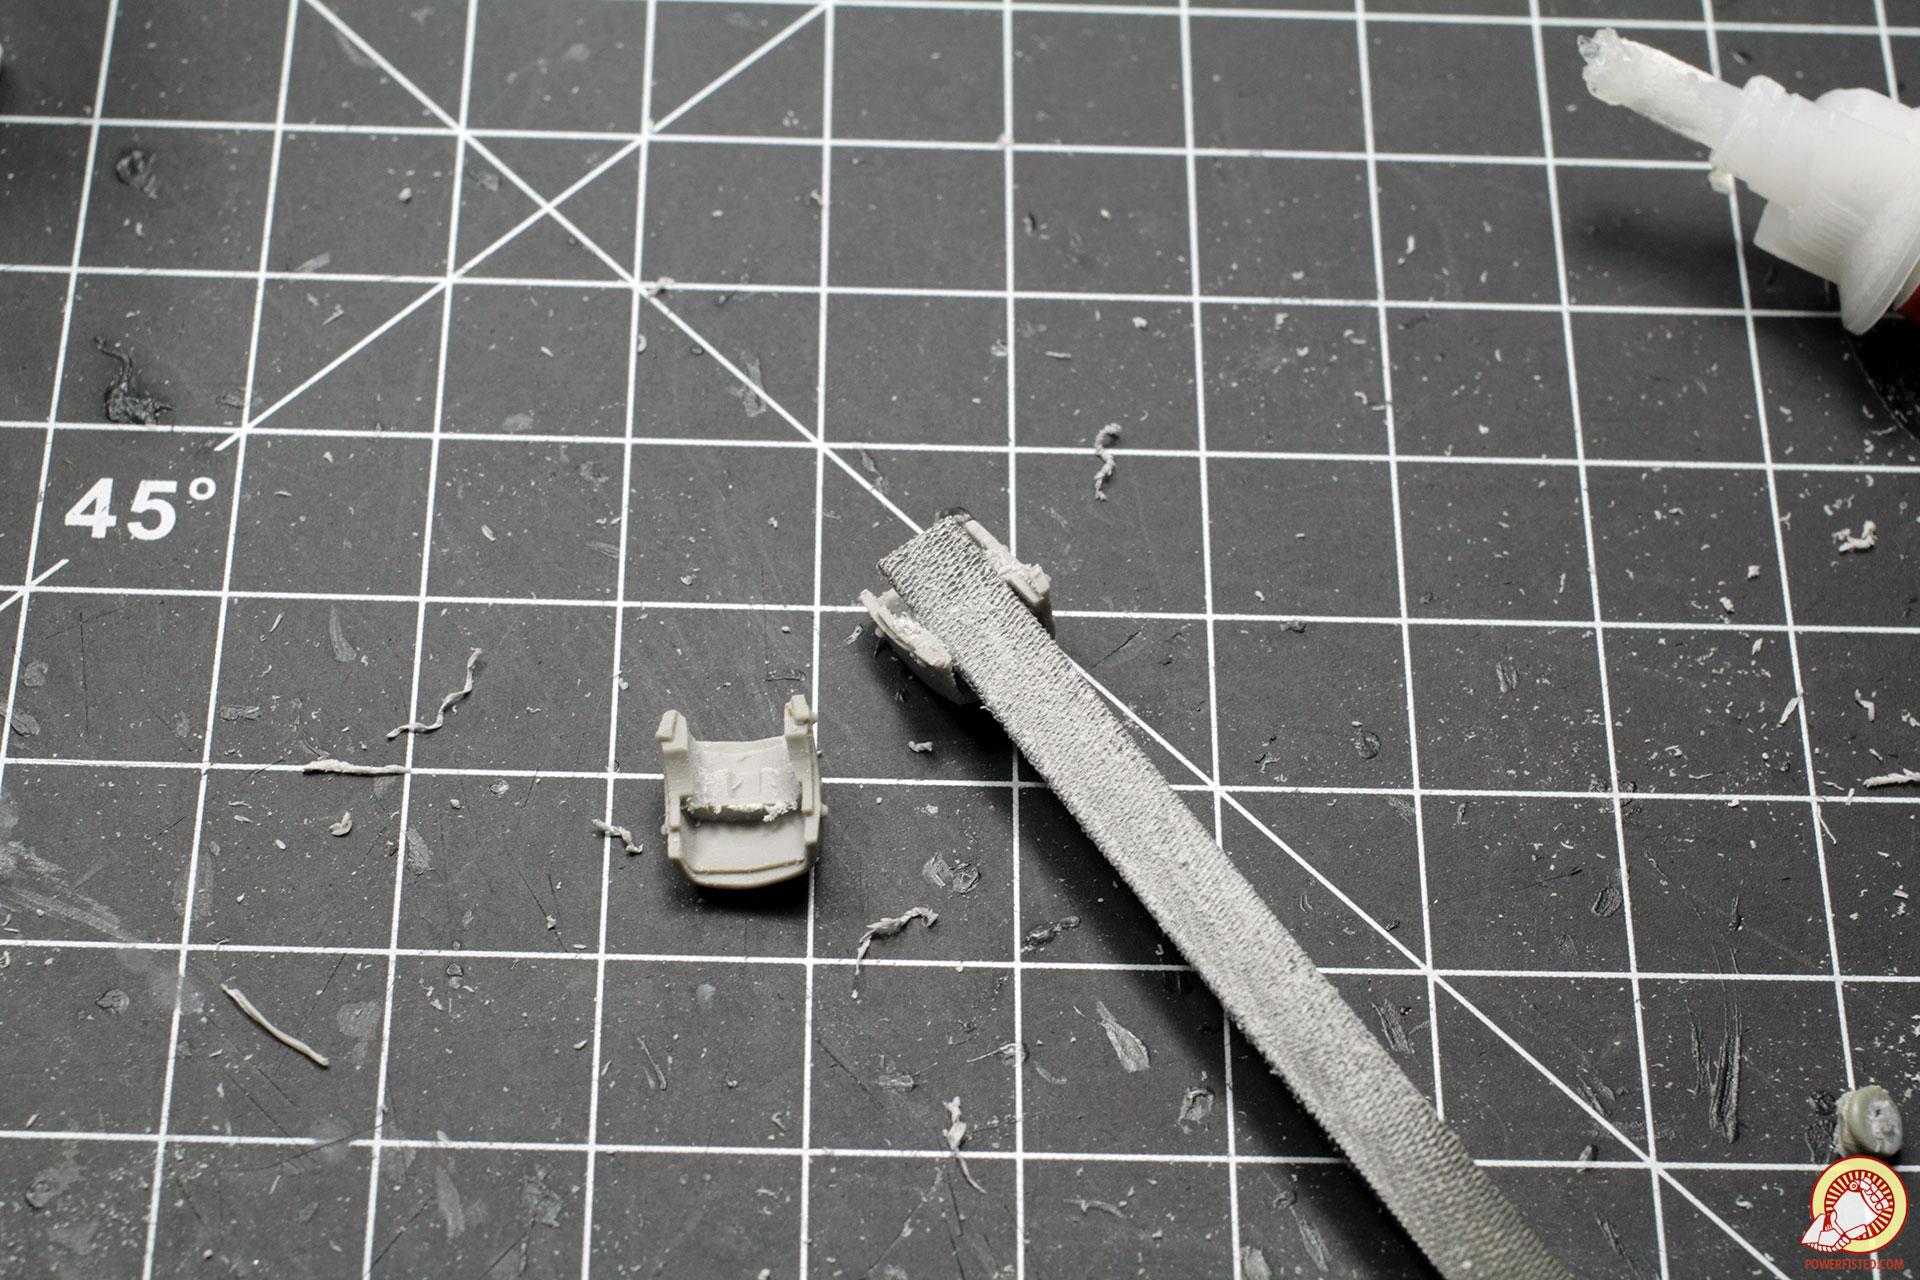
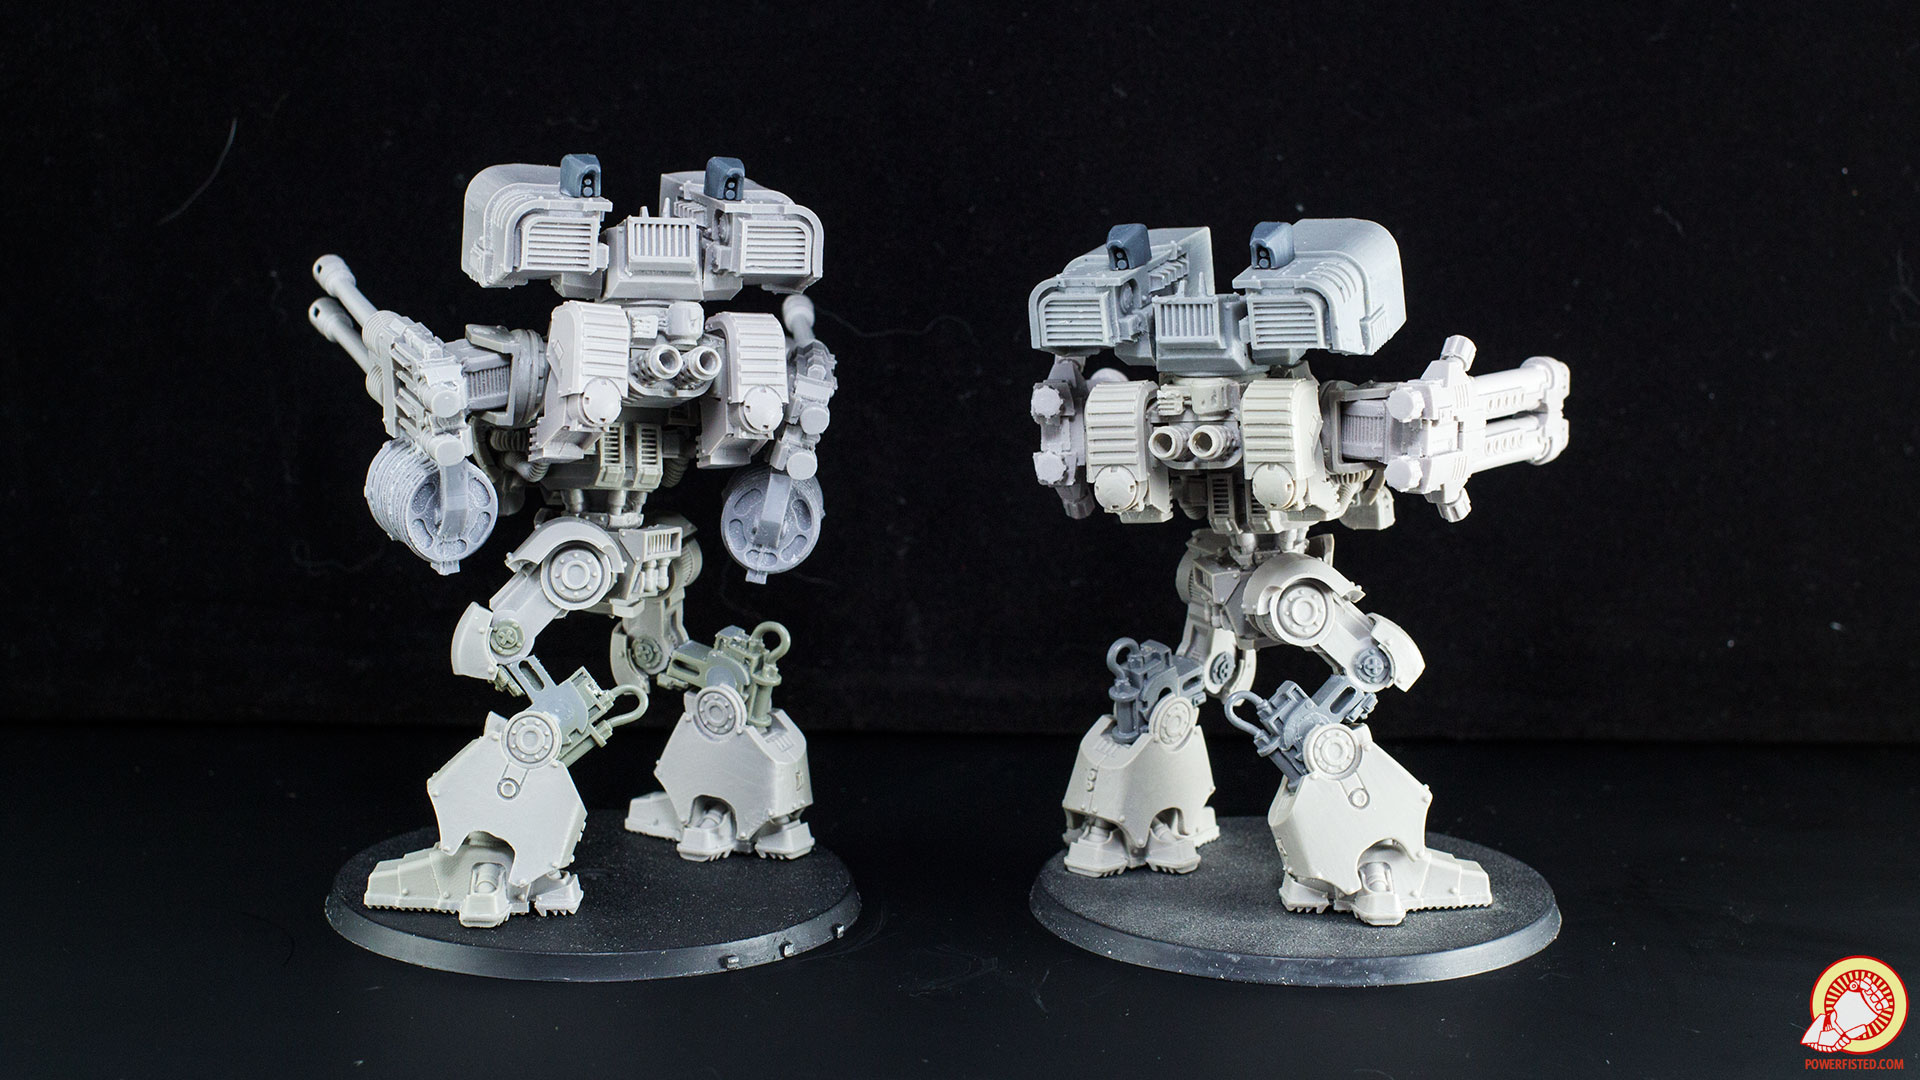
If you go with heavy bolter drum magazines, you’ll need to chop them up, glue them together, and then glue the drums to the autocannon arms.
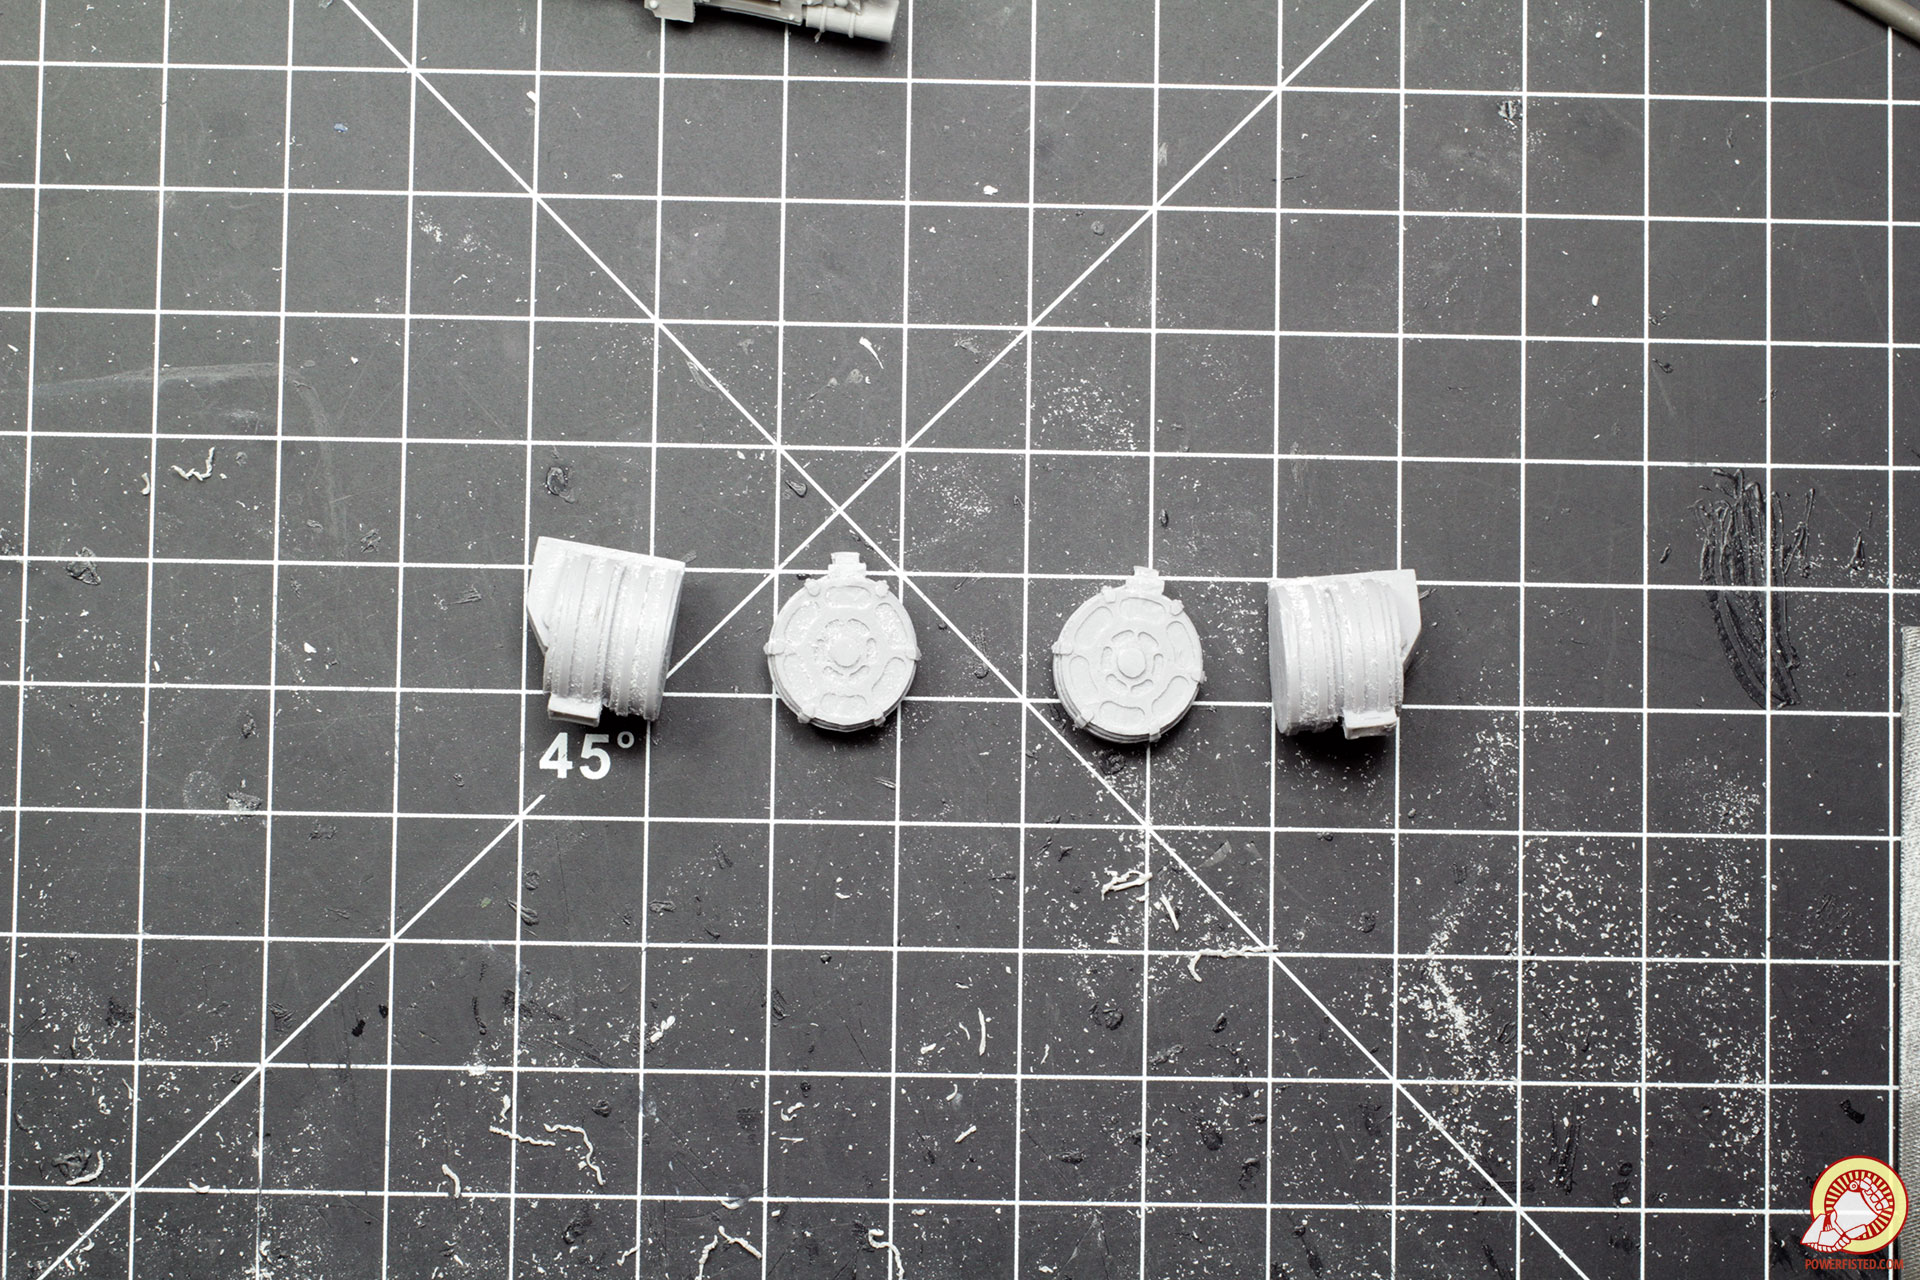
If you prefer the look of the punisher cannon drums, you’ll need to cut them into pieces, and file flat the tops before gluing them to the autocannon arms.
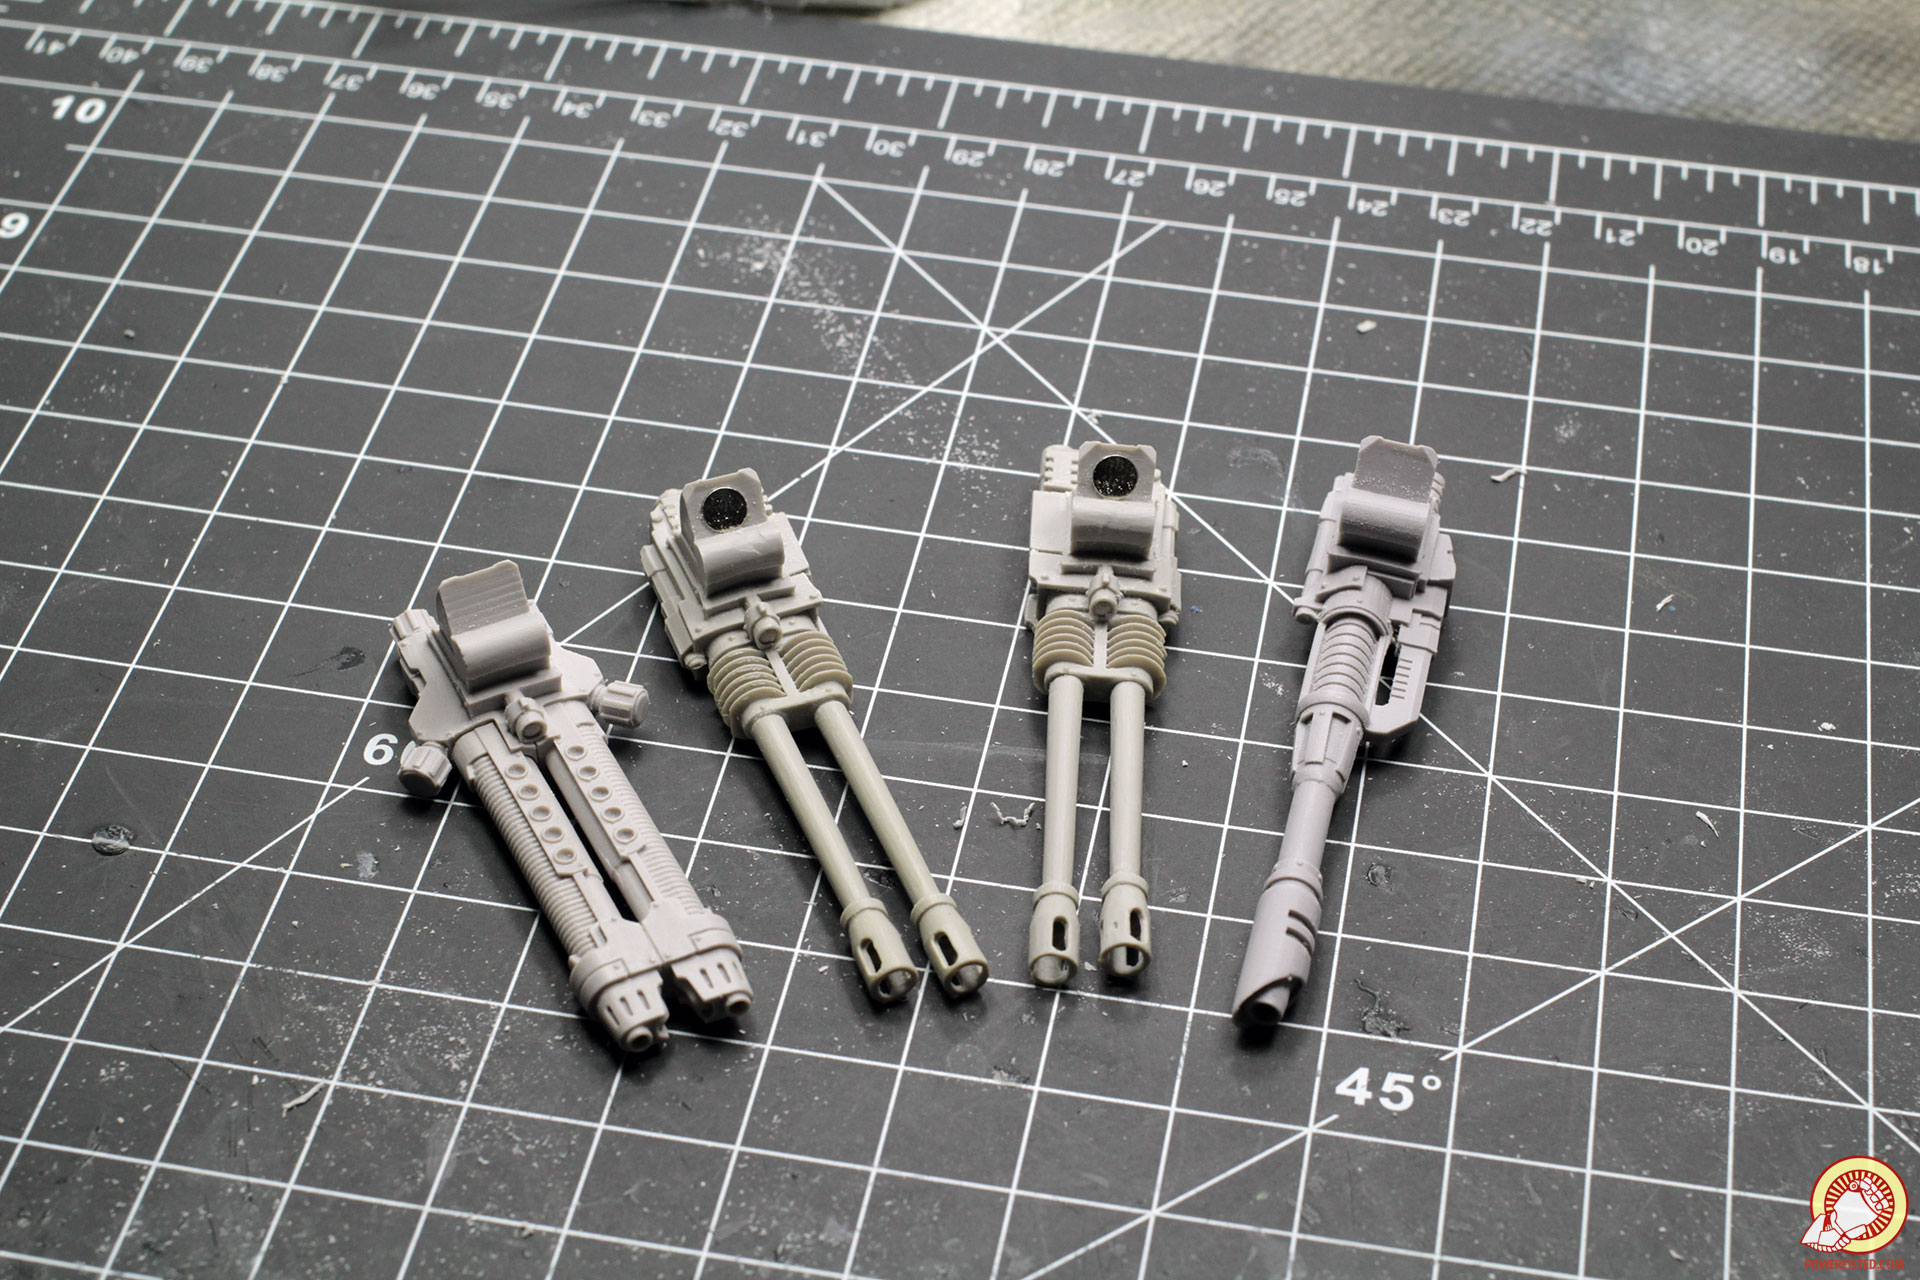
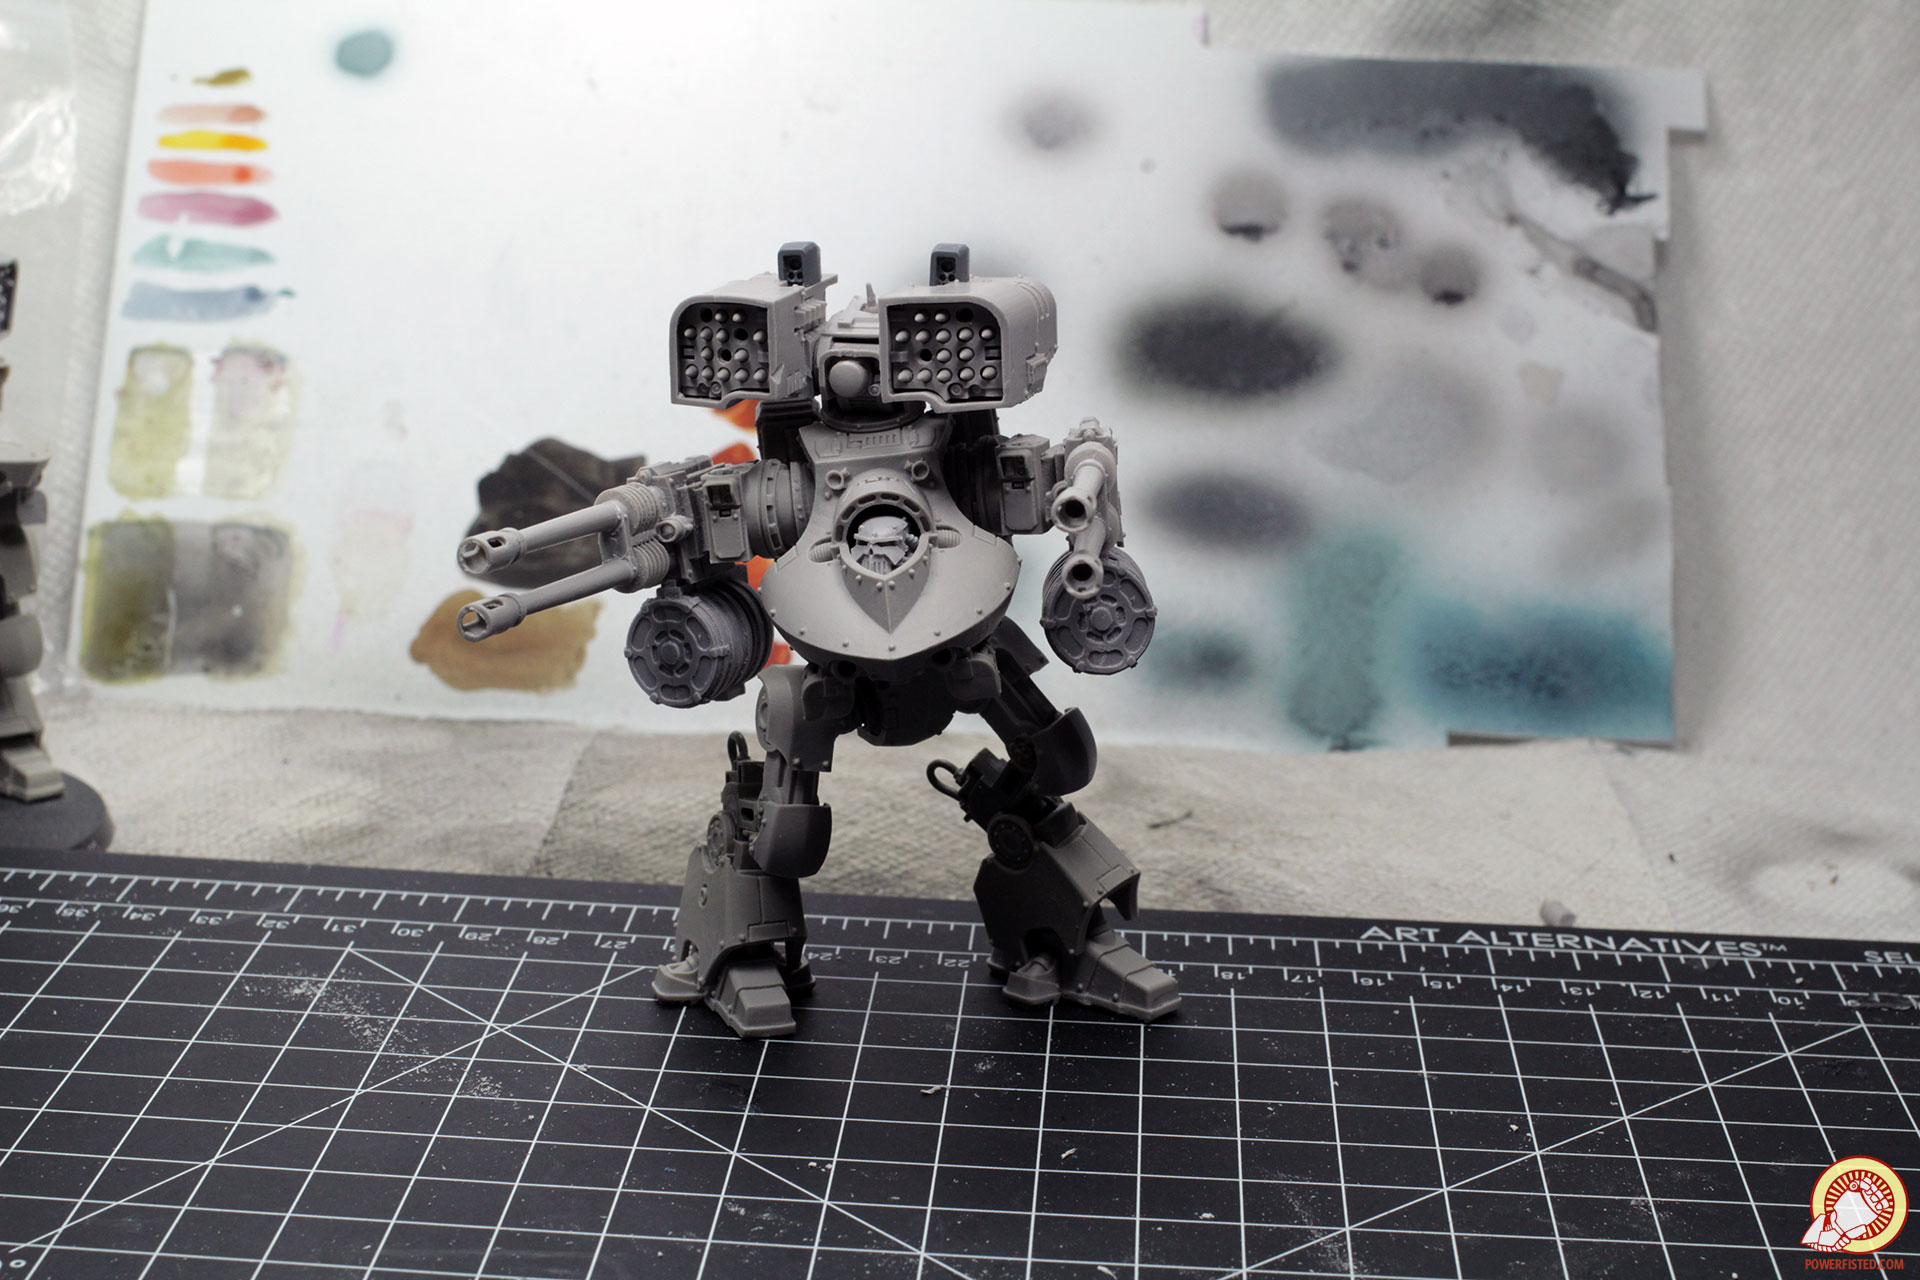
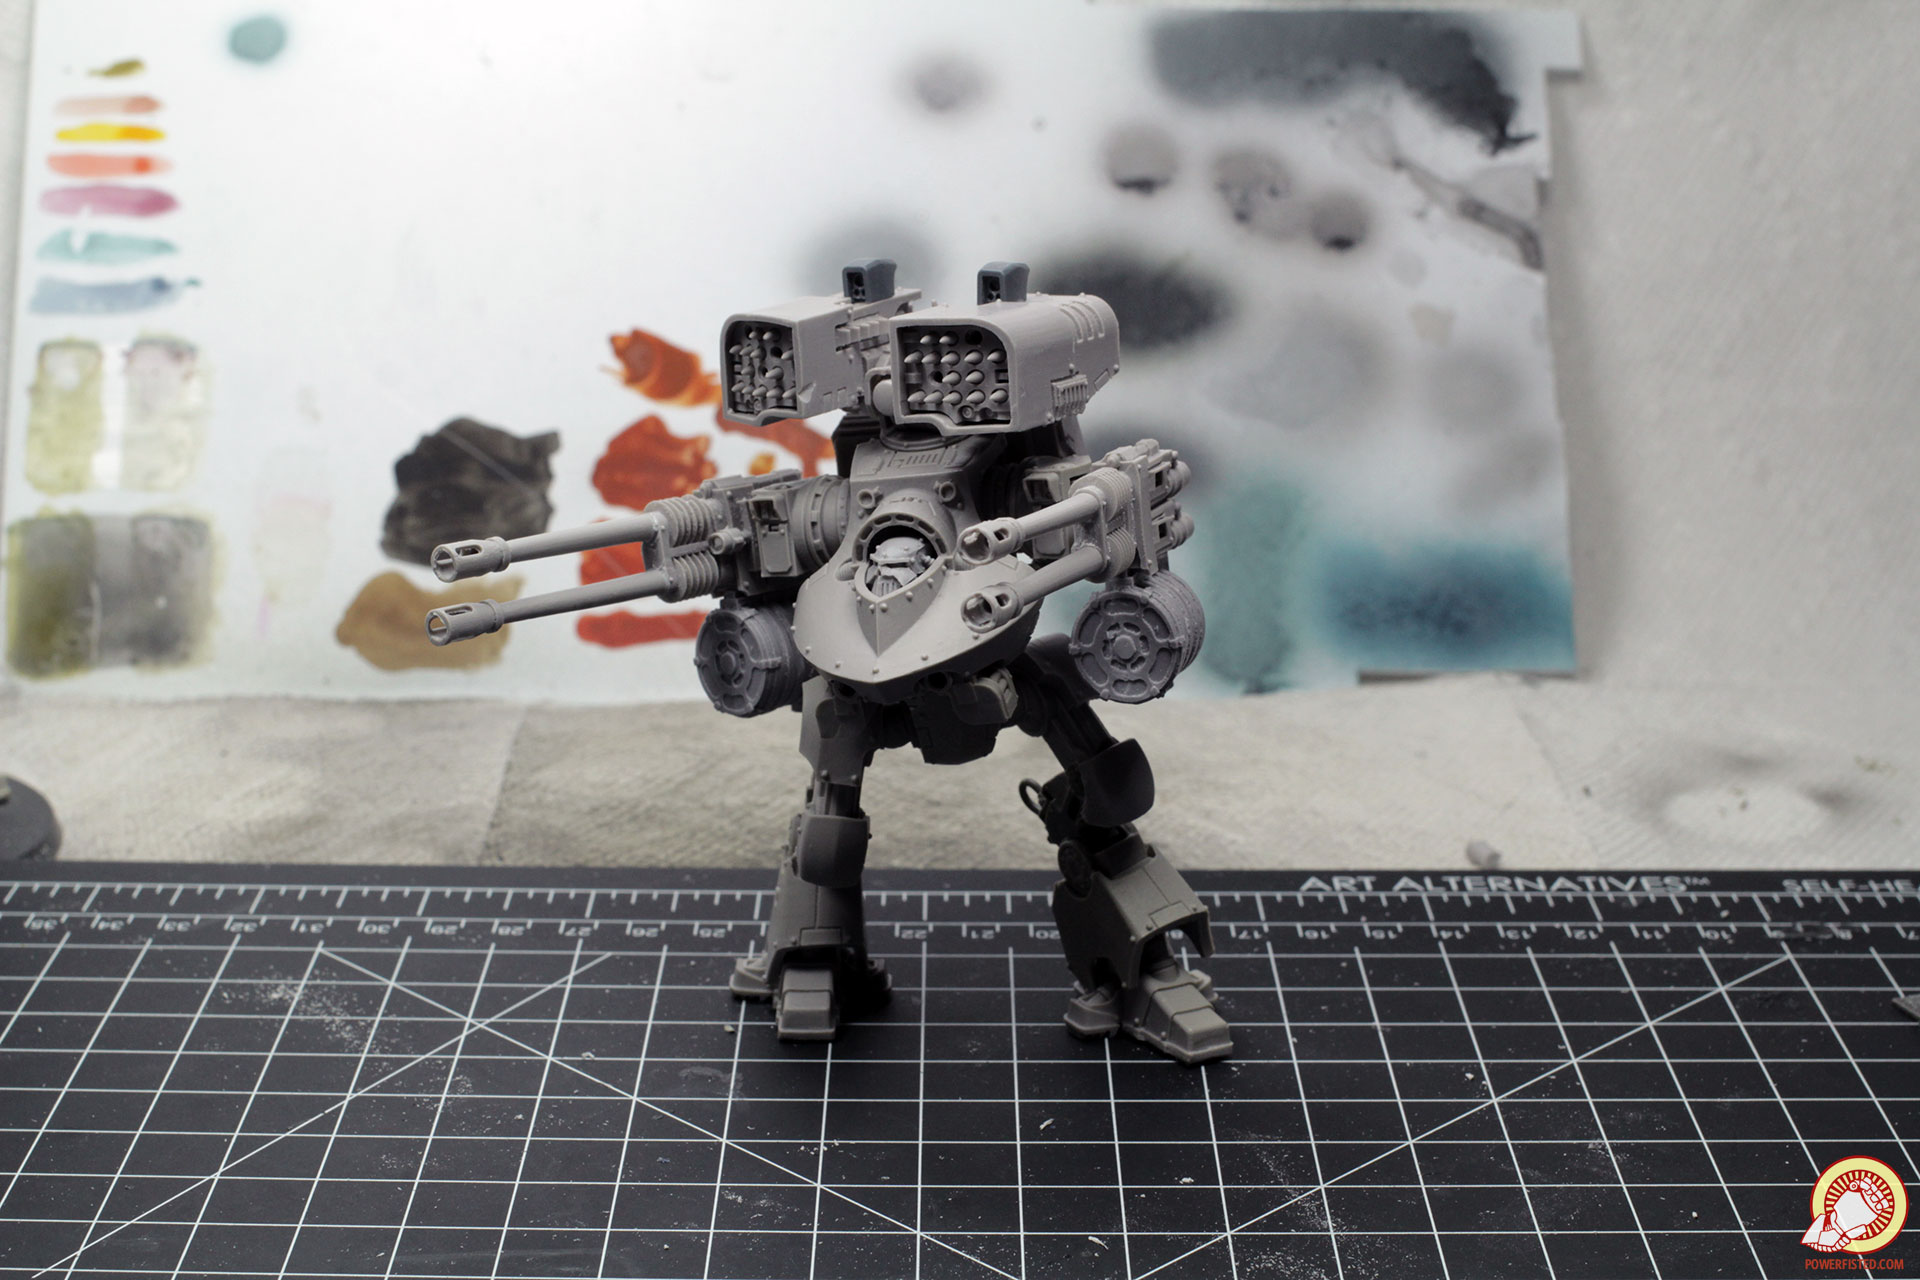
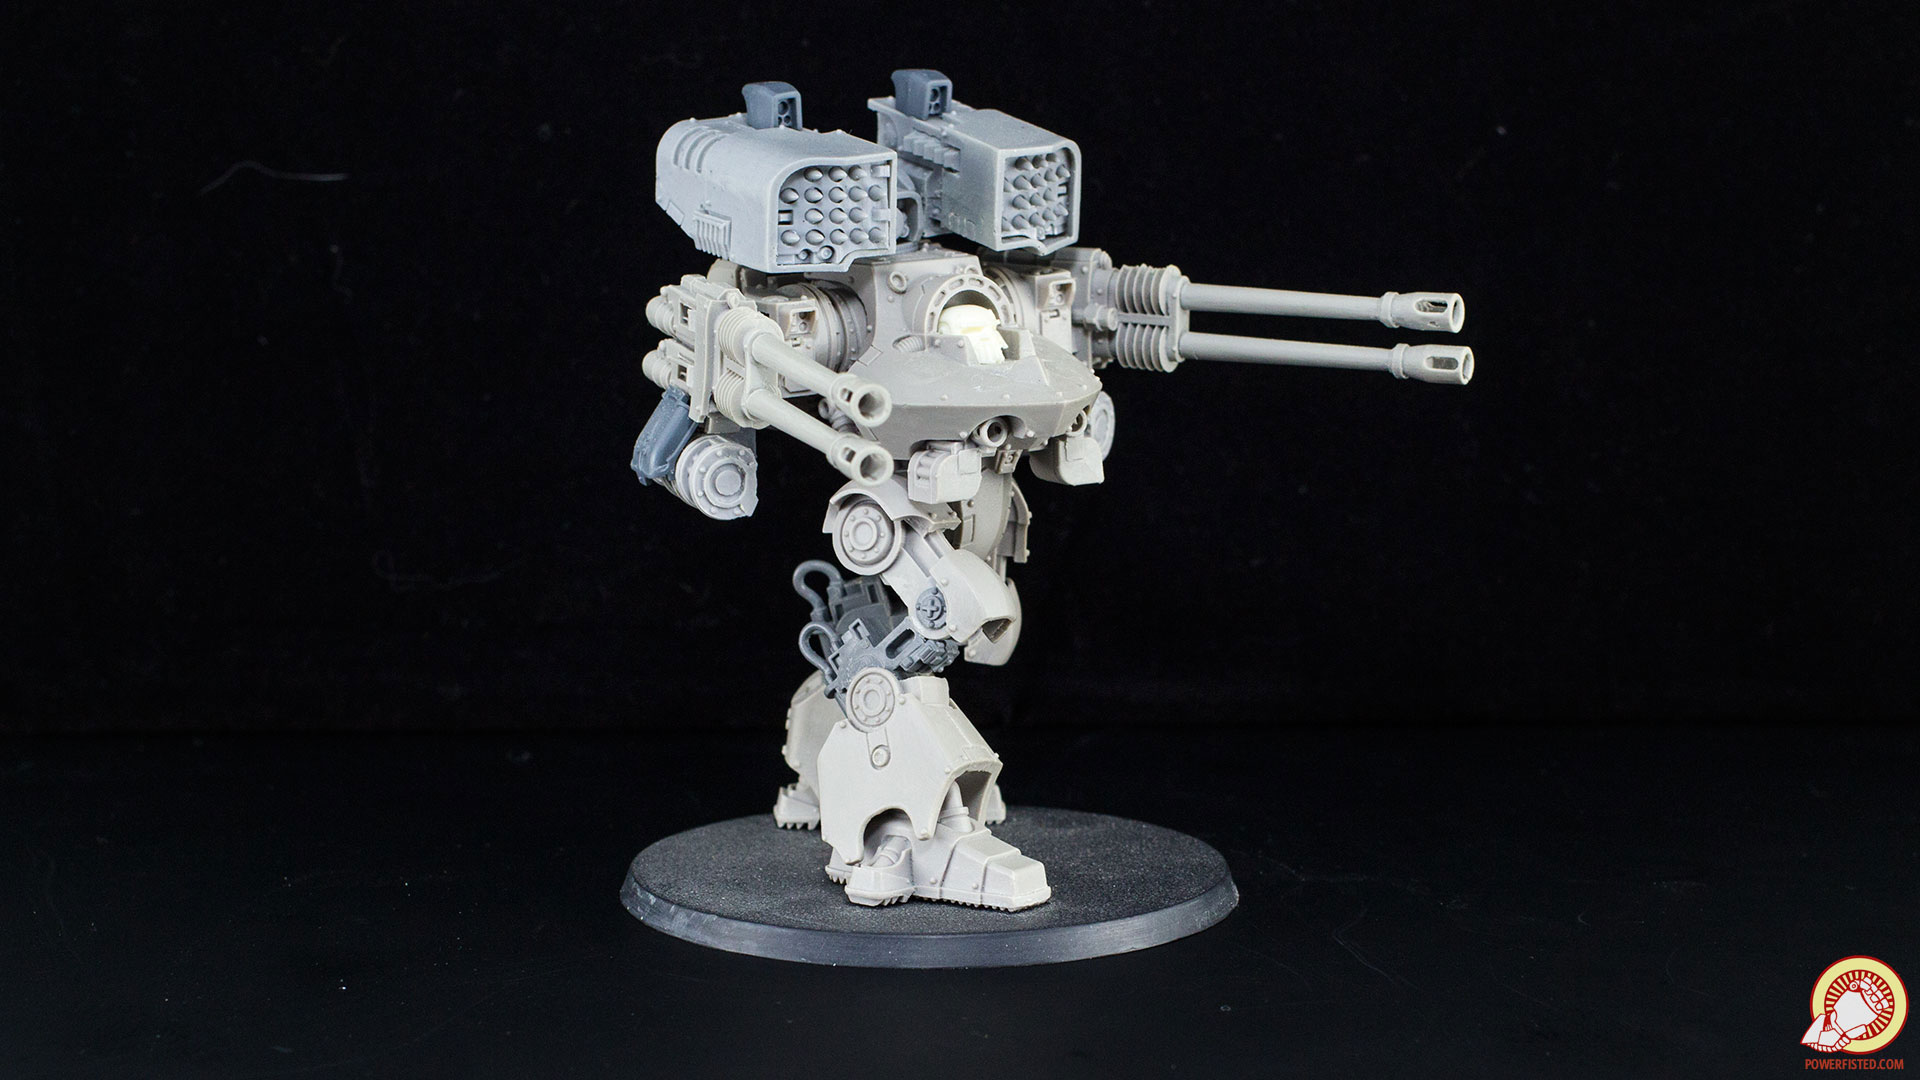
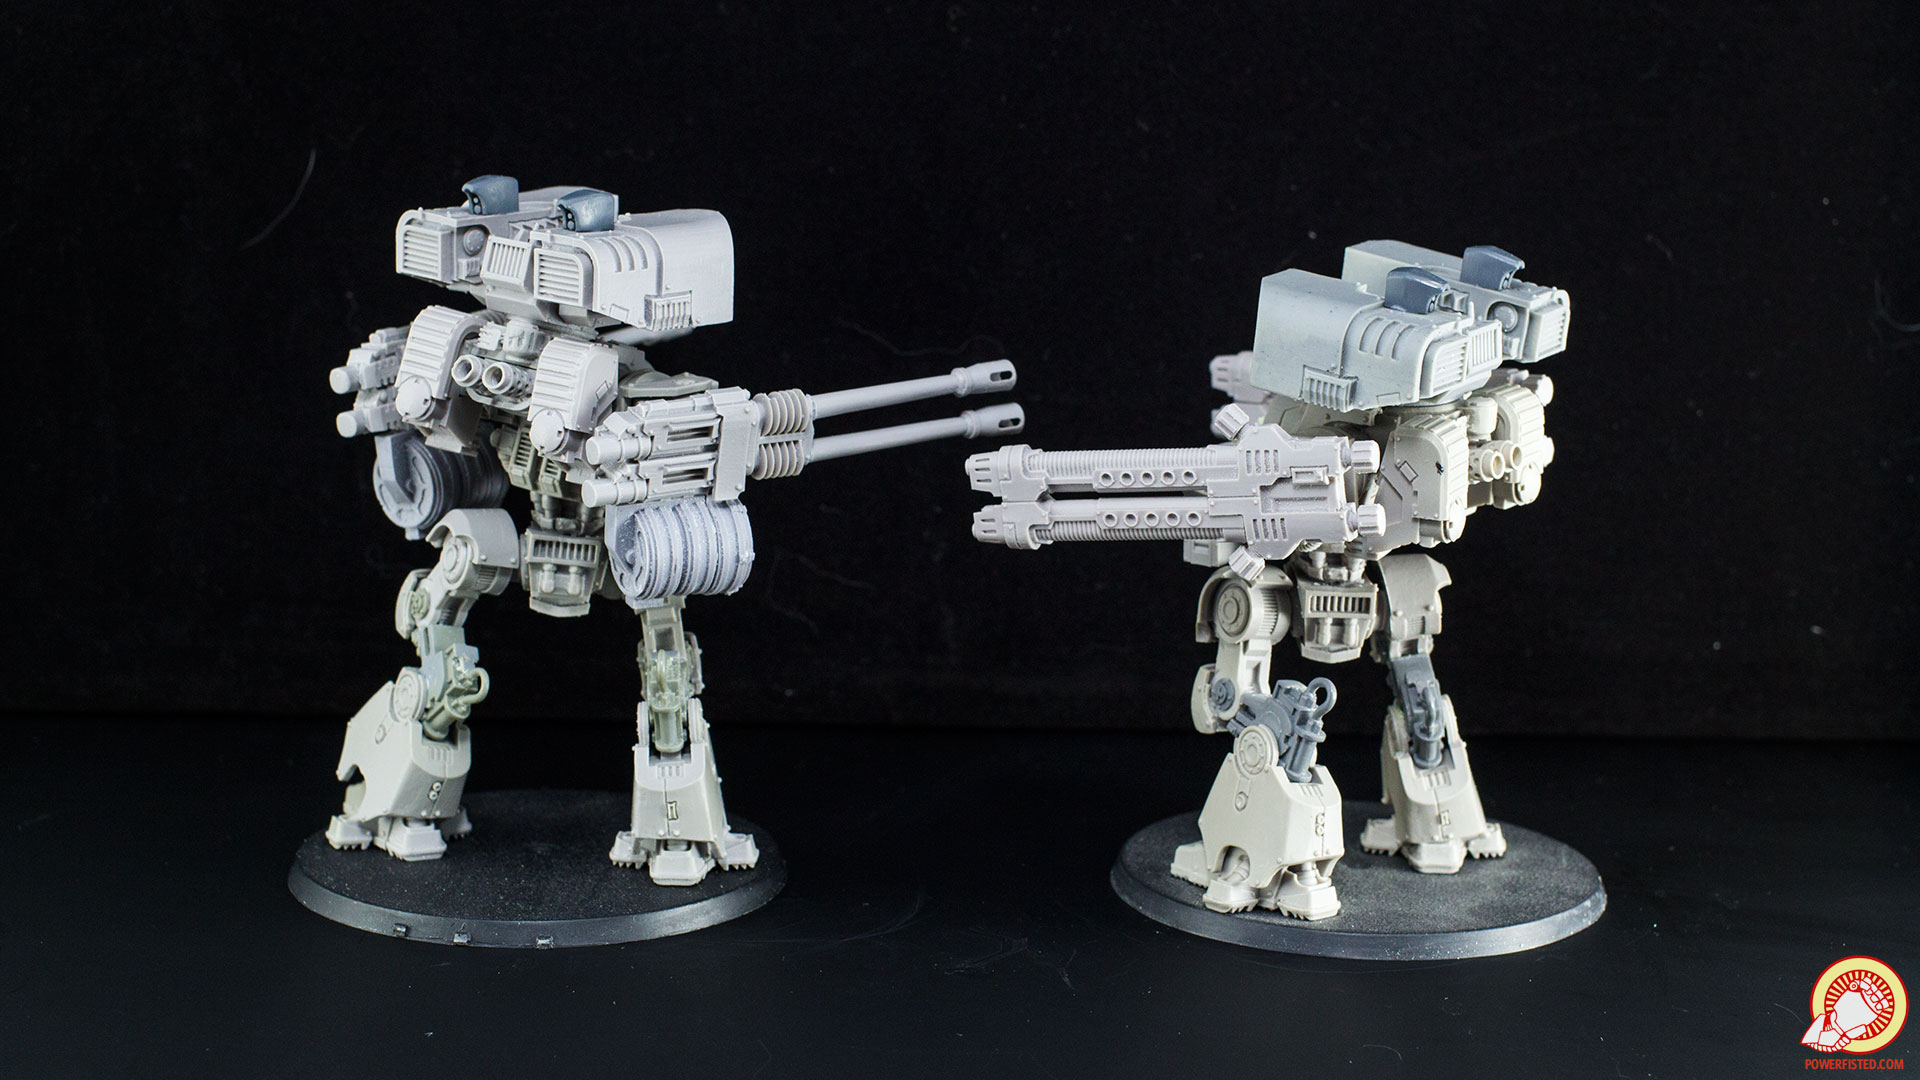
From here you’ll want to magnetize the rest of your arms. After that… it’s a wrap! Your results should look something like these:

Wrap Up
From here the world is yours. If you’re ready to paint, scrub your deredeo down with some soap and warm water. Once dry, you can hit it with some primer and start the painting process. For me, these deredeos are only about 90% complete. Both still need to get through what I call my “detailing stage”. Detailing is much faster than converting and assembly, but is the place where a model is brought to life. When I detail my deredeos I’ll create battle damage, add armor panels, introduce some bonding studs, dangle a few chains, and perhaps squeeze in a chaos arrow or two. How? Well, that’s a tutorial for another day.